D-Link SECURICAM Network DCS-950 User Manual
D-link dcs-950: user guide
Hide thumbs
Also See for SECURICAM Network DCS-950:
- Quick installation manual (12 pages) ,
- User manual (92 pages)
Table of Contents
Advertisement
Quick Links
Download this manual
See also:
User Manual
Advertisement
Table of Contents

Related Manuals for D-Link SECURICAM Network DCS-950


Summary of Contents for D-Link SECURICAM Network DCS-950
-
Page 2: Table Of Contents
Firmware ....................32 Recording ....................33 Trigger ....................34 Motion Detection ................... 35 Port ......................36 Status ......................37 Device Info .................... 37 Help ......................38 Installing the DCS-950 Behind a Router ........... 39 Single Camera Installation ................39 D-Link Systems, Inc. - Page 3 1) Identify Your Camera on the Network ............ 40 2) Assign a Local IP Address for Your Camera .......... 40 Assigning and Opening the HTTP Port on the DCS-950 ........41 3) Open the HTTP Port ................41 Router Setup and Installation ................42 Assigning and Opening Virtual Server Ports ............
- Page 4 Table of Contents DCS-950 User’s Manual Uninstall IPView Application ..............70 Frequently Asked Questions ..............72 Internet Camera Features ................. 72 Internet Camera Installation ................74 How to Ping Your IP Address ..............76 Time Zone Table ................78 Adjusting the Camera Focus ..............80 Technical Specifications ..............
-
Page 5: Package Contents
Package Contents DCS-950 User’s Manual Package Contents D-Link SECURICAM Network DCS-950 Internet Camera Cat5 Ethernet Cable Power Adapter (5.0V, 2.5A) Camera Stand with Mounting Bracket and Screws CD-ROM with Software and Manual Quick Installation Guide Note: Using a power supply with a different voltage than the one included with your product will cause damage and void the warranty for this product. -
Page 6: Introduction
Unlike a PC Camera, the DCS-950 is a stand-alone system with a built-in CPU and Web server that transmits high quality video images for monitoring. The DCS-950 can be accessed remotely, and controlled from any PC/Notebook over the Intranet or Internet via a web browser. -
Page 7: Features And Benefits
Web browser to a local hard drive without installing any software, making it convenient to instantly capture any moment from a remote location. Record Directly to a NAS: The DCS-950 allows you to record directly to a local network area storage device without the use of a dedicated PC for storing recorded video. -
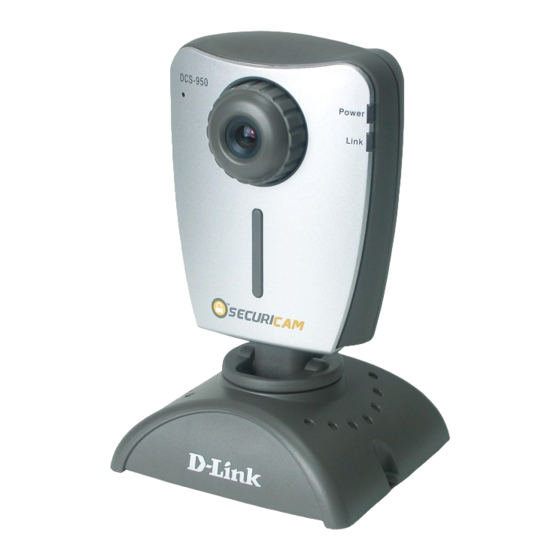
Page 8: Hardware Overview
Release the reset button and the Power LED will begin to flash indicating that the DCS-950’s settings are reverting back to the factory settings. The IP address will also return to the default setting of 192.168.0.20. -
Page 9: Leds
ON. Link LED The Link LED is positioned on the right side of the DCS-950’s lens. It is located below the Power LED. Steady green confirms a good connection to the LAN. Depending on the data traffic, the LED will begin to flash to indicate that the DCS-950 is receiving/transceiving from/to the LAN network. -
Page 10: Hardware Installation
Attach the external power supply to the DC power input connector located on the rear panel of the DCS-950 and connect it to your local power supply. Note: Power source is confirmed when the orange LED Power Indicator located to the right of the lens on the DCS-950 is illuminated. - Page 11 Hardware Installation DCS-950 User’s Manual Attach the Stand and Mounting Bracket If you would like to mount the camera on a wall, you must first attach the stand and mounting bracket. First, attach the mounting bracket to the base of the camera using the screws provided.
-
Page 12: Security
DCS-950 they will be allowed to view the images transmitted by the DCS-950. Note: When the DCS-950 is used for the first time, it is highly recommended that the Administrator set the Admin ID and Admin Password to constrain user access to the DCS-950 since the Default settings for the Admin ID and Admin Password are both “admin.”... -
Page 13: Using The Setup Wizard
Using the Setup Wizard Follow the simple steps below to run the Setup Wizard to guide you quickly through the installation process. Insert the D-Link DCS-950 CD into your CD-ROM drive. Click Install Software. Click Installation Wizard. D-Link Systems, Inc. - Page 14 Using the Setup Wizard DCS-950 User’s Manual Click Next. Click Yes. D-Link Systems, Inc.
- Page 15 Using the Setup Wizard DCS-950 User’s Manual Click Next. Click Finish. D-Link Systems, Inc.
- Page 16 Using the Setup Wizard DCS-950 User’s Manual To run the Setup Wizard, click on Start->Programs->DCS-950 Series Setup Wizard. Your camera’s default IP Address will be displayed on the screen. Click Wizard to begin. By default, the Admin ID and Password are “admin” (lower case). Enter this in both fields.
- Page 17 Using the Setup Wizard DCS-950 User’s Manual The IP Address, Subnet Mask of your camera, Gateway, and DNS addresses must correspond with your network settings for you to access the camera. If you are unsure of what these settings should be, please check with your network administrator. Click Next.
- Page 18 Using the Setup Wizard DCS-950 User’s Manual Your setup is now complete! Wait until the Link LED on the camera begins to flash. Click Link to launch your Web browser and view your images. Your camera is now displayed in the Web browser.
-
Page 19: Using The Configuration Menu
If you would like to open the configuration page from a Web Browser, enter the IP address that you assigned to your DCS-950. Home Screen When you click on “Link”, the DCS-950 Home screen will appear. Use the following displayed options to set up and view your Internet Camera: Wizard... - Page 20 DCS-950 User’s Manual Home Screen Wizard: This page is used to set up the DCS-950 using the Wizard to walk you through setting up the camera for your network. Setup: This will allow you to change the configuration settings of the DCS-950.
- Page 21 Using the Configuration Menu DCS-950 User’s Manual Logout: Click to log out of the DCS-950. If you would like to view or configure the camera, you will must log in again. Select this if the camera is operating under low light conditions.
-
Page 22: Configuration
DCS-950 User’s Manual Configuration Click on Setup from the Home screen to access the settings required for the DCS-950. There will be several options in the Configuration page to choose from to setup your DCS-950 and they are as follows:... -
Page 23: Advanced
Using the Configuration Menu DCS-950 User’s Manual Advanced The Advanced tab provides the following configuration options: Video, User, LAN, PPPoE, and DDNS. Video Advanced > Video Default Level Quality: Select the viewing video quality. By default the quality is set to High. - Page 24 Using the Configuration Menu DCS-950 User’s Manual MPEG Sequence I-frame and P-frame mode and I-frame and BP-frames are Mode: selectable. This determines how many repeated P frames will appear after one I frame. A large “Key frame interval” can reduce the bit rate, but can cause image to be corrupted longer if there is packet loss while transmitting.
-
Page 25: User
Username. The maximum password length is 16 characters (Printable ASCII). The User List displays all the user names that have access to User List: the DCS-950. To delete a user, click on the corresponding trash can icon. D-Link Systems, Inc. -
Page 26: Lan
Using the Configuration Menu DCS-950 User’s Manual Advanced > LAN If you are using a LAN connection, select either Static IP or LAN Settings: DHCP Client. If manually assigning a Static IP, enter your IP Address, IP Subnet Mask, Gateway IP Address, and DNS into the fields provided. -
Page 27: Pppoe
Using the Configuration Menu DCS-950 User’s Manual PPPoE Advanced > PPPoE PPPoE: If you are using a PPPoE connection, click the Yes button and enter the User Name and Password for your PPPoE account. D-Link Systems, Inc. -
Page 28: Ddns
With most Cable and DSL connections, you are assigned a dynamic IP address and that address is used only for the duration of that specific connection. With the DCS-950, you can set up your DDNS service and the DCS-950 will automatically update your DDNS server every time it receives a different IP address. -
Page 29: Tools
Using the Configuration Menu DCS-950 User’s Manual Tools The Tools tab provides the following configuration options: Admin, System, Default, Firmware, Recording, Trigger, Motion Detection, and Port. Admin Tools > Admin User Name: Enter the administrator user name (admin). Password: Enter the current password. -
Page 30: System
Using the Configuration Menu DCS-950 User’s Manual System Tools > System Time: The current camera time. Date: The current camera date. Default NTP Enter the IP address or domain name of the time server. Leaving Server: the box blank will connect the camera to default time servers. -
Page 31: Default
Using the Configuration Menu DCS-950 User’s Manual Default Tools > Default Restart: Click the Restart button to restart the camera system. Default: Click the Restore button to restore factory default settings. This means that any changes made will be lost and the system will be reset to the initial status when shipped from the factory. -
Page 32: Firmware
Firmware Tools > Firmware You can upgrade the firmware by using this tool. First, check the D-Link support site for firmware updates at http://support.dlink.com. Make sure that the firmware you want to use is saved on the local hard drive of your computer. Click on Browse to search the local hard drive for the firmware that you downloaded from the D-Link Website to be used for the update. -
Page 33: Recording
Using the Configuration Menu DCS-950 User’s Manual Recording Tools > Recording Upload Image to Network Share Clicking on the box will enable uploading of images to your Folder: network storage device. Login Method: Select either Anonymous or Account. By selecting Anonymous, no user name or password is required. -
Page 34: Trigger
Using the Configuration Menu DCS-950 User’s Manual Trigger Tools > Trigger SMTP Login Name: The user name used to log into your e-mail account (e.g. jdoe or jdoe@yourisp.com depending on your ISP). The password used to log into your e-mail account. (The SMTP Password: password will appear as dots instead of entered characters.) -
Page 35: Motion Detection
Using the Configuration Menu DCS-950 User’s Manual Motion Detection Increasing the time set here will avoid false alarms. This option Skip Time: allows you to set the amount of time between motion detection events before the next recording will start. -
Page 36: Port
Using the Configuration Menu DCS-950 User’s Manual Saves the related settings of that window. Save: Click to open the Motion Screen Display. The MSD window Open MSD: allows you to monitor the amount of motion detected in each motion window. The graphic bars will increase or decrease depending on the image variation. -
Page 37: Status
Using the Configuration Menu DCS-950 User’s Manual Note: You MUST also set up your router/gateway for Port Mapping; this will enable remote viewing of your camera via the Internet. Please refer to your router’s instruction manual on how to open up ports. For additional help on configuring your camera to work with your router, please refer to the next section on setting up your camera for use with a router. -
Page 38: Help
Using the Configuration Menu DCS-950 User’s Manual The Device Info screen lists the following important settings that are currently set for the DCS-950. IP Address IP Subnet Mask Gateway IP Address PPPoE Wireless Server Name Firmware Version On-Line User Numbers... -
Page 39: Installing The Dcs-950 Behind A Router
Installing the DCS-950 Behind a Router DCS-950 User’s Manual Installing the DCS-950 Behind a Router Single Camera Installation If you are installing a single camera on your network the installation is an easy 4–step procedure: 1) Identify Your Camera on the Network 2) Assign a Local IP Address for Your Camera 3) Determine Your Router’s WAN IP Address (Enable Remote Viewing) -
Page 40: Identify Your Camera On The Network
If you wish to use a different IP Address, be sure that the camera settings correspond to your network settings. The Default Gateway will be the IP Address of your router’s Local IP Address (i.e.192.168.0.1 if you are using a D-Link router) D-Link Systems, Inc. -
Page 41: Assigning And Opening The Http Port On The Dcs-950
Installing the DCS-950 Behind a Router DCS-950 User’s Manual Assigning and Opening the HTTP Port on the DCS-950 (For Installing Multiple Cameras) Opening ports will allow users to view the camera via the Internet. The ports that are opened must be unique for each camera in order to successfully view the images remotely. -
Page 42: Router Setup And Installation
Router Setup and Installation The following steps generally apply to any router that you have on your network. The D-Link DI-624 is used as an example to clarify the configuration process. Your WAN Ip Address information will be listed on following window. -
Page 43: Assigning And Opening Virtual Server Ports
Installing the DCS-950 Behind a Router DCS-950 User’s Manual Assigning and Opening Virtual Server Ports 4) Open Virtual Server Ports To Enable Remote Image Viewing The Virtual Server Ports of your router must be opened for remote access to your camera. -
Page 44: Viewing Your Camera
Installing the DCS-950 Behind a Router DCS-950 User’s Manual Viewing Your Camera After all settings have been entered correctly, a user inside or outside your network will have access to the camera through a standard Web browser. To access from the Internet, simply type in the IP Address of the router given to you by your ISP, a colon, and the port number that you gave your camera. -
Page 45: Ipview Lite Application Installation
IPView Lite software is included for administrators to manage up to 4 DCS-950s remotely, record to hard drive, and configure advanced settings for the DCS-950. IPView Lite is a complete software management tool for the DCS-950 and includes all configurable settings available in the Web configuration utility. - Page 46 IPView Lite Application Installation DCS-950 User’s Manual Click Next. Click Yes. Click Next. D-Link Systems, Inc.
- Page 47 IPView Lite Application Installation DCS-950 User’s Manual Click Next. If your sound card or video card has not passed Windows Logo testing, this window will appear. Click Continue Anyway. If there are previously installed target files that are newer than the source files, do NOT overwrite them.
- Page 48 IPView Lite Application Installation DCS-950 User’s Manual Click Finish. After successfully installing the IPView Lite, the application program for the DCS-950 is automatically installed to \Programs\IPViewLite Directory. To start running the IPView Lite click on Windows Start > Programs > IPViewLite >...
- Page 49 IPView Lite Application Installation DCS-950 User’s Manual Once logged in, the IPView Lite application is executed and the IPView Lite interface will appear in the default List View format: D-Link Systems, Inc.
-
Page 50: Ipview Lite
IPView Lite DCS-950 User’s Manual IPView Lite This section describes the operation of the IPView Lite application User Interface with detailed procedures for using the application. IPView Lite allows you to manage your cameras by enabling you to search, configure and preview all the DCS-950s from one location. -
Page 51: How To Add A Camera
IPView Lite DCS-950 User’s Manual How to Add a Camera To add a new camera select Camera > Add from the IPView Lite. An Add Camera dialog box will appear. (See below.) Enter the IP Address of the camera in the specified field and click Add. If the IP Address is entered incorrectly or if you have a bad network connection, a dialog box will appear to notify you of the error. - Page 52 IPView Lite DCS-950 User’s Manual Click on Search. IPView Lite will detect and search for all the available cameras that are installed on the local area network. Highlight the camera you wish to add and click on Add. The Add Camera dialog box will appear once again with the IP Address entered.
-
Page 53: How To Delete A Camera
IPView Lite DCS-950 User’s Manual How to Delete a Camera To delete a camera you must highlight the camera you wish to delete from the IPView Lite list view format. From the menu bar select Camera > Delete. A Delete Camera dialog box will appear. -
Page 54: How To Change The Ip Address
IPView Lite DCS-950 User’s Manual How to Change the IP Address To change an IP Address for a camera, select Camera > Add. An Add Camera dialog box will appear (see below). Click on Browse. The Browse Camera dialog box will appear with a blank screen (see below). -
Page 55: How To Format The Camera View
IPView Lite DCS-950 User’s Manual Highlight the camera you wish to change and click Change IP. If you have already changed the administrator user ID and password, you will be prompted to enter your admin ID and password before IPView Lite will allow you to change the IP Address for the DCS-950. -
Page 56: How To Rotate The Video View
IPView Lite DCS-950 User’s Manual The icon on the upper left corner of the screen will appear with the camera number that is being displayed. To return to the IPView Lite list view , click on the icon located on the upper left corner of the screen and a case sensitive menu will appear. -
Page 57: How To Take A Snap-Shot With The Camera
IPView Lite DCS-950 User’s Manual How to take a Snap-Shot with the Camera To take a snap shot with the camera, you must highlight the camera you wish to use from the IPView Lite list view format. From the menu bar select Camera > Snap shot. A Save Image dialog box will appear for you to save the snap shot picture. -
Page 58: Camera Property Settings
DCS-950 User’s Manual Camera Property Settings Once you have completed the initial configuration of the DCS-950 using the Web-based interface, you can review or change your configuration using either the Web-based configuration utility or the Property Settings in the DCS-950 IPView Lite. -
Page 59: Recording
The Recording tab provides options for manual recording, schedule recording, or motion trigger recording. Manual Recording If the Manual Recording option is chosen, you must manually start recording in the List view of the DCS-950 in the Menu Bar or by clicking on the Record Icon. D-Link Systems, Inc. -
Page 60: Scheduled Recording
IPView Lite DCS-950 User’s Manual Scheduled Recording Select Schedule Recording to record based on specific times and dates. Click Schedule Setting to set the time and date for recording your files. Select By Date and enter in the dates, Start, and Stop Times. The camera will start to record according to the specified date and time period entered. -
Page 61: Motion Trigger Recording
When this option is selected and the camera detects motion within the range of the viewing window, recording will be triggered. Recording will continue until no motion is detected. Click on Sensitivity Setting to set the sensitivity levels for the DCS-950. D-Link Systems, Inc. -
Page 62: Menu Bar
IPView Lite DCS-950 User’s Manual Menu Bar The menu bar makes it easier to navigate IPView Lite. All Management functions can be accessed from the menu bar. File New : Opens a new camera list. Cameras must then be added to the list for configuration. -
Page 63: View
IPView Lite DCS-950 User’s Manual View View on the menu bar provides users with management capabilities for Columns, List, Camera and Refresh. You can view the Camera in 1 Camera or 4 Camera mode. The View menu bar is pictured below. -
Page 64: List View
IPView Lite DCS-950 User’s Manual List View You can view the format in List view. The List viewing format allows easy management and control of each camera. All the cameras and their properties, such as the camera name, IP Address, user name, and location, will be displayed in the list view. -
Page 65: Camera
IPView Lite DCS-950 User’s Manual Camera Camera on the menu bar provides options to manage the camera. Add up to 4 additional Cameras for viewing. The Camera menu also allows you to Delete a camera, manage the Property, Enable real-time video capture, or take a Snap shot image. -
Page 66: Account
IPView Lite DCS-950 User’s Manual Account The account menu is for administrators to change user name and password. System Configuration This menu allows you to set overwrite options to overwrite old recorded files with new recorded files. Check the Load Last Configuration When Program Starts to load all your configured settings each time you run IPView Lite. -
Page 67: About
IPView Lite DCS-950 User’s Manual In order to allow old video files to be overwritten and replaced by new recorded files, place a check mark in the Recycle Box and click on By HDD Reserved Space or By Time. The Single HDD Reserved Space field refers to the amount of space left on your drive before overwrite takes place. -
Page 68: Ipview Lite Icon Description
IPView Lite DCS-950 User’s Manual IPView Lite Icon Description Open a new file. The hot key is Ctrl+N. Open an existing file. The hot key is Ctrl+O. Save a file. The hot key is Ctrl+S. List view format. The hot key is Ctrl+F1. -
Page 69: Context Sensitive Menu
IPView Lite DCS-950 User’s Manual Context Sensitive Menu In List View format, highlight a camera and right-click to bring up a context sensitive menu for features such as Add, Delete, Property, Enable, and Snap shot and Start/ Stop recordings. In View mode format click on the icon located on the upper left corner of the screen and a case sensitive menu will appear (see below). -
Page 70: Uninstall Ipview Application
Uninstall IPView Application DCS-950 User’s Manual Uninstall IPView Application Click on windows Start Menu > Programs > IPView > Uninstall IPView. A new prompt screen will be displayed like the one below confirming the removal. Choose the option that you want and click Next to continue the process or click on Cancel to reject the uninstall process. - Page 71 Uninstall IPView Application DCS-950 User’s Manual The InstallShield Wizard prompt will appear. Click Finish to complete the uninstallation procedure. D-Link Systems, Inc.
-
Page 72: Frequently Asked Questions
Intranet or Internet via a web browser. 2 What is the maximum number of users that can be allowed to access DCS-950 simultaneously? The maximum number of users that can log onto the Internet Camera at the same time is 8. Please keep in mind the overall performance of the transmission speed will slow down when multiple users are logged on. - Page 73 No, the Internet Camera is used only on Ethernet and Fast Ethernet network or supported by wireless transmission. The D-Link DSB-C110, DSB-C310 can be used as a PC Camera (Webcam). 8 Can the Internet Camera be connected on the network if it consists of only private IP Addresses? Yes, the Internet Camera can be connected to a LAN with private IP Addresses.
-
Page 74: Internet Camera Installation
Frequently Asked Questions DCS-950 User’s Manual Other possible problems might be due to the network cable. Try replacing your network cable. Test the network interface of the product by connecting a local computer directly to the unit, utilizing a standard Crossover Cable, and run the PING utility. If the problem is not solved, the Internet Camera might be faulty. - Page 75 Frequently Asked Questions DCS-950 User’s Manual the light signals and changes it into a digital format so your computer can present it into an image that you are familiar with) has become overloaded when it has been exposed to bright lights such as direct exposure to sunlight or halogen lights. Reposition the Internet Camera into a more shaded area immediately as prolonged exposure to bright lights will damage the CMOS sensor.
-
Page 76: How To Ping Your Ip Address
How to Ping Your IP Address DCS-950 User’s Manual How to Ping Your IP Address The PING (Packet Internet Groper) command can determine whether a specific IP Address is accessible by sending a packet to the specific address and waiting for a reply. - Page 77 How to Ping Your IP Address DCS-950 User’s Manual If you fail to connect to your camera you will see the following: Check to see if you have entered your camera’s IP Address correctly or reassign your camera’s IP Address.
-
Page 78: Time Zone Table
Time Zone Table DCS-950 User’s Manual Time Zone Table GMT stands for Greenwich Mean Time, which is the global time that all time zones are measured from. D-Link Systems, Inc. - Page 79 Time Zone Table DCS-950 User’s Manual D-Link Systems, Inc.
-
Page 80: Adjusting The Camera Focus
Adjusting the Camera Focus DCS-950 User’s Manual Adjusting the Camera Focus To help you get the best image quality, keep in mind that while adjusting the DCS-950 focus you can preview the image quality from your Web browser. Camera Lens Adjust by turning clockwise or counter-clockwise. -
Page 81: Technical Specifications
Technical Specifications DCS-950 User’s Manual Technical Specifications Video specification Resolution: 640 x 480 pixel Sensor: 1/4" color CMOS sensor Gain control: Automatic Exposure: Automatic White Balance: Automatic Shutter: Electronics 1/60 ~ 1/15000 sec Minimum Illumination: 0.5lux@f1.8, 3000K color Focal Length: 6.0 mm... - Page 82 Technical Specifications DCS-950 User’s Manual Communication Support Communication: 10/100Mbps Ethernet and Fast Ethernet only Communication protocol: HTTP, TCP/IP, UDP, ARP, ICMP, BOOTP, RARP, DHCP, PPPoE Web Configuration Requirements: Internet Explorer 6.0 or above CPU: Pentium II, 266 MHz or above...
-
Page 83: Contacting Technical Support
Contacting Technical Support You can find software updates and user documentation on the D-Link website. D-Link provides free technical support for customers within the United States and within Canada for the duration of the warranty period on this product. U.S. and Canadian customers can contact D-Link technical support through our web site, or by phone. -
Page 84: Warranty
D-Link’s sole obligation shall be to repair or replace the defective Hardware during the Warranty Period at no charge to the original owner or to refund at D-Link’s sole discretion. Such repair or replacement will be rendered by D-Link at an Authorized D-Link Service Office. The replacement Hardware need not be new or have an identical make, model or part. - Page 85 Products shall be fully insured by the customer. D-Link will not be held responsible for any packages that are lost in transit to D-Link. The repaired or replaced packages will be shipped to the customer via UPS Ground or any common carrier selected by D-Link, with shipping charges prepaid. Expedited shipping is available if shipping charges are prepaid by the customer and upon request.
- Page 86 THE LIMITED WARRANTY PROVIDED HEREIN, THE ENTIRE RISK AS TO THE QUALITY, SELECTION AND PERFORMANCE OF THE PRODUCT IS WITH THE PURCHASER OF THE PRODUCT. Limitation of Liability: TO THE MAXIMUM EXTENT PERMITTED BY LAW, D-LINK IS NOT LIABLE UNDER ANY CONTRACT, NEGLIGENCE, STRICT LIABILITY OR OTHER LEGAL OR EQUITABLE...
- Page 87 Consult the dealer or an experienced radio/TV technician for help. For detailed warranty outside the United States, please contact corresponding local D-Link office. FCC Caution: The manufacturer is not responsible for any radio or TV interference caused by unauthorized modifications to this equipment;...
-
Page 88: Registration
Registration DCS-950 User’s Manual Registration Product registration is entirely voluntary and failure to complete or return this form will not diminish your warranty rights. 11/30/04 D-Link Systems, Inc.