Table of Contents
Advertisement
1. INSTRUCTIONS FOR USE ..................................................................................................... 4
2. SAFETY PRECAUTIONS ........................................................................................................ 6
3. ENVIRONMENTAL CARE ....................................................................................................... 8
3.1 Our environmental care .................................................................................................................................. 8
3.2 Your environmental care ................................................................................................................................. 8
4. GET TO KNOW YOUR APPLIANCE ....................................................................................... 9
4.1 Description of the controls on the front panel ............................................................................................... 10
5. AVAILABLE ACCESSORIES ................................................................................................. 11
5.1 Using the rack or tray .................................................................................................................................... 11
5.2 Using the support rack .................................................................................................................................. 12
5.3 Using the reduction pan stands .................................................................................................................... 12
6. USING THE COOKING HOB ................................................................................................. 13
6.1 General warnings and advice ....................................................................................................................... 13
6.2 Lighting the hob burners ............................................................................................................................... 13
6.3 Practical hints for using the hob burners ....................................................................................................... 13
6.4 Pan diameters ............................................................................................................................................... 14
7. USING THE OVEN ................................................................................................................ 15
7.1 Before using the appliance ........................................................................................................................... 15
7.2 Oven runners ................................................................................................................................................ 15
7.3 Glass lid (on some models only) ................................................................................................................... 15
7.4 Cooling system ............................................................................................................................................. 15
7.5 Internal light .................................................................................................................................................. 16
7.6 General warnings and advice for use ........................................................................................................... 16
7.7 Electronic programmer .................................................................................................................................. 17
8. COOKING WITH THE OVEN ................................................................................................ 19
8.1 Cooking advice and instructions ................................................................................................................... 20
9. CLEANING AND MAINTENANCE ......................................................................................... 21
9.1 Cleaning stainless steel ................................................................................................................................ 21
9.2 Ordinary daily cleaning ................................................................................................................................. 21
9.3 Food stains or residues ................................................................................................................................. 21
9.4 Cleaning the cooking hob parts .................................................................................................................... 21
9.5 Cleaning the oven ......................................................................................................................................... 23
10. EXTRAORDINARY MAINTENANCE .................................................................................. 24
10.1 Replacing the light bulb (main oven) ........................................................................................................... 24
10.2 Replacing the light bulb (auxiliary oven) ..................................................................................................... 24
10.3 Removing the door ...................................................................................................................................... 25
10.4 Removing the door seal .............................................................................................................................. 25
10.5 Removing the internal glass panels ............................................................................................................ 26
11. INSTALLATION .................................................................................................................. 27
11.1 Installing in kitchen units ............................................................................................................................. 27
11.2 Room ventilation and combustion extraction .............................................................................................. 28
11.3 Wall mounting brackets (where present) ..................................................................................................... 29
11.4 Gas connection ........................................................................................................................................... 30
11.5 Electrical connection ................................................................................................................................... 31
11.6 Positioning the skirt (on some models only) ................................................................................................ 32
11.7 Positioning and levelling the appliance ....................................................................................................... 32
12. ADAPTATION TO DIFFERENT TYPES OF GAS .............................................................. 33
12.1 Replacement of nozzles on the hob ............................................................................................................ 33
12.2 Arrangement of burners .............................................................................................................................. 33
12.3 Burner and nozzle characteristics table ...................................................................................................... 34
12.4 Final operations .......................................................................................................................................... 34
INSTRUCTIONS FOR THE USER: these instructions contain user recommendations, a
description of the controls and the correct procedures for cleaning and maintenance of the
appliance.
INSTRUCTIONS FOR THE INSTALLER: these are intended for the qualified technician who must
install the appliance, set it functioning and carry out an inspection test.
@
Further information about the products can be found at www.smeg.com
Contents
3
Advertisement
Table of Contents

Related Manuals for Smeg SUK 62


Summary of Contents for Smeg SUK 62
-
Page 1: Table Of Contents
12.4 Final operations ............................34 INSTRUCTIONS FOR THE USER: these instructions contain user recommendations, a description of the controls and the correct procedures for cleaning and maintenance of the appliance. INSTRUCTIONS FOR THE INSTALLER: these are intended for the qualified technician who must install the appliance, set it functioning and carry out an inspection test. -
Page 2: Instructions For Use
Rinse thoroughly and dry using a soft cloth. Do not allow residues of sugary foods (such as jam) to set inside the oven. If left to set for too long, they might damage the enamel lining of the oven. -
Page 3: General Instructions
Do not use the hob if pyrolysis (where present) is taking place inside the oven. If you intend to go away for a prolonged period of time, close the mains gas tap or the gas cylinder tap. Take care that no objects are stuck in the door of the oven. -
Page 4: Safety Precautions
Install the appliance so that when opening the drawers or doors of units positioned at the level of the hob there is no possibility of making contact with pans positioned on top of it. - Page 5 Fats and oils can catch fire if they overheat. You are therefore recommended not to leave the appliance while preparing foods containing oils or fats. If fats or oils catch fire, never put water on them. Place the lid on the saucepan and turn off the cooking zone.
-
Page 6: Environmental Care
Therefore, the user must consign the product that has reached the end of its working life to the appropriate selective collection centres for electrical and electronic refuse, or deliver it back to the retailer when purchasing an equivalent product, on a one for one basis. -
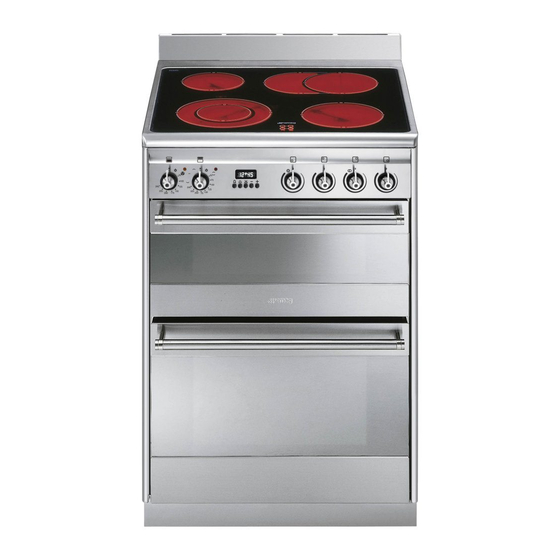
Page 7: Get To Know Your Appliance
Instructions for the user 4. GET TO KNOW YOUR APPLIANCE Cooking hob Control panel Movable roof liner Oven light Oven seal Movable roof liner Oven guide frames Oven ventilation Adjustable feet... -
Page 8: Description Of The Controls On The Front Panel
Instructions for the user 4.1 Description of the controls on the front panel 4.1.1 Programming clock The programming clock can be used to display the current time or to set a timer or a programmed cooking operation. 4.1.2 Main oven thermostat knob This knob allows to select the cooking function and the cooking temperature for the main oven. -
Page 9: Available Accessories
Gently insert racks and trays into the oven until they come to a stop. In models with runners, clean the trays before using them for the first time. Cleaning will remove any manufacturing residues, which may otherwise scratch the sides of the oven cavity when trays are being... -
Page 10: Using The Support Rack
Instructions for the user 5.2 Using the support rack The support rack is inserted into the tray (as shown in the figure). Using this, foods can be cooked and the fat can be collected separately from the food which is being cooked. -
Page 11: Using The Cooking Hob
If the burners should go out accidentally, a safety device will be tripped, cutting off the gas supply, even if the gas tap is open. In this case, turn the knob to the OFF position and wait at least 60 seconds before trying to light the burner again. -
Page 12: Pan Diameters
To prevent damage to the appliance or adjacent units, all pans or griddles must be placed inside the perimeter of the hob. Make sure never to come into contact with the lid glass with pots or pans that are still hot. The glass could crack and break with the heat. -
Page 13: Using The Oven
The toughened glass lid with aluminium edging protects the hob when not in use. Make sure never to come into contact with the lid glass with pots or pans that are still hot. The glass could crack and break with the heat. -
Page 14: Internal Light
During cooking, do not cover the bottom of the oven with aluminium or tin foil and do not place pans or oven trays on it as this may damage the enamel coating. If you wish to use greaseproof paper, place it so that it will not interfere with the hot air circulation inside the oven. -
Page 15: Electronic Programmer
Press the key and the display will show the sum of the current time plus the cooking duration: keep it pressed, and at the same time use the value modification keys to adjust the end of cooking time. - Page 16 The programmer will interpret the cancellation of the program as terminating the cooking operation. 7.7.9 Modifying the set data The set cooking data can be modified at any time by holding down the function key and at the same time pressing the keys...
-
Page 17: Cooking With The Oven
STATIC: As the heat comes from above and below at the same time, this system is particularly suitable for certain types of food. Traditional cooking, also known as static or thermal radiation cooking, is suitable for cooking just one dish at a time. Perfect for all types of roasts, bread and cakes and in any case particularly suitable for fatty meats such as goose and duck. -
Page 18: Cooking Advice And Instructions
• We recommend using a meat thermometer for meat when roasting it. Alternatively, simply press on the roast with a spoon: if it is hard it is ready, if not, it needs another few minutes cooking. 8.1.3 Advice for cooking desserts and biscuits •... -
Page 19: Cleaning And Maintenance
Do not allow residues of sugary foods (such as jam) to set inside the oven. If left to set for too long, they might damage the enamel lining of the oven. - Page 20 Dry them thoroughly and return them to the hob. Continuous contact between the pan stands and the flame can cause modifications to the enamel over time in those parts exposed to heat. This is a completely natural phenomenon which has no effect on the operation of this component.
-
Page 21: Cleaning The Oven
(with the exception of pyrolitic models). In pyrolitic models, the seal may flatten over time and lose its original shape. To restore it, pinch the seal all the way along. This also helps remove any dirt on the seal. -
Page 22: Extraordinary Maintenance
Instructions for the user 10. EXTRAORDINARY MAINTENANCE The oven requires periodic minor maintenance or replacement of parts subject to wear, such as gaskets, light bulbs, etc. Specific instructions for each operation of this kind are given below. Before any intervention that requires access to live parts, disconnect the appliance from the power supply. -
Page 23: Removing The Door
To permit thorough cleaning of the oven, the door seal may be removed. There are fasteners on all four sides to attach it to the edge of the oven. Pull the edges of the seal outwards to detach the fasteners. The seal must be replaced when it loses elasticity... -
Page 24: Removing The Internal Glass Panels
The glass in the door should always be kept thoroughly clean. To facilitate cleaning, it is possible to remove the door (see 10.3 Removing the door) and place it on a canvas, or open it and lock the hinges in order to extract the glass panels. The glass panels of the door can be completely removed by following the instructions provided below. -
Page 25: Installation
It may be installed next to walls, one of which must be higher than the appliance, at a minimum distance of 50 mm from the side of the appliance, as shown in figures A and C relative to the installation classes. -
Page 26: Room Ventilation And Combustion Extraction
The room containing the appliance should be permanently ventilated in accordance with the standards in force. The room where the appliance is installed must have enough air flow as required for the regular combustion of gas and by the necessary air exchange of the same room. The air vents, protected by grills, must be suitably dimensioned in compliance with current standards and positioned so that no part of them is obstructed. -
Page 27: Wall Mounting Brackets (Where Present)
Instructions for the installer 11.3 Wall mounting brackets (where present) The fastening system provided must be installed to ensure the appliance is stable. If installed correctly, this system prevents the appliance tipping over. Use the adjustable feet to level the appliance at Measure the distance from the index of the the required height. -
Page 28: Gas Connection
Connection using a rubber hose complying with current standards is only permitted if the hose can be inspected along its entire length. The inside diameter of the hose must be 8 mm for LPG GAS and 13 mm for NATURAL GAS and CITY GAS. -
Page 29: Electrical Connection
The appliance must be connected to earth in compliance with electrical system safety standards. Where the appliance is connected to the power grid via a plug and socket, both of these must be of the same type and connected to the power cable in accordance with current standards. The socket must be accessible after the appliance has been built in. -
Page 30: Positioning The Skirt (On Some Models Only)
Screw or unscrew the bottom part of the foot until the appliance is stable and level on the floor. To prevent possible damage to the appliance, we recommend to screw the front feet first and then the rear ones. -
Page 31: Adaptation To Different Types Of Gas
Appliance set for gas: NATURAL G20 (2H) pressure 20 mbar (see label on product) In the case of operation with other types of gas, the burner nozzles must be changed and the minimum flame adjusted on the gas taps. To change the nozzles, proceed as described in the following paragraphs. -
Page 32: Burner And Nozzle Characteristics Table
12.4.2Adjusting the hob burner minimum setting for LPG In order to adjust the minimum setting with LPG, the screw at the side of the tap rod must be tightened clockwise all the way. 914774396/ B...