Table of Contents
Advertisement
Quick Links
Advertisement
Table of Contents

Related Manuals for Philips Saeco Map Caffitaly Bravista Latte+


Summary of Contents for Philips Saeco Map Caffitaly Bravista Latte+
- Page 5 ENGLISH 6...
-
Page 6: Table Of Contents
ENGLISH Table of contents Introduction General description Important Electromagnetic fields (EMF) Before first use Installing the machine Preparing for use Filling the water tank Using the machine for the first time Using the machine Adjusting the drip tray and dispensing spout positions Capsules Brewing coffee Adjusting the coffee quantity... -
Page 7: General Description
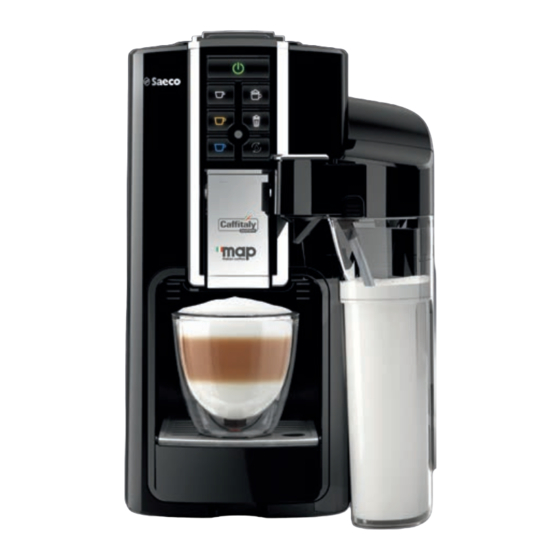
ENGLISH General description (Fig. 1) Capsule compartment opening lever Water tank lid Water tank Capsule compartment Mains cord Steam outlets Milk carafe attachment point Control panel On/off button (green) 10 Espresso button (white) 11 Café latte button (white) 12 Lungo button (yellow) 13 Frothed milk button (white) 14 Service indicator light (orange) 15 Rinse milk circuit button (orange) - Page 8 ENGLISH Do not touch hot surfaces. The surface of the heating element is subject to residual heat after use. Do not lift the machine by the lever that opens the capsule compartment. To move the machine, hold it by the outer housing. Never let the machine operate unattended.
-
Page 9: Electromagnetic Fields (Emf)
ENGLISH Electromagnetic fields (EMF) This machine complies with all applicable standards and regulations regarding exposure to electromagnetic fields. Before first use Installing the machine Remove all packaging material from the machine. Place the machine on a table or worktop away from the tap, the sink and heat sources. -
Page 10: Using The Machine For The First Time
ENGLISH Using the machine for the first time When you use the machine for the first time or if you have not used it for 2 weeks or longer, perform the following steps: Place a cup under the coffee dispensing spout and lift the dispensing spout up in the horizontal position. -
Page 11: Using The Machine
ENGLISH Using the machine Adjusting the drip tray and dispensing spout positions The machine can be used with a variety of cup sizes to dispense your different coffee varieties. You can adjust the position of the drip tray and the dispensing spout to create various dispensing positions. - Page 12 ENGLISH Insert a capsule. Push the lever downwards to close the capsule compartment. Note: If the compartment opening lever does not close easily, check if the capsule is inserted correctly and if the used capsule drawer is not full. Press the desired coffee button: ,Espresso: press the white button ,Lungo: press the yellow button ,Black coffee: press the blue button...
-
Page 13: Adjusting The Coffee Quantity
ENGLISH Adjusting the coffee quantity Each capsule contains the optimal amount of ground coffee (8 grams) for one cup of espresso or lungo with an optimal flavour. You can adjust the amount of brewed coffee according to your taste and the size of your cup, mug or glass. - Page 14 ENGLISH Remove the milk carafe lid. Fill the milk carafe with milk to a level between the MIN and MAX indications. Put the lid on the milk carafe properly. Inserting and removing the milk carafe Note: Do not hold the milk carafe by the lid. The lid can come off the milk carafe.
-
Page 15: Café Latte, Frothed Milk, Latte Macchiato
ENGLISH To remove the milk carafe, lift it and pull it carefully away from the machine. Café latte, frothed milk, latte macchiato Be careful: before milk is dispensed, small jets of hot water may come out of the machine. Do not select coffee varieties that contain milk if the milk carafe is not in place. -
Page 16: Frothed Milk
ENGLISH Insert an espresso capsule. Fill the milk carafe with milk to a level between the MIN and MAX indications. Put the lid on the milk carafe and place the carafe in the machine. Press and hold the white café latte button for 3 seconds until it starts to flash at brief intervals. Then release the button. -
Page 17: Adjusting The Amount Of Frothed Milk
ENGLISH Adjusting the amount of frothed milk You can adjust the amount of frothed milk prepared according to your preference and the size of your glass. Fill the milk carafe with milk to a level between the MIN and MAX indications. -
Page 18: Rinsing The Milk Circuit
ENGLISH The machine stops brewing automatically once it has dispensed the preset volume. To stop the brewing process, you can press the espresso button again. Lift the lever to remove the used capsule. Rinsing the milk circuit Rinse the milk circuit right after use, to ensure optimal hygiene. Note: The rinse button lights up as a reminder and it remains lit until the circuit has been rinsed or the machine has been switched off. - Page 19 ENGLISH Remove the used capsule drawer by pulling out the drip tray as far as it goes. Push the sliding lock on the left side of the used capsule drawer upwards and pull the drip tray out of the used capsule drawer. Empty the drip tray.
-
Page 20: Daily Cleaning Of The Water Tank
ENGLISH Always insert the used capsule drawer before you insert the drip tray. Do not push both parts into the machine at once. Daily cleaning of the water tank Rinse the water tank under the tap every day. This prevents scale and other particles from clogging the filter at the bottom of the water tank. - Page 21 ENGLISH Press the white rinse button. Wait until the dispensing stops. Empty the milk container and remove the milk carafe. Remove the lid and empty the milk carafe. You can now clean the components of the milk frothing system. Perform the following steps: Remove the tube attached to the milk carafe lid by pulling it out.
- Page 22 ENGLISH Open the lid of the milk dispensing spout. Remove the lower part of the milk dispensing spout from the upper part. Clean all the components in lukewarm water with a mild washing-up liquid. Rinse all components with tap water and dry them completely. The internal parts of the frothing system are dishwasher-safe.
-
Page 23: Descaling The Machine
ENGLISH Push the milk dispensing spout onto the fitting. Push the milk dispensing spout back into the lid until it clicks into place. Insert the tube into the opening in the milk dispensing spout. Descaling the machine Scale builds up inside the machine during use. It is essential to descale the machine when the service indicator light illuminates continuously. -
Page 24: Descaling Procedure
ENGLISH Descaling procedure The descaling procedure lasts approximately 30 minutes and consists of a descaling and a rinsing cycle. Note: Do not interrupt the descaling or rinsing cycle and do not switch off the machine. During the descaling cycle, the descaling solution will be dispensed from the coffee and milk dispensing spouts in intervals. - Page 25 ENGLISH The orange service indicator light flashes and the white café latte button lights up continuously when all the descaling solution has been dispensed at the end of the descaling cycle. Empty the bowl and drip tray and place the bowl and drip tray back. Remove the water tank and rinse it under the tap, then fill it up to the MAX level with fresh water. Place the water tank back onto the machine.
-
Page 26: Meaning Of Light Signals
ENGLISH Meaning of light signals The on/off button flashes slowly. The machine is warming up. The rinse milk circuit button light lights up continuously. You have to perform a milk carafe rinsing cycle. Follow the instructions in chapter ‘Using the machine’, section ‘Rinsing the milk circuit’. The service indicator light lights up continuously. -
Page 27: Troubleshooting
ENGLISH Troubleshooting This chapter summarises the most common problems you could encounter with the appliance. If you are unable to solve the problem with the information below contact our Consumer Care Centre on 0800 726 713 in New Zealand. Problem Possible cause Solution The machine does not... - Page 28 ENGLISH Problem Possible cause Solution The machine suddenly stops There is not enough water in Fill the water tank with fresh tap water brewing coffee. the water tank. up to the MAX indication. Coffee grounds end up in A small amount of ground This is normal.
-
Page 29: Warranty
ENGLISH Warranty IMPORTANT: Please keep this warranty card together with your proof of purchase for use when claiming. NEW ZEALAND Jalmac Sales + Marketing Ltd. Consumer Care: 0800 726 713 Website: www.mapcoffee.com In this warranty: We or us means Jalmac Sales + Marketing Ltd. and our contact details are set out at the end of this warranty;... - Page 30 ENGLISH Additional Warranty: In addition to the rights and remedies that you have under the Consumer Guarantees Act of New Zealand or any other applicable law, we provide the following warranty against defects: If, during the first 2 years from their date of purchase from the Supplier (Warranty Period), the Goods prove defective by reason of improper workmanship or materials and none of your statutory rights or remedies apply, we will repair or replace the...
- Page 34 4219.440.5204.2 REV01 All rights reserved.