Epson Small-in-One XP-200 - All-In-Ones Printer Quick Installation Guide
- Start here (4 pages)
Advertisement
Unpack
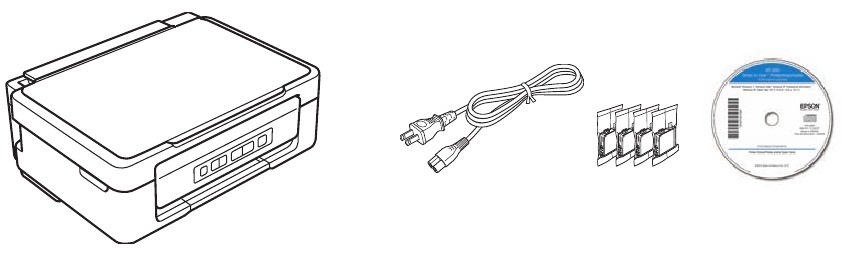
 Do not open the ink cartridge package until you are ready to install the ink. Cartridges are vacuum packed to maintain reliability.
Remove all protective materials

Turn on the printer

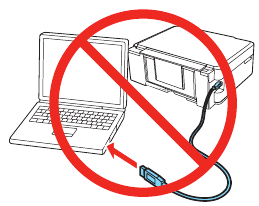
![caution]() Do not connect to your computer yet.
Do not connect to your computer yet.![]()
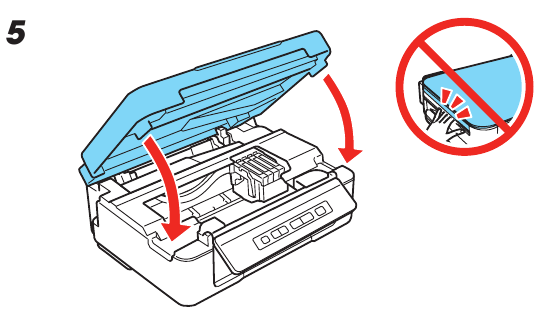
![caution]() Do not lower the control panel without first squeezing the release lever underneath or you may damage your product.
Do not lower the control panel without first squeezing the release lever underneath or you may damage your product.


Install ink cartridges

- Insert the cartridges in the holder for each color. Press each cartridge down until it clicks.

![]()

- Press the
![]() stop button to prime the ink delivery system. This takes about 4 minutes. When the green power light stops fl ashing, priming is complete.
stop button to prime the ink delivery system. This takes about 4 minutes. When the green power light stops fl ashing, priming is complete.
![]()


 The cartridges included with the printer are designed for printer set up and not for resale. After some ink is used for priming, the rest is available for printing.
Don't turn off the printer while it is priming or you'll waste ink.
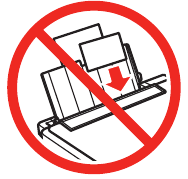
Load paper

Load paper with the printable side face up.
Don't load the paper sideways; always load it short edge first.

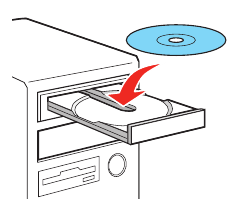
Install software
If your computer does not have a CD/DVD drive, you can download the software from the Epson website (see "EPSON technical support").
Be sure to close your other programs, including any screen savers and virus protection software, before beginning this software installation.
Make sure the printer is NOT CONNECTED to your computer.
- In Windows®, if you see a Found New Hardware screen, click Cancel and disconnect the USB cable.
![]()
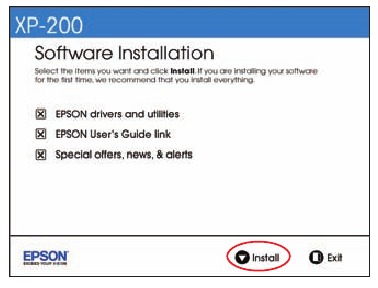
- Windows
![]()
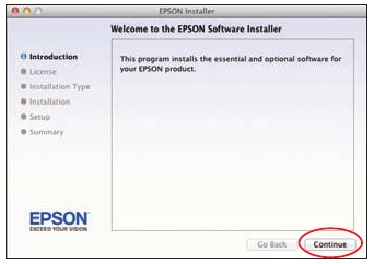
Mac OS X
![]()
- When you see the Select Your Connection screen, check the "Connection options" section on this sheet for more information, then choose your connection.
- When you're done, remove the CD. You're ready to copy, print, and scan! See the back of this sheet or your online User's Guide.
Connection options
Wireless Connection
You must install the software on every computer from which you want to print. The installer may prompt you to connect the printer to your computer with a USB cable temporarily. After the printer is connected to the network, you will be prompted to remove the cable (USB cable not included). Make sure you know your network name (SSID) and network password.
If you don't have this information, contact the person who set up your network. For more help with setting up your printer's wireless network connection, you can view how-to-videos at epson.com/support (U.S.) or epson.ca/support (Canada).
Direct USB Connection
Make sure you have a USB cable. Do not connect the printer to your computer until you're instructed to do so.
Copying and scanning

- Press the
![]() button (for a black-and-white copy) or the
button (for a black-and-white copy) or the ![]() button (for a color copy) to start copying.
button (for a color copy) to start copying. - Press the
![]() and
and ![]() buttons simultaneously to scan your original and save it as a PDF on your computer.
buttons simultaneously to scan your original and save it as a PDF on your computer. - Press the or button for 3 seconds to copy in draft mode.
- While pressing the
![]() or
or ![]() button, press the
button, press the ![]() button within 3 seconds to make 20 copies.
button within 3 seconds to make 20 copies.
 button (for a black-and-white copy) or the
  button (for a color copy) to start copying.
 button within 3 seconds to make 20 copies.
Printing from a computer
- Open your document or photo.
- Select the print option in your application.
- Select your EPSON printer.
- In Windows, select Preferences or Properties.
- Choose your printer settings. (In Windows, click OK when you're done.)

- Click OK or Print to start printing.

Need paper and ink?
Use EPSON specialty papers with DURABrite ® Ultra Ink for professional results. You can purchase them from EPSON ® Supplies Central ® at www.epson.com/ink3 (U.S. sales) or www.epson.ca (Canadian sales).
You can also purchase supplies from an EPSON authorized reseller. To fi nd the nearest one, call 800-GO-EPSON (800-463-7766).

Premium Presentation Paper Matte
Heavyweight, non-glare card stock for school and business projects plus photos.

Troubleshooting
Network setup and printing problems
- If you're connecting the printer via Wi-Fi Protected Setup (WPS), make sure you press the Wi-Fi button on the printer within 2 minutes of pressing the WPS button on your router. The Wi-Fi button on the printer must be pressed for 3 seconds.
- Try connecting to the router or access point with your computer or another device to confirm that it is working correctly.
- Press the
![]() button to print a network status sheet. Verify that the network settings are correct and check the signal strength. If it's weak, try moving the printer closer to your router or access point. Avoid placing the printer next to a microwave oven, 2.4 GHz cordless phone, or large metal objects such as a filing cabinet.
button to print a network status sheet. Verify that the network settings are correct and check the signal strength. If it's weak, try moving the printer closer to your router or access point. Avoid placing the printer next to a microwave oven, 2.4 GHz cordless phone, or large metal objects such as a filing cabinet. - If your router or access point doesn't broadcast its network name (SSID), manually enter the name. If your router or access point has wireless security enabled, you'll also need to know what kind of security it's using and make sure you enter the WEP key or WPA passphrase correctly.
- When using TCP/IP, make sure the product's IP address is set correctly for your network. If your network does not assign IP addresses using DHCP, you need to set the IP address manually.
- Disable the firewall temporarily to see if that may be causing the issue. Contact your firewall manufacturer for assistance.
 button to print a network status sheet. Verify that the network settings are correct and check the signal strength. If it's weak, try moving the printer closer to your router or access point. Avoid placing the printer next to a microwave oven, 2.4 GHz cordless phone, or large metal objects such as a filing cabinet.
Error Indicators
If you see one of the error indicators below, follow the steps here to proceed:
 |  |  |  |
| Paper is jammed. Remove jammed paper from the sheet feeder, load paper correctly, then press a copy button to resume printing. | Paper is out, or multiple pages have fed into the sheet feeder. Load paper correctly, then press a copy button to resume printing. | An ink cartridge is running low on ink. From your computer, you can check which cartridge is low and replace it. | An ink cartridge is expended or not installed correctly. Replace or reinstall the ink cartridge. |
 |  |  |  |
| Printer error. Turn the printer off, check inside for jammed paper or foreign objects, then turn the printer back on. If the error does not clear, contact Epson. | The ink pads are near the end of their service life. Contact Epson. (To resume printing, press a copy button.) | Wi-Fi connection error. Press the Wi-Fi button on the printer to clear the error and try again. | Firmware update error. Contact Epson. |
Any questions?
User's Guide
Click the icon on your desktop (or in the Applications/Epson Software/Guide folder in Mac OS X) to access the online User's Guide, how-to-videos, software downloads, EPSON Supplies Central, and more (requires an internet connection). If you don't have a User's Guide icon, you can install it from the CD or go to the Epson website, as described below.
EPSON technical support
Visit epson.com/support or epson.ca/support to download drivers, view manuals and how-to-videos, get FAQs, or e-mail Epson.
You may also speak with a support specialist by calling (562) 276-4382 (US) or (905) 709-3839 (Canada), 6 AM to 8 PM, Pacific Time, Monday through Friday and 7 AM to 4 PM, Saturday.
EPSON Connect TM/MC, AirPrint, and Google Cloud Print

Print and share from anywhere. Use your smartphone or tablet to print photos and documents while on the go. Learn more at www.epson.com/connect.
Documents / Resources
References
Epson® Official Support
Epson® Official Support
Ink Finder | Epson US
Epson Canada | Homepage
Mobile Printing and Scanning Solutions | Epson US
Download manual
Here you can download full pdf version of manual, it may contain additional safety instructions, warranty information, FCC rules, etc.
Download Epson Small-in-One XP-200 - All-In-Ones Printer Quick Installation Guide
Advertisement
Thank you! Your question has been received!


Need Assistance?
Do you have a question about the Small-in-One XP-200 that isn't answered in the manual? Leave your question here.