Advertisement
- 1 Description of the appliance
- 2 Use
- 3 Cleaning and maintenance
- 4 Descaling
- 5 What to do if
- 6 Important safety information
- 7 Documents / Resources
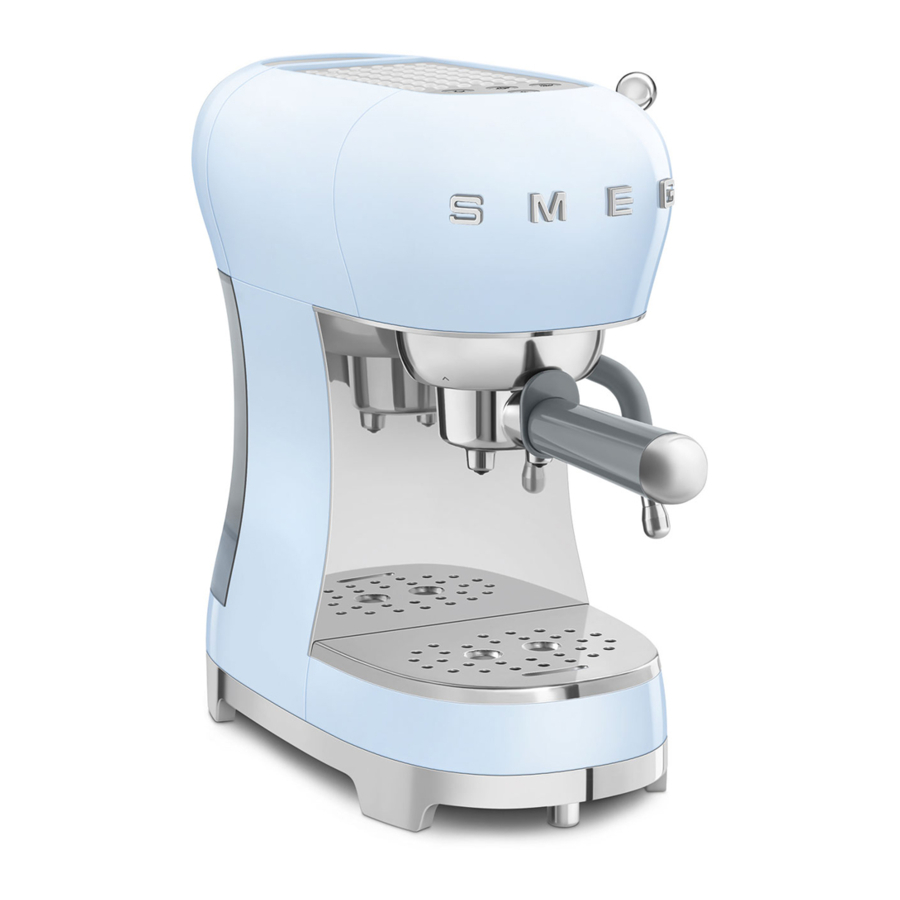
Description of the appliance

- Cup-warmer shelf.
- Dispensing unit.
- Filter-holder.
- Cup tray.
- Level indicator.
- Drip tray.
- Steam wand.
- Steam knob.
- ON/OFF switch.
- Water tank lid.
- Water tank (1 litre).
- Measuring/tamping scoop.
- Coffee pod filter.
- Single filter.
- Double filter.
- Water softener filter (optional).
- Control panel.
- Water hardness test strip.
- Steam wand cleaning needle.
Description of accessories
Accessories included:
- Measuring/tamping scoop
- Accessory to use to dose the amount of ground coffee into the filter and press it inside.
13, 14, 15: Filters
- This machine includes 3 filters; two pressurised for ground coffee and one for paper coffee pods (Fig. B).


- Water hardness test strip
- Use the strip supplied to detect the hardness of the water used as indicated in the "Machine setting - Water hardness" paragraph.
Description of controls
- ON/OFF key
Voltage is supplied to or removed from the machine by pressing this button.
- Dispensing programme change key
The product has 4 espresso functions and steam function, accessible through two menus, White Menu and Orange Menu.
Once the machine is ready for use, by pressing this key it is possible to change the dispensing menu from "White" to "Orange" and vice versa.
| Key | White menu function |
 (20) | Single espresso |
 (21) | Double espresso |
 (22) | Steam dispensing |
| Key | Orange menu function |
| (20) | Long single espresso |
| (21) | Long double espresso |
| (22) | Steam dispensing |
- Descaling alarm
When the key flashes with an orange light, it indicates that a descaling process is necessary.
Before commissioning
- Remove any labels and stickers from the coffee machine.
- Thoroughly wash and dry the coffee machine components (see "Cleaning and maintenance").
- Remove the lid (10) pulling it upwards and then slide the tank out (11).

- Fill the tank (11) with cool, clean water directly from the tap or using a jug, ensuring not exceed the maximum level indicated on the tank.
- Re-introduce the tank (11) pressing it lightly in a way to open the valves located on the bottom of the tank itself.

 Do not use the coffee machine without water in the tank or without the water tank fitted. FAULT HAZARD!
 The parts that may come into contact with foodstuffs are made using materials that comply with the provisions of the legislation in force.
Use
Before starting the coffee machine, carefully read chapter "Warnings" and section "Before commissioning".
Commissioning
On commissioning, the internal circuits must be rinsed. Proceed as described below.
- Switch the coffee machine on by pressing the ON/OFF switch (9): the LEDs of keys (20), (21) and (22) flash to indicate that the pre-set temperature is being reached. The coffee machine is ready for use as soon as the three LEDs stop flashing and have a fixed light.
- Attach the filter holder (3) with 2-cup filter (15) to the coffee machine.

- Position a container under the coffee dispensing nozzles and press the key (21).

- Repeat this procedure 5 times.
- Position a container under the hot water/ steam wand (7).
- Turn the steam knob (8) anti-clockwise and dispense100 ml of water.
- Turn the steam knob (8) again in a clockwise direction to end the operation.


It is recommended to rinse the internal circuits also when the coffee machine has not been used for a long period of time.
Dispensing programme change
- The machine has two dispensing menus in its memory: White Menu and Orange Menu. To pass from one program to another, press the key (23).
- In the White Menu all of the buttons have white lights, in the Orange Menu all of the keys have orange lights.
- For the specific functions of each menu, refer to section "Description of controls".
Preparing espresso coffee
The coffee machine has three filters (FIG. B): 1-cup filter (14), 2-cup filter (15) and pod filter (13). The corresponding icon is found under each filter.

To avoid spraying, do not remove the filter-holder during or immediately after dispensing: wait for a few seconds after dispensing has stopped.
Recommendations for hotter coffee
In order to obtain a hotter espresso coffee, it is recommended to:
- Heat the cups before making the coffee, by rinsing them under hot water.
- Attach the filter holder (3) to the machine with the filter inserted, without adding coffee. Press the 1-cup key (20) to dispense hot water into the cup to be used to make the coffee, this will heat the cup.
When the machine has not been used for a while (more than 30 minutes), it is normal for the first cups of coffee not to be at the right temperature. Repeat the procedure described to obtain a hotter coffee.
Ground coffee
- Insert the 1-cup (14) or 2-cup ground coffee filter (15) into the filter holder (3).

- Fill the filter (14) or (15) with ground coffee, making sure finely ground coffee is used, which is suitable for the espresso.
![]()
- Distribute the ground coffee evenly and tamp down using the tamping scoop (12).
![]()
- Remove any excess ground coffee from the edge of the filter holder (3). Attach the filter holder to the dispensing unit (2) and turn it to the right until it locks in place.


- For one cup, fill the relevant filter (14) with a level measure of coffee (approx. 7 grams.)
- For two cups, fill the filter (15) with two level measures.
- To obtain a strong coffee, tamp down the coffee firmly.
- To obtain a weak coffee, tamp down the coffee less.
- Before introducing the filterholder into the dispensing unit, make sure the edge of the filter is cleaned to remove any coffee residues.
- Position the cup or cups under the filter holder nozzles.
- Press the key relative to the desired function. Preparation ends automatically for every function selected.
- For the specific beverages, refer to section "Description of controls".
- Once dispensing has ended, wait a few seconds and then remove the filter-holder (3) by turning it to the left.
Coffee pods
- Insert the coffee pod filter (13) into the filter holder (3).
- Insert the pod into the filter holder (3), centring it as much as possible. Attach the filter holder (3) to the dispensing unit (2).
- Position the cup or cups under the filter holder nozzles (3) and press the dispensing key (20).
![]()
- Once the coffee has been dispensed, turn the filter holder (3) to the left to remove it.

Before dispensing, make sure that the pod flap remains inside the filter, and not on the edge.
![information]() Dispensing can be stopped at any time by pressing the dispensing key again.
Dispensing can be stopped at any time by pressing the dispensing key again.
After having waited a few seconds following the end of every dispensing operation, it is advised to release the filter-holder and clean the coffee residues from the filter.
Setting the quantity of coffee
The quantity of coffee dispensed can be customised for every function.
To modify the quantity of coffee dispensed by the machine:
- Position a small or large cup under the dispenser (2).
- Press one of the keys relevant to the beverage to be dispensed (20) or (21) for at least 3 seconds, until the LED of the relative button remains on.
- On reaching the desired quantity, stop dispensing by pressing the key again.
- The length has been set and is stored permanently.
Dispensing steam and preparing a cappuccino
- Press the key (22), which starts to flash. Wait for the key to have a fixed light, which indicates that the correct steam dispensing temperature has been reached.
- When the LED (22) has a fixed light, position an empty recipient under the steam wand (7) and turn the steam knob (8) anticlockwise to discharge any water present and then close the knob.
- Fill a container with 100 ml of cold milk, for every cappuccino to be prepared.
- Position the container with milk under the milk frothing wand (7), positioning the tip of the frothing wand in contact with the milk.
- Turn the steam knob (8) anti-clockwise to dispense the steam.
- Successively, introduce the steam wand into the milk, creating a vortex with the container of milk.
- Once the ideal temperature has been reached, stop dispensing by turning the steam knob (8) clockwise.
- Pour the frothy milk into the cups with the previously-prepared espresso.
- To make several cappuccinos, first prepare all the coffees and then froth the milk for all of them together.
- At the end of the operation, clean the steam wand (7) immediately using a damp cloth.
- Discharge any milk residues by turning the steam knob to let the steam out.
- Do not dispense steam for longer than 60 seconds max.
- After heating the milk, the internal part of the steam wand (7) must be cleaned by dispensing steam for a few seconds.
- Clean the steam wand (7) every time it is used, to prevent the deposit of milk residues or clogging. For complete cleaning of the steam wand, see the "Cleaning and Maintenance" paragraph.
The drip tray (6) can be removed if tall cups are used.

The result of the steam function can be affected by the ingredients used. To obtain a good cappuccino, we recommend using semi-skimmed or full-fat milk at fridge temperature (about 5°C).
To prevent obtaining milk with not much froth or large bubbles, always clean the steam wand as described in paragraph "Cleaning and maintenance".
How to cool the heating element
When the temperature of the heating element is too high to dispense coffee, buttons (20) and (21) flash simultaneously.
The heating element must be cooled down if you wish to prepare a coffee immediately after frothing milk.
If the heating element is not cooled down, the coffee dispensed will taste burned.
To cool it quickly, proceed as follows:
- Position a container underneath the steam wand (7) and turn the steam knob (8) anticlockwise to dispense hot water.
![]()
The steam wand (7) will initially dispense steam. Successively, hot water will be dispensed. This means that the heating element has reached the correct temperature to dispense coffee.- Turn the steam knob (8) clockwise and prepare the coffee.
Dispensing hot water
- Turn the machine on using the ON/OFF switch and wait until the coffee dispensing LEDs have a fixed light.
- Position a recipient under the steam wand (7).
- Turn the steam knob (8) anti-clockwise and dispense hot water.
- Stop dispensing by turning the steam knob (8) clockwise.
Accessing the programming menu and changing the settings
- Make sure that the machine is ready for use and maintenance. Press the key (23) for 5 seconds until all keys start to flash: the machine is in programming mode.
- Set the machine to meet your requirements (see below).
- To exit the menu, wait for 30 seconds without pressing any key.
Setting the coffee temperature
- Access the programming menu.
- Press the key (20) to set the temperature of the coffee.
- The key (20) flashes 3 times, after which the current setting LEDs turn on:
| LEDs | Setting the temperature |
 | Low |
 | Medium |
 | High |
- The LEDs start to flash in sequence.
- Press the key corresponding to the desired temperature: low (20), medium (21) or high (22).
- The key selected flashes to indicate the selection has been stored and a single sound is emitted if the acoustic signals are activated.
Setting water hardness
- The machine is factory set to "Hard Water Level". The machine can also be set according to the actual water hardness in the various regions for less frequent descaling.
- If you don't know the water hardness, use the test strip supplied (18) and follow the instructions below.
- Remove the reactive strip supplied from its packaging.
- Fully submerge the strip in a glass of water for about one second.
- Remove the strip from the water and shake it slightly. Read the results after approx. one minute. If 5 blue stripes appear on the strip, select the "soft water" setting. If 1 or 2 pink stripes appear on the strip, select the "average water" setting. If 3, 4 or 5 pink stripes appear on the strip, select the "hard water" setting.
- Access the programming menu.
- Press the key (21) to set water hardness.
- The key (21) flashes 3 times, after which the current setting LEDs turn on:
| LEDs | Setting water |
| | Soft |
 | Medium |
 | Hard |
- The LEDs start to flash in sequence.
- Press the key corresponding to water hardness:
 Soft Soft |  Medium Medium |  Hard Hard |
| <10°dH | 10°dH - 20°dH | >20°dH |
| <18°fH | 18°fH - 36°fH | >36°fH |
| <180 mg/l CaCo3 | 180-300 mg/l CaCo3 | 360 mg/l CaCo3 |
- The key selected flashes to indicate the selection has been stored and a single sound is emitted if the acoustic signals are activated.
To prolong machine operation and preserve the aroma and flavour of the coffee, use of the Smeg Water Softener Filter is recommended (optional, not supplied). For installation and operation, follow the instructions accompanying the accessory. Once installed, set the level of water hardness at "Soft", following the indications in the previous paragraph.
Setting the automatic shut-off time
In order to save energy, the coffee machine has an automatic shut-off function and will turn itself off when it has not been used for a certain period of time.
To turn the appliance back on, press any button on the control panel.
To set the automatic shut-off time:
- Access the programming menu (see section "Access programming menu and change settings").
Press the key (22) to set the automatic shut-off time. - The key (22) flashes 3 times, after which the current setting LEDs turn on:
| LEDs | Time setting |
 | 10 minutes |
| | 30 minutes |
 | 1 hour |
- The LEDs start to flash in sequence.
- Press the button corresponding to the time you wish to set, choosing from 10 minutes (20), 30 minutes (21) or 1 hour (22).
- The key selected flashes to indicate the selection has been stored and a single sound is emitted if the acoustic signals are activated.
Restoring factory values
To restore factory settings:
- Hold keys (21) and (23) down simultaneously for at least 10 seconds.
- All of the buttons will flash together once to indicate that the original settings have been reset.
Activation/deactivation of acoustic signals
- The machine is set by default with the acoustic signals deactivated.
- The acoustic signals can be disabled/ enabled by holding keys (20) and (23) down for 5 seconds;
- The key (20) flashes three times indicating that the setting has been stored.
Cleaning and maintenance
Warnings

Electrocution hazard.
- Remove the plug from the power outlet before cleaning the coffee machine.
- Never immerse the coffee machine in water or other liquids.
- Allow the coffee machine to cool down before cleaning.
Risk of damage to the surfaces.
- Do not use steam jets to clean the coffee machine.
- Do not use cleaning products containing chlorine, ammonia or bleach on parts with metal surface finishes (e.g. anodised, nickel or chrome-plated).
- Do not use abrasive or corrosive detergents (e.g. powder products, stain removers and metal scourers).
- Do not use rough or abrasive materials or sharp metal scrapers.
Cleaning the device body
To keep the external surfaces in good condition, they must be cleaned regularly after all use and when they have cooled down. Clean with a soft, damp cloth.
Cleaning the device components
Cleaning the drip tray
The drip tray (6) is equipped with a red float (5) which projects from the cup holder tray when the maximum liquid level is exceeded.
- Remove the cup holder tray (4) and then remove the drip tray (6) to empty it.
- Clean the drip tray (6) with a cloth and then re-position it together with the cup holder tray (4).
- Dry components and reassemble in the machine.
Cleaning the coffee filters
Clean the coffee filters (13), (14) and (15) regularly under running water. If the holes are clogged, clean them using the needle supplied (19).
Cleaning the steam wand
Clean the steam wand (7) immediately after use.
- Turn the steam knob (8) anti-clockwise to let a little steam out and allow any milk inside to flow out.
- Check that the steam exit hole is not blocked. In the event of any deposits, clean the steam exit hole using the needle supplied (19).


Cleaning the dispensing unit
The dispensing unit (2) must be rinsed every 200 coffees made by dispensing approximately 500 ml of water by pressing the coffee keys (20) or (21) without adding ground coffee or a pod.
Cleaning the water tank
Clean the water tank (11) approx. once a month using a moist cloth and mild detergent.
Descaling
The coffee machine needs descaling when the orange LED on the key (steam) flashes.
The warning will be displayed every time the machine exits the stand-by status, until the descaling procedure is performed.
Proceed as follows to run the descaling cycle:
- Empty the water tank (11) completely and remove the water softening filter (if present).
- Fill the water tank (11) up to MAX with a solution of water and descaler following the doses recommended by the manufacturer.
- Remove the filter holder (3) and position a container under the dispenser (2) and the steam wand (7).
- Turn the machine on by pressing the ON/ OFF button.
- As soon as the machine is ready, hold the key (22) down for 10 seconds until the orange LED has a fixed light.
- Turn the steam knob (8) anti-clockwise.
- Press the key (22) to start descaling, the key (22) starts to flash.
- The descaling cycle automatically performs a series of rinse cycles at intervals to remove lime scale from the inside of the coffee machine, continuing until the tank (11) is empty.
- The descaling cycle stops and the white LED (22) switches on.
- Remove the water tank (11), empty it and rinse it out.
- Fill the tank (11) with water to the maximum level mark and insert it into its housing.
- Position an empty container under the steam wand (7), an empty container under the dispensing unit (2) and check that the steam knob (8) is horizontal.
- Press the steam key (22) again to start the rinse cycle.
- When the tank (11) is empty, it means that the rinse cycle has ended and the machine goes back to ready status.
- Turn the steam knob (8) clockwise.
Personal injury hazard.
- The descaler contains acids that can irritate the skin and eyes.
- Follow the manufacturer's instructions and safety warnings on the packet scrupulously in the event of contact with skin or eyes.
- Use descaler products recommended by Smeg to prevent damage to the coffee machine.
What to do if
| Problem | Possible causes | Solution |
| Coffee does not come out. | No water in the tank (11). Buttons (20) and (21) flash. | Fill the tank (11). |
| The filter holes (13-14-15) are blocked. | Clean the filter (13-14-15) using the needle supplied (19). | |
| The tank (11) is not inserted correctly. | Insert the tank (11) correctly into its housing. | |
| Lime scale build-up. | Perform a descaling cycle. | |
| The coffee drips from the filter holder (3) and the filter holder (3) and not from the nozzles. | The filter holder (3) is not attached correctly or is dirty. | Attach the filter holder (3) and rotate it fully home. Clean the filter holder (3). |
| The dispensing unit gasket is worn. | Have it replaced at an authorised After-sales Centre. | |
| The nozzle holes are blocked. | Clean the nozzle holes. | |
| The filter has been overfilled. | Introduce the correct quantity into the filter using the measuring scoop supplied. | |
| The filter holder (3) will not attach to the coffee machine. | The filter has been overfilled. | Use the measuring scoop (12) supplied and use the correct filter. |
| The coffee machine does not work and all the LEDS flash. | Possible fault. | Unplug the coffee machine and contact an Authorised After-sales Centre. |
| The "crema" of the coffee is light in colour and comes out of the nozzle quickly. | The ground coffee has not been tamped sufficiently. | Tamp the coffee harder. |
| There is insufficient ground coffee. | Increase the amount. | |
| The ground coffee is too coarse. | Use only ground coffee for espresso coffee machines. | |
| Poor quality ground coffee. | Change the type of ground coffee. | |
| The "crema" of the coffee is dark in colour and comes out of the nozzle slowly. | The ground coffee has not been tamped too hard. | Tamp the coffee with less force. |
| There is too much ground coffee. | Reduce the amount used. | |
| The dispensing unit (2) or filter (13-14-15) are blocked. | Clean the dispensing unit (2) and the filter (13-14-15). | |
| The ground coffee is too fine. | Use only ground coffee for espresso coffee machines. | |
| Lime scale build-up. | Perform a descaling cycle. | |
| The LEDs (20) and (21) flash for a few seconds. | Steam knob (8) open. | Turn the steam knob (8) clockwise to close it. |
| High heating element temperature. | Cool the heating element as described. | |
| No water in the tank (11). | Fill the tank (11). | |
| The tank (11) is not inserted correctly. | Insert the tank (11) correctly into its housing. | |
| The coffee is not hot. | Machine not used for a long period of time. | Increase the temperature of the coffee from the programming menu following that indicated in the "Setting the coffee temperature" paragraph. Dispense hot water into the cup in which the coffee will be prepared in order to heat the cup, as described in section "Preparing espresso coffee" |
| The cups have not been pre-heated. | Heat cups by rinsing them with hot water (Note: the hot water function can be used). | |
| Insufficient frothing. | The steam wand is dirty. | Thoroughly clean the steam wand removing the steel nozzle and following the instructions in the manual. Note: froth quality also depends on the type of milk used and its temperature. |
| The machine does not dispense steam. | The steam function was not correctly turned on. | Follow the instructions in paragraph "Steam dispensing". |
| The machine did not reach the steam dispensing temperature. | Wait until the temperature is reached, indicated by key (22) with fixed light. | |
| Lime scale build-up. | Perform a descaling cycle. |
Contact local technical support if the problem is not solved or in case of other types of faults.
Important safety information
Warnings
This user manual is an integral part of the appliance and must therefore be kept in its entirety and on-hand for the whole working life of the appliance.
Important information for the user
| Safety instructions |
 | Information |
| Advice |
Description for use
- The appliance can be used to prepare espresso and cappuccino coffee using ground coffee or coffee pods. All other use is considered improper. Do not use the appliance for purposes different to those for which it is intended.
- This appliance is for household use only. Furthermore, it cannot be used:
- in kitchen areas provided for employees of shops, offices and other work environments;
- in farms/farm holiday facilities;
- by guests at hotels and motels, and in residential environments;
- in bed and breakfasts.
- This appliance may be used by persons with reduced physical, sensory or mental capabilities (including children from the age of 8) provided they are supervised or instructed on the safe use of the appliance and they understand the associated risks.
- Children must not be allowed to play with the machine.
- Keep the appliance and its cable out of the reach of children under 8 years of age.
- Cleaning and maintenance can be performed by children from the age of 8, only if they are closely supervised by an adult.
General safety warnings
- Never immerse the appliance in water.
![]()
Avoid getting the coffee machine wet and do not spray liquids onto it. In the event of contact with liquids, immediately disconnect the cable from the power outlet and dry thoroughly: Electric shock hazard!- Do not position the appliance or cable above or near gas or electric hob burners when they are in use, inside an oven or near other heat sources.
- In the event of a fault, or if the power supply cable is damaged, have the appliance repaired only by a qualified technician or by an authorised after-sales service in order to prevent any hazards.
- Do not make any modifications to the appliance so as not to make the warranty void.
- Do not pull the cable to remove the plug from the outlet.
Safety recommendations for this appliance
- Follow all safety recommendations for safe use of the appliance.
- Read this user manual carefully before using the appliance.
- Do not leave the coffee machine unattended during use.
- Always disconnect the coffee machine from the power outlet before assembly/ disassembly of components and before cleaning operations.
- Allow the coffee machine to cool down before cleaning.
- Do not use the coffee machine without the tank fitted or without water in the tank.
- Leave a space of at least 3 cm between the coffee machine and any walls to the rear or side, and a space of 15 cm above the coffee machine.
![]()
The coffee machine generates heat and produces hot water when running.![]()
Do not touch the cup warmer shelf while the appliance is operating.- Do not use the coffee machine with parts or accessories produced by other manufacturers.
![burn hazard]()
![shock hazard]()
Only use the manufacturer's original spare parts. The use of spare parts not recommended by the manufacturer could lead to fires, electric shocks or personal injury.- Only place the coffee machine on level and dry surfaces.
- Do not use aggressive detergents or sharp objects to clean the coffee machine.
- Never try to put out a fire/flames using water: turn off the appliance, remove the plug from the outlet and smother the flame with a lid or fire blanket.
- Do not let the electrical power cord come into contact with sharp edges.
- Do not position the appliance near to taps or sinks.
- If an extension cable is used, the nominal value indicated must be at least equivalent to the nominal value of the appliance. If the appliance has a 3-wire electric cable with earth, the extension must be a type with 3 wires and earth. The longest cable must be positioned in a way not to rest on the surface or table where it may be pulled by children or cause falls due to tripping.


Manufacturer's liability
The manufacturer declines all liability for injury/damage to persons and objects due to:
- use of the appliance different from that envisioned;
- user manual has not been read;
- tampering with individual parts of the appliance;
- use of non-original spare parts;
- failure to comply with safety warnings.
Keep these instructions carefully. Whenever the appliance is transferred to other persons, it must be accompanied by these user instructions.
The manufacturer reserves the right to make any changes deemed useful for improvement of its products without prior The manufacturer reserves the right to make any changes deemed useful for the improvement of its products without notice. The illustrations and descriptions contained in this manual are therefore not binding and are merely indicative. priornotice. The illustrations and descriptions contained in this manual are therefore not binding and are merely indicative.
For further information on the product: www.smeg.com

Documents / Resources
References
Download manual
Here you can download full pdf version of manual, it may contain additional safety instructions, warranty information, FCC rules, etc.
Advertisement
Thank you! Your question has been received!


Need Assistance?
Do you have a question about the ECF02 that isn't answered in the manual? Leave your question here.