Sony MZ-R37 Operating Instructions Manual
Sony walkman mz-r37 md player: user guide
Hide thumbs
Also See for MZ-R37:
- Operating instructions manual (76 pages) ,
- Service manual (55 pages) ,
- Specification sheet (2 pages)

Related Manuals for Sony MZ-R37


Summary of Contents for Sony MZ-R37
- Page 1 3-866-346-11 (1) Portable MiniDisc Recorder Operating Instructions MZ-R37 1999 by Sony Corporation...
- Page 2 IN NO EVENT SHALL SELLER BE LIABLE FOR ANY DIRECT, INCIDENTAL OR CONSEQUENTIAL DAMAGES OF ANY NATURE, OR LOSSES OR EXPENSES RESULTING FROM ANY DEFECTIVE PRODUCT OR THE USE OF ANY PRODUCT. “MD WALKMAN” is a trademark of Sony Corporation.
- Page 3 Record the serial number in the space provided below. Refer to them whenever you call upon your Sony dealer regarding this product. Model No. MZ-R37 Serial No.
-
Page 4: Table Of Contents
Table of contents Recording an MD right away! ... 6 Playing an MD right away! ... 8 Various ways of recording ... 10 Two ways of connecting to a sound source ... 10 Recording with digital input (optical cable required) ... 11 To start/stop recording in sync with the source player (Synchro-recording) ... - Page 5 Power sources ... 23 Charging the nickel-cadmium rechargeable batteries ... 23 Using on dry batteries ... 24 Additional information ... 25 Precautions ... 25 Troubleshooting ... 27 System limitations ... 29 Messages ... 30 Specifications ... 32 What is an MD? ... 33 Looking at the controls ...
-
Page 6: Recording An Md Right Away
Recording an MD right away! The sound will be sent from the connected equipment as analog signal but will be recorded digitally on the disc. To record from a digital source, see “Recording with digital input” (page 11). Make connections. CD player, cassette recorder, etc. - Page 7 Record an MD. CD player, cassette recorder, etc. (source) Pause Record from the end of the previous recording Record partway through the previous recording Remove the MD A track mark is added at the point where you press P; thus the remainder of the track will be counted as a new track.
-
Page 8: Playing An Md Right Away
Playing an MD right away! To use the recorder on rechargeable batteries or dry batteries, see “Power Sources” (pages 23, 24). Make connections. Headphones with a remote control (supplied) Wear the earpiece marked R in your right ear and the one marked L in your left ear. - Page 9 Play an MD. Pause Find the beginning of the current track Find the beginning of the next track Go backwards while playing Go forward while playing Remove the MD To go backward or forward quickly without listening, press P and then keep pressing = or + ((•+ on the remote control).
-
Page 10: Various Ways Of Recording
zVarious ways of recording Two ways of connecting to a sound source The input jack of this recorder works as both digital and analog input jacks. Connect the recorder to a CD player or a cassette recorder using either digital input or analog input. To record, see “Recording with digital input”... -
Page 11: Recording With Digital Input (Optical Cable Required)
Recording with digital input (optical cable required) Connect to a digital source using the supplied optical cable, or POC-5B or POC-5AB (not supplied) to make digital recordings. Digital recording is possible even from digital equipment with different sampling rates, such as a DAT deck or a BS tuner, using the built-in sampling rate converter. -
Page 12: Recording From A Microphone
Slide SYNCHRO REC to ON. “SYNC” appears in the display. Press and slide REC upward. The recorder stands by for recording. Play the source sound. The recorder starts recording when it receives the playing sound. To stop recording, press p. Notes •You cannot pause manually during synchro-recording. -
Page 13: Recording In Monaural For Double The Normal Recording Time
Recording in monaural for double the normal recording time For longer recordings, choose to record in monaural. The recording time becomes double the normal. MODE•DELETE (at the bottom) While pressing P, press and slide REC upward. The recorder stands by for recording. Press MODE. -
Page 14: Checking The Remaining Time Or The Recording Position
While observing the level meter in the display, adjust the recording level by pressing + (+) or = (–). Set the level so that it hits the 5th indicator from the left (i.e., the length of the lit recording level indicator reaches the full length of the recording level guide) at maximum input level. -
Page 15: Various Ways Of Playback
zVarious ways of playback Playing tracks repeatedly You can play tracks repeatedly in three ways — all repeat, single repeat, and shuffle repeat. MODE•DELETE Press MODE while the recorder is playing an MD. Each time you press the button, the play mode indication changes as follows. -
Page 16: Protecting Your Hearing (Avls)
Protecting your hearing (AVLS) The AVLS (Automatic Volume Limiter System) function keeps down the maximum volume to protect your ears. Digital MEGA BASS•AVLS AVLS indication Keep pressing AVLS for 2 seconds or longer. The AVLS indication lights up. When you try to turn the volume too high, “AVLS”... -
Page 17: Locking The Controls (Hold)
Locking the controls (HOLD) To prevent the buttons from being accidentally operated when you carry the recorder, use this function. HOLD Slide HOLD in the direction of the On the recorder, slide HOLD to lock the controls of the recorder. On the remote control, slide HOLD to lock the controls of the remote control. -
Page 18: Editing Recorded Tracks
zEditing recorded tracks You can edit your recordings by adding/ erasing track marks or labeling tracks and MDs. Premastered MDs cannot be edited. Notes on editing •Do not move or jog the recorder while “EDIT” is flashing in the display. •You cannot edit tracks on an MD that is record-protected. -
Page 19: Adding A Track Mark
(•+ p•ENTER Keep pressing EDIT for 2 seconds or longer during stop. “ flashes in the display. Press = or + ((•+ on the remote control) repeatedly until “ ” “Erase” flashes in the display. Press ENTER. “Erase?” and “ENTER” appear alternately in the display. -
Page 20: Erasing A Track Mark
Erasing a track mark When you record with analog (line) input, unnecessary track marks may be recorded where recording level is low. You can erase a track mark to combine the tracks before and after the track mark. The track numbers will change as follows. -
Page 21: Labeling Recordings
(•+ p•ENTER Keep pressing EDIT for 2 seconds or longer while playing the track you want to move. “ ” “ Name” flashes in the display and the recorder plays the selected track repeatedly. Press = or + ((•+ on the remote control) repeatedly until “... - Page 22 Press ENTER. Press = or + ((•+ on the remote control) repeatedly to select a letter and press ENTER to enter. The selected letter stops flashing and the cursor moves to the next input position. Press CAPS Switch between capital letters, small letters, and marks/numbers.
-
Page 23: Power Sources
2 hours. To cancel charging, press CHARGE. Notes •Do not charge any other rechargeable batteries than the supplied or optional Sony NC-AA nickel cadmium rechargeable batteries. •Be sure to use the supplied AC power adaptor. -
Page 24: Using On Dry Batteries
Batteries Two NC-AA nickel- cadmium rechargeable batteries Two LR6 (size AA) Sony alkaline Bottom dry batteries The battery life may be shorter due to operating conditions and the temperature of the location. When you record, use fully charged rechargeable batteries. -
Page 25: Additional Information
zAdditional information Precautions On safety Do not put any foreign objects in the DC IN 4.5 V jack. On power sources • Use house current, nickel-cadmium rechargeable batteries, two LR6 (size AA) batteries. • For use in your house: Use the AC power adaptor supplied with this recorder. - Page 26 Sony dealer. (If a trouble occurred when the disc was in the recorder, we recommend that the disc be left in the recorder when you consult your Sony dealer so that the cause of trouble may be better understood.) Digital recording Recordable...
-
Page 27: Troubleshooting
Troubleshooting Should any problem persist after you have made these checks, consult your nearest Sony dealer. Cause/Solution Symptom • Audio sources may not be securely connected. The recorder does not b Disconnect the audio sources once and connect them again work or works poorly. - Page 28 Symptom No sound comes through the headphones. An MD is not played from the first track. Playback sound skips. Sound has a lot of static. Cannot find the track marks. The rechargeable battery does not start charging. The lid does not open.
-
Page 29: System Limitations
System limitations The recording system in your MiniDisc recorder is radically different from those used in cassette and DAT decks and is characterized by the limitations described below. Note, however, that these limitations are due to the inherent nature of the MD recording system itself and not to mechanical causes. -
Page 30: Messages
Messages If the following error messages flash in the display window, check the chart below. Error message BLANK ERROR FULL EDIT BUSY HiDCin HOLD LoBATT MEMORY Meaning/Remedy • An MD with no recording on it is inserted. b Insert a recorded MD. •... - Page 31 Meaning/Remedy Error message • You tried to make a copy from a disc that is protected by the Serial NoCOPY Copy Management System. You cannot make copies from a digitally connected source which was itself recorded using digital connection. b Use analog connection instead (page 6). •...
-
Page 32: Specifications
LINE OUT: stereo mini-jack, 194 mV, load impedance 10 kilohm or greater General Power requirements Sony AC Power Adaptor (supplied) connected at the DC IN 4.5 V jack: 120 V AC, 60 Hz (US model) 220–230 V AC, 50/60 Hz (European model) 230–240 V AC, 50 Hz (UK model) -
Page 33: What Is An Md
Optional accessories NC-AA nickel-cadmium rechargeable batteries Optical Cable POC-151HG, POC-152HG, POC-MZ1, POC-MZ2, POC-15B, POC-15AB, POC- DA12SP Line Cable RK-G129, RK-G136 Stereo Microphones ECM-717, ECM-MS907, ECM-MS957 Stereo Headphones* MDR-series Active Speakers SRS-A41, SRS-A91 Recordable MDs MDW-series MiniDisc Carrying Case CK-MD4 MiniDisc Filing Box CK-MD10 Your dealer may not handle some of the above listed accessories. - Page 34 How the MiniDisc got so small The 2.5-inch MiniDisc, encased in a plastic cartridge that looks like a 3.5-inch diskette (see illustration above), uses a new digital audio compression technology called ATRAC (Adaptive TRansform Acoustic Coding). To store more sound in less space, ATRAC extracts and encodes only those frequency components actually audible to the human ear.
-
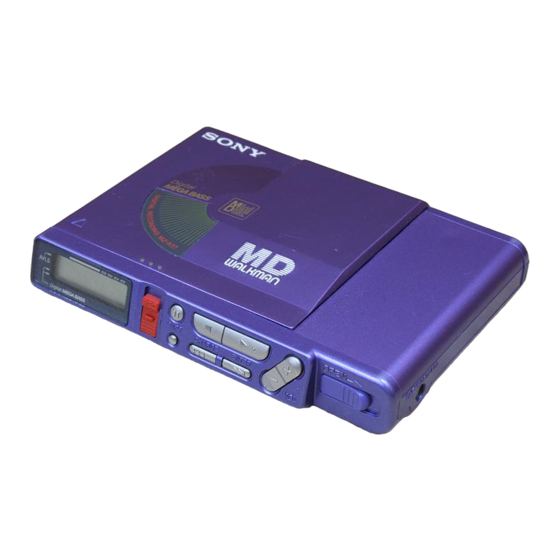
Page 35: Looking At The Controls
Looking at the controls See pages in ( ) for more details. The recorder !º 1 Battery compartment (23) 2 MIC (PLUG IN POWER) jack (12) 3 REC (record) switch (7) 4 Display window (14, 16) 5 (OPTICAL) LINE IN jack (6, 11) 6 LINE OUT jack (17) 7 PHONES/REMOTE jack (8) 8 HOLD switch (17) - Page 36 The display window 1 Level meter Shows the level of the MD being played or recorded. 2 Disc indication Shows that the disc is rotating for recording, playing or editing an MD. mark: AVLS indication (16) 4 MONO (monaural) indication 5 Battery indication (23) or mark: MEGA BASS indication “...
- Page 37 The headphones with a remote control US model 1 Headphones Can be replaced with optional headphones. 2 VOL (volume) •POSITION +/– button (9, 21) 3 DELETE button (21) 4 HOLD switch (17) 5 = (•+ button 6 p (stop)•ENTER button (7, 9, 18) 7 P (pause)•CAPS button (7, 9, 21) 8 T MARK•CANCEL button (18) 9 EDIT•INSERT button (18, 19, 21)
- Page 40 Sony Corporation Printed in Japan...