Breville VMW176 - Microwave Oven with Grill Manual
- Instruction booklet (32 pages)
Advertisement
- 1 Product safety
- 2 Before first use
- 3 Getting started
- 4 Controls
-
5
Using your microwave oven
- 5.1 Microwave cooking basics
- 5.2 Switching on
- 5.3 Cookware test
- 5.4 Materials you can use in your microwave oven
- 5.5 To pause cooking
- 5.6 To stop cooking
- 5.7 Setting the clock
- 5.8 Microwave cooking
- 5.9 Grill and Combination cooking
- 5.10 Multistage cooking (programmed sequence)
- 5.11 Defrosting
- 5.12 To Defrost
- 5.13 Quick Start Cooking
- 5.14 Intelligent Auto Cook menu
- 5.15 Delayed (timed) start cooking
- 5.16 Child-proof lock
- 6 Care and maintenance
- 7 Troubleshooting
- 8 Frequently asked questions
- 9 Connection to the mains supply
- 10 After sales service
- 11 Documents / Resources
Product safety
Please read these instructions before operating the appliance and retain them for future use.
 This product is not suitable for use by children, and may not be suitable for persons requiring supervision unless they receive instruction by a competent person on how to safely use the product. Children should be supervised to ensure that they do not play with the product.
The microwave oven must be earthed.
This microwave oven should only be used for the purpose it was intended.
Do not operate the oven when empty.
Some products such as whole eggs and sealed containers (closed glass jars, sealed baby bottles with teats etc.) may explode and should not be heated in a microwave oven.
Close supervision is necessary when used in the presence of children.
Always have the glass tray and turntable roller in place when operating the oven.
Do not use the microwave oven for any other purpose than food preparation, such as drying clothes, paper or any other non-food item or for sterilising purposes.
Do not use the microwave oven cavity for any type of storage, such as papers, cookbooks etc.
Do not use the microwave for home canning. Microwave ovens are not designed for canning. Improperly canned food may spoil and be dangerous to eat.
Do not cook any food surrounded by a membrane such as egg yolk, potatoes, chicken livers etc. without first piercing several times.
Do not insert any object into the openings on the outer case.
Do not remove any parts such as feet, couplings or screws from the microwave oven.
Do not cook directly on the glass tray. Place food in a proper utensil before placing it in the oven.
Do not use metal pans or dishes with metal handles.
Do not use anything with a metal trim.
Do not use paper covered wire twist ties on plastic bags.
Do not use melamine dishes as they will absorb microwave energy. This will cause the dish to crack or char and slow down the cooking process.
Do not cook in containers with restricted opening such as soft drinks bottles as they may explode if heated in a microwave oven.
Always test the temperature of food cooked in a microwave especially if you are heating food/liquid for a baby. Always allow it to stand for a few minutes and stir the food/liquid to distribute the heat evenly.
Use only a thermometer specifically designed for microwave cooking.
Do not attempt to deep fry food in the oven.
Food containing a mixture of fat and water should stand for 30 to 60 seconds in the oven after it has been turned off. This is to allow the mixture to settle and to prevent bubbling when a spoon is placed in the food/liquid.
Always follow the cooking instructions in your cookbook. Some foods e.g. Christmas puddings, jam, and mincemeat heat up very quickly.
When cooking foods with a high fat or sugar content do not use plastic containers.
Do not use the microwave oven with a damaged power cord or plug or after the appliance has malfunctioned or has been damaged. Return to the nearest authorised service centre for repair.
Paper bags may catch fire in the oven.
Plastic foam containers may melt or contaminate the food or liquid inside when exposed to high temperatures.
Wood will dry out when used in the microwave oven and may split or crack.
When heating food in plastic or paper containers, keep an eye on the oven due to the possibility of ignition.
If smoke is observed, switch off or unplug the appliance and keep the door closed in order to stifle any flames.
Microwave heating of beverages can result in delayed eruptive boiling, therefore care should be taken when handling the container.
Before first use
Retain the packaging in which the microwave oven was supplied so that in the event that the equipment needs to be returned it can be suitably repacked.
Open the packaging carefully and remove each item for inspection. Ensure that all packaging materials are removed from the inside of the door.
Check that all items have been supplied. The items supplied for this model of microwave oven are:
- Microwave oven
- Glass tray (turntable)
- Turntable roller ring
- Grill rack
- Instruction manual
Inspect the microwave oven and power lead for any damage. If any damage is found do not use the oven. Contact the dealer where the product was purchased.
Precautions
To avoid possible exposure to microwave energy, it is important that you do not disarm or tamper with the door safety interlocks.
Do not place any objects between the oven front face and the door, or allow soil or cleaner residue to accumulate on the sealing surfaces.
Check the oven for any damage, in particular, that there is no damage to the door (such as dents) its hinges and latches and the door seals and sealing surfaces. Do not operate the oven if it is damaged in any way. It is particularly important that the oven door is not misaligned and that it closes properly.
Getting started
Setting up your microwave oven
Do not operate your oven if it is damaged.
Place the drive shaft into the hole in the oven floor. You may need to rotate it slightly until it fits to the coupling correctly and slides down all the way. Place the turntable roller ring into the recess in the oven floor. Place the glass turntable onto the shaft until the lugs on the underside of the turntable engage with the drive shaft. Do not operate your microwave oven without these items fitted.

- Glass turntable
- Drive shaft
- Turntable roller ring
- Oven light
- Waveguide cover
Due to our policy of continuous improvement, the actual product may differ slightly from the one illustrated in these instructions.
Do not install the oven over equipment that produces heat, such as a range cooker or cooking hob. Failure to follow this instruction could damage the oven and would make the warranty void.
Do not place the oven in locations of moisture or high humidity or near combustible materials.
Do not block the air intake and outlet vents. Do not place anything on top of the oven. Failure to comply can damage the oven.
Do not remove the feet from the bottom of the oven.
Never operate the oven with the waveguide cover removed.
Requirements
Ensure that the voltage and frequency on the rating label of the oven is the same as that of the household power supply.
Place the oven as far from TVs and radios as possible. Operation of a microwave oven can cause interference to your TV and radio reception.
Select a flat horizontal surface that provides enough open space for the oven inlet and outlet vents and is strong enough to support the microwave oven.
For correct operation, the oven must have sufficient airflow. Ensure there is sufficient space around the oven as shown.
Route the mains lead away from all hot and sharp surfaces. Do not trap the lead under the microwave.
Plug your oven into a standard outlet socket.

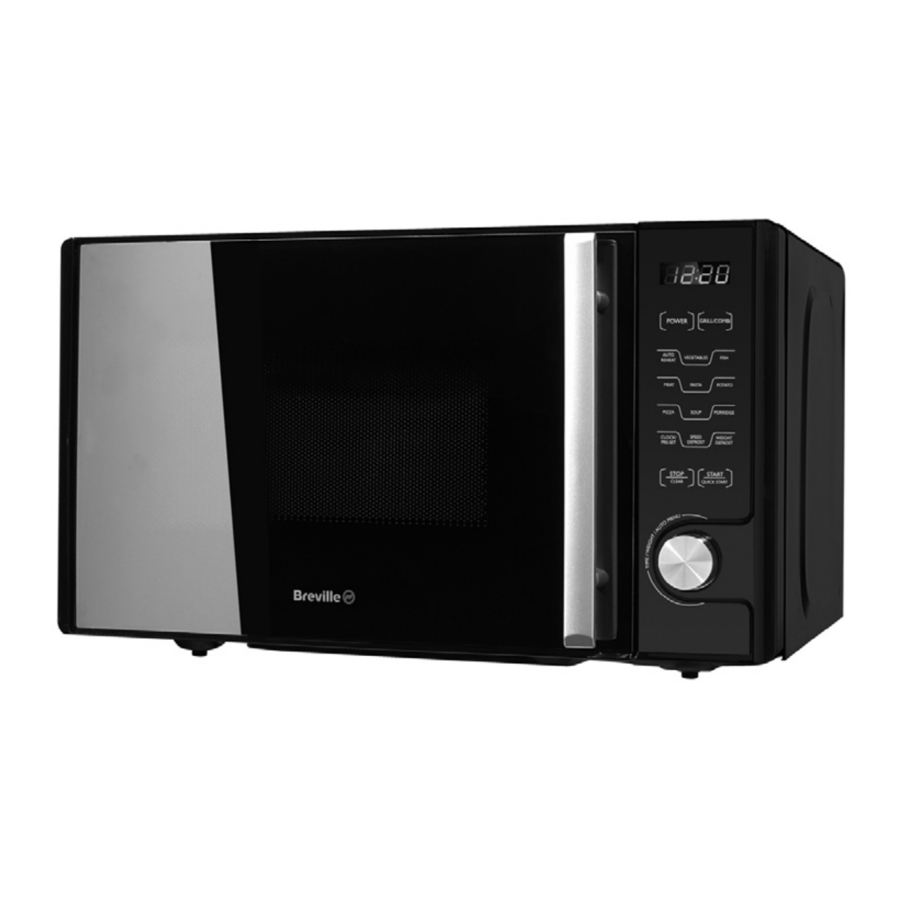
Controls

Using your microwave oven
Microwave cooking basics
Never operate your microwave oven when it is empty as this can damage your oven.
Do not cook directly on the glass tray. Place the food in a microwave-proof dish for example.
Arrange the food with the thickest areas to the outside of the dish. Cook for the shortest indicated time but do not under-cook. Add extra time if required. Severely over-cooked food can smoke and may ignite.
Cover food while cooking. The cover prevents spatter and helps the food to cook more evenly.
To speed cooking and ensure that food is cooked evenly, it should be turned over or stirred at least once during cooking. Larger items, such as joints of meat must be turned at least once.
Rearrange small items of food such as meatballs halfway through cooking. Turn them over and move ones from the centre of the dish to the outside and items from the top to the bottom of the dish.
Cover thin pieces of food such as the ends of chicken legs with small pieces of aluminium foil to prevent them becoming overcooked. Ensure foil is kept more than 1 inch from the oven inner walls.
Switching on
The microwave oven is turned on by plugging its mains lead into the mains outlet socket.
Open the door and the internal light should turn on. Close the door and it should turn off.
Cookware test
There may be certain non-metallic containers that are not safe to use for microwave cooking. If in doubt, you can test the COOKWARE following the procedure below.
- Place the empty container in the oven.
- Microwave on maximum power for 1 minute.
- Carefully feel the container. If it becomes very hot do not use it for microwave cooking.
- Do not exceed 1 minute cooking time when carrying out this test.
The ideal material for a microwave utensil or container is one that is transparent to microwave energy. It allows energy to pass through the container and heat only the food inside.
Microwaves cannot penetrate metal so metal utensils and dishes, and dishes with metallic trim should not be used in this oven when it is used for microwave cooking or combinations and sequences that include microwave cooking.
Do not use recycled paper products as they may contain small metal fragments which could cause sparks and/or a fire.
Round and oval dishes are recommended in preference to square or rectangular dishes as food in corners tends to overcook.
| Cookware | Suitable for microwave cooking |
| Heat resistant glass | YES |
| Non-heat resistant glass | NO |
| Heat resistant ceramic | YES |
| Microwave-safe plastic dish | YES |
| Kitchen paper | YES |
| Metal tray | NO |
| Metal rack | NO |
| Aluminium foil or container (1) | NO |
(1) Aluminium foil may be used in small pieces to cover or shield food such as the ends of chicken legs to prevent them becoming over-cooked. Ensure that the foil is kept more than 1" (25mm) from the oven's inner walls.
Materials you can use in your microwave oven
| Material | Notes |
| Aluminium foil | For shielding only. Small, smooth pieces can be used to cover thin parts of meat or poultry to prevent overcooking. Arcing can occur if foil is too close to oven walls. The foil should be at least 25mm (1 inch) away from the oven walls. |
| Browning dish | Follow the manufacturer's instructions. The bottom of the browing dish must be at least 5mm (3/16" inch) above the turntable. Incorrect usage may cause the turntable to break. |
| Dinnerware | Use microwave-safe only. Follow the manufacturer's instructions. Do not use cracked or chipped dishes. |
| Glass jars | Always remove the lid. Use only to heat food until it is only just warm. Most glass jars are not heat resistant and may break. |
| Glassware | Use only heat resistant oven glassware only. Do not use cracked or chipped glassware. |
| Oven cooking bags | Follow the manufacturer's instructions. Do not close with a metal tie. Make slits to allow steam to escape. |
| Paper plates and cups | Use for short term cooking/warming only. Do not leave oven unattended while cooking. |
| Paper towels | Use to cover food for reheating and absorbing fat. Use with supervision for short term cooking only. |
| Parchment paper | Use as a cover to prevent spattering, or as a wrap for steaming. |
| Plastic | Should be labelled 'Microwave Safe'. Follow manufacturer's instructions. Some plastic containers soften as the food inside gets hot. Boiling bags and lightly closed plastic bags should be slit, pierced or vented as directed on the packaging. |
| Plastic wrap | Use microwave-safe only. Use to cover food during cooking to retain moisture. Do not allow plastic wrap to touch food. |
| Waxed paper | Use as a cover to prevent spattering and retain moisture. |
| Thermometer | Only use thermometers suitable for use in a microwave oven. |
Never operate your microwave oven when it is empty as this will cause damage.
To pause cooking
To pause cooking at any time during the cooking sequence, you can either:
- Open the oven door
- Press the Stop/Clear button once.
To resume cooking close the door and press the Start/Quick Start button.
To stop cooking
To immediately stop cooking at any time:
- Press the Stop/Clear button twice
or
- Open the oven door
- Press the Stop/Clear button.
Setting the clock
The clock displays the time of day in 24-hour format.
To set the clock carry out the following:
- Press the Clock/Pre-set button once.
- Turn the Time/Weight/Power knob until the required hour appears on the display.
- Press the Clock/Pre-set button again.
- Turn the Time/Weight/Power knob until the required minutes are displayed.
- Press the Clock/Pre-set button to confirm the setting.
- The time of day will now be displayed.
Microwave cooking
The grill rack must not be used during microwave cooking.
Your microwave oven has five power level. You can select the power level by either pressing the Power button a number of times or by pressing the Power button then rotating the Time/Weight/Power knob. The selected power level will be shown in the display.
| Press Power button | Microwave power (W) | Display |
| Once | 800 | P100 |
| Twice | 640 | P80 |
| 3 times | 400 | P50 |
| 4 times | 240 | P30 |
| 5 times | 80 | P10 |
Example: To cook for 1 minute at 50% of microwave power.
- Place the food in a suitable container on the turntable and close the door.
- Press the Power button 3 times, or press the Power button once and rotate the Time/Weight/Power knob. The display will show P50.
- Press the Start/Quick Start button.
- Rotate the Time/Weight/Power knob until the display shows 1:00. The longest cooking time selectable is 95 minutes
- Press the Start/Quick Start button.
- The display shows the set cooking time and then counts down in 1 second increments.
- When the cooking time has elapsed, the oven will beep.
- Open the door and remove the food.
Grill and Combination cooking
The grill rack must not be used during combination (microwave/grill) cooking.
Microwave/Grill cooking allows you to combine microwave and grill cooking. Your oven can cook with the grill only, or two combinations of microwave and grill.
| Press Grill/ Combi button | Microwave power | Grill Power | Display |
| Once | Off | 100% | G |
| Twice | 55% | 45% | C-1 |
| 3 times | 36% | 64% | C-2 |
When grill cooking, remember that some foods produce fat and juices that need to be considered when choosing a suitable cooking container.
Example: To cook with the grill only for 5 minutes.
- Put the food into a suitable container/collecting tray and place it onto the grill rack in the oven and close the door.
- Press the Grill/Combi button once. The display will show G.
- Press the Start/Quick Start button.
- Rotate the Time/Weight/Power knob until the display shows 5:00.
- Press the Start/Quick Start button.
- When half the cooking time has passed, the oven will beep to remind you if you need to turn the food over. If you don't need or want to turn the food over, ignore the beep.
- When the cooking time has elapsed, the oven will beep. Open the door and remove the food.
Example: To microwave and grill cook for a period of 25 minutes using the grill/ microwave combination 2 (C-2) setting.
- Place the food in a suitable container on the glass tray and close the door.
- Press the Grill/Combi button three times. The display will show C-2.
- Press the Start/Quick Start button.
- Rotate the Time/Weight/Power knob until the display shows 25:00.
- Press the Start/Quick Start button.
- The display shows the set cooking time and then counts down in 1 second increments.
- When the cooking time has elapsed, the oven will beep. Open the door and remove the food.
Multistage cooking (programmed sequence)
The oven may be set to carry out a sequence of up to two cooking stages. The Weight Defrost function can be used as part of the sequence before the cooking stage. The possible sequences are:
- Weight defrost > microwave cooking
- Microwave cooking first stage > microwave cooking second stage
The following example describes setting a 500g Weight Defrost followed by a Microwave cooking sequence.
- Place the food in a suitable container on the turntable and close the door.
- Press the Weight Defrost button. dEF1 will be displayed.
- Rotate the Time/Weight/Power knob to select 500.
- Press the Power button.
- The display will show P100 to indicate full power. If required, press the Power button until the required power level is displayed.
- Press the Start/Quick Start button.
- Rotate the Time/Weight/Power knob until the required cooking time is displayed.
- Press the Start/Quick Start button.
- The cooking sequence will begin.
- When the sequence has ended the oven will beep.
This example describes how to set a two stage microwave cooking sequence. The first stage will cook on full power for 2 minutes and the second stage will cook on 50% power for 1 minute.
- Press the Power button. The display will show P100 to indicate full power.
- Press the Start/Quick Start button.
- Rotate the Time/Weight/Power knob until the display shows 2:00.
- Press the Power button three times. The display will show P50 to indicate 50% power.
- Press the Start/Quick Start button.
- Rotate the Time/Weight/Power knob until the display shows 1:00.
- Press the Start/Quick Start button.
- The cooking sequence will begin.
- When the sequence has ended the oven will beep.
Defrosting
Your oven has two modes of defrosting: Weight Defrost and Speed Defrost.
Both defrost methods require that you know the weight of food to be defrosted. The speed defrost setting can thaw food slightly faster than the weight defrost setting but can only be used for foods up to a maximum weight of 1200g. The weight defrost setting can thaw foods weighing up to 2000g.
Whenever you use your oven to defrost frozen foods, always make sure that the food is thawed completely before using it.
To achieve even defrosting, the food should be turned or stirred at least once during the cycle or more often with larger amounts of food.
To Defrost
- Place the food in a suitable container on the turntable and close the door.
- Press either the Weight Defrost or Speed Defrost button.
- The display will show dEF1 (weight defrost) or dEF2 (speed defrost).
- Rotate the Time/Weight/Power knob until the weight of the food to be defrosted is displayed. Turning the knob clockwise increases the weight, anti-clockwise decreases it. The display shows the weight in grams.
- Press the Start/Quick Start button.
- When the cooking time has ended, the oven will beep.
- After the required standing time, remove the defrosted food from the oven.
Quick Start Cooking
The Quick Start cooking feature allows you to begin microwave cooking at the press of a single button. The microwave power is fixed at maximum (100%) and the maximum cooking time using this method is 95 minutes. Each press of the Start/Quick Start button increases the cooking time by 30 seconds.
- Place the food in a suitable container on the glass tray and close the door.
- Press the Start/Quick Start button in quick succession the required number of times. For example, to cook for 1 minute 30 seconds, press the Start/Quick Start button 3 times.
- Cooking will start immediatley and the timer will begin to count down.
Intelligent Auto Cook menu
The Intelligent Auto Cook feature means that it is not necessary to program the cooking time or select the correct power. All you need to do is specify the type and quantity of food that you want to cook and the intelligent programs do all the rest for you. The food types and weights available are listed in the Intelligent Auto Cook Menu table.
Example: To use the intelligent auto cook menu function to cook 350g of fish:
- Place the food in a suitable container on the turntable and close the door.
- Press the Fish button four times. The display will show 350.
- Cooking will begin.
- When the cooking time has ended, the oven beeps.
- After the required standing time, remove the food from the oven.
 | Display shows: | |||||
| 1 | 2 | 3 | 4 | 5 | 6 | |
| AUTO REHEAT | A-1 | 150 | 250 | 350 | 400 | - |
| VEGETABLES | A-2 | 150 | 350 | 500 | - | - |
| FISH | A-3 | 150 | 250 | 350 | 400 | 450 |
| MEAT | A-4 | 150 | 300 | 450 | 600 | - |
| PASTA (1) | A-5 | 50 | 100 | 150 | - | - |
| POTATO (2) | A-6 | 1 | 2 | 3 | - | - |
| PIZZA (3) | A-7 | 1 | 2 | 3 | - | - |
| SOUP | A-8 | 500 | 750 | 1000 | - | - |
| PORRIDGE | A-9 | 550 | 1100 | - | - | - |
The figures in the above table (except where stated) represent the weight of the selected food.
(1) For a 50g portion of pasta add 450ml of cold water. For a 100g portion of pasta, add 800ml of cold water. For a 150g portion of pasta, add 1200ml of cold water.
(2) The potato program is based on a 200g (medium size) potato and can cook 1, 2 or 3 potatoes. Place the potatoes in a suitable container on the turntable. Always place the potatoes around the edge of the turntable or dish being used. Don't put them together in the centre of the dish as this will cause uneven cooking. Always maintain a gap between each potato.
(3) Pizza program 1 based on a 80g pizza, program 2 is based on a 160g pizza and program 3 is based on a 250g pizza.
Delayed (timed) start cooking
You can program your oven to delay the start of cooking e.g. if you are going out and you would like your meal to be ready on your return. Before programming the start time, make sure that your oven clock is set correctly.
- Place the food in a suitable container on the turntable and close the door.
- Press the Power button as required to set the desired cooking power level.
- Press the Start/Quick Start button.
- Rotate the Time/Weight/Power knob to set the required cooking time.
- Press the Clock/Pre-set button. The current time will be displayed with the hours digits flashing.
- Turn the Time/Weight/Power knob to set the desired start time hour.
- Press the Clock/Pre-set button. The minutes digits will now flash.
- Turn the Time/Weight/Power knob to set the desired start time minutes.
- Press the Start/Quick Start button.
- At the programmed time, your microwave oven will start cooking.
Child-proof lock
When the child-proof lock is set, it disables the control panel buttons. This prevents unsupervised operation by young children, or any other person who does not know how to reset the lock. This feature may only be set when the oven is not cooking in which case it would normally be in Clock mode (displaying the time of day).
To activate the Lock
- Press and hold the Stop/Clear button for approximately 3 seconds.
A beep will be heard and the lock icon will appear on the display.
To deactivate the Lock
- Press and hold the Stop/Clear button for approximately 3 seconds.
A beep will be heard and the lock icon will disappear from the display.
Care and maintenance
Before carrying out any cleaning, turn off the oven and remove the plug from the mains supply socket.
The door seal area must be kept clean at all times to eliminate the possibility of microwave energy escaping.
It is hazardous for anyone other than a competent person to carry out any service or repair operation which involves the removal of a cover which gives protection against exposure to microwave energy or high voltage.
General
Most cleaning can be carried out with a damp cloth and mild detergent solution, rinsed with a clean damp cloth and wiped dry.
Never use sprays or harsh cleaners, cleaning powders or scouring or other abrasive pads.
Cleaning should be carried out on a weekly basis, more often if required.
Excessive oil spatters on the inside top will be difficult to remove if left longer. Wipe spatters inside the oven with a damp paper towel soon after cooking, especially after cooking chicken or bacon.
Oven
Clean the inside of the oven with a soft cloth damped with a mild detergent solution to remove any food spatters. Pay particular attention to the mica waveguide cover and surrounding area.
The outside surface should be cleaned in the same way. Do not use a wet cloth as this could cause water to seep into ventilation openings and damage the operating parts. Wipe the observation window in the door both inside and outside with the damp cloth.
If steam (condensation) accumulates inside or around the outside of the door, wipe it away with a soft cloth.
Control panel
If the control panel becomes dirty, clean with a soft dry cloth. A lightly damp cloth may be used for stubborn marks. Do not use sprays or harsh cleaners as they may stain or dull the panel.
Removable items
The glass turntable may be removed for cleaning. Wash it in warm soapy water or in a dishwasher. Be careful not to chip or scratch the glass as this may cause the turntable to break during use.
The turntable roller and oven floor should be cleaned regularly to allow the glass tray to rotate easily and quietly. Wash the turntable roller in warm soapy water or in a dishwasher.
Ensure that the items are replaced correctly. Refer to the Getting Started section in this guide for details.
Removing odours
Odours can be removed from the microwave oven by adding the juice and skin of one lemon to a cup of water, then microwave for 5 minutes in a deep microwavable bowl. Afterwards wipe the inside of the microwave oven thoroughly and dry with a soft cloth.
Maintenance
The only electrical user replaceable items in this microwave oven are the mains plug and the mains fuse in the plug.
For all repairs you are advised to contact your local approved service centre for this equipment. Your supplier will be able to advise you in this matter.
Troubleshooting
| Observation | Explanation |
| Microwave interfering with TV reception | Radio and TV reception may suffer interference when the microwave oven is operating. It is similar to the interference produced by small electrical appliances like a food mixer, vacuum cleaner or electric fan. This is normal. |
| Dim oven light | In low power microwave cooking, the oven light may become dim. This is normal. |
| Steam accumulating on door, hot air coming out of the vents. | During cooking, steam may come out of the food. Most will escape through the vents but some may accumulate on a cool surface such as the oven door. This is normal. |
| Oven started accidentally for microwave cooking when there is no food in the oven | No damage will result if the microwave operates empty for a short time, but this should be avoided. |
Frequently asked questions
Check to see if the problem you are experiencing is listed in the chart below. If the problem cannot be solved with reference to this chart contact your local authorised service centre.
| Question | Answer |
| When the oven is plugged into a mains supply socket for the first time, it does not work properly. What's wrong? | The microcomputer in the oven may temporarily become scrambled and fail to function as programmed. Unplug the oven from the supply socket and plug it back in again. The microcomputer will then reset for correct functioning |
| Why is there noise coming from the turntable when the oven is turned on? | This noise occurs when the turntable roller slips on the bottom of the oven. Frequent cleaning of these parts should eliminate or reduce the noise. |
| Why is there noise coming from the oven when the power level is set low? | When cooking with power other than 100%, the oven automatically turns on and off to produce a lower power output. The clicking noise can be heard when the oven switches on and off. This is normal. |
| Why is there steam coming from the air exhaust vent? | Steam is produced during cooking. The oven has been designed to vent this steam. |
| What is wrong when the oven light will not illuminate? | There may be several reasons. The light bulb has burned out or the start button has not been pressed. |
| Why do eggs sometimes pop? | The egg yolk may pop because of steam build-up inside the membrane. Pierce the membrane with a toothpick before cooking it. Never microwave eggs in their shells as they may explode. |
| How are boil-overs avoided? | Use a larger utensil than usual for cooking. If you open the oven door or press the cancel butoon the food will stop boiling. |
Connection to the mains supply
This appliance must be earthed.
This appliance is fitted with either a moulded or rewirable BS1363, 13 amp plug. The fuse should be rated at 13 amps and be ASTA approved to BS1362.
If the fuse in a moulded plug needs to be changed, the fuse cover must be refitted. The appliance must not be used without the fuse cover fitted.
If the plug is unsuitable, it should be dismantled and removed from the supply cord and an appropriate plug fitted as detailed below. If you remove the plug it must not be connected to a 13 amp socket and the plug must be disposed of immediately.
The wires of the mains lead are coloured in accordance with the following code:
GREEN/YELLOW = EARTH
BLUE = NEUTRAL
BROWN = LIVE
The wire which is coloured GREEN/YELLOW must be connected to the terminal in your plug which is marked with an E or by the earth symbol (![]() ) or coloured GREEN or GREEN /YELLOW.
) or coloured GREEN or GREEN /YELLOW.
The wire which is coloured BLUE must be connected to the terminal in your plug which is marked with the letter N or coloured BLACK.
The wire which is coloured BROWN must be connected to the terminal in your plug which is marked with the letter L or coloured RED.
If any other plug is used, a 13 amp fuse must be fitted either in the plug or adaptor or at the distributor board.
Plug should be BS1363 approved Fit a 13 Amp Fuse

Ensure that the outer sheath of the cable is firmly held by the clamp
After sales service
These appliances are built to the very highest of standards. There are no user serviceable parts. Follow these steps if the unit fails to operate:
- Check the instructions have been followed correctly.
- Check that the fuse has not blown.
- Check that the mains supply is functional.
If the appliance will still not operate, return the appliance to the place it was purchased for a replacement. To return the appliance to the Customer Service Department, follow the steps below:
- Pack it carefully (preferably in the original carton). Ensure the unit is clean.
- Enclose your name and address and quote the model number on all correspondence.
- Give the reason why you are returning it.
- If within the guarantee period, state when and where it was purchased and include proof of purchase (e.g. till receipt).
- Send it to our Customer Service Department at the address below:
Customer Service Department
Pulse Home Products Limited
Middleton Road
Royton
Oldham
OL2 5LN, UK.
Telephone: 0161 621 6900 Fax: 0161 626 0391
e-mail: info@pulse-uk.co.uk

Documents / ResourcesDownload manual
Here you can download full pdf version of manual, it may contain additional safety instructions, warranty information, FCC rules, etc.
Advertisement
Thank you! Your question has been received!


Need Assistance?
Do you have a question about the VMW176 that isn't answered in the manual? Leave your question here.