Hitachi air core 600 Installation & Maintenance Manual
Ceiling suspended unit cooling only type
Hide thumbs
Also See for air core 600:
- Installation & maintenance manual (37 pages) ,
- Installation & maintenance manual (41 pages)
Table of Contents
Advertisement
Quick Links
Advertisement
Table of Contents

Related Manuals for Hitachi air core 600


Summary of Contents for Hitachi air core 600
- Page 1 –...
-
Page 2: Table Of Contents
Contents Safety Precautions Caution Statements........................ 15 Composition of the Air Conditioner..................17 Operation Manual ........................19 Special Remarks ........................19 Troubleshooting........................19 Diagram of Refrigerant Cycle Refrigerant Flow Diagram......................21 Installation and Maintenance 1. Safety Notice ........................22 2. Tools and Instruments for Installation .................23 3. - Page 3 There are symbols on both indoor and outdoor equipment. This symbol applies to the R32 refrigerant, the type of which is on the label of the outdoor unit. In the case of this refrigerant, the R32 unit uses Warning a flammable refrigerant. (Risk of fire) Yes, if this refrigerant leaks and is exposed to an open flame or a heated part.
- Page 4 • Do not turn on the lights until the entire operation is completed, if the lights are turned on before the entire operation is completed, it may cause serious accidents such as electric shock or fire. • If the leaking air conditioner comes into direct contact with the flame, toxic gases may be produced.
- Page 5 • This unit is part of the package that makes up this air conditioner and cannot be installed in complete sets or with equipment not authorized by the manufacturer. • When a pipe less than 3 meters in length is installed, the sound of the outdoor unit will be transmitted to the indoor unit, which may produce working noise or abnormal noise.
- Page 6 Caution If the unventilated area is smaller than the minimum installation area, the air conditioner should not be installed in this area. The installation height is the minimum installation height, that is, the minimum installation height of the cold air pipe or indoor unit, whichever is the lowest. The following table is determined according to the minimum installation height of 1.8 meters and 2.2 meters If the required minimum installation height is less than 1.8 meters, the minimum installation space must be recalculated.
- Page 7 • Individuals involved in operating or able to manage the air conditioning cycle should hold a valid qualification issued by an industrial certification assessment body, which has the authority to certify skills. • The ability to operate air conditioners safely according to instructions approved by industry authorities •...
- Page 8 - The equipment and vents are working properly and nothing is blocking them. - If the air conditioner water circuit is used indirectly, check the presence of air conditioner water. - Text on the device must be clear and easy to read, and difficult-to-read text and symbols should be corrected.
- Page 9 • Such inspections should take into account the effects of service life or continuous vibration from sources such as compressors or fans. 6. Detection of flammable air conditioners • Do not use fire sources to locate or detect air conditioning water leaks. •...
- Page 10 o The air conditioner transfer cylinder should be kept upright. o Be sure to ground the cooling system before adding th e air conditioner to the system. o When filling is complete, close the system label (if it is not already there). o Be very careful not to add too much air conditioning to the cooling system.
- Page 11 • If possible, the cylinders used to pump the air conditioner should be flushed from a system that does not contain the air conditioner and cooled before starting to pump the air conditioner from the system. • The equipment used to pump air conditioning water from the system should be placed in the correct working order, the documentation shows that the working procedures for the equipment are at hand, and the equipment used to pump air conditioning water from the system should be suitable for pumping flammable air conditioning from the system.
-
Page 12: Safety Precautions
Safety Precautions Precautions for using R32 refrigerant The basic installation work procedures are the same as the conventional refrigerant (R22 or R410A). However, pay attention to the following points: WARNING 1. Transport of equipment containing flammable refrigerants. Attention is drawn to the fact that additional transportation regulations may exist with respect to equipment containing flammable gas. - Page 13 Safety Precautions WARNING 6-8 Checks to the refrigeration equipment 6-8 Checks to the refrigeration equipment • Where electrical components are being changed, they shall be fit for the purpose and to the correct specification. • Where electrical components are being changed, they shall be fit for the purpose and to the correct specification. •...
- Page 14 Safety Precautions WARNING Detection of flammable refrigerants • Under no circumstances shall potential sources of ignition be used in the searching for or detection of refrigerant leaks. • A halide torch (or any other detector using a naked flame) shall not be used. Leak detection methods The following leak detection methods are deemed acceptable for systems containing flammable refrigerants: •...
- Page 15 Safety Precautions WARNING Prior to the task being carried out, an oil and refrigerant sample shall be taken in case analysis is required prior to re-use of reclaimed refrigerant. It is essential that electrical power is available before the task is commenced. a) Become familiar with the equipment and its operation.
- Page 16 Safety Precautions WARNING • Appliance shall be installed, operated and stored in a room with a floor area larger than X (X see below). • The installation of pipe-work shall be kept to a room with a floor area larger than X (X see below). •...
-
Page 17: Caution Statements
Caution Statements Alert Symbols : DANGER : The symbol refers to a hazard which can result in severe personal injury or death. : The symbol refers to a hazard or an unsafe practice which may result in severe personal injury WARNING ... - Page 18 Caution Statements ● Type and rating of circuit breakers/ELB is detailed in “Installation and Maintenance WARNING part. If the fuses in units blows, please call the service agency to replace it with a new one. Please do not replace it by yourself, or else it may result in accident, for example, electric shock.
-
Page 19: Composition Of The Air Conditioner
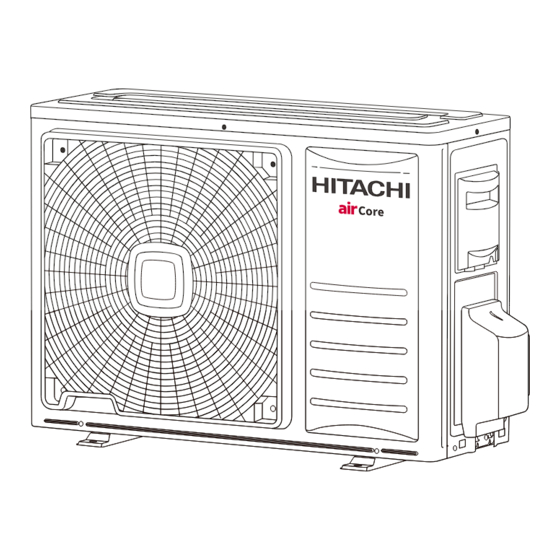
Composition of the Air Conditioner Indoor unit Air Intake Filter (Inside of Air Intake) Display Panel Air Outlet Vertical Louver (Inside of Horizontal Louver) Horizontal Louver Wireless Remote Controller Outdoor unit Remote controller (optional) You can control the air conditioner with the wire or wireless remote controller. It is used for controlling power ON/OFF, setting the running mode, temperature, fan speed and other functions. - Page 20 Composition of the Air Conditioner Display panel Remote controller You can control the air conditioner with remote controller. It is used for power ON/OFF, setting the operating mode, temperature, fan speed, etc. Operation instruction will be further specified in remote controller's manual separately. Please read it carefully before using this appliance and keep it for future reference.
-
Page 21: Operation Manual
Operation Manual Special remarks • 3-minute protection after the compressor stops To protect compressor, the system implements a 3 minutes once operation is stopped. • 5 minute-protection Compressor must run for at least 5 minutes once operation starts. During the 5 minutes, compressor will not stop even after set point is reached. - Page 22 Operation Manual 3. Not Cooling or Heating Properly • Check for obstruction of air flow in outdoor or indoor units. • Check if there are too many heating sources in the room. • Check if the air filter is clogged with dust. •...
-
Page 23: Diagram Of Refrigerant Cycle
Diagram of Refrigerant Cycle Refrigerant Flow Diagram Indoor unit Cooling cycle Apellation Apellation Hexagon nut Ambient temperature sensor Indoor heat exchanger Coil temperature sensor List of componentnames Outdoor unit Apellation Compressor Outdoor heat exchanger Electronic expansion valve Stop valve(Liquid) Stop valve (Gas) List of componentnames... -
Page 24: Installation And Maintenance
Installation and Maintenance 1. Safety Notice WARNING ·Installation should be left to the dealer or other professional personnel. (Improper installation may cause water leakage, electrical shock, or fire.) ·Install the unit according to the instruction given in this manual. (Incomplete installation may cause water leakage, electrical shock, or fire.) ·Be sure to use the supplied or specified installation parts. -
Page 25: Tools And Instruments For Installation
Installation and Maintenance 2. Tools and Instruments for Installation Number Number Tool Tool Number Tool Pipe cutter Standard screwdriver Drill Cross head screwdriver Pipe expander Vacuum pump Inner hexagon spanner Charge hose Knife or wire stripper Pipe bender Leveler Measuring tape Adjustable wrench Hammer 3. - Page 26 Installation and Maintenance LIST OF ACCESSORIES Washer (M10) For Unit Hanging For Unit Hanging And Paper Pattern Adjustment Insulation For Refrigerant Piping Connection Insulation Cord Clamp For Pipe Cover Fixing For Drain Pipe Connection Drain Hose For Joint Socket Connection Hose Clamp Heavy Insulation For Drain Hose Cover...
-
Page 27: Installation
Installation and Maintenance ·Select the suitable areas to install the unit with 3.2 Installation approval of the user. 3.2.1 Suspension bolts ·Ensure that the air path is not blocked. (1) Consider the pipe direction, wiring, and ·Ensure that condensate can drain properly. maintenance carefully. - Page 28 Installation and Maintenance 3.2.3 Install the indoor unit. Hanging plate Ceiling type installation (1) Select the suspension bolt locations and the pipe Hanging plate hole location. fixing bolts(M8) i. Use enclosed paper pattern as a reference, and drill the holes for the suspension bolts and pipe. NOTE: Decide the locations based on the direct measurements.
-
Page 29: Indoor Unit Refrigerant Pipe
Installation and Maintenance 4. Indoor Unit Refrigerant Pipe DANGER (2) As shown in Fig. 4.4, screw up the nuts with 2 spanners. Use the R32 refrigerant. During leakage check and test, do not mix oxygen, acetylene and other flammable or reactive gases, because these gases result in explosion. -
Page 30: Drain Piping
Installation and Maintenance 5. Condensate Drain Piping CAUTION · Install the drain piping Drain piping connections • Do not connect the drain directly to sewage pipes with Refrigerant pipes smell of ammonia. The ammonia in the sewage might enter the indoor unit through the drain pipes and corrode the heat exchanger. -
Page 31: Electrical Wiring
Installation and Maintenance 6. Electrical Wiring 6.1 General Check CAUTION •When clamping the wiring, to prevent external pressure being exerted on the wiring connections, use the clamping material and conduct fixing firmly. • When performing the wiring work, ensure that the wiring is proper and cannot cause the control box lid to open up, if so close the cover firmly. -
Page 32: Change Of Static Pressure
Installation and Maintenance 6.3 Attaching the Air Return Grille •The air return grille must be attached after electric cabling work is completed. (1) Fix the air return grille onto the indoor unit with screws supplied as accessories (4 pieces). (2) Close the air return grille. This completes the unit installation work. -
Page 33: Installation Of The Outdoor Unit
Installation and Maintenance Pipe length L Over 300mm(Single fan) Indoor unit Over 600mm(Double fan) Height difference H Outdoor unit Fill the Model Max. Height Limit Pipe refrigerant difference(H) length(L) (Btu/h) (over 7.5 m.) 15 (g/m) 3~25(m) 15(m) 35 (g/m) 30(m) 25K~55K 3~50(m) Fig.7.3... -
Page 34: Refrigerant Piping
Installation and Maintenance 8. Refrigerant Piping The two refrigerant pipes (and electrical wire if local 8.1 Flaring with Pipe Expander codes permit) should be taped together with white NOTE: A good flare will have the following characteristics: armoring tape. The drain hose may also be included Inside surface is glossy and smooth. -
Page 35: Vacuuming And Test Run
Installation and Maintenance 9. Vacuuming and Test Run WARNING · Only after all the check points have been checked Air and moisture remaining in the refrigerant system the unit can be operated. have undesirable effects. (A) Check and make sure that the resistance of the Therefore, they must be removed completely with the Ω... -
Page 36: Electrical Installation
Installation and Maintenance 9.5 Electrical Installation ● Use an ELB (Electric Leakage Breaker). If not used, it may cause an electric shock or a fire. ● Do not operate the system until all the check points have been cleared. (A) Check to ensure that the insulation resistance is more than 2MΩ, by measuring the resistance between ground and the terminal of the electrical parts. -
Page 37: Unpacking The Unit Instructions
Unpacking the unit instructions Specifications Dimension (WxHxD) 990×680×230 990×680×230 1285×680×230 1580×680×230 1580×680×230 1580×680×230 1580×680×230 Indoor unit Packing(WxHxD) 1100×820×350 1100×820×350 1400×820×350 1690×820×350 1690×820×350 1690×820×350 1690×820×350 Net/Gross weight 30/35 30/35 34/44 46/53.5 46/53.5 46/53.5 46/53.5 Dimension(WxHxD) 810×580×280 860×670×310 860×670×310 900×750×340 900×1170×320 900×1170×320 900×1170×320 Outdoor unit Packing(WxHxD) - Page 39 Specifications in this document are subject to change without notice, in order that Hitachi-Johnson Controls Air Conditioning, Inc. may bring the latest innovations to their customers. Hitachi-Johnson Controls Air Conditioning, Inc. © 2023 Hitachi-Johnson Controls Air Conditioning, Inc. 2023.5 2023.5 Version.B...