Black & Decker Gizmo GG200, Gizmo GG100 - Cordless Grater Manual
- Use and care book (2 pages) ,
- Use and care book (2 pages)
Advertisement
IMPORTANT SAFEGUARDS
When using electrical appliances, basic safety precautions should always be followed, including the following:
- Read all instructions.
- To protect against electrical hazards, do not immerse appliance in water or other liquid.
- Close supervision is necessary when any appliance is used by or near children.
- Unplug from outlet when not in use, before putting on or taking off parts, and before cleaning.
- Avoid contact with moving parts.
- Do not mount unit over or near any portion of a heating or cooking appliance or a sink or basin.
- Do not operate any appliance with a damaged cord or plug, or after the appliance malfunctions, or has been dropped or damaged in any manner.
Return appliance to the nearest authorized service facility for examination, repair or electrical or mechanical adjustment. Or, call the appropriate toll-free number on the cover of this manual. ![burn hazard]()
![shock hazard]()
The use of attachments not recommended or sold by the appliance manufacturer may cause fire, electric shock or injury.- Do not use outdoors.
![burn hazard]()
![shock hazard]()
To reduce the risk of fire or electric shock do not operate any heating appliance beneath the mounted unit.- Do not let cord hang over edge of table or counter or touch hot surfaces.


SAVE THESE INSTRUCTIONS.
BATTERY REMOVAL AND DISPOSAL
This product uses rechargeable, recyclable nickelcadmium batteries. When the batteries can no longer be charged, they should be removed, recycled, or disposed of properly. These batteries must not be incinerated or composted.
To Remove Batteries:
- Remove the Flip-Top Blade Holder and Blade.
- Use a small Phillips-head screwdriver to flip out the screw protector pads located at the top and bottom of one side of the Unit.
- Remove the screws. Grasp the unit with both hands and gently pull the Unit apart.
- Turn over the Unit and you will see the battery pack encased in plastic.
Note: If the batteries have leaked or vented, wear protective gloves before touching the battery pack.
- Using pliers, first disconnect the negative (-) black wire from one battery, then disconnect the positive (+) red wire in the same way. Lift out the battery pack. See below for re-cycle/ disposal information.

Do not attempt to remove the plastic covering from the batteries.
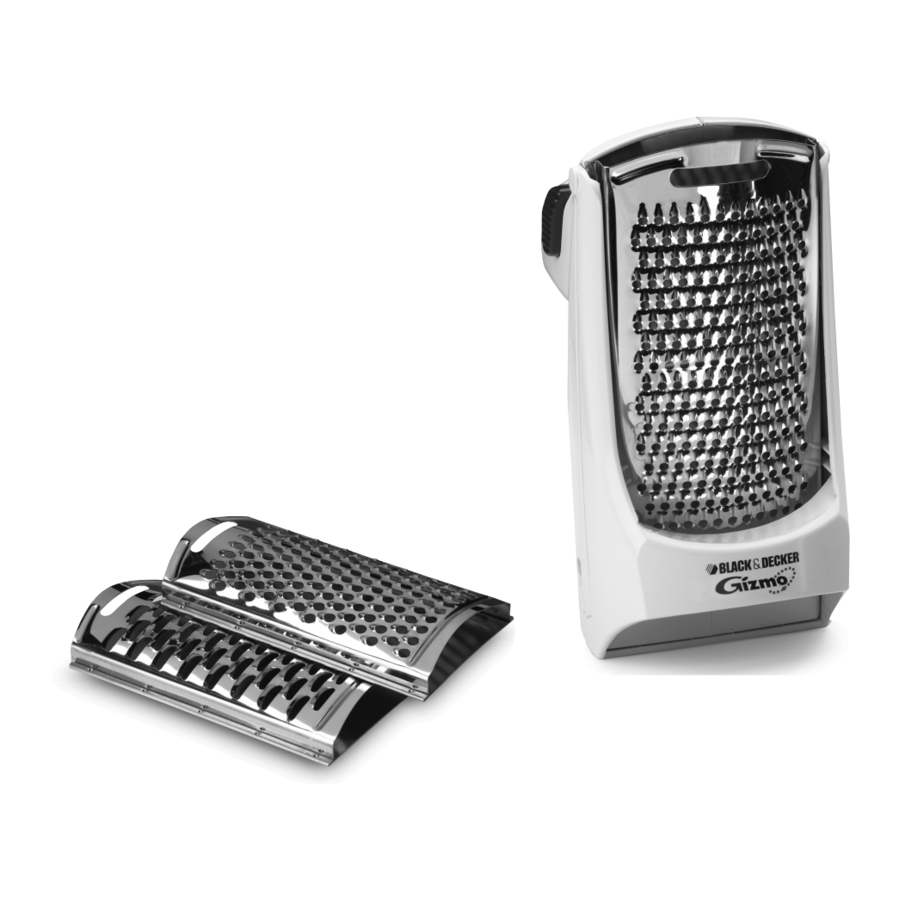
Overview

- AC charger
- Blade eye
- †Flip-top blade holder with food rest(Part # 179387-00)
- Wall hook
5a. †Fine grating blade
(Part #179384-00) all models
5b. †Shaving blade
(Part #179386-00) selected models only
5c. †Coarse grating blade
(Part #179383-00) selected models only
- Grater unit
- "On" buttons
† Consumer replaceable
NOTE: The GG200 is equipped with the fine grating, the coarse grating and the shaving blades. The GG100 comes with the fine grating blade only.
How to Use
This product is for household use only.
- Before first use, you will need to charge the Grater Unit for about 15 hours, typically overnight. Subsequent chargesas needed should be for 12 hours or overnight.
Note: The Flip-Top Blade Holder and a Blade do not need to be in place in order to charge the Grater Unit. The Holder and desired Blade can be assembled on the Grater Unit just before using. - To charge the Grater Unit, plug the small end of the AC Charger into the Grater Unit and plug the other end into astandard wall outlet.
- When fully charged, the Grater Unit will operate for about 20 minutes, depending on the kind of food being grated, shredded or shaved.
Note: As an example, this is enough power for a family of 4 to each grate about 2 tablespoons of cheese on their pasta for about 4 dinners. This is also more than enough time for grating a larger quantity of cheese for cooking. - For best performance, let the Grater Unit run down completely before recharging it. Recharging the Unit after eachshort use may shorten the life of the nickel-cadmium battery.
- Before using the Blades, wash the Blades in sudsy water or in the dishwasher. Dry thoroughly.
To Assemble
- Place the Grater Unit on a flat surface, such as a countertop or table. Fit rounded-rod top of the Flip-Top BladeHolder into the long slot at the top of the Grater Unit. Flip up the Holder; it will stay in position to allow a Blade to be placed on the Unit.
- Select a Blade. (See "Blade Chart" below) The Blade Eye should always be positioned at the top of the Grater Unit.
- Fit the Blade Indentation on the back of the Blade onto the Pin on the Grater Unit (A), then flip down the Holderand snap into place. The Grater is now ready to use.

![]()


Mounting the Wall Hook
- Hold the storage bracket against the wall in the desired location. Mark the location of the screw hole.
- Set the bracket aside and drill a hole through the mark.
- If mounting the unit on drywall or plaster, use a wall anchor. Push the anchor all the way into the drilled hole.
- Place the screw through the bracket and into the anchor or wood. Hand twist to secure initially, then tighten with ascrewdriver. Do not over-tighten.
- Use the Blade Eye to hang the Grater Unit securely on the Wall Hook.
![]()

Grating, Shredding or Shaving Foods with the Device
There are two ways to grate, shred or shave food using the Gizmo™ Grater:
- Hold the assembled Grater from behind in either hand, letting the Holder lay comfortably on your hand. Hold thefood to be grated in the other hand resting on the Food Rest located at the bottom of the Flip-Top Blade Holder. Press only one of the "On" Buttons to operate; if you are left-handed, use the right-side Button, if you are righthanded, use the left-side Button. As the Blade moves up and down, simply hold the food in place on the Food Rest and the movement of the Blade will automatically grate, shred or shave the food.
This position is perfect for use at the table, for grating Parmesan cheese directly on top of pasta or Cheddar cheese on tacos, for example.
Note: For best result, lightly hold the food down on the Blade but do not press. Pressing the food down on the blade will result in reduced battery power and reduced shredding, grating or shaving performance.
- Place the assembled Grater on a countertop or table, letting the unit rest at the angle created by the Back Rest. Usingone hand, slightly lift up the unit by the Back Rest. You may want to place a piece of waxed paper or a flat dish under the Grater to contain the grated, shredded or shaved food. Hold the food to be grated in the other hand resting on the Food Bar located at the bottom of the Flip-Top Blade Holder. As the Blade moves up and down, simply hold the food steady and the movement of the Blade will automatically grate the food.
This position is ideal when grating a quantity of food, such as grated citrus zest or grated or shredded cheese to be used in a recipe.
When finished grating, shredding or shaving, lightly tap the Food Rest with your fingers to ensure that all the food falls from the inside of the Blade. Use a rubber spatula to remove any food that may remain inside the Blade.
| BLADE CHART NOTE: The GG200 is equipped with the Fine Grating, the Coarse Grating and the Shaving Blades. The GG100 comes with the Fine Grating Blade only. | |
| Food | Blade |
| Parmesan/Romano Cheese (hard) | Fine Grating Blade |
| Cheddar, Swiss or Jarlsberg Cheese (semisoft) | Coarse Grating Blade |
| Lemons, Limes, Oranges for zest | Either Fine or Coarse Blade Grating Blade |
| Chocolate/White Chocolate/Coconut (fresh) | Shaving Blade |
| Carrots/Hard bread for crumbs | Coarse Grating Blade |
| Nutmeg, cinnamon and other hard spices | Fine Grating Blade |
Care and Cleaning
TO CLEAN:
- Before cleaning, remove the Flip-Top Blade Holder and the Blade from the Grater Unit. The three Blades and FlipTop Blade Holder are dishwasher safe. They can also be washed by hand in sudsy water; dry thoroughly before storing.
- Do not immerse the Grater Unit in water. Clean the Grater Unit with a soft damp cloth and dry before storing.
- Do not use abrasive cleaners or scouring pads to clean the Grater Unit.
NEED HELP
For service, repair or any questions regarding your appliance, call the appropriate "800" number on the cover of this book. Do not return the product to the place of purchase. Do not mail the product back to the manufacturer nor bring it to a service center. You may also want to consult the website listed on the cover of this manual.
One Year Limited Warranty
Applies only in the United States and Canada
What does it cover?
- Any defect in material or workmanship; provided; however, Applica'sliability will not exceed the purchase price of the product
For how long?
- One year after the date of original purchase
What will we do to help you?
- Provide you with a reasonably similar replacement product that is eithernew or factory refurbished
How do you get service?
- Save your receipt as proof of the date of sale.
- Check our on-line service site at www.prodprotect.com/applica, or callour toll-free number, 1-800-231-9786, for general warranty service
- If you need parts or accessories, please call 1-800-738-0245.

Documents / Resources
References

Download manual
Here you can download full pdf version of manual, it may contain additional safety instructions, warranty information, FCC rules, etc.
Download Black & Decker Gizmo GG200, Gizmo GG100 - Cordless Grater Manual
Advertisement
Thank you! Your question has been received!


Need Assistance?
Do you have a question about the Gizmo GG200 that isn't answered in the manual? Leave your question here.