Advertisement
Features
Your watch provides you with the features and functions described below.
- World Time
Instantly view the current time in 100 cities around the globe. - Alarms
The watch can be configured to sound a tone and flash its display illumination, or to vibrate when a preset alarm time is reached. - Stopwatch
The stopwatch measures elapsed time up to 1000 hours in 1/100-second increments. - Timer
The timer counts down from a preset start time, and the watch sounds a tone and flashes its display illumination, or it vibrates when the countdown reaches zero.
About this User's Guide
Display Types
Depending on the model of your watch, display text appears either as dark figures on a light background or light figures on a dark background. All sample displays in this manual are shown using dark figures on a light background.
- Note that the display style of a watch is fixed. You cannot switch between styles.
![]()

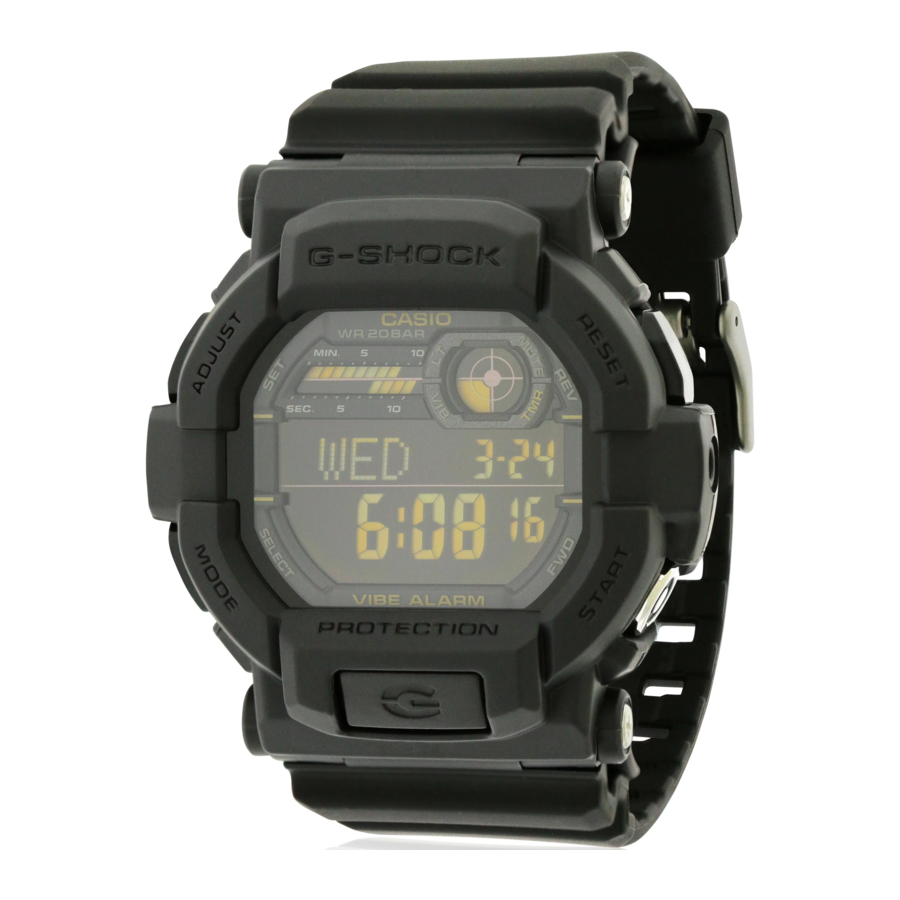
Button Names and Display Indications
Operations on this watch are performed using buttons A through D, and the L button. The illustration below shows the locations and the meanings of the different buttons and display indicators. See "Using Modes".

Note
- The names shown above are used in the button operation explanations throughout this User's Guide.
- Note that the illustrations in this User's Guide are intended for reference only. The actual watch may appear somewhat different than depicted in the illustrations.
Display Indicators

| Number | Name | Meaning |
 | Auto Light ON indicator | Auto Light enabled. |
 | Vibration indicator | Vibration alert enabled for alarms/timer. |
 | PM indicator | Indicates p.m. times during 12-hour timekeeping. |
 | Snooze indicator | Snooze alarm enabled. |
 | Alarm indicator | Alarm is turned on. |
 | MUTE indicator | Button operation tone disabled. |
 | Timer indicator | Timer countdown operation in progress. |
 | DST indicator | Summer time enabled (time advanced by one hour). |
 | Hourly time signal indicator | Hourly time signal is turned on. |
Using Modes
Each press of ![]() cycles between modes as shown in the illustration below.
cycles between modes as shown in the illustration below.

Mode Overview
| Mode | Functions |
| Timekeeping Mode |
|
| World Time Mode |
|
| Alarm Mode |
|
| Stopwatch Mode |
|
| Timer Mode |
|
Adjusting the Time Setting
Use the procedure below to configure the watch's time and date settings.
Configuring Current Time and Date Settings
- In the Timekeeping Mode, hold down
![]() for about two seconds until the time zone setting screen appears.
for about two seconds until the time zone setting screen appears.
![]()
[SET Hold] will appear on the watch display, followed by the time zone setting screen. - Use
![]() to select the item whose setting you want to change.
to select the item whose setting you want to change.
Each press of![]() cycles through available settings in the sequence shown below.
cycles through available settings in the sequence shown below.


Note
The numbers in the above diagram indicate how many times you need to press  to display each setting.
- Use
![]() and
and ![]() to change the currently selected setting as described below.
to change the currently selected setting as described below.
| Screen | Setting | Operation |
 | Time zone of the city where you will use the watch | Use  and and  . . |
 | Summer time on/off | Press . |
 | 12-hour (12H)/24-hour (24H) timekeeping switching | Press . |
 | Seconds 00-reset
| Press . |
 | Hour and minutes settings | Use and . |
 | Year, month, day settings | Use and . |
Note
Refer to the "City Name List" (back of this manual) to determine the time zone of the city where you will be using the watch.
- Summer time, or Daylight Saving Time (DST) as it is known in some countries, calls for setting clocks ahead one hour from standard time during the summer season. Note that the period during which and the areas where summer time is applied depend on each country. Some countries or geographic areas may not use summer time.
- The DST indicator will be on the display and timekeeping will be advanced by one hour when summer time is turned on.
- The watch's Full Auto Calendar automatically makes adjustments in the day setting to account for different length months and leap year.
- After all the settings are the way you want, press
![]() to return to the Timekeeping Mode.
to return to the Timekeeping Mode.
World Time
World Time lets you display the current time in any one of 100 cities (35 time zones) around the world.
To view the times in other time zones
- In the Timekeeping Mode, press
![]() to enter the World Time Mode.
to enter the World Time Mode.

See "Using Modes".
[WT100] will appear on the display for about one second, and then the name of the currently selected World Time city will scroll across the display.

Note
Scrolling of the World Time city name will stop after about two minutes. To restart scrolling, press ![]() .
.
- Use
![]() and
and ![]() to scroll through the World Time Mode city names.
to scroll through the World Time Mode city names.
See "City Name List" (back of this manual).
- Scrolling to a city name displays the current time in that city.
- Holding down either button scrolls at high speed.
- To display the UTC city name (UTC offset 0), press
![]() and
and ![]() at the same time.
at the same time.
- To return to the Timekeeping Mode, press
![]() four times.
four times.
To configure the Summer Time (DST) setting
- In the World Time Mode, hold down
![]() for about two seconds.
for about two seconds.
![]()

- [DST Hold] will appear on the display. After that, [DST Hold] will disappear and the summer time setting will toggle to either on or off.
- DST on the display indicates that summer time is turned on.
Note
- Summer time, or Daylight Saving Time (DST) as it is known in some countries, calls for setting clocks ahead one hour from standard time during the summer season. Note that the period during which and the areas where summer time is applied depend on each country. Some countries or geographic areas may not use summer time.
- The DST indicator will be on the display and timekeeping will be advanced by one hour when summer time is turned on.
- The summer time setting cannot be changed for the UTC World Time zone.
- The summer time setting is applied to the currently selected time zone only. A setting configured for one time zone does not affect any other time zone.
Alarms and Hourly Time Signal
You can set up to five different alarms. When any one of the alarm times is reached the watch will sound an alarm tone and flash its display illumination, or it will vibrate for about 10 seconds. The hourly time signal causes the watch to sound a tone and flash its display illumination or to vibrate every hour on the hour.
See "To change the alarm/timer alert method".
To enter the Alarm Mode
- In the Timekeeping Mode, press
![]() twice to enter the Alarm Mode.
twice to enter the Alarm Mode.
See "Using Modes".
[ALARM] will appear on the display for about one second. After that, an alarm setting screen (Alarm 1 through Alarm 5, or hourly time signal) will appear.


Note
If you do not perform any operation for about two or three minutes while in the Alarm Mode, the watch will automatically return to the Timekeeping Mode.
To change an alarm setting
- In the Alarm Mode, use
![]() to select the alarm whose setting you want to change.
to select the alarm whose setting you want to change.
![]()
- Use
![]() to select the alarm type or to toggle the hourly time signal between on and off.
to select the alarm type or to toggle the hourly time signal between on and off.

| Alarm 1 to 4 | |
 | Alarm does not sound. |
 | Alarm sounds only once at the preset time and does not sound again after that. |
 | Alarm sounds at the preset time each day. |
| Snooze alarm | |
 | Alarm does not sound. |
 | Alarm sounds at the preset time each day, and up to seven times at five minute intervals thereafter. |
| Hourly time signal | |
 | Hourly time signal does not sound. |
 | Hourly time signal sounds every hour on the hour. |
The Alarm indicator is displayed while an alarm is turned on, while the Hourly time signal indicator is displayed while the hourly time signal is turned on. When the snooze alarm is turned on, both the alarm indicator and the snooze indicator are displayed.

- To change an alarm time setting, hold down
![]() for about two seconds until the hour digits of the current alarm time start to flash.
for about two seconds until the hour digits of the current alarm time start to flash.
![]()
[SET Hold] will appear on the display. After that, [SET Hold] will disappear and the hour digits will flash. - Each press of
![]() causes the flashing to move between the hour and the minutes digits.
causes the flashing to move between the hour and the minutes digits.
The flashing digits are the ones that are selected. - Use B and D to change the flashing setting, and set the hour and minutes you want.

- Holding down either button scrolls the setting at high speed.
- If you are using 12-hour timekeeping, the PM indicator will appear for times between noon and 11:59 p.m.
- After all the settings are the way you want, press
![]() to exit the setting screen.
to exit the setting screen. - To return to the Timekeeping Mode, press
![]() three times.
three times.
To stop a tone/vibration alert operation
Pressing any one of the buttons will stop an ongoing tone/vibration alert operation.
To test the alarm
In the Alarm Mode, hold down to perform the tone/vibration alert operations.
Stopwatch
The stopwatch measures elapsed time in units of 1/100 seconds up to 999 hours, 59 minutes, 59.99 seconds. Elapsed time returns to zero automatically and timing continues from there when the maximum limit is reached.
To enter the Stopwatch Mode
In the Timekeeping Mode, press  three times to enter the Stopwatch Mode.
See "Using Modes".
[STW] will appear on the display for about one second, and then the stopwatch screen will appear.

To measure time with the stopwatch
The following shows button operations for stopwatch operations.
- Elapsed time/cumulative time

- Split time (paused elapsed time reading)


Pressing  while timing is being performed displays the split time (with [SPLIT] flashing), but elapsed timing continues internally.
Note
- Once started, elapsed time measurement continues until you press
![]() to stop it, even if you change to a different mode and even if the stopwatch reaches the elapsed time measurement limit.
to stop it, even if you change to a different mode and even if the stopwatch reaches the elapsed time measurement limit. - If you change to another mode while a split time is frozen on the display, split time display will be canceled.

Timer
The timer start time can be set in one-second increments up to 24 hours. The watch will sound a tone and flash its display illumination, or it will vibrate when the end of the timer countdown is reached.
See "To change the alarm/timer alert method".
Note
You can start a timer countdown operation while in the Timekeeping Mode.
See "Using the Timer in the Timekeeping Mode" for more information.
To enter the Timer Mode
In the Timekeeping Mode, press four times to enter the Timer Mode.

See "Using Modes".
To set the timer start time
- In the Timer Mode, hold down
![]() for about two seconds.
for about two seconds.
[SET Hold] will appear on the display. After that, [SET Hold] will disappear and the hours digits will flash.
![]()

Note
- If a timer countdown operation is in progress, press
![]() to stop it and then press
to stop it and then press ![]() to reset the timer to its start time before performing the above step.
to reset the timer to its start time before performing the above step. - If a timer countdown operation is paused, press
![]() to reset the timer to its start time before performing the above step.
to reset the timer to its start time before performing the above step.
- Use
![]() to move the flashing between the hours, minutes, and seconds.
to move the flashing between the hours, minutes, and seconds.
The flashing digits are the ones that are selected. - Use
![]() and
and ![]() to change the currently selected setting (hours, minutes, or seconds).
to change the currently selected setting (hours, minutes, or seconds).
- Holding down either button scrolls the setting at high speed.
- To specify a start time of 24 hours, set the timer to 0H 00'00".
- After all the settings are the way you want, press
![]() to exit the setting screen.
to exit the setting screen.
To perform a countdown
The following shows button operations for a countdown.

Note
- A tone/vibration alert is performed for about 10 seconds when the end of the countdown is reached, and the display returns to the screen that was shown before the countdown was started.
- Even if you exit the Timer Mode while a timer countdown is ongoing, the countdown will continue and the tone/vibration alert operation will be performed when the end of the countdown is reached.
- A timer indicator flashes while a countdown operation is in progress.
Using the Timer in the Timekeeping Mode
To start a timer countdown
In the Timekeeping Mode, press .
This will cause the day of the week and day display to change to a timer display.

Note
- If a previous countdown was stopped part way through in the Timer Mode, pressing
![]() will resume the countdown.
will resume the countdown. - The
![]() button will be disabled if a countdown that was started in the Timer Mode is still in progress.
button will be disabled if a countdown that was started in the Timer Mode is still in progress. - An ongoing countdown (started in either the Timer Mode or Timekeeping Mode) cannot be stopped or reset in the Timekeeping Mode.
To view the timer start time
In the Timekeeping Mode, press  .
.
This will cause the timer start time to appear for one second in the display in place of the day of the week and day.
Note
- If a countdown was stopped part way through in the Timer Mode, the current (stopped) countdown time will be displayed when you press
![]() in the Timekeeping Mode.
in the Timekeeping Mode. - While a countdown is in progress, the display will show the countdown. You can switch to display of the day of the week and day by pressing
![]() .
.

To stop a tone/vibration alert operation
Pressing any one of the buttons will stop an ongoing tone/vibration alert operation.
Other Settings
You can use the procedures in this section to turn the tone that sounds when you press a button on or off.
You can also select either tone and display illumination flashing, or vibration as the alert method for the alarm and timer.
To turn the button operation tone on or off
- In the Timekeeping Mode, hold down
![]() for about two seconds until the time zone setting screen appears.
for about two seconds until the time zone setting screen appears.
![]()
- Press
![]() nine times to display the button operation tone setting screen.
nine times to display the button operation tone setting screen.
See "Configuring Current Time and Date Settings".
The screen will show either [KEY![]() ] or [MUTE].
] or [MUTE].
![]()
- Press
![]() to toggle the setting between [KEY
to toggle the setting between [KEY ![]() ] (ON) and [MUTE] (OFF).
] (ON) and [MUTE] (OFF).
When [MUTE] (OFF) is selected, a MUTE indicator is displayed to indicate that the button operation tone will not sound.
![]()
- To return to the Timekeeping Mode, press
![]() .
.


Note
The above procedure affects the button operation tone only. The alarm, hourly time signal, and time up alarm are not affected.
To change the alarm/timer alert method
- In the Timekeeping Mode, hold down
![]() for about two seconds until the time zone setting screen appears.
for about two seconds until the time zone setting screen appears.
![]()
- Press
![]() 11 times to display alert setting screen.
11 times to display alert setting screen.
See "Configuring Current Time and Date Settings".
The screen will show either [VIB] or [FLASH]. - Press
![]() to toggle the setting between [VIB] and [FLASH].
to toggle the setting between [VIB] and [FLASH].
The Vibration indicator is shown on the display while [VIB] is selected.

 | Alert by vibration. |
 | Alert by tone and flashing display illumination. |
- To return to the Timekeeping Mode, press
![]() .
.
To test vibration
In the Timekeeping Mode, hold down to perform the vibration operation.
Illumination
You can use the procedure below to illuminate the display for easy reading in the dark.
To illuminate the display
Press ![]() to illuminate the display.
to illuminate the display.
Note
Illumination will turn off automatically if it is on when an alarm time or the end of a countdown is reached.
Light Use Precautions
Frequent use of the light can shorten battery life.
Using Auto Light
When Auto Light is enabled, angling the watch towards your face at an angle of 40˚ or greater will illuminate the display automatically.

Note
Auto Light is disabled automatically while an alarm is sounding.
To enable or disable Auto Light
In the Timekeeping Mode, hold down  for at least three seconds.
This will toggle Auto Light between enabled (Auto Light ON indicator displayed) and disabled.

Auto Light Precautions
- Auto Light may not work properly if your arm is angled horizontally 15˚ or more as shown in the illustration.
![]()
- The presence of static electricity or magnetism can cause Auto Light not to work. If this happens, try lowering your arm and raising it back up again.
- You may notice a rattling sound inside the watch when you angle it towards your face. This is the sound of the Auto Light switch, and does not indicate malfunction.
- Auto Light remains enabled only for about six hours. After that it is disabled automatically.

To specify the illumination duration
- In the Timekeeping Mode, hold down
![]() for about two seconds until the time zone setting screen appears.
for about two seconds until the time zone setting screen appears.
![]()
- Press
![]() 10 times to display the illumination duration setting screen.
10 times to display the illumination duration setting screen.
See "Configuring Current Time and Date Settings".
The screen will show either [LT1], [LT3], or [LT5].
![]()
- Press
![]() to cycle the illumination duration setting between [LT1] (1.5 seconds), [LT3] (3 seconds), and [LT5] (5 seconds).
to cycle the illumination duration setting between [LT1] (1.5 seconds), [LT3] (3 seconds), and [LT5] (5 seconds). - To return to the Timekeeping Mode, press
![]() .
.


Low Battery Indication
A low battery indicator appears on the display when battery voltage drops below a certain level. Availability of some functions becomes limited while the low battery indicator is displayed. If the low battery indicator remains on the display, have the battery replaced as soon as possible.
Note
For information about battery life guidelines and supported battery types, see the product specifications.
See "Specifications".
The following describes how display of the low battery indicator affects watch operation.

- The watch enters the Timekeeping Mode.
- Display illumination becomes disabled.
- Alert sound and vibration become disabled.
Note
Repeated use of the display illumination, tone/vibration alert, or other functions over a short period can result in a momentary drop in battery voltage. This can cause temporary display of the low battery indicator and limited availability of some watch functions.
Specifications
| Accuracy at normal temperature: | ± 15 seconds a month (including Stopwatch and Countdown Timer accuracy) |
| Basic Functions: | Hour, minutes, seconds; a.m./p.m. (P); 12/24-hour timekeeping format; Month, day, day of the week; Full auto calendar (2000 to 2099); Summer time setting |
| World Time: | Current time in 100 cities (35 time zones) + UTC (Universal Coordinated Time) time display; Summer time setting |
| Alarms and Hourly Time Signal | |
| Alarms: | Daily or one-time alarms: 4 Snooze Alarm: 1 Setting units: Hour, minute Tone and display illumination flash, or vibration alert: 10 seconds |
| Hourly time signal: | Beeps or vibrates every hour on the hour |
| Stopwatch | |
| Measuring unit: | 1/100 second |
| Measuring capacity: | 999:59'59.99" (1000 hours) |
| Measurement functions: | Elapsed time, cumulative time, split times |
| Countdown Timer | |
| Countdown unit: | 1/10 second |
| Countdown range: | 24 hours |
| Setting unit: | 1 second |
| Time up alert: | 10-second tone and display illumination flashing, or vibration |
| Other: | Low battery alert; Auto return to Timekeeping Mode; Alert by tone and illumination, or by vibration; High-brightness LED light; Selectable illumination duration; Operation tone on/off |
| Battery: | One lithium battery (Type: CR2032) |
| Approximate Battery Life: | 5 years
Approximate battery life can be shortened by more frequent operation. |
City Name List


Note
- The above list shows the city names of this watch.
- If you will use the watch in a city that is not included in the City Name List, select a city name that is in the same time zone as your city.
- Time zones in the above list are in accordance with Coordinated Universal Time (UTC).
* In June 2012, the time offsets of the cities listed below were changed by +1 hour.
Note that this watch does not reflect this change and it uses the former offsets of these cities.
When using this watch in the cities below, always leave the summer time setting ON in order to advance the time by one hour.
Moscow
Novosibirsk
Vladivostok

Documents / ResourcesDownload manual
Here you can download full pdf version of manual, it may contain additional safety instructions, warranty information, FCC rules, etc.
Download CASIO G-SHOCK GD-350 - 20 Bar WR Digital Wath Manual
Advertisement
Thank you! Your question has been received!


Need Assistance?
Do you have a question about the G-SHOCK GD-350 that isn't answered in the manual? Leave your question here.