Table of Contents

Related Manuals for Panasonic EU6441-U1


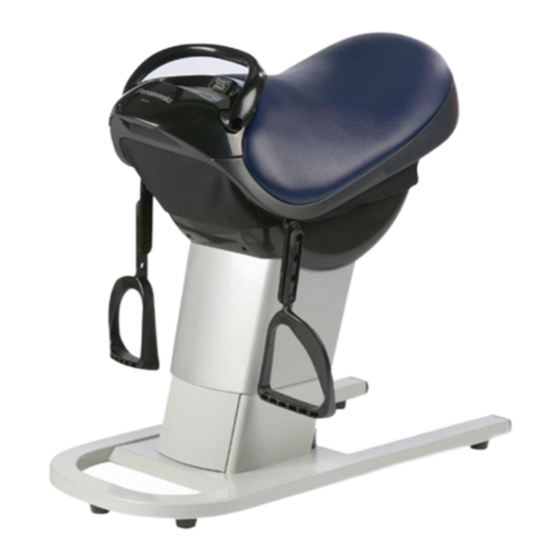
Summary of Contents for Panasonic EU6441-U1
-
Page 1: Table Of Contents
ORDER NO. HPD0512U64C1 Core Trainer Exercise Equipment EU6441-U1 CONTENTS Page Page 1 DIAGRAM OF MAIN PCB 6 CHECK THE OPERATION 2 CHECKING 7 INSTALL THE SAFETY COVER AND MACHINE COVER 3 DISASSEMBLY 8 FINAL OPERATION CHECKING 4 REPLACE THE DRIVING UNIT... -
Page 2: Diagram Of Main Pcb
EU6441-U1 1 DIAGRAM OF MAIN PCB... -
Page 3: Checking
EU6441-U1 2 CHECKING... - Page 4 EU6441-U1...
- Page 5 EU6441-U1...
- Page 6 EU6441-U1...
- Page 7 EU6441-U1...
-
Page 8: Disassembly
EU6441-U1 3 DISASSEMBLY 1. Remove the Safety cover on the Seat. When you install the Safety cover, insert the Pushrivets in the holes with its head fully pushed so that they cannot fall. Then, push the tips of the Pushrivets near the holes of the housings to make them loose and insert the Pushrivets fully in the holes of the housings. - Page 9 EU6441-U1 b. Unscrew four screws as the Figure. 4. Remove the Controller case. a. Unscrew four screws as the Figure. b. Be careful not to lose the Nylon clamp, which binds the Connecting cord for Controller. 5. Remove the Seat.
- Page 10 EU6441-U1 6. Remove the Machine cover. a. Unscrew six screws as the Figure. b. Cut two Insulated ties. 7. Remove the Main PCB case. a. Unscrew two screws as the Figure. 8. Remove the Elevation cover. a. Unscrew four screws as the Figure.
- Page 11 EU6441-U1 b. Remove the Cover plate and the Pushrivet. 9. Remove the Seat lift. a. Remove the upper four Seat lift fixing bolts by 10mm(3/8´´) socket wrench. b. Remove two Seat lift fixing bolts by 13mm(1/2´´) socket wrench. 10. Remove the Driving unit.
-
Page 12: Replace The Driving Unit
EU6441-U1 4 REPLACE THE DRIVING UNIT 1. Remove the Safety cover on the Seat. a. Remove 13 Pushrivets. 2. Pull down the Machine cover. a. Unscrew six screws as the Figure. 3. Remove the Seat on the Unit by 13mm(1/2´´) socket wrench. -
Page 13: How To Allign Wires
EU6441-U1 5. Remove the Seat lift. a. Remove two Seat lift fixing bolts by 13mm(1/2´´) socket wrench. 6. Remove the Driving unit. a. Remove one Supporting rod fixing bolt by 17mm(5/8´´) socket wrench. b. Remove two Driving unit fixing bolts by 19mm(3/4´´) socket wrench. - Page 14 EU6441-U1 b. Align the Wires so that the Power source wire and the Sensor wire are parallel. Bind the two Wires on the partapprox. 50-60mm(2-2 3/8´´) from the Wire fixing part (A) with the Insulated tie small. * Bind the Wires along the Power source wire so that the Wires are not tangled.
- Page 15 EU6441-U1 3. Align the Wires.(2) a. Pass the Insulated tie middle though the bottom hole on the side of the PCB case and bind/fix it under the Ferite core. (Align the Wires inside the B-PCB case.) b. Pass the Power source wire connector from the A part to the bottom of the PCB case and insert the Connector to the Main PCB firmly.
-
Page 16: Check The Operation
EU6441-U1 5. Grease on the Screw of the Seat unit. a. Grease the Screw from the bottom to the top. Be careful not to splash grease on other parts. b. Turn on the Power switch. c. Push the Controller case and operate the Seat unit. -
Page 17: Exploded View
EU6441-U1 9 EXPLODED VIEW... -
Page 18: Replacement Parts List
EU6441-U1 10 REPLACEMENT PARTS LIST Ref. No. Part No. Part Name & Description Remarks Per Unit WEU6441A3698 SEAT CUSHION UL WEU6441K6357 GRIP FIXING SCREW WEU6441K3927 REIGN WEU6441K3918 FRONT PANEL UL WEU6441L9137 SCREW WEU6441S3118 CONTROLLER CASE WEU6441L0748 CLAMP WEU6441L2128 CONTROLLER PCB... - Page 19 EU6441-U1 Ref. No. Part No. Part Name & Description Remarks Per Unit WEU6441K4368 RIGHT FOOT STEP WEU6441K4378 LEFT FOOT STEP WEU6441A8018 PACKAGING WEU6441L8798 OPERATION MANUAL...