Table of Contents
Advertisement
Quick Links
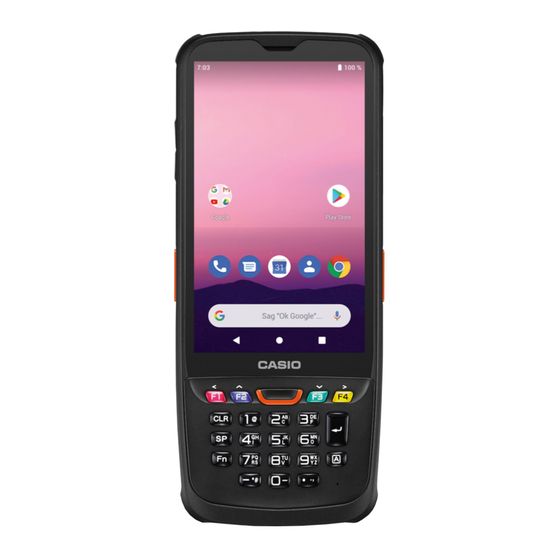
IT-G600
HARDWARE TEST / SETTING
1. General
In this chapter, how to check the hardware of IT-G600 is explained.
The general fl ow to start up the test program is as follows:
Prepare equipment required.
Insert a microSD card and nanoSIM card into the device.
Start the test program.
Perform function tests.
Perform Initial Settings. (When the Main PCB is replaced)
Perform resetting.
Remove the microSD card and nanoSIM card.
1
Advertisement
Table of Contents

Related Manuals for Casio IT-G600


Summary of Contents for Casio IT-G600
- Page 1 IT-G600 HARDWARE TEST / SETTING 1. General In this chapter, how to check the hardware of IT-G600 is explained. The general fl ow to start up the test program is as follows: Prepare equipment required. Insert a microSD card and nanoSIM card into the device.
-
Page 2: Test Equipment
The following shows the major equipment used for function test. NOTE: For equipment used for the special test, see respective test items. USB memory USB cable Head set Type-C (male) Type-A (female) nanoSIM microSD card card Test Object IT-G600 USB cable Type-C(male) PC Type-A(male) Cradle 2... -
Page 3: List Of Tests
You can check the WLAN. WLAN You can check the KEY. You can check the Earphones JACK. EARJACK You can check IT-G600’s I/O connector correctly IO USB DETECT communicate with your PC. You can check IT-G600’s I/O connector correctly working with USB HOST device. -
Page 4: Preparation For Inspection
IT-G600 4. Preparation for inspection 4-1. Insert a microSD card and SIM card into the device. 4-2. Running the Diagnostic Program < W-LAN model> Scroll up Tap about 10 times < WAN model>... - Page 5 IT-G600 5. Test Procedures ■ SDcard INPUT[ *#*#1277#*#*...
- Page 6 IT-G600 ■ MIC/SP/Receiver Click [Record] button. Click [Play] button. Speak to the microphone. Check the recorded voice. Press "Play Reciver Check [Second MIC] Click [Success] if the test Sound" to hear the sound in the same way result is satisfactory.
- Page 7 IT-G600 ■ LED/VIBRATOR Click "Touch screen" Check that the LED lights in the same color as the screen display Click [Success] if the test Check the vibration Check that the key result is satisfactory. of the vibrator backlight is on...
- Page 8 IT-G600 ■ BATTERY COVER DETECT Release the right Check that it is "Closed" lock lever Close the right Check to be "Opened" Click [Success] if the test lock lever result is satisfactory.
- Page 9 IT-G600 ■ TOUCH Draw a silver line, Draw an outline with silver Click Next line on the screen. Click [Success] if the test Draw freely, result is satisfactory. Click Exit...
- Page 10 IT-G600 ■ LCD/BACKLIGHT ←FLICK There is no display abnormality in each color. Increase number Click [Complete] Click [Success] if the test to 10 level. result is satisfactory.
- Page 11 IT-G600 ■ SCANNER Trigger Onを押して 正常なら"SUCCESS" 任意のバーコードを読み取る をクリック...
- Page 12 IT-G600 ■ WLAN Click [Success] if the test Connect to any result is satisfactory. connection destination...
- Page 13 IT-G600 ■ KEY Click [Success] if the test Press all the keys result is satisfactory.
- Page 14 IT-G600 ■ EARJACK Attach the headset to the IT-G600. Press the "Record" button Press the "Play" button to to record the voice play the recorded voice Click [Success] if the test result is satisfactory.
- Page 15 IT-G600 ■ IO USB DETECT System configuration Changeover switch set to "A" When the cradle is attached, Click [Success] if the test it changes from red to green result is satisfactory.
- Page 16 IT-G600 ■IO USB HOST System configuration Changeover switch set to "B" When the cradle is attached, Click [Success] if the test it changes from red to green result is satisfactory.
- Page 17 IT-G600 ■ MicroUSB DETECT System configuration Changing from red to Click [Success] if the test green when connected result is satisfactory. to a computer...
- Page 18 IT-G600 ■ MicroUSB HOST System configuration Changing from red to Click [Success] if the test green when connected result is satisfactory. to USB memory...
- Page 19 IT-G600 ■ CAMERA The image taken by the The camera flash can camera is displayed be turned off / on Click [Success] if the test result is satisfactory.
- Page 20 IT-G600 ■ NFC Click [Success] if the Contact the “NFC Test card” test result is satisfactory. near scanner(NFC Antenna).
- Page 21 IT-G600 ■ SENSOR Click [Success] if the test ACCEL(accelerometer) result is satisfactory. ⇒Shake the product up / down / left / right MAGNETIC(geomagnetic sensor) ⇒Will be confirmed automatically GYRO(gyro sensor) ⇒Shake the product up / down / left / right LIGHT(illuminance sensor) ⇒Cover the top of the product...
- Page 22 IT-G600 ■ BLUETOOTH The connection Click [Success] if the test destination is displayed result is satisfactory.
- Page 23 IT-G600 ■ WAN Please confi rm that the content of the SIM card is displayed. It will pass if the contents are displayed. ...
-
Page 24: Checking The Default Settings
The latest OS fi le can be downloaded from the following URL. https://dealer.casio.jp/system_en/pa/PADealer/support_soft_form.php?CLASS=Software&ID=IT-G600 (1) Preparation of OS image file Install the microSD card in which the OS update image fi le is written in IT-G600. (2) OS update operation Run “Settings” and start the OS update operation as follows. -
Page 25: Initializing The Device
IT-G600 7. Initializing the Device...