Advertisement
Quick Links
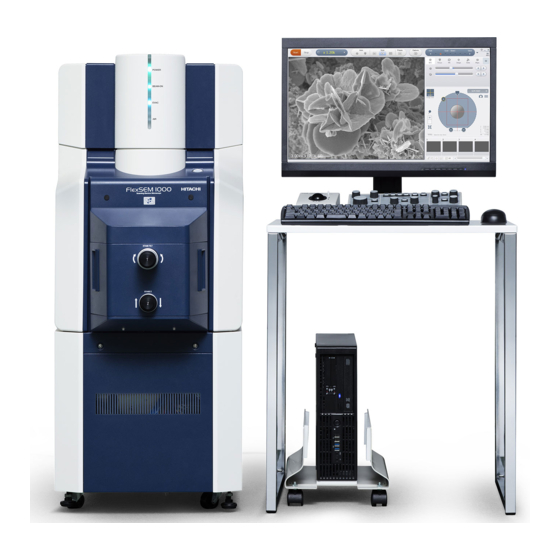
Hitachi FlexSEM 1000 User Guide / Operation Procedures
•
No food and drinks are allowed in the room
•
Remember to "Sign in" on the sign-up sheet
•
Turn on the ROOM IN USE light (red light switch) when the SEM is in use
•
Wear gloves when handling the samples and sample holders
•
Ensure that you transfer your data into OMERO or Z: drive by the end of the imaging session
Starting the SEM
•
Turn on the main switch mounted on the wall for the SEM, then turn on the power switch on
the side of the SEM
•
Open the FlexSEM1000 software. There is no password needed to press Start.
o Note: It may take several minutes for the SEM to clear the chamber of air. Please
wait until Specimen exchange button is ready
Loading the Sample
•
Press the green Specimen exchange button once it becomes available and allow time for the
SEM to fully vent the chamber with air
o Note: Initial stage position should be: X = 0.000mm, Y = 0.000mm, R = 0.0deg, Z =
~23.0mm, T = 0.0deg
•
Put on gloves and mount the sample on the appropriate sample holder
•
Adjust the height of the specimen on the sample holder using the height gauge
o Note: For the large and tilt holder, adjust the height until the gap between the
height gauge and the topmost surface of the specimen is approximately 1 mm. For
the cup-shaped holder, set the topmost surface of the specimen to the same
position as the upper surface of the specimen holder.
•
Once the specimen exchange is available, open the airlock door fully and load your sample
o Note: Ensure that the sample holder is mounted properly on the stage
•
Select the sample holder type on the interface
o Note: For the tilt holder, stage Z direction position has to be set at 5.0mm. Warning
sign will show up if it is not at 5.0mm, follow the instruction accordingly
o For the cup holder and large holder, you will be required to select the stub size that
you are using (typically either Ø26 or Ø15mm)
•
Click Next
•
Select Capture, and allow the stage to move the sample into the view of the camera
o Note: Please do not insert the airlock door until the SEM map says
•
Insert the airlock door until it is "locked" and a small gap remains in the door
•
At this point, EVAC button will become available on the interface, and pressing it will
commence evacuating the SEM, creating a vacuum environment
o Note: While the SEM is evacuating, you may need to manually align the observation
area (red circle) with the stub on the SEM map. Using the mouse, drag the center of
the red circle to map onto the circumference of the stub
Saving the Image
•
Select Menu > Save condition settings > Save settings
o Note: Here, you can configure your filename, location and file type
Freeze
Page 1 of 3
Last edited: 14 August 2020
Advertisement

Summary of Contents for Hitachi FlexSEM 1000
- Page 1 Hitachi FlexSEM 1000 User Guide / Operation Procedures • No food and drinks are allowed in the room • Remember to “Sign in” on the sign-up sheet • Turn on the ROOM IN USE light (red light switch) when the SEM is in use •...
- Page 2 • Check the ‘Save with automatic numbering’ to avoid saving the image one by one manually after every capture o Note: Ensure to reset auto increment to 1 so that numbering will begin at 0001 • Check the ‘Embed the data display into image’ o Note: You may customise the data display under Menu >...
- Page 3 o Note: It is recommended to scan first using Scan 2 at Slow4 or 5 before capturing the image o You may check the capture settings under Menu Shutting Down • Once imaging is completed, select the STOP button at the top left corner to turn off the electron beam •...


