Bosch SmartGrow Life MSGP3L CN Series Information For Use
Smart indoor gardening device
Hide thumbs
Also See for SmartGrow Life MSGP3L CN Series:
- User manual (228 pages) ,
- User manual (112 pages) ,
- User manual (121 pages)

Related Manuals for Bosch SmartGrow Life MSGP3L CN Series


Summary of Contents for Bosch SmartGrow Life MSGP3L CN Series
- Page 1 SmartGrow Life MSGP3L...CN [zh] 使用说明书 家用种植机 [en] Information for Use Smart indoor gardening device...
-
Page 2: Table Of Contents
更多信息,请参考《数字用户指南》。 目录 1 安全性 .......... 3 7.3 清洁电器 ........ 12 1.1 一般注意事项 ....... 3 7.4 清洁概览 ........ 14 1.2 使用范围 ........ 3 8 附件 .......... 14 1.3 用户群的限制 ....... 3 1.4 安全须知 ........ 3 9 处理故障... -
Page 3: 安全性
安全性 zh 1 安全性 请注意以下安全注意事项。 1.1 一般注意事项 ¡ 请仔细阅读本说明书。 ¡ 请妥善保管说明书及产品资料以备日后查阅或提供给下一位使用 者。 1.2 使用范围 本电器仅限用于: ¡ 用于萌发植物种子。 ¡ 仅限私人家庭和室温下的居家环境室内区域。 ¡ 最高在海拔 2000 m 使用。 1.3 用户群的限制 凡年满 8 岁的孩童,身体、感官或智力有缺陷的人士以及缺乏相关经 验和知识的人士,应在负责安全使用机器人员的监督或指导下,了解 使用机器可能带来的危险后,方能使用本机器。 严禁孩童将本机器当成玩具玩耍。 孩童不得进行清洁及用户维护的工作。 1.4 安全须知 警告 ‒ 有电击危险! 安装不当可能发生危险。 ▶ 仅限按规格铭牌所提供之信息连接并运行电源适配器。 ▶ 电器只能与随附的电源适配器连接并运行。 警告 ‒ 有着火危险! 剧烈的热量可能会导致电器和其他部件着火。 ▶ 切勿将电器放在高温表面或热源附近。... -
Page 4: 环境保护和节约
zh 环境保护和节约 将其他附件和随附文档从包装中取 2 环境保护和节约 出。 去除其他不需要的包装材料。 去除不需要的贴纸和保护膜。 2.1 处理包装材料 3.2 包装内容 包装材料皆是环保材质并可再生利用。 请分类处理各部件。 ▶ 拆开包装后,请检查所有部件是否在运 输过程中发生损坏,供货是否完整。 装箱单包括: 3 打开包装和检查 ¡ 家用种植机 ¡ 高度模块 (2 件) 这里向您介绍打开包装时必须注意的事 ¡ 营养剂量勺 项。 ¡ 电源适配器 3.1 打开包装 ¡ 随附资料 将产品从包装中取出。... -
Page 5: 了解机器
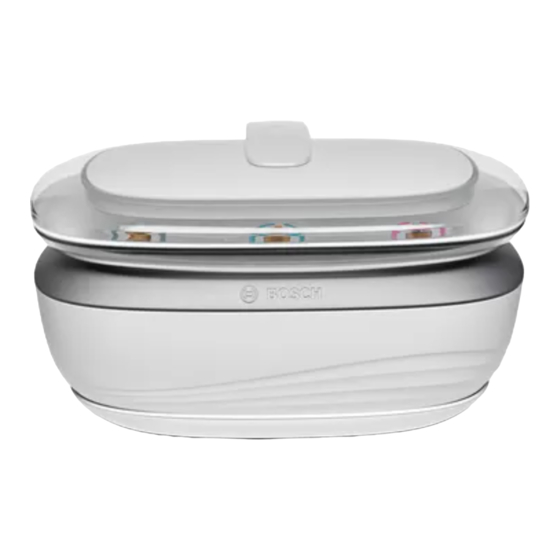
了解机器 zh 4 了解机器 4.1 电器 您可以在此查看机器的相关部件。... -
Page 6: 灯光模式一览
zh 使用 水槽 灯光模式 状态 LED 灯闪烁两 ¡ 睡眠模式和标准模 泵 次。 式之间的手动切换 已确认。 水位传感器 ¡ 已达到水槽的最大 防溅环 容量。LED 灯闪烁 两次白光。 储水盘 LED 灯亮起绿 除垢已启动,泵正在 胶囊托盘 光。 运行。 LED 灯亮起或 → "处理故障", 页16 种子胶囊孔穴 闪烁红光。 触控按钮 LED 灯不亮。 → "处理故障", 页16 LED 灯光照组件 4.4 营养液加注量... -
Page 7: 电器的准备工作
操作 zh 5.1 电器的准备工作 5.3 安装电器 取下光照组件。 将电器插头插入底座。 将其他所有零件从底座中取下。 将底座置于坚实、平整的表面上。 首次使用前,先清洁所有上一步从底 座取下的零件。 → "清洁和保养", 页12 操作 6 操作基本知识 将已清洁且干燥的零件备用。 操作 6.1 开始培育 5.2 一般注意事项 注意 请遵守这些提示,以便您能够以最佳方 ¡ 务必将营养剂包装密封。 式使用本电器。 ¡ 务必以规定的混合比例使用营养剂。 本电器不得在以下条件下安装: 不得添加其他材料,如肥料。 ¡ 在阳光直射下 ¡ 在空调和暖气附近 ¡ 在室外 ¡ 在可能发生霜冻的区域 ¡ 在环境温度超过 36 °C 的区域。 ¡... - Page 8 zh 操作 将水槽置于底座上。 装上防溅环 、储水盘 和胶囊托 盘 。 将 1 勺 (2 g) 营养剂加入到 1.5 升新 鲜自来水中。 拆开种子胶囊的包装,并用剪刀将其 分开。 将准备好的营养液添加到水槽中。注 小心地将封盖从种子胶囊上撕下,不 意标记 。 要让种子掉出或粘在封盖上。 将种子胶囊装入孔穴中。 务必将所有种子胶囊孔穴都装上胶 囊。...
-
Page 9: 装入高度模块
操作 zh 将光照组件置于底座上。 6.2 装入高度模块 当能够见到最初的叶子时,取下光照 组件。 插入电源适配器。 取下光照组件时,用手固定底座。 将一个高度模块置于底座上。 a 光照组件亮起粉光,且泵启动自动灌 溉循环。 将光照组件置于高度模块上。 a 培育已启动,发芽阶段开始。 一旦一个或多个高度模块被使用,光 照组件便会亮起白光。... -
Page 10: 加注营养液
zh 操作 如果植物几乎达到光照组件的下表 将营养液缓慢地注入胶囊托盘。 面,则再装入一个高度模块。 如果光照组件闪烁白光两次,便说明 已达到最大容量。 注意 ¡ 最多可以同时使用 4 个高度模块。 6.4 收获植物 ¡ 最多可以使用两个补光增高模块,与 两个标准高度模块一起装入。 当植物或果实足够大时,便开始收 获。 6.3 加注营养液 如果营养液耗尽,光照组件便会每 3 分 钟闪烁蓝光 10 次,且泵停下。 将 1 勺 (2 g) 营养剂加入到 1 升新鲜 自来水中。 在将植物全部收获后,对所有零件进 行除垢,然后彻底清洁。 → "清洁和保养", 页12 6.5 设置睡眠模式 在 16 小时运行后,电器会自动进入睡 眠模式,并在... -
Page 11: 手动开启标准模式
操作 zh 触摸触控按钮 3 秒钟,直到光照组件 6.7 将照明调暗,或短暂关闭 闪烁两次。 如要调暗照明,可短促触摸触控按 钮。 a 电器启动 8 小时睡眠模式。 a 睡眠模式的开始时间已保存,并将保 调暗后的照明在 2 小时后自动停止。 持到您再一次改动。 如要关闭照明,可再次短促触摸触控 注: 睡眠模式应在晚上开始,从而可让 按钮。 植物在黑暗中进入恢复期。这样,便能 如要重新开启照明,可再次短促触摸 防止诸如卧室中的明亮照明的干扰。 触控按钮。 6.6 手动开启标准模式 注意 ¡ 在下一个睡眠模式结束后,照明将自 在 8 小时睡眠模式后,电器会自动进入 动重新开启。 标准模式。 ¡ 每天多次调暗或关闭照明,可对植物 如要更改标准模式的开始时间,请在 的生长产生不利影响。 需要的时间手动开启标准模式。 如要退出睡眠模式,可触摸触控按钮 6.8 启动假日模式... -
Page 12: 清洁和保养
zh 清洁和保养 触摸触控按钮 10 秒钟,直到光照组 要求 ▶ 件亮起粉光。 ¡ 胶囊托盘内没有种子胶囊。 ¡ 电器已完全组装好,已装入一个高度 模块,且光照组件已装上。 准备除垢溶液。选择以下选项中的其 中一个: 将两茶匙柠檬酸溶解在 1 升约 ‒ 50 °C 的温水中。 将一粒除垢片溶解在 1 升温水 ‒ 中,并等待 5 分钟。 将准备好的除垢溶液缓慢地注入胶囊 托盘。 触摸触控按钮 15 秒钟,直到光照组 a 电器处于假日模式。 件亮起绿光。 注: 如要退出假日模式,可短促触摸触 控按钮。 7 清洁和保养 7.1 清洁产品 您可以在这里找到适用于您的电器的清 洁产品的相关信息。... - Page 13 清洁和保养 zh 取下光照组件和高度模块。 把泵壳逆时针转动并取下。 取下胶囊托盘 、储水盘 和防溅 取出泵螺旋桨。 环 。 按照清洁概览中的说明,清洁所有部 取下水槽。 件。 干燥后,按相反顺序重新组装所有部 件。 注: 装入泵螺旋桨时,应注意螺旋桨上 或其下方不得有残留物。泵螺旋桨必须 平稳转动。...
-
Page 14: 清洁概览
7.4 清洁概览 您可以在这里找到每个部件的最佳清洁方法。 8 附件 可向客户服务、专业经销商或在线购买 配件将视电器而定。购买时,请务必提 附件。请仅使用原装配件,因其完全搭 供机器确切的标记(E-Nr.)。 → 页 配您的机器。 请在我们的目录、在线商店或客户服务 处查看适用于您电器的附件。 www.bosch-home.cn 附件 名称 使用 高度模块 MSGZHB1L 如果植物几乎达到光照组件的下表面,则再添加 一个高度模块。您达到最多 4 个模块的最大高 度。... - Page 15 附件 zh 附件 名称 使用 补光增高模块 MSGZHB2L 增加一份灯光。这样,您的植物便会长的更快, 并可以更早收获。 提示: 为达到完美的结果,最多可以交替将两个 补光增高模块或花果补光增高模块加到高度模块 上。 花果补光增高 MSGZHB3L 用于开花植物的特殊灯光。它能提高开花率从而 模块 确保更高的产量。 提示: 为达到完美的结果,最多可以交替将两个 补光增高模块或花果补光增高模块加到高度模块 上。 芽苗菜托盘 MSGZMTL 同时种植两种不同的芽苗菜。 ¡ 将 1 勺 (2 g) 营养剂加入到 1.5 升新鲜自来水 中,然后注入水槽。 ¡ 装上防溅环、储水盘和芽苗菜托盘。 ¡ 将芽苗菜籽包中的菜籽分别放入一个芽苗菜段 中。重新装上芽苗菜盖。 ¡ 将光照组件置于底座上,并插入电源适配器。 光照组件亮起粉光,发芽阶段开始。 ¡...
-
Page 16: 处理故障
zh 处理故障 9 处理故障 设备上发生的小故障,您大多可以自行解决。联系客户服务之前,请先运用处理故 障信息尝试自行解决。此举可避免不必要的支出。 故障 故障原因和故障排除 光照组件持续亮起红 泵锁死或螺旋桨缺失。 光,直到水槽被取出。 检查泵螺旋桨是否安装到位。 检查泵壳是否安装到位。 电器位于磁性金属表面上。 检查位置是否适合长期放置。 → "一般注意事项", 页7 选择另一个位置。 光照组件不亮。 电器未与电源连接。 检查电源适配器是否已插入插座。 检查电源线是否与底座正确连接。 环境温度高于 40 °C。过热保护已将电器关闭。 检查位置是否适合长期放置。 → "一般注意事项", 页7 关上窗帘或百叶窗,将温度降下来。 睡眠模式已开启,或照明已手动关闭。 → "设置睡眠模式", 页10 → "将照明调暗,或短暂关闭", 页11 光照组件存在电子控制问题 请将本电器从电源上断开几小时,以重置光照组件。 重新连接电器。 注: 如果故障不能排除,请与客户服务部门联系。 光照组件每... -
Page 17: 运输、储存和废弃处理
运输、储存和废弃处理 zh 高度(无高度模 193 mm 10 运输、储存和废弃处理 块) 高度(安装一个高 293 mm 10.1 处理旧机器 度模块) 高度(安装两个高 393 mm 旧机器本身含有一些有用的原料,通过 度模块) 环保的方式加以处理可回收再利用。 按环保的方式废弃处理机器。 ▶ 11.4 保修 关于有效的回收处理方法的信息,请 询问专业经销商以及市政当局或城市 您有权根据下列条件要求为您的机器提 管理部门。 供保修。 本电器的保修条款由电器售出国的代表 处确定。有关这些条款的详细信息,请 向购买电器的零售商洽询。 当根据保修 11 客户服务 条款进行任何索赔时,必须出具销售凭 证或收据。 有关您所在国家╱地区的保修期和保修 条款的详细信息,请向本公司的客户服 务、经销商或在本公司网站查询。 联系客户服务时,需要告知产品编号 (E-Nr.)和制造编号(FD)。 有关客户服务的联系信息,请查看本说 明书后面的客户服务索引或本公司的网 站。 11.1 产品编号(E-Nr.)和制造 编号(FD) 可在机器的规格铭牌上查看产品编号 (E-Nr.)和制造编号(FD)。... - Page 18 Futher information and explanations are available online: Table of contents 1 Safety .......... 19 6.7 Dimming or switching off the 1.1 General information.... 19 lighting temporarily .... 29 1.2 Intended use...... 19 6.8 Starting holiday mode .... 29 1.3 Restriction on user group.. 19 7 Cleaning and servicing ....
-
Page 19: Safety
Safety en 1 Safety Observe the following safety instructions. 1.1 General information ¡ Read this instruction manual carefully. ¡ Keep the instruction manual and the product information safe for future reference or for the next owner. 1.2 Intended use Only use this appliance: ¡ for growing plants from plant capsules. ¡... - Page 20 en Safety WARNING ‒ Risk of fire! Intense heat may cause the appliance and other parts to catch fire. ▶ Never place the appliance on or near hot surfaces.
-
Page 21: Environmental Protection And Saving Energy
Environmental protection and saving energy en 3.1 Unpacking the appliance 2 Environmental protec- and parts tion and saving energy Take the appliance out of the packaging. 2.1 Disposing of packaging Take all other parts and the ac- companying documents out of the The packaging materials are environ- packaging and place them to mentally compatible and can be re- hand. -
Page 22: Familiarising Yourself With Your Appliance
en Familiarising yourself with your appliance 4 Familiarising yourself with your appliance 4.1 Device You can find an overview of the parts of your appliance here. -
Page 23: Symbols
Familiarising yourself with your appliance en Water bowl Illumination Status mode Pump The LEDs The device is in the light up pink. sprouting phase or Water-level sensor holiday mode is Anti-spill ring switched on. The LEDs One or more height Watering tray light up modules are inser- Plant tray... -
Page 24: Before Using For The First Time
en first time Remove all other parts from the Illumination Status docking unit. mode The LEDs Only a little nutrient light up blue solution remains in the water bowl. 5 seconds while the pump is run- ning. The LEDs The water bowl con- flash blue 10 tains too little nutrient times every... -
Page 25: Installing The Device
operation en Place the water bowl on the dock- 5.3 Installing the device ing unit. Insert the device plug in the dock- ing unit. Add 1 spoonful (2 g) of nutrients to 1.5 litres of fresh tap water. Place the docking unit on a stable and level surface. - Page 26 en operation Fit the anti-spill ring , the water- Place the light unit on the docking ing tray and the plant tray . unit. Unpack the plant capsules and Insert the power supply. separate them using scissors. a The light unit lights up pink and the Carefully remove the cover film pump starts the automatic water- from the plant capsules so the...
-
Page 27: Inserting The Height Module
operation en Place the light unit on the height 6.2 Inserting the height mod- module. Remove the light unit when the first leaves appear. The light unit lights up white as soon as one or more height mod- ules are used. To remove the light unit, hold the Insert another height module when docking unit with your hand. -
Page 28: Harvesting Plants
en operation Add 1 spoon (2 g) of nutrients to Once you have harvested your 1 litre of fresh tap water. plants in their entirety, descale all parts and clean them thoroughly. → "Cleaning and servicing", Page 30 6.5 Setting sleep mode The device automatically goes into sleep mode after 16 hours of activity and wakes up again after 8 hours. -
Page 29: Dimming Or Switching Off The Lighting Temporarily
operation en To change the start time of stand- To switch the lighting back on, ard mode, wait until the time you touch the touch button briefly require. again. To end sleep mode, touch the Notes touch button for 3 seconds until ¡... -
Page 30: Cleaning And Servicing
en Cleaning and servicing Slowly pour the prepared descal- 7 Cleaning and servicing ing solution into the plant tray. Touch the touch button for 15 seconds until the light unit 7.1 Cleaning products lights up green. Find out here which cleaning products are suitable for your appli- ance. - Page 31 Cleaning and servicing en Remove the light unit and the Turn the pump housing anticlock- height modules. wise and remove. Remove the plant tray , the wa- Take out the pump impeller. tering tray and the anti-spill ring . Clean all parts as indicated in the cleaning overview.
-
Page 32: Overview Of Cleaning
Accessories vary from one appliance to another. When purchasing ac- cessories, always quote the exact product number (E no.) of your appli-... - Page 33 Accessories en Accessory Designation Height module MSGZHB1L Insert another height module when the plants have almost reached the light unit. You can in- sert up to 4 height modules. Boosting light MSGZHB2L For an additional portion of light. This way, module your plants grow faster and can be harvested earlier.
- Page 34 en Accessories Accessory Designation Design clips MSGZDC1L, Personalise your SmartGrow with coloured MSGZDC2L, design clips for the height modules. Replace MSGZDC3L the design clips by removing the standard clip for the height module from the side and then attaching the coloured design clip.
-
Page 35: Troubleshooting
Troubleshooting en 9 Troubleshooting You can rectify minor faults on your appliance yourself. Read the troubleshoot- ing information before contacting after-sales service. This will avoid unneces- sary costs. Fault Cause and troubleshooting Light unit will light up The pump is blocked or the impeller is missing. continuously red until Check that the pump impeller is positioned cor- the water bowl is re-... - Page 36 en Troubleshooting Fault Cause and troubleshooting The light unit lights up The device measures a very high ambient temperat- red for 10 seconds ure of 36-40 °C. every 5 minutes. Check whether the location is suitable in the long term. → "General information", Page 24 Close curtains or blinds to lower the room temper- ature.
-
Page 37: Transportation, Storage And Disposal
Transportation, storage and disposal en 11.1 Product number (E-Nr.) 10 Transportation, stor- and production number age and disposal (FD) You can find the product number (E- 10.1 Disposing of old appli- Nr.) and the production number (FD) ance on the appliance's rating plate. Make a note of your appliance's de- Valuable raw materials can be re- tails and the Customer Service tele- used by recycling. - Page 38 en Customer Service The guarantee conditions for this ap- pliance are as defined by our repres- entative in the country in which it is sold. Details regarding these condi- tions can be obtained from the dealer from whom the appliance was pur- chased.
- Page 39 Central Service Contacts CN China, 中国 BSH Home Appliances Service Jiangsu Co. Ltd. 中国江苏省南京市鼓楼区清江南 路18号3幢 Building 3, No. 18 Qingjiang South Road, Gulou District Nanjing, Jiangsu Province Service Tel.: 400 8855 888* mailto:careline.china@bshg.com www.bosch-home.cn *phone rate depends on the network used...
- Page 40 Expert advice for your Bosch home appliances, help with problems or a repair from Bosch experts. Find out everything about the many ways Bosch can support you: www.bosch-home.com/service Contact data of all countries are listed in the attached service directory.