Table of Contents
Advertisement
Quick Links
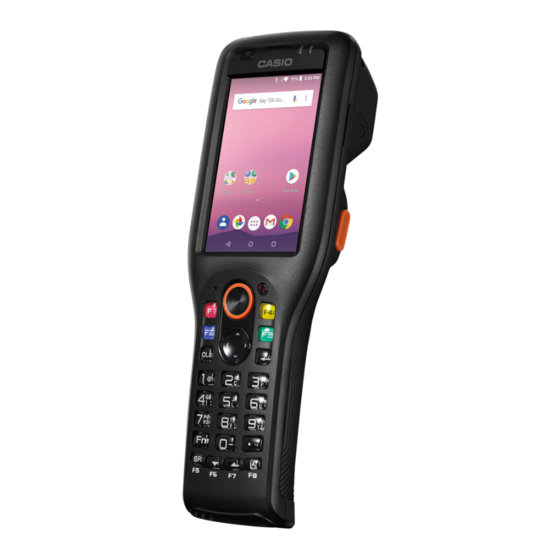
1. General
In this chapter, how to check the hardware of DT-X400 is explained.
The general fl ow to start up the test program is as follows:
Insert a microSD card and SIM card (WAN model) into the device.
Perform Initial Settings. (When the Main PCB is replaced)
Remove the microSD card and SIM card (WAN model).
HARDWARE TEST / SETTING
Prepare equipment required.
Start the test program.
Perform function tests.
Perform resetting.
– 1 –
DT-X400 / VER.1
Advertisement
Table of Contents

Summary of Contents for Casio DT-X400
- Page 1 DT-X400 / VER.1 HARDWARE TEST / SETTING 1. General In this chapter, how to check the hardware of DT-X400 is explained. The general fl ow to start up the test program is as follows: Prepare equipment required. Insert a microSD card and SIM card (WAN model) into the device.
-
Page 2: Test Equipment
DT-X400 / VER.1 2. Test Equipment The following shows the major equipment used for function test. NOTE: For equipment used for the special test, see respective test items. Test Object DT-X400 USB memory USB cable Type-C (male) Type-A (female) USB cable... -
Page 3: List Of Tests
USB DETECT You can check DT-X400’s I/O connector correctly communicate with your PC. USB HOST You can check DT-X400’s I/O connector correctly working with USB HOST device. CAMERA You can check DT-X400’s phone module function. You can check DT-X400’s NFC module function. Please make sure battery cover closed fi... -
Page 4: Preparation For Inspection
DT-X400 / VER.1 4. Preparation for inspection 4-1. Insert a microSD card and SIM card (WAN model) into the device. 4-2. Running the Diagnostic Program < W-LAN model > Tap about 10 times < W-LAN model> – 4 –... -
Page 5: Test Procedures
DT-X400 / VER.1 5. Test Procedures Y Running the Diagnostic Program & microSD Card Type [*#*#1277#*#*] – 5 –... - Page 6 DT-X400 / VER.1 Y MIC/SP/Receiver (1) Function test of a microphone and a speaker. <1> Click [Record] button. <2> Click [Stop] button. Speak to the microphone. Click [Play Receiver Sound] Click [Second MIC] radio <3> Click [Play] button. button. button.
- Page 7 DT-X400 / VER.1 Y LED/VIBRATOR/KEYPAD BACKLIGHT (1) Examination of LED. * Run this test in the dark place. It is diffi cult to distinguish the backlight of keyboard in bright place. * Color of LED changes to red, green and blue in turn and then backlights of keyboard light up.
- Page 8 DT-X400 / VER.1 Y BATTERY COVER DETECT (1) Check the battery cover detect. [FREE] Click [Success] if the test result [LOCK] is satisfactory. – 8 –...
- Page 9 DT-X400 / VER.1 Y TOUCH PANEL (1) Conditioning test for touch of the screen. Draw an outline with silver line [Next] on the screen. If line is broken, test is fail. [Next] Free to draw the line. Draw a diagonal with silver line [Next] on the screen.
- Page 10 DT-X400 / VER.1 Y LCD/BACKLIGHT (1) Examination of dead pixel or color shading. * One color appears in full screen. It turns red, green, blue black and white when the screen is touched. And then brightness is changed for 10 level from dark to bright, and it returns to default level.
- Page 11 DT-X400 / VER.1 Y SCANNER (1) Function test of scanner (barcode reader). Turn scanner on PDA toward Click [Trigger Off ] button to plain wall and then click check if the laser beam stops. [Trigger On] button to generate Type and Value of the scanned red laser beam.
- Page 12 DT-X400 / VER.1 Y W-LAN (1) Check Wireless LAN functions correctly. Wait for some time on this screen till scanning result comes out. Check [WLAN MAC]. Wait for sometime, [Network State] will be change to Click [Success] if the test result [CONNECTED], and mark in is satisfactory.
- Page 13 DT-X400 / VER.1 Y KEY (1) Check all keys operate properly. * When keys are pressed, the color of keys indicated on the screen changes from blue to another color. (black >> red >> green >> blue >> red >> ...) * When all keys are pressed more than once a confi...
- Page 14 DT-X400 / VER.1 Y USB DETECT (1) Check the USB cable is recognized properly. (2) Connection Test Object DT-X400 USB cable Type-C (male) Type-A (male) (3) Test Connect the sync cable to PC. Click [Success] when sync cable is recognized.
- Page 15 DT-X400 / VER.1 Y USB HOST (1) Test USB Host is recognized properly. (2) Connection Test Object DT-X400 USB memory USB cable Type-C (male) Type-A (female) (3) Test Connect the USB host cable Check USB host status. with storage device.
- Page 16 DT-X400 / VER.1 Y CAMERA (1) Check camera preview. Preview picture is displayed Click [Capture] button. automatically. Wait until appear photo. Click [Flash ON] button. Check camera fl ash. Click [Focus] button. Check camera focus. Click [Success] if the test result Click [OK] button.
- Page 17 DT-X400 / VER.1 Y NFC (1) NFC functions correctly. Contact the “NFC Test card” Check information of the “NFC near scanner(NFC Antenna). test card”. Click [Success] if the test result is satisfactory. Y SENSOR (1) Check sensors. Follow above procedures.
- Page 18 DT-X400 / VER.1 Y BLUETOOTH (1) Check Bluetooth connection is recognized properly. Wait for sometime. Check [Bluetooth MAC]. Click [Refresh] button. Click [Success] if the test result Wait for some time on this is satisfactory. screen till scanning result comes out.
- Page 19 DT-X400 / VER.1 Y IMAGE DEMO (1) Check scanner’s preview. Check the preview. Click [Success] if the test Click [Stop] button. result is satisfactory. Y WAN (1) Please confi rm that the content of the SIM card is displayed. It will pass if the contents are displayed.
- Page 20 (Android_MFGE_v2.1.2.apk) ↓ Slide screen Enter serial...
-
Page 21: Initializing The Device
7. Initializing the Device – 21 –...


