Makita DJV180 Instruction Manual
Hide thumbs
Also See for DJV180:
- Instruction manual (65 pages) ,
- Instruction manual (72 pages) ,
- Instruction manual (37 pages)
Table of Contents
Advertisement
Quick Links
Advertisement
Table of Contents

Related Manuals for Makita DJV180


Summary of Contents for Makita DJV180
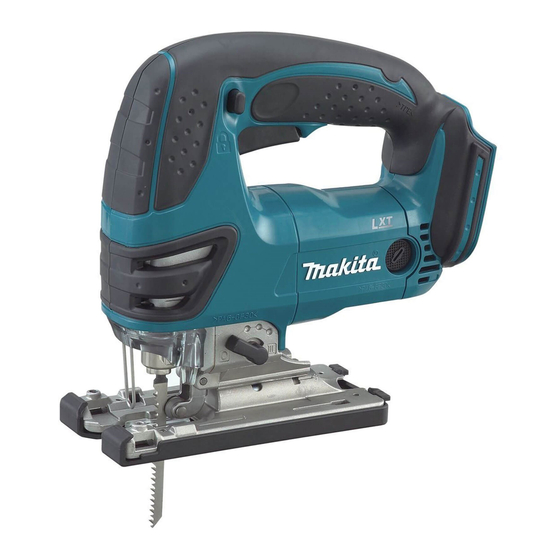
- Page 1 INSTRUCTION MANUAL Cordless Jig Saw DJV180 Read before use.
-
Page 2: Specifications
SPECIFICATIONS Model DJV180 Length of stroke 26 mm Max. cutting capacities Wood 135 mm Mild steel 10 mm Aluminum 20 mm Strokes per minute (min 0 - 2,600 Overall length 257 mm Net weight 2.7 - 3.0 kg Rated voltage D.C. -
Page 3: Ec Declaration Of Conformity
Do not abuse the cord. Never use the cord for NOTE: The declared vibration total value(s) has been carrying, pulling or unplugging the power tool. measured in accordance with a standard test method Keep cord away from heat, oil, sharp edges and may be used for comparing one tool with another. - Page 4 Battery tool use and care Recharge only with the charger specified by the manufacturer. A charger that is suitable for one type of battery pack may create a risk of fire when used with another battery pack. Use power tools only with specifically desig- nated battery packs. Use of any other battery packs may create a risk of injury and fire. When battery pack is not in use, keep it away from other metal objects, like paper clips, coins, keys, nails, screws or other small metal objects, that can make a connection from one...
- Page 5 SAVE THESE INSTRUCTIONS. CAUTION: Only use genuine Makita batteries. WARNING: DO NOT let comfort or familiarity Use of non-genuine Makita batteries, or batteries that with product (gained from repeated use) replace have been altered, may result in the battery bursting strict adherence to safety rules for the subject causing fires, personal injury and damage. It will product.
-
Page 6: Functional Description
Battery protection system (Lithium- FUNCTIONAL ion battery with star marking) DESCRIPTION CAUTION: • Always be sure that the tool is switched off and the battery cartridge is removed before adjust- ing or checking function on the tool. Installing or removing battery cartridge ► 1 . Star marking Lithium-ion batteries with a star marking are equipped with a protection system. This system automatically cuts off power to the tool to extend battery life. The tool will automatically stop during operation if the tool and/or battery are placed under one of the following conditions: • Overloaded: The tool is operated in a manner that causes it to draw an abnormally high current. - Page 7 Switch action Indicator lamps Remaining capacity Lighted Blinking 75% to 100% 50% to 75% 25% to 50% 0% to 25% Charge the battery. The battery may have ► 1 . Lock-off button 2. Switch trigger malfunctioned. NOTE: Depending on the conditions of use and the ambient temperature, the indication may differ slightly from the actual capacity.
- Page 8 Return the tool opener to its original position. ASSEMBLY After installing, always make sure that the blade is securely held in place by trying to pull it out. CAUTION: CAUTION: • Always be sure that the tool is switched off and • Do not open the tool opener excessively, or it the battery cartridge is removed before carrying may cause tool damage. out any work on the tool. To remove the blade, open the tool opener to the posi- Installing or removing saw blade tion shown in the figure. Pull the saw blade out toward the base. CAUTION: •...
-
Page 9: Cover Plate
The dust nozzle can be installed on either left or right side of the base. ► 1 . Base 2. Anti-splintering device Then connect a Makita vacuum cleaner to the dust For splinter-free cuts, the anti-splintering device can nozzle. be used. To install the anti-splintering device, move the tool base all the way forward and fit it from the back of tool base. When you use the cover plate, install the... -
Page 10: Operation
OPERATION CAUTION: • Always hold the base flush with the workpiece. Failure to do so may cause blade breakage, resulting in a serious injury. ► 1 . Base 2. Bolt 3. Hex wrench Tilt the base until the desired bevel angle is obtained. The V-notch of the gear housing indicates the bevel angle by graduations. Then tighten the bolt firmly to secure the base. ► 1 . Cutting line 2. Base Turn the tool on without the blade making any contact and wait until the blade attains full speed. - Page 11 Cutouts Finishing edges Cutouts can be made with either of two methods A or B. A) Boring a starting hole: To trim edges or make dimensional adjustments, run the blade lightly along the cut edges. Metal cutting ► 1 . Starting hole Always use a suitable coolant (cutting oil) when cutting • For internal cutouts without a lead-in cut from an metal. Failure to do so will cause significant blade wear.
- Page 12 NOTE: • Always use blades No. B-17, B-18, B-26 or B-27 when cutting circles or arcs. Guide rail adapter set (accessory) ► 1 . Hex wrench 2. Bolt 3. Fence guide When repeatedly cutting widths of 160 mm or less, use of the rip fence will assure fast, clean, straight cuts. To install, insert the rip fence into the rectangular hole on the side of the tool base with the fence guide facing down.
-
Page 13: Maintenance
Use a screwdriver to remove the brush holder caps. Take out the worn carbon brushes, insert the new ones and secure the brush holder caps. ► 1 . Brush holder cap 2. Screwdriver To maintain product SAFETY and RELIABILITY, repairs, any other maintenance or adjustment should be per- formed by Makita Authorized Service Centers, always using Makita replacement parts. 13 ENGLISH... - Page 16 Makita Europe N.V. Jan-Baptist Vinkstraat 2, 3070 Kortenberg, Belgium Makita Corporation 3-11-8, Sumiyoshi-cho, Anjo, Aichi 446-8502 Japan 885272C222 www.makita.com 20181128...