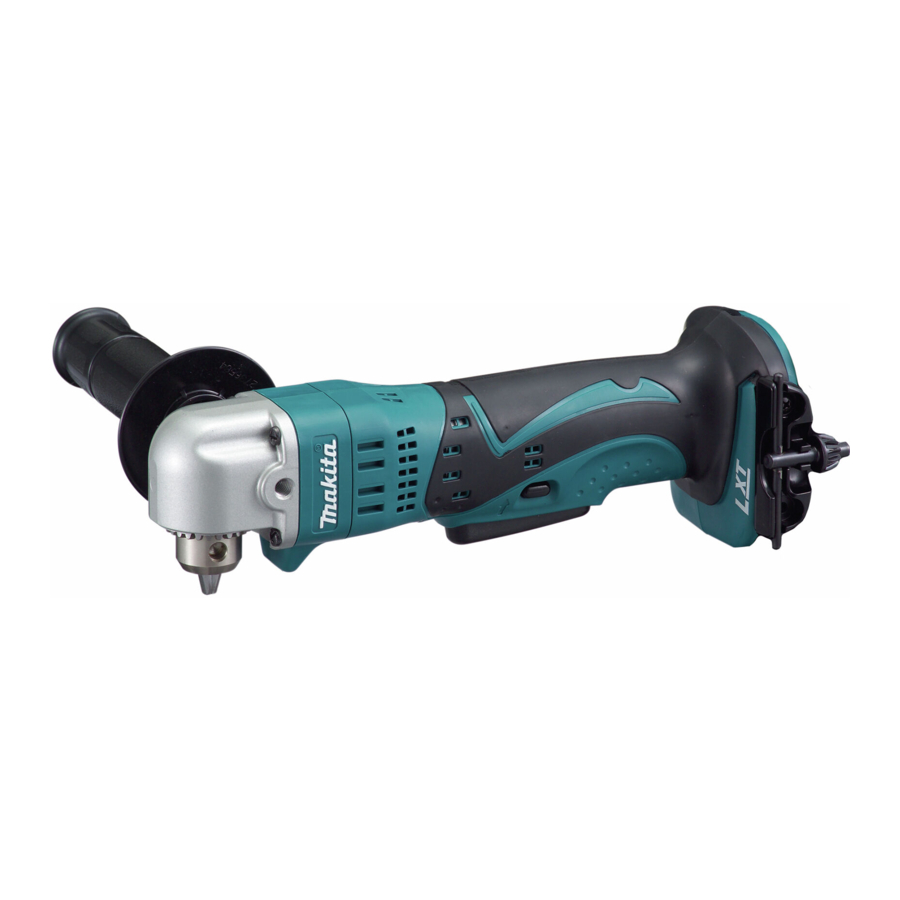
Makita DDA340 Instruction Manual
Cordless angle drill
Hide thumbs
Also See for DDA340:
- Instruction manual (61 pages) ,
- Instruction manual (41 pages) ,
- Instruction manual (41 pages)
Table of Contents
Advertisement
Quick Links
Cordless Angle Drill
EN
Perceuse d'Angle sans Fil
FR
Akku-Winkelbohrmaschine
DE
Trapano angolare a batteria
IT
Haakse accuboormachine
NL
Taladro Angular Inalámbrico
ES
Furadeira Angular a Bateria
PT
Akku vinkelboremaskine
DA
Φορητό γωνιακό τρυπάνι
EL
Akülü Açılı Matkap
TR
DDA340
DDA350
INSTRUCTION MANUAL
MANUEL D'INSTRUCTIONS
BETRIEBSANLEITUNG
ISTRUZIONI PER L'USO
GEBRUIKSAANWIJZING
MANUAL DE
INSTRUCCIONES
MANUAL DE INSTRUÇÕES
BRUGSANVISNING
ΕΓΧΕΙΡΙΔΙΟ ΟΔΗΓΙΩΝ
KULLANMA KILAVUZU
4
10
16
22
29
35
41
47
53
59
Advertisement
Table of Contents

Related Manuals for Makita DDA340


Summary of Contents for Makita DDA340
- Page 1 Akku-Winkelbohrmaschine BETRIEBSANLEITUNG Trapano angolare a batteria ISTRUZIONI PER L’USO Haakse accuboormachine GEBRUIKSAANWIJZING MANUAL DE Taladro Angular Inalámbrico INSTRUCCIONES Furadeira Angular a Bateria MANUAL DE INSTRUÇÕES Akku vinkelboremaskine BRUGSANVISNING Φορητό γωνιακό τρυπάνι ΕΓΧΕΙΡΙΔΙΟ ΟΔΗΓΙΩΝ Akülü Açılı Matkap KULLANMA KILAVUZU DDA340 DDA350...
- Page 2 Fig.1 Fig.5 Fig.2 Fig.6 Fig.3 Fig.7 Fig.4 Fig.8...
- Page 3 Fig.9 Fig.10 Fig.11...
-
Page 4: Specifications
The typical A-weighted noise level determined accord- sures to protect the operator that are based on an ing to EN62841-2-1: estimation of exposure in the actual conditions of Model DDA340 use (taking account of all parts of the operating Sound pressure level (L ) : 73 dB(A) cycle such as the times when the tool is switched... -
Page 5: Safety Warnings
Do not touch the drill bit or the workpiece NOTE: The declared vibration total value(s) has been immediately after operation; they may be measured in accordance with a standard test method extremely hot and could burn your skin. and may be used for comparing one tool with another. Some material contains chemicals which may NOTE: The declared vibration total value(s) may also be toxic. Take caution to prevent dust inhala- be used in a preliminary assessment of exposure. -
Page 6: Functional Description
18. Keep the battery away from children. CAUTION: Always install the battery cartridge SAVE THESE INSTRUCTIONS. fully until the red indicator cannot be seen. If not, it may accidentally fall out of the tool, causing injury to CAUTION: Only use genuine Makita batteries. you or someone around you. Use of non-genuine Makita batteries, or batteries that CAUTION: Do not install the battery cartridge have been altered, may result in the battery bursting forcibly. If the cartridge does not slide in easily, it is causing fires, personal injury and damage. It will... -
Page 7: Overload Protection
Indicating the remaining battery Switch action capacity CAUTION: Before installing the battery car- Only for battery cartridges with the indicator tridge into the tool, always check to see that the ► Fig.2: 1. Indicator lamps 2. Check button switch lever actuates properly and returns to the "OFF"... -
Page 8: Installing Hook
Installing or removing drill bit OPERATION Optional accessory ► Fig.7: 1. Chuck key CAUTION: Always insert the battery cartridge all the way until it locks in place. If you can see the To install the drill bit, place it in the chuck as far as it will red indicator on the upper side of the button, it is not go. Tighten the chuck by hand. Place the chuck key in locked completely. Insert it fully until the red indicator each of the three holes and tighten clockwise. Be sure cannot be seen. If not, it may accidentally fall out of to tighten all three chuck holes evenly. the tool, causing injury to you or someone around To remove the drill bit, turn the chuck key counterclock- you. -
Page 9: Maintenance
To maintain product SAFETY and RELIABILITY, repairs, any other maintenance or adjustment should be performed by Makita Authorized or Factory Service Centers, always using Makita replacement parts. OPTIONAL ACCESSORIES CAUTION: These accessories or attachments are recommended for use with your Makita tool specified in this manual. The use of any other accessories or attachments might present a risk of injury to persons. Only use accessory or attachment for its stated purpose. If you need any assistance for more details regard- ing these accessories, ask your local Makita Service Center. •...