Advertisement
Quick Links
REMOTE TRANSMITTER
Recommended operating range: -20℃ to 60℃, -4℉ to 140℉
RF transmission frequency:
433.92MHz
Remote transmitter:
1 unit
RF transmission range:
maximum 30 meters
Temperature sensing cycle:
around 50 seconds
POWER
Main unit:
4.5V, use 3 x AA 1.5V alkaline battery
Remote transmitter:
3V, use 2 x AA 1.5V alkaline battery
DIMENSION
Main unit:
22.2(W) x 20.2(H) x 2.3(D)cm
8.74(W) x 7.95(H) x 0.90(D)inch
Remote transmitter:
4.0(W) x 13.0(H) x 2.4(D)cm
1.6(W) x 5.1(H) x 0.9(D)inch
FCC INFORMATION:
This equipment has been tested and found to comply with the limits for a Class B digital device, pursuant to Part 15 of
the FCC Rules. These limits are designed to provide reasonable protection against harmful interference in a residential
installation. This equipment generates, uses, and can radiate radio frequency energy and, if not installed and used in
accordance with the instructions, may cause harmful interference to radio communications. However, there is no
guarantee that interference will not occur in a particular installation. If this equipment does cause harmful interference
to radio or television reception, which can be determined by turning the equipment off and on, the user is encouraged
to try to correct the interference by one or more of the following measures:
- Reorient or relocate the receiving antenna.
- Increase the separation between the equipment and receiver.
- Connect the equipment into an outlet on a circuit different from that to which the receiver is connected.
- Consult the dealer or an experienced radio/TV technician for help.
This device complies with Part 15 of the FCC Rules. Operation is subject to the following two conditions:
(1) This device may not cause harmful interference, and
(2) This device must accept any interference received, including interference that may cause undesired operation.
Caution: Any changes or modifications not expressly approved by the party responsible for compliance could void the
user's authority to operate the equipment.
Thank you for your purchase of this quality clock. The utmost care has gone into the design and manufacture of your
clock. Please read these instructions and store them in a safe place for future reference.
The clock has a built in receiver that automatically synchronizes itself with the WWVB radio signal broadcast by the
US Government's National Institute of Standards & Technology (NIST) in Fort Collins, Colorado.
signal daily broadcast ensures that the atomic clock will always display the most accurate date and time.
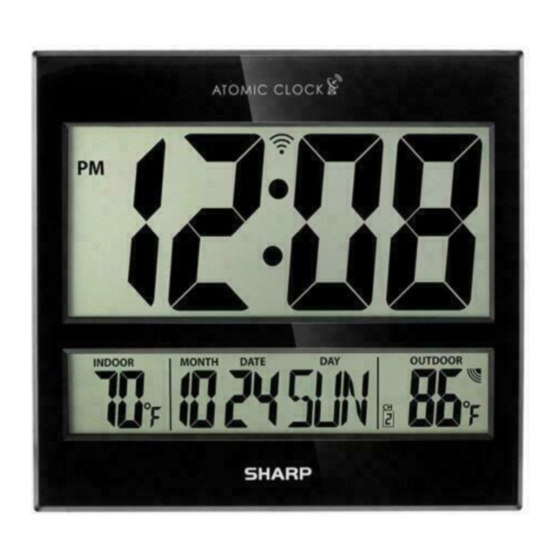
The receiver unit has a clear, easy-to-read display that shows indoor temperature, outdoor temperature,time, month,
date, day. The remote sensor transmits the outdoor temperature. To receive the outdoor temperature, place the
sensor anywhere within 30 meters; the 433.92MHz technology means no wire installation is required.
The Atomic Clock will always be accurate to within one second as it receives daily WWVB updates. Daylight Saving
Time also automatically updates so there is no need to re-set the clock manually!
IMPORTANT: If the Atomic Clock does not receive the WWVB signal immediately, wait overnight and it will be
set in the morning.
QUICK START GUIDE:
1. Insert batteries into remote sensor. In the battery compartment, set the Channel to number 1.
2. Insert batteries into clock.
3. Set the Channel to receive outside temperature to number 1. Locate the Channel button on the back side of clock.
Note Channel number display in Outside Temperature section of clock display.
4. Locate the Daylight Savings Button and turn it to ON.
5. Choose your time zone.
6. Now you can either set the time and day manually OR wait until the clock receives the atomic signal. The signal is
usually received overnight but it will begin looking for the signal immediately. During the day there is a lot of
interference and that is why the signal is often received overnight. Once the clock receives the atomic signal and all
of the clock settings are in place, the time and date will be automatically updated.
FEATURES:
1
. CLOCK DISPLAY:
- Displays time in hours and minutes; calendar display of month, date & day; indoor temperature; outdoor
temperature; signal strength indicator; daylight saving (DST).
2. UP / WAVE / 12/24 BUTTON:
- In the TIME / CALENDAR setting mode, press it to increase the setting values. Hold the button for 3 seconds,
the display will change rapidly.
- In normal mode, press and hold the button for 3 seconds for receive the RCC signal immediately.
- During the RCC receiving period, press the button again to stop the RCC reception.
- In normal mode, press the button to switch 12/24 time display format.
3. DOWN / ℃/℉ BUTTON:
- In the TIME / CALENDAR setting mode, press the button to decrease the setting values. Hold the button for 3
seconds, the display will change rapidly.
- In normal mode, press the button to switch temperature unit ℃/℉.
4. ENTER / CHANNEL BUTTON:
SPC1107
- In the TIME / CALENDAR setting mode, press the button to confirm the setting.
- In normal mode, press the button to switch the between channel 1, 2 and 3 to receive the 433.92MHz signal;
press and hold the button for 3 seconds will pairing with the outdoor remote sensor.
Atomic Wall Clock
Instructions & Warranty
Atomic Clock
2
3
4
5
1
The WWVB radio
6
7
8
9
10
11
Advertisement

Related Manuals for Sharp SPC1107


Summary of Contents for Sharp SPC1107
- Page 1 - In normal mode, press the button to switch temperature unit ℃/℉. 4. ENTER / CHANNEL BUTTON: SPC1107 - In the TIME / CALENDAR setting mode, press the button to confirm the setting. - In normal mode, press the button to switch the between channel 1, 2 and 3 to receive the 433.92MHz signal;...
- Page 2 5. DST SWITCH: SIGNAL STRENGTH INDICATOR: - In normal mode, slide the switch to ON/OFF the DST function. The signal indicator displays signal strength in 4 levels. Wave segment flashing means time signals are being received. 6. WALL MOUNT NOTE: 1.