Table of Contents
Advertisement
Quick Links
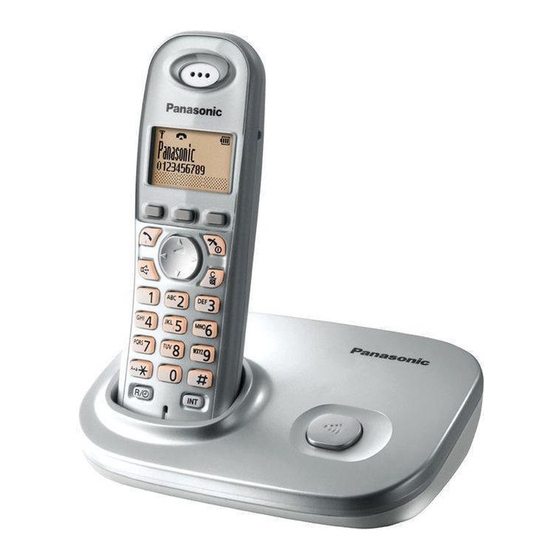
Model shown is KX-TG7301.
This unit is compatible with Caller ID. You must subscribe to the appropriate
service offered by your service provider/telephone company.
Charge the batteries for about 7 hours before initial use.
Please read these operating instructions before using the unit and save
them for future reference.
Operating Instructions
Model No.
Digital Cordless Answering System
Model No.
Digital Cordless Phone
KX-TG7301NZ
KX-TG7302NZ
KX-TG7321NZ
KX-TG7322NZ
Advertisement
Table of Contents

Related Manuals for Panasonic KX-TG7301


Summary of Contents for Panasonic KX-TG7301
- Page 1 Digital Cordless Answering System KX-TG7321NZ Model No. KX-TG7322NZ Model shown is KX-TG7301. This unit is compatible with Caller ID. You must subscribe to the appropriate service offered by your service provider/telephone company. Charge the batteries for about 7 hours before initial use.
-
Page 2: Table Of Contents
Table of Contents Introduction Answering system settings ..34 Product information ....3 Voice Mail Service Accessory information ... . . 4 Voice mail service. -
Page 3: Introduction
Introduction Product information Thank you for purchasing a Panasonic digital cordless phone. Important: L The suffix (NZ) in the following model numbers will be omitted in these instructions: KX-TG7301NZ/KX-TG7302NZ/KX-TG7321NZ/KX-TG7322NZ Notable differences between the models KX-TG7301 series L Model shown is KX-TG7302. -
Page 4: Accessory Information
Introduction Feature differences Intercom Model No. Answering system N ⇔ N KX-TG7301 – KX-TG7302 – KX-TG7321 KX-TG7322 *1 Intercom calls can be made between the handsets. *2 Intercom calls can be made between the handsets by purchasing and registering one or more optional handsets (page 5). - Page 5 Introduction Additional/replacement accessories Please contact your nearest Panasonic dealer for sales information. Accessory item Model number DECT repeater KX-A272 Replacement battery information: L Replace batteries only with a nickel metal hydride (Ni-MH) type of battery. This model requires 2 AAA (R03) batteries for every handset. For best performance, we recommend using Panasonic rechargeable batteries (Model No.
-
Page 6: For Your Safety
Introduction Radio waves emitted from this product may cause such devices to For your safety malfunction resulting in an accident. To prevent severe injury and loss of Operating safeguards life/property, read this section carefully L Unplug the product from power outlets before using the product to ensure before cleaning. - Page 7 Introduction L Never touch uninsulated telephone instructions may cause the batteries wires or terminals unless the to swell or explode. telephone line has been disconnected at the network interface. General notice L Use caution when installing or L This equipment will be inoperable modifying telephone lines.
-
Page 8: Important Safety Instructions
The base unit and other compatible with another item of Telepermitted Panasonic units use radio waves to equipment of a different make or communicate with each other. model, nor does it imply that any... - Page 9 Introduction L Do not place heavy objects on the Information on Disposal in other power cord or top of the product. Countries outside the European L When you leave the product unused Union for a long period of time, unplug the product from the power outlet.
-
Page 10: Preparation
Preparation F {6} (Play) Message indicator Controls G {x} (Locator) H {s} (Answer on) Base unit Answer on indicator ■ KX-TG7301/KX-TG7302 Handset A Charge contacts B {x} (Locator) Base unit ■ KX-TG7321/KX-TG7322 A B CD A Speaker B Soft keys... -
Page 11: Display
Preparation Using the navigator key Display The handset navigator key can be used to navigate through menus and to select items shown on the display by pressing Handset display items {^}, {V}, {<}, or {>}. Item Meaning To adjust the receiver or speaker volume, press {^} to increase the Within range of a base volume, or press {V} to decrease the... -
Page 12: Connections
(C). being used by another handset or the base Base unit unit. L Use only the supplied Panasonic AC adaptor PQLV207AL. *1 Caller ID subscribers only L Use only the supplied telephone line *2 KX-TG7321/KX-TG7322 *3 Voice mail subscribers only cord. -
Page 13: Battery Installation And Replacement
Please attach a DSL/ADSL filter (contact KX-TG7302/KX-TG7322 your DSL/ADSL provider) to the telephone line between the base unit L Use only the supplied Panasonic AC and the telephone line socket in the adaptor PQLV209AL. event of the following: – noise is heard during conversations. -
Page 14: Battery Charge
Important: L If the handset does not automatically turn on after installing/replacing batteries, press {ih} for about 1 second, or place the handset on the *1 Model shown is KX-TG7301. base unit or charger. *2 KX-TG7302/KX-TG7322 Note: Note: L When replacing batteries, remove the L It is normal for the handset to feel old batteries. -
Page 15: Wall Mounting
Battery level Wall mounting Battery icon Battery level High Base unit Medium 85 mm L When flashing: Needs charging. Panasonic Ni-MH battery Screws (Not supplied) performance (supplied batteries) Operation Operating time Hook In continuous use 17 hours max. Not in use... -
Page 16: Symbols Used In These Operating Instructions
Preparation Symbols used in these Setting up the unit operating instructions before use Symbol Meaning Display language The words in the K (middle soft key) brackets indicate button {V}/{^}: “Handset Setup” i names on the handset and base unit. Example: {V}/{^}: “Display Setup”... - Page 17 Preparation Note: L To correct a digit, press {<} or {>} to move the cursor to the digit, then make the correction. L The date and time may be incorrect after a power failure. In this case, set the date and time again.
-
Page 18: Making/Answering Calls
Making/Answering Calls {V}/{^}: “Yes” i M i {ih} Making calls Pause (for PBX/long distance service users) Lift the handset and dial the phone A pause is sometimes required when number. L To correct a digit, press {C/T}. making calls using a PBX or long distance service. -
Page 19: Useful Features During A Call
Making/Answering Calls the 2nd caller’s information is displayed Adjusting the handset ringer volume after you hear the call waiting tone on the Press {^} or {V} repeatedly to select the handset. desired volume while the handset is Press {R/E} to answer the 2nd call. ringing for an incoming call. -
Page 20: Key Lock
Making/Answering Calls Key lock The handset can be locked so that no calls or settings can be made. Incoming calls can be answered, but all other functions are disabled while key lock is To turn key lock on, press K (middle soft key) for about 3 seconds. -
Page 21: Phonebook
Phonebook L If there is no entry corresponding to the character you selected, the Handset phonebook next entry is displayed. L To change the character entry The phonebook allows you to make calls mode: without having to dial manually. You can ( i {V}/{^}: Select the add 100 names and phone numbers. -
Page 22: Copying Phonebook Entries
You can copy phonebook entries to the having to dial manually. phonebook of another compatible During an outside call, press n. Panasonic handset. {V}/{^}: Select the desired entry. Press M to dial the number. Copying an entry Find the desired entry (page 21). -
Page 23: Programming
Programming Programmable settings You can customise the unit by programming the following features using the handset. Programming by scrolling through the display menus K (middle soft key) Press {V} or {^} to select the desired top-menu. i M Press {V} or {^} to select the desired item in sub-menu 1. i M L In some cases, you may need to select from sub-menu 2. - Page 24 Programming Top-menu Sub-menu 1 Sub-menu 2 Page – – Base Unit Setup Ringer Volume <Medium> – Recall/Flash <600 msec.> – Area Code – Base Unit PIN <0000> – Repeater Mode <Off> *1 If you program these settings using one of the handsets, you do not need to program the same item using another handset.
-
Page 25: Special Instructions For Programmable Settings
Programming Note: L You can skip to step 4 by pressing Special instructions {R/E} in standby mode. for programmable L To stop the alarm, press any dial key or place the handset on the base unit settings or charger. L When the handset is in use, the alarm Alarm will not sound until the handset is in standby mode. -
Page 26: Registering A Unit
PIN. The unit will not {V}/{^}: “Register H.set” i reveal the PIN to you. If you forget your PIN, contact your nearest Base unit: Panasonic service centre. Proceed with the operation for your K (middle soft key) model. {V}/{^}: “Base Unit Setup” i ■... - Page 27 You can increase the signal range of the L When the handset has been base unit by using a DECT repeater. registered successfully, w stops Please use only the Panasonic DECT flashing. repeater noted on page 5. Contact your Note: Panasonic dealer for details.
-
Page 28: Caller Id Service
Caller ID Service Caller information for the last 50 callers is logged in the caller list from the most Using Caller ID service recent call to the oldest. L If the unit cannot receive caller Important: information, the following is displayed: L This unit is Caller ID compatible. -
Page 29: Caller List
Caller ID Service {V}/{^}: “Edit and Call” i Caller list Edit the number. L Press dial key ({0} to {9}) to add, Important: L Only 1 person can access the caller {C/T} to delete. list at a time. Viewing the caller list and Erasing caller information calling back K (middle soft key) -
Page 30: Answering System
Answering System greeting message asking callers to call again later. Answering system – If you recorded your own greeting message, the same message is still Available for: announced to callers even though KX-TG7321/KX-TG7322 their messages are not recorded. The answering system can answer and record calls for you when you are unavailable to answer the phone. -
Page 31: Greeting Message
Answering System {V}/{^}: “Play Greeting” i Greeting message {ih} When the unit answers a call, callers hear a greeting message. You can Erasing your greeting record your own greeting message or message use a pre-recorded greeting message. If you erase your own greeting message, the unit plays a pre-recorded greeting Recording your greeting message for callers. -
Page 32: Listening To Messages Using The Handset
Answering System Operating the answering Operating the answering system system You can also operate the answering Operation system by pressing dial keys or soft keys {^} or {V} Adjust the speaker on the handset. K (middle soft key) i {V}/{^}: volume “Answer System”... -
Page 33: Remote Operation
Answering System unauthorised parties from listening to Erasing all messages your messages remotely. K (middle soft key) Important: L In order to operate the answering {V}/{^}: “Answer System” i system remotely, you must first set a remote access code. {V}/{^}: “Erase Message” i K (middle soft key) {V}/{^}: “Answer System”... -
Page 34: Answering System Settings
Answering System Enter your remote access code Remote commands within 10 seconds after the long beep. You can press dial keys to access L The greeting message is played certain answering system functions without waiting for the voice guidance to back. - Page 35 Answering System {V}/{^}: “Answer System” i the call prior to the service provided by your service provider/telephone company. {V}/{^}: “Settings” i M Note: {V}/{^}: “Number of Rings” i L This service can capture messages while the user is on a dial-up Internet {V}/{^}: Select the desired setting.
- Page 36 Answering System {V}/{^}: Select the desired setting. i M i {ih}...
-
Page 37: Voice Mail Service
Voice Mail Service Voice mail service To receive Call Minder or Message Mailbox messages, please note the following: “Call Minder” and “Message Mailbox” are automatic answering services offered by your service provider/ telephone company. After you subscribe to this service, your service provider/telephone company’s Voice Mail system will answer calls for you when you are unavailable to answer the... -
Page 38: Intercom/Locator
Intercom/Locator Intercom Transferring calls Intercom calls can be made between Outside calls can be transferred handsets. between 2 handsets. During an outside call, press {INT} Note: L If you receive an outside call while to put the call on hold. talking on the intercom, you hear Enter the desired handset number interrupt tones. -
Page 39: Conference Calls
Intercom/Locator Conference calls Handset locator 2 handsets can have a conference call You can locate a misplaced handset by with an outside party. The following 2 paging it. methods are available: Base unit: – Another person presses {C} while Press {x}. one person is talking with an outside L All registered handsets beep for 1 party (“Call share”, page 19). -
Page 40: Useful Information
Useful Information Character entry The dial keys are used to enter characters and numbers. Each dial key has multiple characters assigned to it. The available character entry modes are Alphabet (ABC), Numeric (0-9), Greek (F), Extended 1 (G), Extended 2 (H), and Cyrillic (I). - Page 41 Useful Information Extended 1 character table (N) L The following are used for both uppercase and lowercase: Extended 2 character table (O) L The following are used for both uppercase and lowercase: Cyrillic character table (P)
-
Page 42: Error Messages
Useful Information Error messages If the unit detects a problem, one of the following messages is shown on the display. Display message Cause/solution L Erase unnecessary messages (page 32). Answer Sys. Full L The supplied telephone line cord has not been Check Tel Line connected yet or not connected properly. -
Page 43: Troubleshooting
Useful Information Troubleshooting If you still have difficulties after following the instructions in this section, disconnect the base unit’s AC adaptor and turn off the handset, then reconnect the base unit’s AC adaptor and turn on the handset. General use Problem Cause/solution L Make sure the batteries are installed correctly... - Page 44 Cancel unused handset registrations from the base unit (page 27). L You entered the wrong PIN. If you forget your PIN, contact your nearest Panasonic service centre. L Place the handset and the base unit away from other electrical appliances.
- Page 45 Useful Information Making/answering calls, intercom Problem Cause/solution w is flashing. L The handset is not registered to the base unit. Register it (page 26). L The handset is too far from the base unit. Move closer. L The base unit’s AC adaptor is not connected. Check the connections.
- Page 46 Useful Information Caller ID Problem Cause/solution L You must subscribe to a Caller ID service. Caller information is not displayed. Contact your service provider/telephone company for details. L If your unit is connected to any additional telephone equipment, remove and plug the unit directly into the wall socket.
- Page 47 Insert the batteries and charge fully before use. If the unit does not work properly, contact your nearest Panasonic service centre. Caution: L To avoid permanent damage, do not use a microwave oven to speed up the drying...
-
Page 48: Specifications
: Approx. 170 g Base unit ■ Duplex procedure: Handset: Approx. 130 g TDMA (Time Division Multiple : Approx. 60 g Charger Access) *1 KX-TG7301/KX-TG7302 ■ Channel spacing: *2 KX-TG7321/KX-TG7322 1,728 kHz *3 KX-TG7302/KX-TG7322 ■ Bit rate: Note: 1,152 kbit/s L Design and specifications are subject ■... -
Page 49: Index
Index Pause: 18 Phonebook: 21 Index Phonebook copy: 22 PIN: 26 Additional handsets: 26 Power failure: 13 Alarm: 25 Power on/off: 16 Answering calls: 18 Recall/flash: 19, 24 Answering system: 30 Redialling: 18 Call screening: 30, 35 Repeater: 27 Erasing messages: 32, 34 Ringer tone: 23 Greeting only: 35 Listening to messages: 31, 32, 33... - Page 50 Notes...
- Page 51 Notes...
- Page 52 1-62, 4-chome, Minoshima, Hakata-ku, Fukuoka 812-8531, Japan Copyright: This material is copyrighted by Panasonic Communications Co., Ltd., and may be reproduced for internal use only. All other reproduction, in whole or in part, is prohibited without the written consent of Panasonic Communications Co., Ltd.