
Related Manuals for Samsung NAS Series


Summary of Contents for Samsung NAS Series
- Page 1 QNAP Enterprise-class NAS Series: ES1640dc v2, ES1640dc QNAP Enterprise-class JBOD Series: EJ1600 v2, EJ1600 Hardware User Manual Version 1.0 ©2017. QNAP Systems, Inc. All Rights Reserved.
- Page 2 Thank you for choosing QNAP products! This user manual provides description of the hardware of the ES NAS and relevant guideline of certain functions. Please read carefully and strictly adhere to the instructions of the manual. This user manual is applicable to the following ES NAS models: ES1640dc v2 and ES1640dc This user manual is applicable to the following EJ JBOD models: EJ1600 v2 and EJ1600...
- Page 3 Regulatory Notice FCC Notice The QNAP NAS complies with different FCC compliance classes. Please refer to Appendix C for details. Once the class of the device is determined, refer to the following corresponding statement. ======================================================= FCC Class A Notice This device complies with Part 15 of the FCC Rules. Operation is subject to the following two conditions: This device may not cause harmful interference.
- Page 4 CE NOTICE The QNAP NAS complies with different CE compliance classes. Please refer to Appendix C for details.
- Page 5 Symbols in this document This icon indicates the instructions must be strictly followed. Failure to do so could result in injury to human body or death. Warning This icon indicates the action may lead to disk clearance or loss OR failure to follow the instructions could result in data damage, disk damage, or Caution product damage.
-
Page 6: Table Of Contents
Table of Contents Chapter 1. Introduction to QNAP ES NAS series ..................9 Chapter 2. Hardware Specifications......................11 Chapter 3. System Components ......................... 14 Front Panel Features ..........................14 Font Panel LEDs and Buttons ........................14 Rear Panel Features ..........................17 Rear Panel LEDs and Buttons ........................ - Page 7 Chapter 4. Service and Maintenance ......................34 Safety Considerations ..........................34 Preparation Procedures .......................... 34 Powering Down the ES NAS ........................35 Replacing the battery backup unit (BBU) ....................35 Replacing hot-plug power supply ......................36 Replacing hot-plug SAS HDDs ......................... 37 Replacing field-replaceable fan modules ....................
- Page 8 Safety Warnings The ES NAS can operate normally in temperatures of 0ºC–40ºC (32ºF -104ºF) and relative humidity of 5%–95%. Please make sure the environment is well-ventilated. The power cord and devices connected to the ES NAS must provide correct supply voltage (770W, 100-240 V@50/60Hz).
-
Page 9: Chapter 1. Introduction To Qnap Es Nas Series
QNAP NAS product lines. The ES NAS series consists of two new major products: the ES1640dc v2 and the ES1640dc. Both of these models are ideal for mid- to large-scale network storage systems. - Page 10 Cinder nodes. Data safety and encryption Combined with the world-class business resiliency and encryption features, the ES NAS series provides a unique combination of high availability, performance, and security. QES built-in support for shared folder and LUN encryption ensures critical business-sensitive data is protected. In addition, WORM (Write Once Read Many) functionality protects data from being tampered at a shared-folder level.
-
Page 11: Chapter 2. Hardware Specifications
Chapter 2. Hardware Specifications Caution: Modifying the hardware, software, or firmware of the QNAP products will void the warranty. QNAP is not responsible for any form of damage or loss of data caused by modifying the QNAP products. Users should bear their own risks of all sorts of possible data loss or system instabilities due to changing the hardware parts, modifying the default system firmware or installing any unauthorized third party applications on QNAP products. - Page 12 10GbE LAN Port (x 2 Four SFP+ (Intel XL710-AM1) Two RJ45 (Intel X540-BT2) for every system) PCIe expansion slots PCIe Slot x8 (Gen3 x8): PCIe Slot x8 (Gen2 x8): (x 2 for every system) Pre-installed with a LAN-10G2T- Reserved for 40GbE or 10GbE X550 NIC (2 x 10GbE RJ45 ports), LAN card replaceable with a 40GbE NIC...
- Page 13 Dimensions (mm) 618 (Depth) x 446.2 (Width) x 132 618 (Depth) x 446.2 (Width) x 132 (Height), excluding the handles (Height), excluding the handles Weight (Net) 24.11kg 24.11kg All product specifications are subject to change without prior notice.
-
Page 14: Chapter 3. System Components
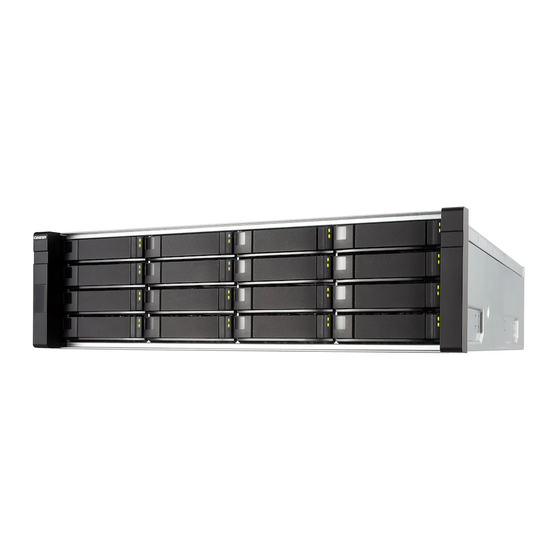
Chapter 3. System Components Front Panel Features The power button, Power/Status LED indicators and LCD status display are conveniently located at the front panel for easy access. ES1640dc v2: ① ② ③ ④ ⑤ ES1640dc: ① ② ③ ④ ⑤ Note: Refer to the next section for detailed descriptions on these features. - Page 15 Off = System power off Status Green Green =The system is operating normally. Red = One or more of the following conditions exist: • There are system errors or warnings (e.g. degraded RAID mode, memory failure, fan/power supply failure, system/disk temperature too high, storage pool reaching threshold value) recorded in system logs of the QES to notify system administrators.
- Page 16 * The dual active-active controller system enables a single controller to take over the pool disk resources owned by the other controller in the event of a controller failure. Takeovers can be initiated manually or be set up with the automatic system failover protection (please refer to the software user manual).
-
Page 17: Rear Panel Features
Rear Panel Features The rear panel consists of two Storage Controllers, both including I/O expansion slots, Ethernet ports, USB connectors, onboard mini-SAS ports, a SAS HBA, the Storage Controller power-on button, a reset button, the system management port and the BBU. ES1640dc v2: ①... -
Page 18: Rear Panel Leds And Buttons
Rear Panel LEDs and Buttons Item Description Status Color Power supply LED Green On = Power turned on and power supply Orange functioning properly Flashing green= System off Flashing orange= AC power cord is unplugged Off = One or more of the following conditions exist: •... -
Page 19: Storage Controllers
for about 5 seconds. It provides the same function as the Power on and Shut Down function in the High Availability app on QES. 9 (Left) 10 Gigabit Ethernet RJ- Green Green = 10 GbE connection 45 Ports Orange Orange = 1 GbE connection LAN1/LAN2 Speed LED Off = 100Mbps connection 9 (Right) -
Page 20: Redundant Power Supply
4 x SFP+ (Intel® XL710-AM1) for Model ES1640dc v2 or 2 x RJ45 (Intel® X540-BT2) for Model ES1640dc The ES NAS series is architected and validated with Intel® Xeon® processor E5 v2. The Ethernet ports based on the Intel XL710 or X540 Ethernet controller implement hardware optimizations and off-loads for exceptional performance. -
Page 21: Storage Features
40GbE networking can be easily achieved with the installation of network cards via the PCIe expansion (PCIe Gen3 x8). On the ES1640dc v2, the PCIe slot is pre-installed with a LAN-10G2T-X550 network card that offers two 10GbE RJ45 ports. Users can replace it with a dual-port QSFP+ 40GbE NIC to provide massive data transmission potential and to simplify network cabling. - Page 22 does not provide any redundancy protection. So, in the event that a disk is corrupted or otherwise damaged, all data on that disk will be lost. RAID 0 Striping A striping RAID group combines two or more disks into one large, logic al disk. It offers the fastest disk ac cess performance but no data redundancy protection in the event of disk failure or damage.
- Page 23 disk failures and the system can still operate properly. RAID 10 RAID 10 is a combination of RAID 1 (mirroring) and RAID 0 (striping), without parity. RAID 10 is a stripe across a number of disks to provide fault tolerance and high speed data transfer.
-
Page 24: Reset Button Behavior
protect your data. RAID-TP requires a minimum of 4 drives. Reset Button Behavior Reset button: Press to reset the system settings. Basic system reset Advanced system reset System (1 beep) (2 beeps) All ES models 3 sec 10 sec Basic system reset (3 sec) Press the reset button for 3 seconds, a beep sound will be heard. -
Page 25: Service Port
Service port Note: The service port is the main point for hardware installation, configuration, and maintenance activities and it should only be used by QNAP technical support personnel or when you are instructed by QNAP technical support. The service port is an RS-232 port with RJ-11 connector. Please use the appropriate cable/adapter (i.e.RJ-11 to DB9/DB9 to USB or RJ-11 to USB) to connect this port with your computer. -
Page 26: Connecting Expansion Units
Connecting Expansion Units The ES NAS Series offers the expansion enclosures for expanding the storage space beyond the original drive number offered by the base ES NAS. There are two models of expansions to choose from: the EJ1600 v2 and the EJ1600. These expansions connect to the ES NAS system through the 12 or 6 Gbps SAS expansion ports (depending on the base enclosure model) on the Storage Controller. - Page 27 The following figure is an example of the storage system ES1640dc and expansion enclosure EJ1600: Expansion Expansion IN PORT OUT PORT IN PORT OUT PORT As shown in the above figure, the cabling method used to connect expansion units creates a redundant- cross loop configuration.
- Page 28 1. Connect either of the mini-SAS ports of the SAS HBA on Storage Controller A in the ES NAS and the (SAS) IN PORT on the left controller in the expansion enclosure with a mini-SAS cable. 2. (Repeat the above step for Storage Controller B) Connect either of the mini-SAS ports of the SAS HBA on Storage Controller B in the ES NAS and the (SAS) IN PORT on the right controller in the expansion enclosure with a mini-SAS cable.
-
Page 29: Expansion Units Features
Expansion Units Features Just like the ES NAS system, the power button, Power/Status LED indicators and LCD status display are conveniently located at the front panel on the EJ expansion units for easy access. EJ1600 v2: ① ② ③ ④ ⑤... -
Page 30: Enclosure Ids
LCD status display The two-digit number represents the expansion unit number. It corresponds to the REXP# in the Storage Manager of the QES. Enclosure IDs Each expansion enclosure has an ID number associated with it. The ID allows each enclosure to be identified properly to the ES NAS system. - Page 31 EJ1600: ①②③④ ⑤ ⑥ ⑦ Service Ports Onboard mini-SAS Ports...
-
Page 32: Rear Panel Leds And Buttons
Rear Panel LEDs and Buttons Status Green Off = The system is powered off. Orange Green = The system is operating normally. Flashing green = The system is booting. Green Green = The fan is operating normally. Orange Orange = Damage/error Off = Not detecting any fans Connection Status Green... -
Page 33: Service Port Of Expansion Units
Service port of expansion units Note: The service port is the main point for hardware installation, configuration, and maintenance activities and it should only be used by QNAP technical support personnel or when you are instructed by QNAP technical support. The service port of the expansion unit is an RS-232 port with DB-9 (or DE-9) connector. -
Page 34: Chapter 4. Service And Maintenance
Chapter 4. Service and Maintenance Note: This chapter is intended for qualified IT personnel and IT administrators. QNAP assumes you are a qualified IT technician. Safety Considerations Before performing service procedures, review all the safety information. To prevent damaging the device, be aware of the warnings below. A discharge of static electricity from finders or electric conductors may damage system boards or other static-sensitive devices. -
Page 35: Powering Down The Es Nas
• Power down the system • If the rack environment or the ES NAS location is hard for performing maintenance service, remove the ES NAS from the rack. Reverse rack mounting procedure to remove the ES NAS from the rack. Please refer to the next chapter: Quick-Deploy Rack kit installation for details. Powering Down the ES NAS WARNING To reduce the risk of personal injury, electric shock, or damage to the device, remove... -
Page 36: Replacing Hot-Plug Power Supply
To replace the component, reverse the removal procedure. Replacing hot-plug power supply The system comes with two hot-plug power supplies (770W). These PSUs are capable of redundant power supply; when one of them fails, the other will provide power to the entire system. To remove a hot-plug power supply: 1. -
Page 37: Replacing Hot-Plug Sas Hdds
Warning: To reduce the risk of electric shock or damage to the equipment, do not connect the power cord to the power supply until the power supply is installed to the device. Replacing hot-plug SAS HDDs Warning: Do not remove the bottom 4 HDDs as they are used to install or configure the operating system. To avoid data loss, please back up all data on the hard drives. -
Page 38: Replacing Field-Replaceable Fan Modules
Replacing field-replaceable fan modules To remove a fan: 1. Shut down the respective Storage Controller that contains this fan either from QES (refer to the High Availability app in software manual) or by pressing the power button on the Storage Controller’s back panel. - Page 39 3. Take off the top cover of the Storage Controller by uninstalling the screws (3 at the top, 2 at each side).
-
Page 40: Installing Dimms
4. Remove the screw that secures the metal bracket to the chassis then remove the metal bracket. 5. Align and insert the expansion card into the PCIe slot. 6. Replace the screw of the metal bracket to secure the card to the chassis. Note: When removing or inserting the Storage Controller, please use the handle of the Storage Controller to ensure proper handling of the Storage Controller. - Page 41 3. Take off the top cover of the Storage Controller by uninstalling the screws (3 at the top, 2 at each side).
- Page 42 4. Insert the DIMMs. Note: To replace or upgrade a system component, refer to the QNAP website for a list of optional accessories that have been validated with the ES NAS series.
-
Page 43: Chapter 5. Quick-Deploy Rack Kit Installation Instructions
Chapter 5. Quick-Deploy Rack kit Installation Instructions Overview This chapter details instructions for installing QNAP rack rails into square-hole racks for the 3U ES NAS. These quick rails automatically latch into the square holes of racks and greatly reduce installation time. Kit contents Item Figure... -
Page 44: Mounting The Device
Warning Ensure that the rack has anti-tip measures in place. Such measures may include floor-bolting and anti-tip feet specified by the rack manufacturer and applicable codes. Warning To reduce the risk of personal injury or damage to the equipment, at least two people are required to lift the ES NAS during installation or removal. - Page 45 Place the cage nuts 6 holes (or 2U space from the centerline of the rail) above and snapt it into the square holes of the front columns. Theses cage nuts will be used to attach the ES NAS to the rack later (Figure 2).
- Page 46 Figure 4: Attach the screws...
-
Page 47: Appendix A: Multipathing Support For High Availability
Appendix A: Multipathing Support for High Availability ES NAS support connections from multiple hosts with multiple-port configurations in an iSCSI storage area networking (SAN) environment and utilizes standard Ethernet infrastructure. This allows connectivity of a host computer running a Windows server-class operating system with integrated Multipath I/O (MPIO) support. - Page 48 Using this configuration with MPIO, each network port on the host server will be able to see both controllers and use alternate paths to communicate with the ES NAS.
-
Page 49: Appendix B: Beep Alarm
Appendix B: Beep alarm The beep alarm can be disabled in “Control Panel” > “System Settings” > “Hardware”> “Buzzer”. Beep Times Description Short beep 1) The ES NAS/SAN is starting up (0.5 Sec) 2) The ES NAS/SAN is being shut down (software shutdown) 3) The user presses the reset button to reset the ES NAS/SAN 4) The ES NAS is performing giveback. -
Page 50: Appendix C. Product Compliance Class
Appendix C. Product Compliance Class NAS Models ES1640dc v2 Class A Class A ES1640dc Class A Class A... -
Page 51: Technical Support
Technical Support QNAP provides dedicated online support and customer service via instant messenger. Online Support: http://helpdesk.qnap.com/ Forum: http://forum.qnap.com Technical Support in the USA and Canada: Online Support: http://helpdesk.qnap.com/ TEL: +1-909-595-2782 #3 Address: 168 University Parkway, Pomona CA 91768 Service Hours: 08:00-17:00 (GMT- 08:00 Pacific Time, Monday to Friday) -
Page 52: Gnu General Public License
GNU GENERAL PUBLIC LICENSE Version 3, 29 June 2007 Copyright © 2007 Free Software Foundation, Inc. <http://fsf.org/> Everyone is permitted to copy and distribute verbatim copies of this license document, but changing it is not allowed. Preamble The GNU General Public License is a free license for software and other kinds of works. The licenses for most software and other practical works are designed to take away your freedom to share and change the works. - Page 53 Developers that use the GNU GPL protect your rights with two steps: (1) assert copyright on the software, and (2) offer you this License giving you legal permission to copy, distribute and/or modify it. For the developers' and authors' protection, the GPL clearly explains that there is no warranty for this free software.
- Page 54 “The Program” refers to any copyrightable work licensed under this License. Each licensee is addressed as “you”. “Licensees” and “recipients” may be individuals or organizations. To “modify” a work means to copy from or adapt all or part of the work in a fashion requiring copyright permission, other than the making of an exact copy.
- Page 55 The “System Libraries” of an executable work include anything, other than the work as a whole, that (a) is included in the normal form of packaging a Major Component, but which is not part of that Major Component, and (b) serves only to enable use of the work with that Major Component, or to implement a Standard Interface for which an implementation is available to the public in source code form.
- Page 56 do not control copyright. Those thus making or running the covered works for you must do so exclusively on your behalf, under your direction and control, on terms that prohibit them from making any copies of your copyrighted material outside their relationship with you. Conveying under any other circumstances is permitted solely under the conditions stated below.
- Page 57 a) The work must carry prominent notices stating that you modified it, and giving a relevant date. b) The work must carry prominent notices stating that it is released under this License and any conditions added under section 7. This requirement modifies the requirement in section 4 to “keep intact all notices”.
- Page 58 than your reasonable cost of physically performing this conveying of source, or (2) access to copy the Corresponding Source from a network server at no charge. c) Convey individual copies of the object code with a copy of the written offer to provide the Corresponding Source.
- Page 59 If you convey an object code work under this section in, or with, or specifically for use in, a User Product, and the conveying occurs as part of a transaction in which the right of possession and use of the User Product is transferred to the recipient in perpetuity or for a fixed term (regardless of how the transaction is characterized), the Corresponding Source conveyed under this section must be accompanied by the Installation Information.
- Page 60 a) Disclaiming warranty or limiting liability differently from the terms of sections 15 and 16 of this License; or b) Requiring preservation of specified reasonable legal notices or author attributions in that material or in the Appropriate Legal Notices displayed by works containing it; or c) Prohibiting misrepresentation of the origin of that material, or requiring that modified versions of such material be marked in reasonable ways as different from the original version;...
- Page 61 However, if you cease all violation of this License, then your license from a particular copyright holder is reinstated (a) provisionally, unless and until the copyright holder explicitly and finally terminates your license, and (b) permanently, if the copyright holder fails to notify you of the violation by some reasonable means prior to 60 days after the cessation.
- Page 62 You may not impose any further restrictions on the exercise of the rights granted or affirmed under this License. For example, you may not impose a license fee, royalty, or other charge for exercise of rights granted under this License, and you may not initiate litigation (including a cross-claim or counterclaim in a lawsuit) alleging that any patent claim is infringed by making, using, selling, offering for sale, or importing the Program or any portion of it.
- Page 63 recipient's use of the covered work in a country, would infringe one or more identifiable patents in that country that you have reason to believe are valid. If, pursuant to or in connection with a single transaction or arrangement, you convey, or propagate by procuring conveyance of, a covered work, and grant a patent license to some of the parties receiving the covered work authorizing them to use, propagate, modify or convey a specific copy of the covered work, then the patent license you grant is automatically extended to all recipients of...
- Page 64 Notwithstanding any other provision of this License, you have permission to link or combine any covered work with a work licensed under version 3 of the GNU Affero General Public License into a single combined work, and to convey the resulting work. The terms of this License will continue to apply to the part which is the covered work, but the special requirements of the GNU Affero General Public License, section 13, concerning interaction through a network will apply to the combination as such.
- Page 65 WITH YOU. SHOULD THE PROGRAM PROVE DEFECTIVE, YOU ASSUME THE COST OF ALL NECESSARY SERVICING, REPAIR OR CORRECTION. 16. Limitation of Liability. IN NO EVENT UNLESS REQUIRED BY APPLICABLE LAW OR AGREED TO IN WRITING WILL ANY COPYRIGHT HOLDER, OR ANY OTHER PARTY WHO MODIFIES AND/OR CONVEYS THE PROGRAM AS PERMITTED ABOVE, BE LIABLE TO YOU FOR DAMAGES, INCLUDING ANY GENERAL, SPECIAL, INCIDENTAL OR CONSEQUENTIAL DAMAGES ARISING OUT OF THE USE OR INABILITY TO USE THE PROGRAM (INCLUDING BUT NOT LIMITED TO LOSS OF DATA OR DATA BEING RENDERED INACCURATE OR LOSSES SUSTAINED BY...