Makita XWT07XV Instruction Manual
Hide thumbs
Also See for XWT07XV:
- Instruction manual (33 pages) ,
- Instruction manual (12 pages) ,
- Instruction manual (12 pages)
Table of Contents

Related Manuals for Makita XWT07XV


Summary of Contents for Makita XWT07XV
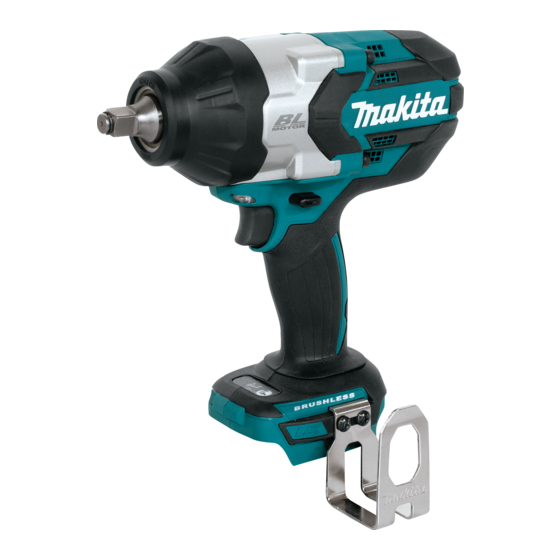
- Page 1 INSTRUCTION MANUAL MANUAL DE INSTRUCCIONES Cordless Impact Wrench Llave de Impacto Inalámbrica XWT07 XWT08 XWT09 XWT07XV XWT08XV XWT09XV IMPORTANT: Read Before Using. IMPORTANTE: Lea antes de usar.
-
Page 2: Specifications
ENGLISH (Original instructions) SPECIFICATIONS Model: XWT07 / XWT07XV XWT08 / XWT08XV XWT09 / XWT09XV Fastening capacities Standard bolt M12 - M30 (1/2″ - 1-1/4″) M12 - M24 (1/2″ - 1″) High tensile bolt M10 - M24 (3/8″ - 1″) M10 - M22 (3/8″ - 7/8″) Square drive 19 mm (3/4″) - Page 3 Personal Safety Use the power tool, accessories and tool bits etc. in accordance with these instructions, tak- Stay alert, watch what you are doing and use ing into account the working conditions and common sense when operating a power tool. the work to be performed.
- Page 4 It will also void the Makita warranty for the Makita tool and charger. revolutions or reciprocation per minute Tips for maintaining maximum...
-
Page 5: Functional Description
Battery protection system FUNCTIONAL DESCRIPTION Lithium-ion battery with star marking CAUTION: Always be sure that the tool is switched off and the battery cartridge is removed before adjusting or checking function on the tool. Installing or removing battery cartridge CAUTION: Always switch off the tool before installing or removing of the battery cartridge. -
Page 6: Electric Brake
NOTE: While pulling the switch trigger, the lamp consistently fails to quickly stop after the switch trigger status cannot be changed. is released, have the tool serviced at a Makita service center. NOTE: For approximately 10 seconds after releasing the switch trigger, the lamp status can be changed. - Page 7 For approximately one minute after releasing the switch trigger, the impact force can be changed. Specifications of each impact force grade Impact force grade displayed on Maximum blows Application panel XWT07 / XWT08 / XWT09 / XWT07XV XWT08XV XWT09XV Hard 2,200 min (/min) Tightening when force and speed are desired. Medium 2,000 min (/min) Tightening when you need good controlled power.
- Page 8 An incorrect size impact socket will result in inac- curate and inconsistent fastening torque and/or damage to the bolt or nut. Installing or removing impact socket Only for Model XWT07, XWT08, XWT07XV, XWT08XV (optional accessory) CAUTION: Make sure that the impact socket and the mounting portion are not damaged before installing the impact socket.
-
Page 9: Installing Hook
Installing or removing drill bit/ Ring socket adapter Only for Model XWT09, XWT09XV Only for Model XWT09, XWT09XV (optional accessory) ► 1. Bracket 2. Ring 3. Screws The ring is convenient for hanging the tool with hoist. A=11.2 mm (7/16″) First, place the rope through the ring. - Page 10 Model XWT07, XWT07XV Proper fastening torque for standard bolt N•m (ft•lbs) (590) M30(1-1/4″) M30(1-1/4″) (440) Hold the tool firmly and place the impact socket over the bolt or nut. Turn the tool on and fasten for the proper fastening time.
- Page 11 Model XWT08, XWT08XV Model XWT09, XWT09XV Proper fastening torque for standard bolt Proper fastening torque for standard bolt N•m N•m (ft•lbs) (ft•lbs) (590) M30(1-1/4″) M24(1″) (300) M30(1-1/4″) M24(1″) (440) M20(3/4″) M24(1″) M20(3/4″) (300) (150) M24(1″) (150) 1. Fastening time (second) 2. Fastening torque 1.
-
Page 12: Maintenance
The manner of holding the tool or the material inspection shows the trouble is caused by defective of driving position to be fastened will affect the workmanship or material, Makita will repair (or at our torque. option, replace) without charge. -
Page 13: Especificaciones
ESPAÑOL (Instrucciones originales) ESPECIFICACIONES Modelo: XWT07 / XWT07XV XWT08 / XWT08XV XWT09 / XWT09XV Capacidades de apriete Perno estándar 12 mm - 30 mm (1/2″ - 1-1/4″) 12 mm - 24 mm (1/2″ - 1″) Perno de alta resistencia 10 mm - 24 mm (3/8″ - 1″) 10 mm - 22 mm (3/8″... - Page 14 No exponga las herramientas eléctricas a la Mantenimiento y uso de la herramienta eléctrica lluvia ni a condiciones húmedas. La entrada de No fuerce la herramienta eléctrica. Utilice la agua en una herramienta eléctrica aumentará el herramienta eléctrica correcta para su aplica- riesgo de que se produzca una descarga eléctrica.
- Page 15 No utilice una herramienta ni una batería que 10. No toque la broca de taladro o la pieza de tra- estén dañadas o hayan sido modificadas. Las bajo inmediatamente después de la operación, baterías dañadas o modificadas podrían oca- ya que podría estar extremadamente caliente y sionar una situación inesperada provocando un ocasionar quemaduras en la piel.
-
Page 16: Descripción Del Funcionamiento
Asimismo, esto inva- Para quitar el cartucho de batería, deslícelo de la herra- lidará la garantía de Makita para la herramienta y el mienta mientras desliza el botón sobre la parte delan- cargador Makita. - Page 17 Oprima el botón de verificación en el cartucho de la soltar el gatillo interruptor, lleve la herramienta a mante- batería para que indique la capacidad restante de la nimiento a un centro de servicio Makita. batería. Las luces indicadoras se iluminarán por algu- nos segundos.
- Page 18 Iluminación de la luz delantera Accionamiento del conmutador de inversión de giro PRECAUCIÓN: No mire a la luz ni vea a la fuente de luz directamente. ► 1. Palanca del interruptor de inversión ► 1. Luz PRECAUCIÓN: Confirme siempre la direc- ción de rotación antes de la operación.
- Page 19 Apriete cuando se requiere un ajuste fino con un perno de diámetro pequeño. Gráfico de fuerza de impacto/tamaño de perno correspondiente (referencia) Grado de la fuerza de impacto XWT07 / XWT07XV XWT08 / XWT08XV XWT09 / XWT09XV mostrado en el panel...
-
Page 20: Montaje
Para dados de impacto con anillo en MONTAJE O y pasador Solamente para el modelo XWT07, XWT07XV PRECAUCIÓN: Asegúrese siempre de que la herramienta esté apagada y el cartucho de batería haya sido extraído antes de realizar cualquier trabajo en la misma. -
Page 21: Operación
Instalación del gancho ► 1. Broca 2. Mandril Para instalar la broca, jale el mandril en dirección de la ► 1. Ranura 2. Gancho 3. Tornillo flecha e inserte la broca en el mandril hasta donde se pueda. El gancho resulta útil para colgar temporalmente la Luego suelte el mandril para asegurar la broca. - Page 22 Modelo XWT07, XWT07XV Modelo XWT08, XWT08XV Torsión de apriete apropiada para un perno Torsión de apriete apropiada para un perno estándar estándar N•m N•m (ft•lbs) (ft•lbs) 800 N•m 800 N•m (590 ft•lbs) (590 ft•lbs) 30 mm(1-1/4″) 30 mm(1-1/4″) 30 mm(1-1/4″) 30 mm(1-1/4″)
-
Page 23: Mantenimiento
1. Tiempo de apriete (segundos) 2. Torsión de apriete Para mantener la SEGURIDAD y FIABILIDAD del pro- ducto, las reparaciones, y cualquier otra tarea de man- tenimiento o ajuste deberán ser realizadas en centros de servicio autorizados o de fábrica Makita, empleando siempre repuestos Makita. 23 ESPAÑOL... -
Page 24: Accesorios Opcionales
Makita. Si la inspección muestra que el problema ha sido a causa de un defecto de mano de obra o material, Makita hará la reparación (o a su discreción, el reemplazo) sin ningún cargo. Esta garantía no aplica cuando: •... - Page 28 Para reducir la exposición a estos productos químicos: trabaje en un área bien ventilada y póngase el equipo de seguridad indicado, tal como las máscaras contra polvo que están especialmente diseñadas para filtrar partículas microscópicas. Makita Corporation 3-11-8, Sumiyoshi-cho, Anjo, Aichi 446-8502 Japan 885444-914...