
Related Manuals for Makita XCU04


Summary of Contents for Makita XCU04
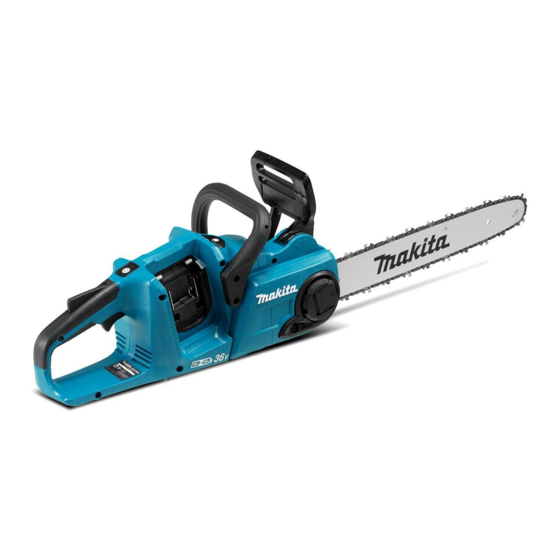
- Page 1 INSTRUCTION MANUAL MANUAL DE INSTRUCCIONES Cordless Chain Saw Electrosierra Inalámbrica XCU03 XCU04 IMPORTANT: Read Before Using. IMPORTANTE: Lea antes de usar.
-
Page 2: Specifications
ENGLISH (Original instructions) SPECIFICATIONS Model: XCU03 XCU04 Overall length (without guide bar) 443 mm (17-1/2″) Rated voltage D.C. 36 V Standard battery cartridge BL1815N, BL1820B, BL1830, BL1830B, BL1840B, BL1850B, BL1860B Net weight with 90PX 4.7 kg 4.8 kg (when using BL1815N) (10.4 lbs) -
Page 3: General Power Tool Safety Warnings
Prevent unintentional starting. Ensure the SAFETY WARNINGS switch is in the off-position before connecting to power source and/or battery pack, picking up or carrying the tool. Carrying power tools with General power tool safety warnings your finger on the switch or energising power tools that have the switch on invites accidents. - Page 4 When battery pack is not in use, keep it away Carry the chain saw by the front handle with from other metal objects, like paper clips, the chain saw switched off and away from your coins, keys, nails, screws or other small metal body.
- Page 5 Use of non-genuine Makita batteries, or batteries that have been altered, may result in the battery bursting causing fires, personal injury and damage. It will direct current also void the Makita warranty for the Makita tool and charger. feet per minute Tips for maintaining maximum...
-
Page 6: Parts Description
PARTS DESCRIPTION Battery cartridge Front hand guard Guide bar Saw chain Lever Adjusting dial Check button Capacity indicator Main power lamp Main power switch Lock-off lever Rear handle Switch trigger Front handle Oil tank cap Chain catcher Adjusting screw (for oil pump) Guide bar cover 6 ENGLISH... -
Page 7: Functional Description
Tool / battery protection system FUNCTIONAL DESCRIPTION The tool is equipped with a tool/battery protection sys- tem. This system automatically cuts off power to the motor to extend tool and battery life. The tool will auto- CAUTION: matically stop during operation if the tool or battery is Always be sure that the tool is placed under one of the following conditions. -
Page 8: Main Power Switch
NOTE: Depending on the conditions of use and the Capacity indicator status Remaining battery ambient temperature, the indication may differ slightly capacity from the actual capacity. Blinking Main power switch 50% to 100% WARNING: Always turn off the main power 20% to 50% switch when not in use. -
Page 9: Adjusting The Chain Lubrication
To prevent the switch trigger from being accidentally pulled, a lock- Checking the run-down brake off lever is provided. To start the tool, depress the lock-off lever and pull the switch trigger. Release the switch trigger to stop. CAUTION: If the saw chain does not stop within one second in this test, stop using the chain saw and consult our authorized service center. - Page 10 ► 1. Lever ► 1. Sprocket Turn the adjusting dial to "-" direction to release the saw chain tension. Rest the guide bar in place on the chain saw. Turn the adjusting dial to "-" direction to slide the adjusting pin in the direction of arrow. ►...
-
Page 11: Adjusting Saw Chain Tension
► 1. Lever 2. Sprocket cover ► 1. Adjusting dial 2. Guide bar 3. Saw chain Keep holding the guide bar lightly and tighten the Adjusting saw chain tension sprocket cover. Make sure that the saw chain does not loose at the lower side. CAUTION: Carry out the procedure of install- Return the lever to the original position. - Page 12 The oil delivery may otherwise be impaired. NOTICE: Use the saw chain oil exclusively for Makita chain saws or equivalent oil available in the market. NOTICE: Never use oil including dust and parti- cles or volatile oil.
- Page 13 Burrowing and parallel-to-grain cuts With the saw chain running, saw into the wood while using the rear handle to raise the saw and the front one to guide it. Use the spike bumper as a pivot. CAUTION: Burrowing and parallel-to-grain cuts Continue the cut by applying slight pressure to may only be carried out by persons with special train- the front handle, easing the saw back slightly.
-
Page 14: Maintenance
— Consider the wind speed and direction. Do not carry out felling work if the wind is gusting strongly. — Trimming of root swellings: Begin with the largest swellings. Make the vertical cut first, then the horizontal cut. — Stand to the side of the falling tree. Keep an area clear to the rear of the falling tree up to an angle of 45°... -
Page 15: Sharpening The Saw Chain
— The sharpening angle of 30° must be the same on all cut- Sharpening the saw chain ters. Different cutter angles cause the chain to run roughly and unevenly, accelerate wear, and lead to chain breaks. Sharpen the saw chain when: —... -
Page 16: Cleaning The Guide Bar
Cleaning the oil discharge hole Small dust or particles may be built up in the oil dis- charge hole during operation. These dust or particles may impair the oil to flow and cause an insufficient lubrication on the whole saw chain. When a poor chain oil delivery occurs at the top of guide bar, clean the oil discharge hole as follows. -
Page 17: Storing The Tool
Oil tank cap Check tightness. Chain catcher Inspection. Screws and Inspection. nuts To maintain product SAFETY and RELIABILITY, repairs, any other maintenance or adjustment should be performed by Makita Authorized or Factory Service Centers, always using Makita replacement parts. 17 ENGLISH... -
Page 18: Troubleshooting
Before asking for repairs, conduct your own inspection first. If you find a problem that is not explained in the manual, do not attempt to dismantle the tool. Instead, ask Makita Authorized Service Centers, always using Makita replace- ment parts for repairs. -
Page 19: Optional Accessories
IN NO EVENT SHALL MAKITA BE LIABLE FOR ANY OPTIONAL INDIRECT, INCIDENTAL OR CONSEQUENTIAL DAMAGES FROM THE SALE OR USE OF THE ACCESSORIES PRODUCT. THIS DISCLAIMER APPLIES BOTH DURING AND AFTER THE TERM OF THIS WARRANTY. CAUTION: These accessories or attachments... -
Page 20: Especificaciones
ESPAÑOL (Instrucciones originales) ESPECIFICACIONES Modelo: XCU03 XCU04 Longitud total (sin la barra de guía) 443 mm (17-1/2″) Tensión nominal 36 V c.c. Batería estándar BL1815N, BL1820B, BL1830, BL1830B, BL1840B, BL1850B, BL1860B Peso neto con la 90PX 4,7 kg 4,8 kg... -
Page 21: Advertencias De Seguridad
ADVERTENCIA: Utilice una combinación apropiada de la barra de guía y cadena de la sierra. De lo contra- rio, esto podría ocasionar una lesión personal. No maltrate el cable. Nunca utilice el cable ADVERTENCIAS DE para transportar, jalar o desconectar la herra- mienta eléctrica. - Page 22 Mantenimiento y uso de la herramienta eléctrica En condiciones abusivas, podrá escapar líquido de la batería; evite tocarlo. Si lo toca No fuerce la herramienta eléctrica. Utilice la accidentalmente, enjuague con agua. Si hay herramienta eléctrica correcta para su aplica- contacto del líquido con los ojos, busque asis- ción.
- Page 23 Tenga extrema precaución al cortar matorra- les y árboles jóvenes. El material tierno puede quedar atascado en la cadena de la sierra y ser lanzado hacia usted o hacerle perder el equilibrio. Cargue la sierra eléctrica del mango delantero estando apagada y lejos de su cuerpo. Cuando vaya a transportar o almacenar la sierra eléc- trica, coloque siempre la cubierta de la barra de guía.
- Page 24 Asimismo, esto inva- seguridad para el cartucho de lidará la garantía de Makita para la herramienta y el batería cargador Makita. Antes de utilizar el cartucho de batería, lea Consejos para alargar al máximo...
-
Page 25: Descripción De Las Piezas
DESCRIPCIÓN DE LAS PIEZAS Cartucho de batería Protector de mano delantero Barra de guía Cadena de la sierra Palanca Dial de ajuste Botón de verificación Indicador de capacidad Lámpara de alimentación principal Interruptor de alimentación principal Palanca de desbloqueo Mango trasero Gatillo interruptor Mango delantero Tapa del tanque de aceite... -
Page 26: Descripción Del Funcionamiento
Sistema de protección para la DESCRIPCIÓN DEL herramienta/batería FUNCIONAMIENTO La herramienta está equipada con un sistema de protección para la herramienta/batería. Este sistema corta en forma auto- PRECAUCIÓN: Asegúrese siempre de que la mática el suministro de energía al motor para prolongar la vida herramienta esté... - Page 27 La capacidad restante de la batería es mostrada mien- Luces indicadoras Capacidad tras oprime el botón de verificación. Los indicadores de restante capacidad corresponden a cada batería. Iluminadas Apagadas Parpadeando Estado del indicador de capacidad Capacidad restante de la La batería batería pudo haber Encendido...
-
Page 28: Ajuste De La Lubricación De La Cadena
Empuje el protector de mano delantero hacia Accionamiento del interruptor adelante con el dorso de su mano. Asegúrese de que la sierra eléctrica se detenga de inmediato. ADVERTENCIA: Por su seguridad, esta herramienta está equipada con una palanca de desbloqueo para prevenir un arranque no inten- cional de la herramienta. -
Page 29: Montaje
MONTAJE PRECAUCIÓN: Asegúrese siempre de que la herramienta esté apagada y el cartucho de batería haya sido extraído antes de realizar cualquier trabajo en la misma. PRECAUCIÓN: No toque la cadena de la sierra con las manos descubiertas. Siempre use guantes al manipular la cadena de la sierra. - Page 30 Coloque la cubierta de la pieza dentada en la sierra Presione y abra completamente la palanca hasta eléctrica de tal forma que el pasador de ajuste quede que se escuche un clic. Gírela ligeramente en sentido posicionado en el orificio pequeño en la barra de guía. inverso al de las manecillas del reloj para aflojar un poco la cubierta de la pieza dentada.
-
Page 31: Operación
AVISO: Utilice el aceite para la cadena de la sie- una sola pasada: rra exclusivamente para sierras eléctricas Makita Presione levemente sobre el mango y continúe cor- o un aceite equivalente disponible en el mercado. tando haciendo retroceder la sierra eléctrica un poco;... - Page 32 Cuando corte madera que esté bajo tensión, corte primero el lado presionado (A). Luego realice el corte final desde el lado tensionado (B). Esto evitará que la barra quede atascada. Aserrado Apoye el borde inferior del cuerpo de la sierra eléctrica sobre la madera que va a cortar.
- Page 33 Talado PRECAUCIÓN: El talado solo deberá ser realizado por personas capacitadas. Este trabajo es peligroso. Cumpla con los reglamentos locales si desea talar un árbol. ► 1. Dirección de talado 2. Zona de peligro 3. Ruta de escape Cuando realice el talado de árboles, siga los procedi- mientos a continuación: Corte la hendidura tan cerca del suelo como sea posible.
-
Page 34: Mantenimiento
Afile la cadena de la sierra con frecuencia pero sólo un ADVERTENCIA: No corte directamente a tra- poco cada vez. Por lo general sólo dos o tres pasadas vés de las fibras bajo ninguna circunstancia. De lo con una lima son suficientes para un reafilado de rutina. contrario, el árbol caerá... - Page 35 — El ángulo de afilado de 30° deberá ser el mismo en todas las partes cortadoras. Las diferencias de ángulos en las partes cortadoras causan que la cadena corra de forma brusca e irregular, acelera el desgaste y provocan la rotura de la cadena. —...
- Page 36 Limpieza de la cubierta de la pieza Reemplazo de la pieza dentada dentada PRECAUCIÓN: Una pieza dentada desgas- En el interior de la cubierta de la pieza dentada se acu- tada dañará una cadena nueva de la sierra. En mularán astillas y aserrín. Retire la cubierta de la pieza este caso, reemplace la pieza dentada.
-
Page 37: Instrucciones Para El Mantenimiento Periódico
Inspección. tuercas Para mantener la SEGURIDAD y FIABILIDAD del pro- ducto, las reparaciones, y cualquier otra tarea de man- tenimiento o ajuste deberán ser realizadas en centros de servicio autorizados o de fábrica Makita, empleando siempre repuestos Makita. 37 ESPAÑOL... -
Page 38: Resolución De Problemas
Antes de solicitar alguna reparación, primero realice una inspección por su cuenta. Si detecta algún problema que no esté explicado en el manual, no intente desensamblar la herramienta. En vez de esto, solicite la reparación a un centro de servicio autorizado de Makita, usando siempre piezas de repuesto Makita. Estado de la avería Causa Solución... -
Page 39: Accesorios Opcionales
Makita. Si la inspección muestra que el problema ha sido a causa de un defecto de mano de obra o material, Makita hará la reparación (o a su discreción, el reemplazo) sin ningún cargo. Esta garantía no aplica cuando: •... - Page 40 Para reducir la exposición a estos productos químicos: trabaje en un área bien ventilada y póngase el equipo de seguridad indicado, tal como las máscaras contra polvo que están especialmente diseñadas para filtrar partículas microscópicas. Makita Corporation 3-11-8, Sumiyoshi-cho, Anjo, Aichi 446-8502 Japan 885537B943...