Table of Contents
Advertisement
Available languages
Available languages
Quick Links
Advertisement
Table of Contents

Related Manuals for Breville Quick Touch Crisp BMO700BSS


Summary of Contents for Breville Quick Touch Crisp BMO700BSS
- Page 1 Quick Touch Crisp ™ Instruction Book - BMO700...
-
Page 2: Table Of Contents
BREVILLE Contents RECOMMENDS SAFETY FIRST 2 Breville recommends safety first At Breville we are very safety 15 Components conscious. We design and 16 Assembly manufacture consumer 18 Functions products with the safety of you, – Setting the clock – Setting the beep volume our valued customer, foremost –... - Page 3 It is promotional labels before not designed for industrial or using the Breville microwave laboratory use. oven for the first time. • As with any appliance, close • Read and follow the specific supervision is required when “PRECAUTIONS TO AVOID...
- Page 4 Breville microwave oven. • Do not immerse cord or • Always operate the microwave plug in water. oven on a heat-resistant surface.
- Page 5 • Always turn the microwave off • Do not place the microwave by pressing the STOP/CLEAR oven on or near a hot gas or button and unplug the electric burner, or where it power plug from the wall could touch a heated oven. outlet before: •...
- Page 6 • Do not use an extension cord. and call Breville Consumer If the power supply cord is Support. too short, have a qualified • For any maintenance other...
- Page 7 • Position the appliance at a • All suitable glass or plastic minimum distance 4 inches food containers should be away from side walls and used in strict compliance with 8 inches from top, curtains and the cookware manufacturer's other heat or steam sensitive recommendations.
- Page 8 • Do not use metal containers or • Some containers and/or plates utensils in the microwave oven may appear suitable for use as these could cause sparking in the microwave oven but and/or fire. may be coated in a glaze that will absorb the microwave •...
- Page 9 STOP/CLEAR or liquid can escape causing button and correct the problem burns or injury. or contact Breville Consumer • Eggs in the shell and Support for assistance. whole hard boiled eggs should • Wipe the oven cavity with a not be cooked or heated in soft, damp cloth after each use.
- Page 10 • The microwave oven should be • Do not store any materials, cleaned regularly and any food other than manufacturer’s splattering inside the cavity recommended accessories, should be removed. Failure to in this microwave oven when maintain the microwave oven not in use.
- Page 11 • Stir the liquid both before and operated. Immediately cease halfway through heating it. use and call Breville Consumer • Do not use straight-sided Support for examination, repair containers with narrow necks. or adjustment. It is particularly •...
- Page 12 −This equipment has been NOTE tested and found to comply This equipment generates, uses with Part 18 of the FCC Rules. and can radiate radio frequency Operation is subject to the energy and, if not installed following two conditions: (1) and used in accordance with This device may not cause the instructions, may cause...
- Page 13 GROUNDING NOTE INSTRUCTIONS Do not use an adapter plug with this appliance. (Adapter plugs WARNING are not permitted in Canada.) Improper use of the grounding CALIFORNIA can result in a risk of PROPOSITION 65: electric shock. (Applicable to California residents only). •...
- Page 14 SHORT CORD INSTRUCTIONS Your Breville appliance is fitted with a short power supply cord to reduce personal injury or property damage resulting from pulling, tripping or becoming entangled with a longer cord. SPECIFICATIONS POWER 120V~ 60Hz 1450W SOURCE GRILL INPUT...
-
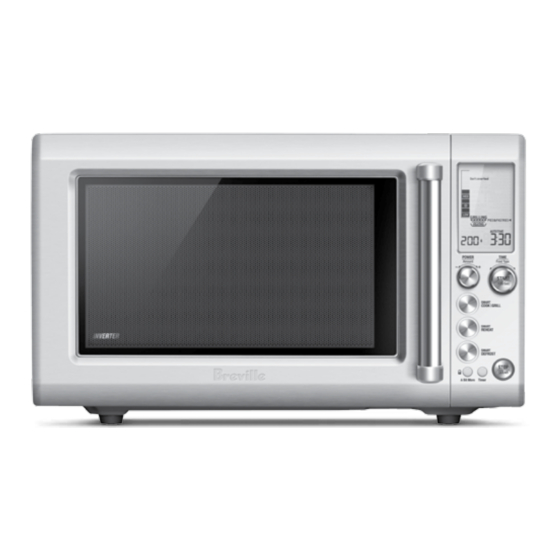
Page 15: Components
Components A. Viewing window H. STOP/CLEAR button Press once to pause without cancelling B. Door handle the current program. Press twice to clear C. Crisper pan the display. Use with COOK & GRILL functions to I. TIMER button crisp and brown foods. Convenient and easy to read kitchen timer. -
Page 16: Assembly
INSTALLATION THE MICROWAVE OVEN Assembly 1. Place the unit on a clean, dry and level surface that provides enough open space BEFORE FIRST USE for the intake and/or outlet vents. Blocking the intake and/or outlet openings can Before first use, remove all promotional damage the microwave. - Page 17 If there is any damage, do not operate the oven and contact a Breville service center. • Do not immerse the microwave oven, power cord or plug in water or any other liquid.
-
Page 18: Functions
Grilled Cheese The minute digits will flash, indicating they Frozen Snacks can be changed. Turn the TIME dial to adjust Functions the minutes and press START to confirm. TIME POWER Food Type Amount Melt Chocolate SETTING THE CLOCK Soften Butter Press SET CLOCK on the shortcuts panel. -
Page 19: Setting The Beep Volume
Baked Potato Soften Butter Pizza The screen will return to the default display. SETTING THE UNIT OF WEIGHT When in standby mode, the screen will now Press UNITS on the shortcuts panel. display the 24hr time. TIME POWER Bacon The selected unit will flash, indicating it can Food Type Amount be changed. -
Page 20: Setting The Child Lock
SMART REHEAT SMART COOK GRILL SETTING THE CHILD LOCK Turn the START dial to set your desired time in minutes and seconds. Press the START button SMART Activate the child lock to prevent accidental DEFROST to begin counting down. usage of the microwave. To enable the child TIME POWER Food Type... -
Page 21: Instant Start/+30 Sec
SMART COOK GRILL Press STOP/CLEAR once to pause the timer. For example SMART Press START to resume counting up or press COOK GRILL SMART User presses the SMART REHEAT button. REHEAT STOP/CLEAR a second time to clear the timer and return to the default screen. SMART SMART REHEAT... -
Page 22: Stop/Clear
STOP/CLEAR Press START to begin reheating. TIME POWER Food Type Amount Press STOP/CLEAR once to pause the current function. Press twice to clear and return to the default screen. SMART COOK GRILL TIME POWER SMART REHEAT Food Type Amount SMART DEFROST SMART Reheat process ends. -
Page 23: When Cooking Is Finished
WHEN COOKING IS FINISHED TIME & POWER LEVEL ADJUSTMENT At the end of any cooking cycle, the microwave Select different times and microwave power will beep 3 times and ‘End’ will flash on levels by turning the TIME and POWER dials. the screen for 5 minutes or until the door Turning the TIME Dial is opened. -
Page 24: Smart Settings
STANDBY MODE SMART COOK | GRILL When the microwave has been idle for The SMART COOK | GRILL setting uses 1 minute, Standby mode will be activated. predetermined microwave and grill times The LCD backlight will turn off and the to take the guesswork out of cooking your buttons will no longer be illuminated. - Page 25 Press START to begin the cook cycle. Selecting a COOK & GRILL setting The TIME appears and begins to count down. If the selected food type uses microwave and grill functionality, ‘COOK & GRILL’ will be displayed on the LCD screen. The COOK &...
- Page 26 If you choose to preheat the crisper pan, the Once the pan has completed preheating, or if microwave will prompt you to insert the empty the preheating phase is skipped, the microwave crisper pan. will prompt you to place your food on the pan. TIME POWER TIME...
-
Page 27: Smart Cook Food Types
Press START to begin the cook cycle. Icon descriptions The TIME appears and begins to count down. = Microwave only = Grill only = Microwave + grill TIME POWER Food Type Amount SMART COOK FOOD TYPES Oatmeal The SMART COOK – OATMEAL setting uses 2 power levels, first 100% to activate the SMART Microwave, grill or combination icons will... - Page 28 Rice Potato - Whole The SMART COOK – RICE setting uses The SMART COOK – WHOLE POTATO 2 power levels, first 100% to boil the water setting is suitable for cooking large whole and then 50% to gently simmer the rice baking potatoes.
- Page 29 Veg - Fresh Bacon The SMART COOK – FRESH VEG setting The SMART COOK – BACON setting is is suitable for all types of vegetables such as designed to cook bacon slices until crisp. carrots, beans, broccoli and cauliflower. Line the crisper pan or other microwave safe Cook times are based on vegetables directly plate with 2 layers of paper towels.
- Page 30 Dried - Herbs Caramel The SMART COOK – CARAMEL setting is The SMART COOK – DRIED HERBS setting ideal for caramelizing sugar and water to make heats fresh herbs so they become dry and crisp caramel sauce, toffee and other caramel in texture.
-
Page 31: Smart Cook & Grill Food Types
Caramel Table Potato - Roasted The SMART COOK & GRILL – ROASTED AMOUNT SUGAR WATER CHECK POTATO setting is suitable for cooking cut EVERY potatoes, small new potatoes or cut sweet 1 MIN potatoes so that they are brown and crispy on AFTER the outside while remaining soft and tender on 1 cup... -
Page 32: Smart Reheat
Frozen Pizza Arrange snacks on the preheated crisper pan, allowing ½–1" (1–2cm) gaps between pieces. The SMART COOK & GRILL – FROZEN Halfway through the cook program, the oven PIZZA setting is ideal for cooking frozen will beep and flash ‘Stir/Turn food’. Pause and pizzas so the crust gets crispy and the cheese is rearrange food so that the food in the center of melted and golden brown. - Page 33 After selecting a food type, turn the AMOUNT Leftovers dial to adjust the quantity or weight. The SMART REHEAT – LEFTOVERS setting is suitable for reheating a single plate of leftovers (approx. 10oz/300g) or larger quantities of casseroles, stew or other meals. For even reheating, place food on a microwave safe plate or in a shallow microwave safe dish or bowl.
- Page 34 Meat Halfway through the reheat program, the oven will beep and flash ‘Stir/Turn food’. The SMART REHEAT – MEAT setting is Pause and stir soup from the outside to the suitable for reheating already cooked steaks, center. Recover and press START to continue. chops and other small cuts of meat.
-
Page 35: Smart Defrost
SMART DEFROST Press START to begin the defrost cycle. SMART COOK GRILL The TIME appears and begins to count down. The SMART DEFROST setting is designed to gently defrost foods without overheating it or SMART REHEAT drying out the edges. Press the SMART DEFROST SMART button to display the food menu... - Page 36 Chicken Soup The SMART DEFROST – CHICKEN setting The SMART DEFROST – SOUP setting is is suitable for defrosting chicken pieces or a suitable for defrosting frozen homemade or whole chicken. store bought soups. For chicken pieces, position the pieces in a Remove soup from any packaging and place single layer on a microwave safe plate and do into a microwave safe bowl.
-
Page 37: Shortcuts
FAVORITE Beverage SHORTCUTS Melt chocolate Popcorn The Melt Chocolate shortcut is designed to Use the Shortcuts panel inside the door to melt chocolate without overheating or seizing perform common cooking tasks at the push of Baked Potato of the chocolate. This setting was designed for a button. - Page 38 SOME IMPORTANT TIPS FOR 7. Turn medium to large food items over twice during microwaving. This enables even MICROWAVE COOKING exposure to microwaves. 1. Choose cooking dishes that are shallow 8. Heat breaded or fried food on the crisper and preferably have straight sides. pan or a paper towel-lined plate to keep Shallow dishes enable the food to cook food crisp.
-
Page 39: Care & Cleaning
Do not use an abrasive cleaner. • If it becomes necessary to replace the oven light, please consult Breville Consumer Support to have it replaced. - Page 40 Otherwise, the door safety lock system will prevent the microwave from switching on. NOTE If none of the above rectify the situation, then contact Breville Consumer Support. Do not try to adjust or repair the oven yourself.
-
Page 41: Troubleshooting
Troubleshooting POSSIBLE PROBLEM EASY SOLUTION • Microwave oven Clean door and sealing surface of the oven. • interfering with radio, Reorient the receiving antenna of radio or television. • TV or similar equipment. Relocate the microwave oven with respect to the receiver. •... - Page 42 Turntable roller not inserted Reset and clean if necessary. noise during operation. properly or needs to be cleaned. If you continue to have any concerns or questions, contact Breville Consumer Support. Our contact details are on the back cover of this book.
- Page 43 Quick Touch Crisp Manuel d'instructions - BMO700...
- Page 44 BREVILLE VOUS Table des RECOMMANDE matières LA SÉCURITÉ 44 Breville vous recommande AVANT TOUT la sécurité avant tout 58 Composants 59 Assemblage Chez Breville, la sécurité 61 Fonctions occupe une place de choix. – Réglage de l'horloge Nous concevons et fabriquons –...
- Page 45 étiquettes promotionnelles applications auxquelles il est avant d'utiliser le four à destiné, tel que décrit dans micro-ondes de Breville pour ce manuel. Ne pas utiliser la première fois. de produits en aérosol ou • Lisez et respectez les chimiques corrosifs dans le ''PRÉCAUTIONS CONTRE LE...
- Page 46 • Cet appareil doit être réparé ii) Retirez les attaches uniquement par un personnel métalliques des sachets en qualifié. Contactez un centre papier ou en plastique avant de service autorisé près de de les mettre dans le four. chez vous pour effectuer les iii) Si des matériaux à...
- Page 47 • N'utilisez pas le four si • Gardez l'appareil propre. l'entraîneur de plateau et le Suivez les consignes plateau tournant en verre ne de nettoyage fournies dans ce sont pas en place. Veillez à ce manuel (page 83). que le plateau en verre soit •...
- Page 48 IMPORTANTES • Lorsque vous utilisez le micro- ondes et pour faciliter une MESURES DE bonne circulation d'air, assurez- vous qu'il y a suffisamment SÉCURITÉ POUR d'espace au-dessus et autour TOUT APPAREIL de l'appareil (voir la section 'Installation', point 2 en ÉLECTRIQUE page 59).
- Page 49 électrique quand l'appareil est et appelez le Soutien aux en marche. consommateurs de Breville. • Lorsque vous rangez le • Pour tout entretien autre que micro-ondes, enroulez le le nettoyage, contactez le cordon sans trop le tendre.
- Page 50 MESURES DE SÉCURITÉ • Afin d'assurer une bonne PARTICULIÈRES POUR rotation du plateau et une VOTRE MICRO-ONDES cuisson uniforme des aliments, les contenants et/ou assiettes • Le four à micro-ondes est compatibles au micro-ondes ne conçu pour chauffer les doivent pas excéder la largeur aliments et les boissons.
- Page 51 • N'utilisez pas de contenants • Certains contenants et/ou ou ustensiles métalliques dans assiettes peuvent sembler le four à micro-ondes, car ils convenir au micro-ondes, pourraient provoquer des mais s'ils sont enduits d'une étincelles et/ou s'enflammer. couche de glacis, cette couche absorbera l'énergie des •...
- Page 52 Soyez extrêmement et remédiez au problème prudent lorsque vous ouvrez ou contactez le Soutien aux les sacs, pochettes, couvercles consommateurs de Breville. ou contenants, car la vapeur, les aliments ou les liquides chauds pourraient s'en échapper et causer des brûlures ou...
- Page 53 • Après chaque utilisation, COMBINAISONS essuyez la cavité du four avec INCOMPATIBLES AVEC LE un chiffon doux et humide. Des FOUR À MICRO-ONDES: résidus alimentaires ou corps • Des aliments ou ustensiles gras laissés à l'intérieur du four métalliques de dimension peuvent faire surchauffer la excessive ne doivent pas être cavité, entrainer un risque de...
- Page 54 LA SURFACE OU Y INSÉREZ l'utilisation et contactez le UNE CUILLÈRE OU Soutien aux consommateurs UN USTENSILE. de Breville pour les opérations d'inspection, de réparation • Ne surchauffez pas le liquide. ou de réglage. Il est • Remuez le liquide avant et en particulièrement important...
- Page 55 • Après le réchauffage, laissez • Cet équipement a été testé et reposer le récipient quelques déclaré conforme à la Section instants dans le micro-ondes 18 des règles de la FCC. Son avant de le retirer du four. utilisation est soumise aux deux conditions suivantes : •...
- Page 56 INSTRUCTIONS DE LIAISON NOTE À LA TERRE Cet appareil utilise, génère et peut irradier (diffuser) de AVERTISSEMENT l'énergie de fréquences radio, Une mauvaise installation de la et lorsqu'il n'est pas installé ou liaison à la terre peut entraîner utilisé en accord avec le manuel un risque d'électrocution.
- Page 57 397 mm (15,5 po) (P) sans poignée INSTRUCTIONS SUR LE DIAMÈTRE COURT CORDON DU PLATEAU 315 mm (12,4 po) TOURNANT Votre appareil Breville est muni DIAMÈTRE d'un court cordon d'alimentation DU PLAT À 300 mm (12 po) qui réduit le risque de blessures CROUSTILLER ou dommages pouvant résulter...
- Page 58 Composants A. Vitre de la porte G. Boutons de fonctions intelligentes CUIRE | GRILLER, RÉCHAUFFER & B. Poignée de la porte DÉCONGELER C. Plat à croustiller Choisir parmi une variété de types Utiliser avec les fonctions CUIRE & d'aliments avec préréglages pour micro- GRILLER pour faire croustiller et brunir ondes et griller, réchauffer et décongeler.
- Page 59 INSTALLATION DU MICRO-ONDES Assemblage 1. Placez l'appareil sur une surface propre, sèche, de niveau et qui offre suffisamment d'espace pour les évents d'entrée et/ou de sortie. Le fait de bloquer les évents d'entrée AVANT LA PREMIÈRE UTILISATION et/ou de sortie peut endommager le Avant la première utilisation, retirez micro-ondes.
- Page 60 à l'intérieur de la cavité ou sur la porte. En cas de dommage, ne faites pas fonctionner le micro-ondes et contactez un centre de service Breville. • N'immergez pas le micro-ondes, le cordon d'alimentation ou la fiche dans l'eau ou tout autre liquide.
- Page 61 Bacon Grilled Cheese Les chiffres des minutes clignoteront, indiquant qu'ils peuvent être changés. Tournez Fonctions le cadran TEMPS pour ajuster les minutes et Frozen Snacks appuyez sur MARCHE pour confirmer. TIME POWER Melt Chocolate Food Type Amount RÉGLER L'HORLOGE Appuyez sur la touche RÉGLER L'HORLOGE Soften Butter du panneau de raccourcis.
- Page 62 Baked Potato Soften Butter L'écran retournera à l'affichage par défaut. RÉGLER LES UNITÉS DE POIDS En mode veille, l'écran affichera maintenant Pizza Appuyez sur la touche UNITÉS du panneau de l'heure sur 24 heures. TIME raccourcis. POWER Food Type Amount L'unité...
- Page 63 SMART REHEAT RÉGLER LE VERROUILLAGE Tournez le cadran MARCHE pour régler le temps que vous désirez en minutes et en POUR ENFANTS SMART secondes. Appuyez sur MARCHE pour activer COOK GRILL SMART Activez le verrouillage pour enfants afin de DEFROST le compte à...
- Page 64 SMART DEFROST ‰ Appuyez une fois sur ARRÊT/EFFACER pour SMART BOUTON A BIT MORE (Un peu plus) COOK GRILL faire une pause. Appuyez sur MARCHE pour Utilisez la fonction A BIT MORE ‰ reprendre le compte progressif ou pressez si les aliments ne sont pas tout sur ARRÊT/EFFACER une seconde fois pour SMART A Bit More...
- Page 65 Ouvrez la porte du micro-ondes, vérifiez les À l'aide du cadran QUANTITÉ, sélectionnez aliments et, s'ils nécessitent un peu plus de '8 oz'. réchauffage (A BIT MORE ), fermez la porte. ‰ TIME POWER TIME Food Type Amount POWER Food Type Amount Appuyez sur MARCHE pour amorcer Appuyez sur A BIT MORE...
- Page 66 ARRÊT/EFFACER VENTILATEUR Appuyez une fois sur ARRÊT/EFFACER pour À la fin du cycle de cuisson, le ventilateur TIME POWER Food Type Amount arrêter temporairement la fonction en cours. pourrait tourner pour refroidir les composants Appuyez deux fois pour l'effacer et retourner à électriques.
- Page 67 Tourner le cadran PUISSANCE MODE VEILLE Utilisez le cadran PUISSANCE pour Après que le micro-ondes aura été inactif sélectionner 10 différents niveaux de pendant 1 minute, le mode veille sera activé. puissance, 10%–100%. Tournez le cadran en L'écran ACL ne sera plus rétroéclairé et les sens horaire pour augmenter le niveau de boutons ne seront plus illuminés.
- Page 68 CUISSON | GRILLAGE INTELLIGENTS Après avoir sélectionné le type d'aliments, tournez le cadran QUANTITÉ pour ajuster la Le réglage CUISSON | GRILLAGE quantité ou le poids. INTELLIGENTS utilise des temps de cuisson au micro-ondes et de grillage prédéterminés pour vous permettre de cuire vos aliments favoris sans y aller à...
- Page 69 Sélectionner un réglage de Si vous choisissez de préchauffer le plat à croustiller, le micro-ondes vous demandera CUISSON & GRILLAGE d'insérer le plat à croustiller sans aliments. Si le type d'aliments sélectionné utilise les fonctionnalités de micro-ondes et de grillage, 'COOK &...
- Page 70 Les icones pour micro-ondes, grillage ou autre combinaison apparaîtront à mesure que le cycle de cuisson progressera. TIME POWER Food Type Amount TIME POWER Food Type Amount SMART Tournez le cadran QUANTITÉ pour ajuster la COOK GRILL quantité ou le poids. SMART SMART COOK GRILL...
- Page 71 TYPES D'ALIMENTS POUR Riz (Rice) CUISSON INTELLIGENCE Le réglage de CUISSON INTELLIGENTE – RICE utilise 2 niveaux de puissance. D'abord, Gruau (Oatmeal) 100% pour faire bouillir l'eau, puis 50% pour faire mijoter le riz et l'attendrir. Le réglage de CUISSON INTELLIGENTE –...
- Page 72 Pommes de terre entières (Potato - whole) Légumes frais (Fresh Veg) Le réglage de CUISSON INTELLIGENTE Le réglage de CUISSON INTELLIGENTE – FRESH VEG convient à tous les types de – WHOLE POTATO sert à cuire de grosses légumes, comme les carottes, fèves, brocoli et pommes de terre.
- Page 73 Légumes congelés (Frozen Veg) Herbes séchées (Dried Herbs) Le réglage de CUISSON INTELLIGENTE – Le réglage de CUISSON INTELLIGENTE – DRIED HERBS réchauffe les fines herbes pour FROZEN VEG convient à tous les types de les sécher et les rendre croustillantes. légumes congelés, incluant les mélanges de Les fines herbes séchées de telle façon légumes emballés.
- Page 74 Caramel Tableau de cuisson du caramel Le réglage de CUISSON INTELLIGENTE – QUANTITÉ SUCRE APRÈS, CARAMEL sert à caraméliser le sucre et l'eau VÉRIFIEZ pour obtenir une sauce caramel, du caramel au CHAQUE beurre ou autres régals à base de caramel. MINUTE Le réglage CARAMEL utilise 2 niveaux de 1 tasse...
- Page 75 À mi-temps du programme, le four bipera et le À mi-temps du programme, le four bipera et le message 'Stir/Turn food' clignotera. Faites une message 'Stir/Turn food' clignotera. Faites une pause, tournez les morceaux de poulet, puis pause, remuez ou tournez les légumes, puis appuyez sur MARCHE pour continuer.
- Page 76 À mi-temps du programme, le four bipera et le message 'Stir/Turn food' clignotera. Faites une pause, tournez les tranches de pain, ajoutez le fromage ou toute autre garniture, puis appuyez sur MARCHE pour continuer. À la fin du cycle de cuisson, retirez et servez immédiatement.
- Page 77 Pâtes & riz (Pasta & rice) Le réglage RÉCHAUFFAGE INTELLIGENT – PASTA & RICE sert à réchauffer des pâtes déjà cuites et du riz, avec ou sans sauce. Placez les aliments dans un bol allant au micro-ondes. Ajoutez 1–2 cuillerées à soupe d'eau ou plus de sauce.
- Page 78 Poulet (Chicken) Légumes (Veg) Le réglage RÉCHAUFFAGE INTELLIGENT Le réglage RÉCHAUFFAGE INTELLIGENT – CHICKEN sert à réchauffer lentement les - VEG sert à réchauffer les légumes déjà cuits, morceaux de poulet sans trop les cuire ou les comme les pommes de terre, brocoli, dessécher.
- Page 79 DÉCONGÉLATION INTELLIGENTE Appuyez sur MARCHE pour amorcer le cycle de décongélation. Le TEMPS s'affichera et le Le réglage de DÉCONGÉLATION compte à rebours débutera. INTELLIGENTE est conçu pour dégeler lentement les aliments sans les surchauffer ou assécher les extrémités. Appuyez sur le bouton DÉCONGÉLATION INTELLIGENTE pour afficher le menu d'aliments.
- Page 80 Poulet (Chicken) À mi-temps du programme, le four bipera et le message 'Stir/Turn food' clignotera. Faites Le réglage de DÉCONGÉLATION une pause, remuez la soupe de l'extérieur vers INTELLIGENTE – CHICKEN sert à le centre, en brisant les morceaux gelés, puis décongeler les morceaux de poulet ou appuyez sur MARCHE pour continuer.
- Page 81 FAVORITE Beverage Pour programmer le raccourci FAVORI: Chocolat fondu 1. Réglez le micro-ondes au temps et à Le raccourci Chocolat fondu sert à faire fondre Popcorn la température que vous désirez. Vous le chocolat sans le surchauffer ni le saisir. pouvez le faire manuellement ou choisir Ce réglage a été...
- Page 82 Beverage Popcorn Beurre ramolli QUELQUES CONSEILS IMPORTANTS POUR LA CUISSON AU MICRO-ONDES Le raccourci Beurre ramolli a été conçu Baked Potato pour ramollir le beurre sorti directement du 1. Choisissez des plats de cuisson peu réfrigérateur (environ 5°C/40°F). Pizza profonds et de préférence avec les côtés droits.
- Page 83 9. La température interne des aliments Entretien & continue d'augmenter, une fois sortis du four, et prolonge ainsi la cuisson. Il est donc nettoyage préférable de ne pas trop les cuire. 10. Les contenants, assiettes ou plats • Débranchez le micro-ondes avant de utilisés dans le four doivent toujours être le nettoyer.
- Page 84 éclaboussures ou déversements. four, contactez le Soutien aux consommateurs Ne pas utiliser de nettoyant abrasif. de Breville pour la faire remplacer. • Le panneau de commande ne doit pas être • Avant de ranger votre micro-ondes, appuyez mouillé. Nettoyez-le avec un chiffon doux et sur le bouton ARRÊT/EFFACER, puis...
- Page 85 Guide de dépannage PROBLÈME SOLUTION FACILE • Le micro-ondes crée Nettoyez la porte et la surface d'étanchéité du four. • de l'interférence avec Réorientez l'antenne réceptrice de la radio ou du téléviseur. • la radio, la télé ou autre Replacez le micro-ondes en fonction du récepteur. •...
- Page 86 Replacez l'entraîneur de plateau et émet un bruit quand inséré correctement ou doit nettoyez-le, si nécessaire. l'appareil fonctionne. être nettoyé. Pour toute question ou information, contactez le Soutien aux consommateurs de Breville. Vous trouverez nos coordonnées sur la couverture arrière de ce manuel.
- Page 87 Glossaire de traduction pour écran ACL COOK CUISSON COOK & GRILL CUISSON & GRILLAGE Type d'aliments Type d'aliments Select Food Type Select Food Type sélectionné sélectionné OATMEAL GRUAU OATMEAL GRUAU POPCORN MAÏS SOUFFLÉ POPCORN MAÏS SOUFFLÉ LEFTOVERS RESTES D'ALIMENTS LETOVERS RESTES D'ALIMENTS PASTA &...
- Page 88 Web: www.breville.ca/support Breville is a registered trademark of Breville Pty. Ltd. A.B.N. 98 000 092 928. Copyright Breville Pty. Ltd. 2015. Due to continued product improvement, the products illustrated/photographed in this booklet may vary slightly from the actual product.