
Related Manuals for ViewSonic VS13426


Summary of Contents for ViewSonic VS13426
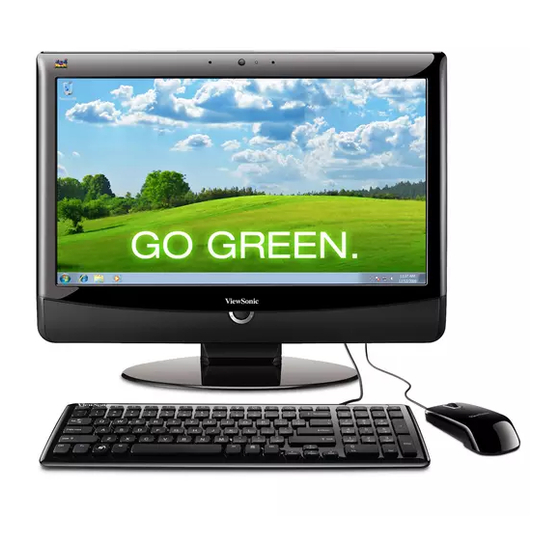
- Page 1 ViewSonic ® VPC220 - User Guide All-in-One PC - Guide de l’utilisateur - Guía del usuario - Pyководство пользователя - Kullanιcι kιlavuzu Model No. : VS13426...
- Page 2 This wireless module device complies with part 15 of FCC Rules. Operation is subject to the following two conditions: (1) this device may not cause harmful interference, and (2) this device must accept any interference received, including interference that may cause undesired operation. ViewSonic VPC220...
- Page 3 15 min of ® NERGY user inactivity for the display and less than 30 min of inactivity for the computer. Move the mouse or click any button on the keyboard to wake the computer from Sleep mode. ViewSonic VPC220...
- Page 4 15. Risk of explosion if battery is replaced by an incorrect type. Dispose of used batteries according to the instructions. ViewSonic VPC220...
- Page 5 Lead as an allotting element in steel containing up to 0.35% lead by weight, aluminium containing up to 0.4% lead by weight and as a cooper alloy containing up to 4% lead by weight. ViewSonic VPC220 Proposed Maximum Actual Concentration...
- Page 6 ViewSonic Product Registration To meet your future needs, and to receive any additional product information as it becomes available, please register your product on the Internet at: www.viewsonic. com. The ViewSonic Wizard CD-ROM also provides an opportunity for you to print ®...
-
Page 7: Table Of Contents
Advanced Menu ... 32 Boot Menu ... 36 Security Menu ... 38 Exit Menu ... 40 System Recovery ... 42 When to Use System Recovery ... 42 Running ViewSonic Recovery Manager ... 42 Specifications ... 45 Troubleshooting ... 47 ViewSonic VPC220... -
Page 8: Getting Started
Your package comes with the following items. If any of them are missing, please contact your retailer. All-in-One PC Power adapter Power cord Mouse (optional) Driver & UG disc Quick Start Guide Keyboard (optional) Remote Control (optional) USB IR Receiver (Optional) F socket coaxial TV plug (optional) ViewSonic VPC220... -
Page 9: System Overview
Touch Screen (select model) Power Button Brightness Control Button (wireless / HDD) ViewSonic VPC220 Description Use for chatting and other interactive applications. Use for taking pictures, recording videos, and video conferencing. Touch the screen to select objects and perform other tasks. - Page 10 USB connectors VGA-out HDMI-in Stand Kensington lock Memory compartment ViewSonic VPC220 Description Use to connect the power adapter Use to connect TV Antenna. Connect a LAN cable for network connection. For audio/video input Red: Right audio channel White: Left audio channel...
- Page 11 Microphone Connector Headphone connector USB connector Optical disk Drive Eject button ViewSonic VPC220 Description Supports memory cards including XD, SD, MS, MS Pro, or MMC cards. Connect an external microphone. Connect speakers or headphones. Connect USB devices such as a mouse, keyboard, printer, and other peripherals.
-
Page 12: Safety And Comfort Tips
Adjust the angle/position of the LCD panel to have an optimal view. • Avoid using your computer in a space which may cause you discomfort (such as on a bed). • The computer is an electrical device, please treat it with great care to avoid personal injuiry. ViewSonic VPC220... -
Page 13: Having Good Work Habits
• At regular, 10-minute intervals, lift up your eyes and look straight ahead at least 5 meters away. • Do some stretching exercises. • Change your work position frequently without neglecting good back posture. • Take frequent breaks to relieve any numbness in legs or arms. ViewSonic VPC220... -
Page 14: Setting Up Your Computer
This computer is capable to auto detect the USB devices installed, and if there is no detection of the devices, please manually enable the USB devices by going to Start > Control Panel > Hardware and Sound > Add a device to add the new device. HDMI Video ViewSonic VPC220... -
Page 15: Connecting Communication Devices
This allows users to move around within a broad coverage area and still be connected to the network. For more instructions or detailed steps on connecting to the wireless LAN, please ask your MIS staff or network manager for help. Internet ViewSonic VPC220... -
Page 16: Connecting Video Equipment
The input signal select On-Screen Display (OSD) menu will display automatically. Press control button to choose PC or HDMI, the signal source will switch after 2 sec. Conversely if you don’t choose a signal source, the OSD menu will automatically disappear after 2 sec. ViewSonic VPC220 HDMI Video... -
Page 17: Connecting External Display Devices
• To increase the brightness, press • To decrease the brightness, press Connecting External Display Devices Connect an external monitor or other standard VGA-compatible device (such as projector, television, etc) using a VGA cable (not included with purchase). HDMI Video ViewSonic VPC220... -
Page 18: Connecting Audio Components
Plug the microphone cable into the microphone connector of your computer. Tilting the Screen Place the computer on a stable surface, such as a table. Pull the bottom of the screen outwards, the screen can be tilted about 10º~35º to suit your preference. ViewSonic VPC220... -
Page 19: Connecting The Power Supply
Plug the power cord into an electrical outlet. Note • When disconnecting the power, always unplug the power cord from the electrical outlet first. Use the cord’s head to unplug, never pull the cable. Using the Card Reader The card reader supports SD, MMC, MS, and XD memory cards. Inserting a memory card Insert the card into the memory card slot. Push gently until the card clicks into place. ViewSonic VPC220 HDMI Video... -
Page 20: Using The Optical Disk Drive
3. With the label side facing forward, place the disc in the center of the disc tray. 4. Gently push the disc tray back into the disk slot. 5. The optical disc drive indicator is on and your computer will start to read the disc you just inserted. Note • Do not remove the disc while the computer is still reading or playing it. ViewSonic VPC220... -
Page 21: Using The Tv Tuner (Select Model)
Using the TV Tuner (Select model) The TV Tuner includes the IR receiver, Remoter Controller and an application ViewSonic. Overview of the Remote Controller No. Description Turn on/off the application Turn on/off the sound. Use numeric button to select a channel Display TV full screen Change between available audio modes Main Screen: Use the arrow button to navigate all on-screen items. - Page 22 View Teletext / Close caption information View EPG information. ( the function is only for digital TV) Record the current program Play the selected file and freeze the playback temporarily Go to the previous item in the playlist. Move backwards in interval ViewSonic VPC220...
-
Page 23: Starting The Tv Tuner
While you watch TV or record video from your PC monitor, you can use the application to capture images for your document, presentation or web page. Select TV. Press on the remote control or select image. ViewSonic VPC220 on the control panel to capture a... - Page 24 Double click the small TV monitor to switch to the full-screen. Video You can view recorded video or other video files. Playing Video files Select Video. Select video file in the list or select More Videos to choose other folders. ViewSonic VPC220 to record a program immediately, and then select...
- Page 25 Music Playing Music Select Music Add Music and then select the desired folder. Choose the tracks you wish to play and then select OK to go back. Then you can see the added file displayed. ViewSonic VPC220...
-
Page 26: System Operations
Plug one end of the network cable to the LAN connector at the rear of your computer. Connect the other end to a network hub or a wall socket. Press the Power button to turn on the computer. Click Start > Control Panel. ViewSonic VPC220... - Page 27 Select Network and Internet > Connect to the Internet. Check Show connection options that this computer is not set up to use, and select Broadband (PPPoE). ViewSonic VPC220...
- Page 28 Enter the information for your Internet service provider (ISP). For details on the required data, contact your internet service provider. To establish a LAN connection, click Connect. ViewSonic VPC220...
-
Page 29: Connecting To Wireless Lan
Connecting to Wireless LAN Press the Power button to turn on the computer. Click Start > Control Panel. Select Network and Internet > Connect to the Internet. ViewSonic VPC220... - Page 30 Select Wireless. If the WLAN connection are available, the computer displays a list of available WLAN connection, and select a connection from the list. Otherwise, select Open Network and Sharing Center to establish a new connection. Select Set up a new connection or network. ViewSonic VPC220...
- Page 31 Select Manually connect to a wireless network, and click Next. Enter the information for the wireless network. The new WLAN connection is now completed, and click Close. To change the WLAN settings, click Change connection settings. ViewSonic VPC220...
-
Page 32: Adjusting Lcd Screen Resolution
Adjusting LCD Screen Resolution Click Start > Control Panel. Select Appearance and Personalization > Adjust screen resolution. Select the desired resolution setting. Click on the pull-down menu to see more options. Click OK. ViewSonic VPC220... -
Page 33: Using The Touch Screen (Optional)
Using the Touch Screen (Optional) Calibrating the Screen To ensure touch accuracy, calibrate the screen. Click Start > Control Panel. Select Harware and Sound > Calibrate the screen for pen or touch input. Click Calibrate. Follow the on-screen instructions to complete screen calibration. ViewSonic VPC220... -
Page 34: Using The On-Screen Keyboard
• To modify the word, follow the visual instructions on help. Click any of the following icons • To enter text per character, click Tools > Write character by character. To write by word, click Tools > Write in freehand style. • For other options, click Tools. ViewSonic VPC220 Handwriting icon to view the instructions. -
Page 35: Power Management
To improve energy efficiency, you can use the power plan to reduce the amount of power your computer uses, maximize the performance, or balance the two. Click Start > Control Panel. Select System and Security > Power Options. Select a power plan. To adjust the selected power plan settings, click Change plan settings. ViewSonic VPC220... -
Page 36: Using The Power Saving Mode
To wake up the computer from sleep mode, do one of the following: • Press the Power button. • Move the mouse. • Press any key on the keyboard. Note Energy Saving Tip: • If the computer is left idle for a period of time, press the Power button to turn off the LCD screen, or set the computer to enter sleep mode. • Set the Windows power plan to “power saver”. See “Using the Power Plan” on page 32. • Install energy-efficiency PC software to manage energy consumption. • Disconnect the power plug from the AC outlet if the device is not being used for a long period of time. ViewSonic VPC220... -
Page 37: Bios Setup Utility
Be sure that the keyboard is properly installed before you turn on your All-In- One PC. • If you wish to enter the BIOS Setup after the Windows operation system starts up, you have to restart the All-in-One PC and follow the same procedure above. BIOS Action Keys Function Key <ESC> Return to the previous menu or exit the BIOS setup while saving changes. <Enter> Display the sub-menu. <F1> Display the Help screen. <F7> Discard changes. <F8> Load Failsafe defaults. ViewSonic VPC220 Description... -
Page 38: Bios Setup Menu
Use the up and down arrow keys to move through the sub-menu. Main Menu Displays the system overview information about BIOS version, CPU features, memory size and setting of system time and date. ViewSonic VPC220 Description... -
Page 39: Advanced Menu
Hyper-Threading Technology with an operating system that does not support it. Execute Disable Bit Capability: Help prevent certain classes of malicious buffer overflow attacks when combined with a supporting operating system. Hyper Threading Technology: Hyper Threading Technology provides faster response time and improves system performance. With Hyper Threading Technology: ViewSonic VPC220... - Page 40 The IDE Configuration displays the status of IDE devices installed in your All- in- One PC. When the system starts up, BIOS automatically detects the connected IDE devices. Select Primary IDE Master and press [Enter] to launch the SATA Primary IDE Master settings screen. ViewSonic VPC220...
- Page 41 BIOS to auto detect the devices. Do not manually change these settings to ensure system performance. USB Configuration The USB Configuration sub-menu allows you to configure the USB Configuration and USB Mass Storage Device settings. Select USB Mass Storage Device Configuration and press [Enter] to launch the USB Mass Storage Device Configuration screen. ViewSonic VPC220...
- Page 42 Power Configuration The Power Configuration sub-menu allows you to configure the mode to restore on AC power loss. Chipset Configuration The Chipset Configuration sub-menu allows you to enable or disable PXE booting. ViewSonic VPC220...
-
Page 43: Boot Menu
Hardware Health Configuration This sub-menu displays the hardware condition of your All-in-One PC. Boot Menu Set up boot type and boot sequence. Note • The available sub-menu options may vary depending on the installed devices on your All-in-One PC. ViewSonic VPC220... - Page 44 This will decrease the time needed to boot the system. • Quiet Boot: When disabled, the normal POST (Power On Self Test) messages are displayed when the system boots up. When enabled, ViewSonic logo is displayed instead. • Bootup Num-Lock: Turn the “Power-on state for Numlock” on or off.
-
Page 45: Security Menu
To change the specified device, press [Enter] to select an available device from the list. Boot Menu ® When the ViewSonic logo appears, quickly press the F11 button on the keyboard. Then you will enter Boot Menu. It allows you to select the boot device. Security Menu Install or clear Supervisor’s and user’s password settings. - Page 46 Security Menu. With this option, you can configure when the system will prompt you for the password: • Setup: You are required to enter the password every time you access the BIOS Setup Utility. • Always: You are required to enter the password on every system boot. ViewSonic VPC220...
-
Page 47: Exit Menu
A message will appear to confirm clearing of password, select Ok then press [Enter]. Note • Once you have set the Supervisor Password, you cannot start your All-in- One PC without entering the password. Be sure not to forget the password. Write down your password and keep it safe and private from other people. Exit Menu Save or discard the changes before leaving the BIOS Setup Menu. There are five types of Exit options: • Save Changes and Exit Select this option to save modified settings and exit BIOS. ViewSonic VPC220... - Page 48 Select this option to load optimal default values. • Load Failsafe Defaults Select this option to load failsafe default values. To perform an option, do the following: Select an item. Press [Enter]. A confirmation message appears. Select Ok to proceed or Cancel to cancel the operation. ViewSonic VPC220...
-
Page 49: System Recovery
However all files and other data on the drive “C:” will be deleted. Running ViewSonic Recovery Manager Your All-in-One PC uses ViewSonic Recovery Manager for system recovery functions. To run ViewSonic Recovery Manager, follow the steps below: Turn on the All-in-One PC. - Page 50 Note • If Windows operating system starts up before you press F3 and you still wish to run System Recovery, restart the All-in-One PC then follow the same above procedures. The “ViewSonic Recovery System” window appears. Click Recover to Factory Default. Click Yes. Another confirmation message appears on the screen. Click Yes. A message appears on the screen. Click OK. System recovery is initiated. ViewSonic VPC220...
- Page 51 After the system has been restored, the following window appears. Click OK to restart your All-in-One PC. After restarting, the Windows Setup Wizard appears to help you configure basic settings. 10. Follow the on-screen instructions to complete setup and start using your All-in- One PC. ViewSonic VPC220...
-
Page 52: Specifications
LCD (Select model) • HD+ (1920 x 1080 pixels) • LAN: ATHEROS AR8151 GbE LAN Controller Communications • Wireless LAN: Through Mini PCI-E WLAN module Stereo Speakers • Two 4 Ohm 3.0 Watt Stereo ViewSonic VPC220 Specifications ® Series ®... - Page 53 • Input: AC100-240V~, 50-60Hz • Output: 19.5V, 6.7A or 6.9A Dimensions 513 (W) x 452 (H) x 250 (D) mm (W x H x D) 20.2” (W) x 17.8” (H) x 9.84” (D) Weight • 20.16 lbs ( 9.15 kg) ViewSonic VPC220 Specifications...
-
Page 54: Troubleshooting
● If the CD-ROM requires software, make sure the software is installed according to the program’s instructions. ● Moisture condensation may have occurred. Leave the computer for at least 1 hour while the computer is turned on. ● Clean the CD-ROM. ● Check the speaker volume. ViewSonic VPC220... - Page 55 Internet access. ● The wireless LAN data transfer speed is affected by distance and obstructions between devices and access points. To maximize the data transfer speed, please choose an access point that is closest to your All-in-One PC. ViewSonic VPC220...
- Page 56 Renta y Datos, 29 SUR 721, COL. LA PAZ, 72160 PUEBLA, PUE. Tel: 01.222.891.55.77 CON 10 LINEAS Electroser, Av Reforma No. 403Gx39 y 41, 97000 Mérida, Yucatán. Tel: 01.999.925.19.16 Other places please refer to http://www.viewsonic.com/la/soporte/index.htm#Mexico Latin America (Peru) www.viewsonic.com/la/ T= 0800-54565 Macau www.hk.viewsonic.com T= 853 2870 0303...
- Page 57 What the warranty covers: ViewSonic warrants its products to be free from defects in material and workmanship during the warranty period. If a product proves to be defective in material or workmanship during the warranty period, ViewSonic will, at its sole option, repair or replace the product with a similar product.
- Page 58 Exclusion of damages: ViewSonic’s liability is limited to the cost of repair or replacement of the product. ViewSonic shall not be liable for: 1. Damage to other property caused by any defects in the product, damages based...