Table of Contents
Advertisement
Quick Links
Advertisement
Table of Contents

Related Manuals for AEG BEK431011M


Summary of Contents for AEG BEK431011M
- Page 1 BEK431011M User Manual Oven USER MANUAL...
-
Page 2: Table Of Contents
FOR PERFECT RESULTS Thank you for choosing this AEG product. We have created it to give you impeccable performance for many years, with innovative technologies that help make life simpler – features you might not find on ordinary appliances. Please spend a few minutes reading to get the very best from it. -
Page 3: Safety Information
SAFETY INFORMATION Before the installation and use of the appliance, carefully read the supplied instructions. The manufacturer is not responsible for any injuries or damage that are the result of incorrect installation or usage. Always keep the instructions in a safe and accessible location for future reference. -
Page 4: Safety Instructions
Disconnect the appliance from the power supply before • carrying out any maintenance. If the mains power supply cable is damaged, it must be • replaced by the manufacturer, its Authorised Service Centre or similarly qualified persons to avoid an electrical hazard. WARNING: Ensure that the appliance is switched off before •... - Page 5 • The electrical installation must have an isolation device which lets you disconnect Built in depth of the appli‐ 548 mm the appliance from the mains at all poles. ance The isolation device must have a contact Depth with open door 1022 mm opening width of minimum 3 mm.
- Page 6 • Open the appliance door carefully. The • Before maintenance, deactivate the use of ingredients with alcohol can cause appliance and disconnect the mains plug a mixture of alcohol and air. from the mains socket. • Do not let sparks or open flames to come •...
-
Page 7: Installation
3. INSTALLATION 3.1 Building in WARNING! Refer to Safety chapters. www.youtube.com/electrolux www.youtube.com/aeg How to install your AEG/Electrolux Oven - Column installation (*mm) min. 550 min. 560 (*mm) min. 550 min. 560... -
Page 8: Product Description
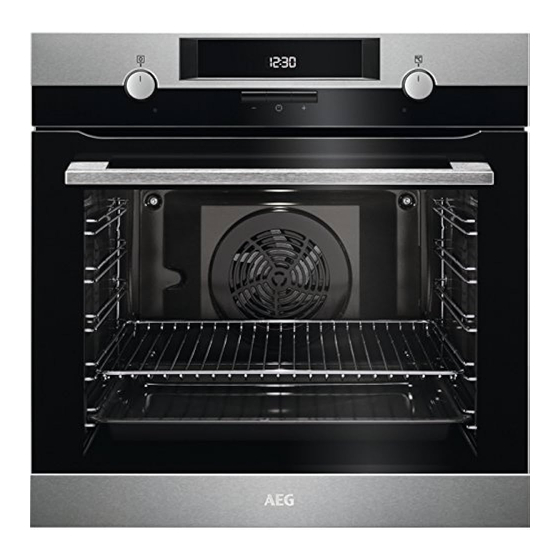
3.2 Securing the oven to the cabinet 4. PRODUCT DESCRIPTION 4.1 General overview Control panel Knob for the heating functions Power lamp / symbol Display Temperature indicator / symbol Control knob (for the temperature) Heating element Lamp Cavity embossment - Aqua cleaning container Shelf support, removable Shelf positions... -
Page 9: Before First Use
5.2 Sensor fields / Buttons To set the time. To set a clock function. To set the time. 5.3 Display A. Clock functions B. Timer 6. BEFORE FIRST USE WARNING! Refer to Safety chapters. 6.1 Before first use The oven can emit an odour and smoke during preheating. Make sure that the room is ventilated. -
Page 10: Daily Use
7. DAILY USE WARNING! Heating func‐ Application Refer to Safety chapters. tion 7.1 How to set: Heating function To grill thin pieces of food and to toast bread. Grill Step 1 Turn the knob for the heating functions to select a heating function. To grill thin pieces of food in large quantities and to toast Step 2... -
Page 11: Clock Functions
8. CLOCK FUNCTIONS 8.1 Clock functions Clock function Application To set, change or check the time of day. Time of Day To set how long the oven works. Duration To set when the oven turns off. End Time To combine functions: Duration and End Time. Time Delay To set a countdown. - Page 12 How to set: Duration Step 5 Turn the knobs to the off position. How to set: End Time Step 1 Set an oven function and the temperature. Step 2 - press repeatedly. - starts to flash. Step 3 - press to set the time. The display shows: - flashes when the set time ends.
-
Page 13: Using The Accessories
How to cancel: Clock functions Step 2 Press and hold: The clock function turns off after few seconds. 9. USING THE ACCESSORIES devices. The high rim around the shelf WARNING! prevents cookware from slipping of the shelf. Refer to Safety chapters. 9.1 Inserting accessories A small indentation at the top increases safety. -
Page 14: Additional Functions
10. ADDITIONAL FUNCTIONS 10.1 Cooling fan 10.2 Safety thermostat When the oven operates, the cooling fan Incorrect operation of the oven or defective turns on automatically to keep the surfaces of components can cause dangerous the oven cool. If you turn off the oven, the overheating. - Page 15 Conventional Cook‐ True Fan Cooking CAKES (min) (°C) (°C) Shortbread dough 3 (2 and 4) 20 - 30 Cake mould Buttermilk cheese‐ 60 - 80 Cake mould, Ø cake 26 cm Strudel 60 - 80 Baking tray Jam tart 30 - 40 Cake mould, Ø...
- Page 16 Conventional Cooking True Fan Cooking BREAD AND PIZZA (min) (°C) (°C) White bread, 1 - 2 60 - 70 pieces, 0.5 kg each Rye bread, preheating 30 - 45 Bread tin is not needed Bread rolls, 6 - 8 rolls 2 (2 and 4) 25 - 40 Baking tray...
- Page 17 Conventional Cook‐ True Fan Cook‐ MEAT (min) (°C) (°C) English roast beef, medium 60 - 70 English roast beef, well done 70 - 75 Conventional Cooking True Fan Cooking MEAT (min) (°C) (°C) Pork shoulder, with rind 120 - 150 Pork shin, 2 pieces 100 - 120 Leg of lamb...
- Page 18 GRILL (kg) (min) (min) 1st side 2nd side Fillet steaks, 4 pieces 12 - 15 12 - 14 Beef steak, 4 pieces 10 - 12 6 - 8 Sausages, 8 12 - 15 10 - 12 Pork chops, 4 pieces 12 - 16 12 - 14 Chicken, half, 2...
- Page 19 let it cool down for one night to complete the drying. For 1 tray use the third shelf position. POULTRY (°C) (min) For 2 trays use the first and fourth shelf position. Poultry, portions, 0.2 - 200 - 220 30 - 50 0.25 kg each Chicken, half, 0.4 - 0.5 190 - 210...
- Page 20 (°C) (min) Sweet rolls, 12 pieces baking tray or dripping pan 40 - 50 Rolls, 9 pieces baking tray or dripping pan 35 - 45 Pizza, frozen, 0.35 kg wire shelf 45 - 55 Swiss roll baking tray or dripping pan 30 - 40 Brownie baking tray or dripping pan...
- Page 21 (°C) (min) Small Conventional Baking tray 20 - 30 cakes, 20 Cooking per tray Small True Fan Baking tray 150 - 160 20 - 35 cakes, 20 Cooking per tray Small True Fan Baking tray 2 and 4 150 - 160 20 - 35 cakes, 20 Cooking...
-
Page 22: Care And Cleaning
12. CARE AND CLEANING WARNING! Refer to Safety chapters. 12.1 Notes on cleaning Clean the front of the oven with a soft cloth with warm water and a mild detergent. Clean and check the door gasket around the frame of the cavity. Use a cleaning solution to clean metal surfaces. - Page 23 12.3 How to use: Aqua Clean Step 3 Set the temperature to 90 °C. This cleaning procedure uses humidity to remove remaining fat and food particles from Step 4 Let the oven work for 30 min. the oven. Step 5 Turn off the oven.
- Page 24 Step 6 Pull the door trim to the front to remove it. Step 7 Hold the door glass panels by their top edge and carefully pull them out one by one. Start from the top panel. Make sure the glass slides out of the supports completely.
-
Page 25: Troubleshooting
Before you replace the lamp: Step 1 Step 2 Step 3 Turn off the oven. Wait until the Disconnect the oven from the Put a cloth on the bottom of the cav‐ oven is cold. mains. ity. Back lamp Step 1 Turn the glass cover to remove it. -
Page 26: Energy Efficiency
14. ENERGY EFFICIENCY 14.1 Product Information and Product Information Sheet* Supplier's name Model identification BEK431011M 949496240 Energy Efficiency Index 95.3 Energy efficiency class Energy consumption with a standard load, conventional mode 0.93 kWh/cycle Energy consumption with a standard load, fan-forced mode 0.81 kWh/cycle... -
Page 27: Environmental Concerns
15. ENVIRONMENTAL CONCERNS appliances marked with the symbol with Recycle materials with the symbol . Put the household waste. Return the product to the packaging in relevant containers to your local recycling facility or contact your recycle it. Help protect the environment and municipal office. - Page 28 www.aeg.com/shop...