Table of Contents

Related Manuals for Panasonic SC-ALL2GN


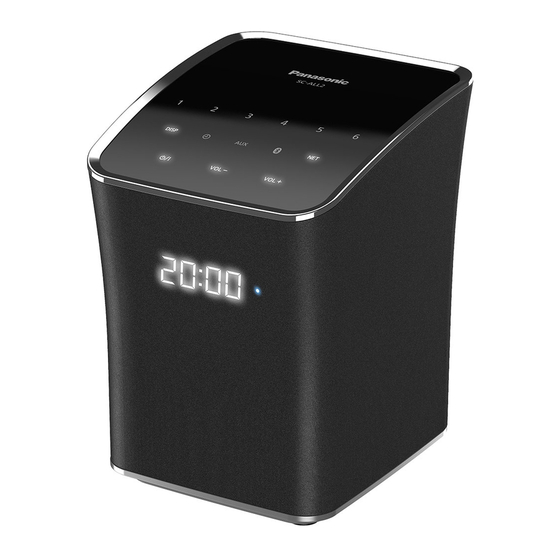
Summary of Contents for Panasonic SC-ALL2GN
- Page 1 Operating Instructions <Full version> Wireless Speaker System Model No. SC-ALL2 Thank you for purchasing this product. Please read these instructions carefully before using this product, and save this manual for future use. RQT0A27-B...
-
Page 2: Table Of Contents
Table of contents Accessories ..................... 3 Unit care....................4 About Bluetooth ..................5 ® Control reference guide................7 Network indicator illumination ..............8 Connections ..................10 Network settings..................12 Streaming music over the network ............21 Bluetooth operations................30 ® AUX input .................... -
Page 3: Accessories
Accessories 1 AC mains lead For the black model: (K2CT2YY00097) For the white model: (K2CT2YY00110) For the black model: (K2CQ2YY00119) For the white model: (K2CQ2YY00136) (K2CJ2YY00101) ≥ Do not use AC mains lead with other equipment. ≥ Product numbers provided in this operating instructions are correct as of May 2015. -
Page 4: Unit Care
Unit care Clean this unit with a soft, dry cloth. ≥ Never use alcohol, paint thinner or benzine to clean this unit. ≥ Before using chemically treated cloth, carefully read the cloth’s instructions. ∫ To dispose or transfer this unit The unit may keep the user settings information in the unit. -
Page 5: About Bluetooth
About Bluetooth ® Panasonic bears no responsibility for data and/or information that is compromised during a wireless transmission. ∫ Frequency band used This system uses the 2.4 GHz frequency band. ∫ Certification of this device ≥ This system conforms to frequency restrictions and has received certification based on frequency laws. - Page 6 ≥ This system may not function properly if radio waves from a nearby broadcasting station, etc. are too strong. ∫ Intended usage ≥ This system is for normal, general use only. ≥ Do not use this system near an equipment or in an environment that is sensitive to radio frequency interference (example: airports, hospitals, laboratories, etc.).
-
Page 7: Control Reference Guide
Control reference guide Top view ※ ※ ※ ※ ※ ※ ※ ※ Display Standby/on switch and indicator [Í/I] Network indicator (l 8, 9) Touch to switch the unit from on to standby mode or vice versa. In Internet radio preset channel standby mode, the unit is still switches [1] to [6] (l 28) consuming a small amount of... -
Page 8: Network Indicator Illumination
Network indicator illumination The below illustrates the network indicator illumination patterns. Network indicator Description Illumination: blue/red Blinks alternately ≥ The unit is carrying out an internal process. – Wait for approximately 1 minute before the blinking stops. – Do not disconnect the AC mains lead. Doing so may cause malfunction or damage. - Page 9 Network indicator Description Illumination: blue Lights up ≥ The unit is connected to the network. Illumination: red Blinks ≥ The unit is connecting to the network. – When the network connection cannot be established, the blinking keeps going. Check the network connection.
-
Page 10: Connections
Connections AC mains lead (supplied) To an AC outlet ≥ This unit consumes a small amount of AC power (l 52) even when turned off. ≥ For the purpose of power conservation, disconnect the power supply if you will not be using it for extended period of time. Some settings will be lost after you disconnect the system. - Page 11 Connection of an external device Audio cable (not supplied) Plug type: 3.5 mm stereo ≥ For details, refer to the operating instructions of the device. - 11 -...
-
Page 12: Network Settings
Network settings You can stream music from a device on the network by using the Qualcomm AllPlay™ smart media platform or DLNA feature. To use ® these features, this unit must join the same network as the device. ≥ Please update the unit’s firmware after the network settings are complete. (l 38) Choose a network setting method from the following. - Page 13 Using an Internet browser ≥ The following steps are based on a smartphone. ≥ Do not connect a LAN cable. Doing so will disable the Wi-Fi function. ® Turn this unit on. Go to Wi-Fi settings on the device. ® ≥...
- Page 14 Select “ALL2 _AJ” to connect to this unit. ≥ “ ” stands for a character that is unique to each set. ≥ This can take up to 1 minute to appear in your Wi-Fi list. ≥ If this operation does not work correctly, please repeat it several times. ≥...
- Page 15 Select your network name (SSID) and type the password. ≥ Check the wireless router for the network name (SSID) and the password. ≥ A list of network names (SSIDs) will be appeared when you select the “Network Name” box. ≥ To show the characters typed in the “Password” box, select “Show Password”.
- Page 16 ∫ Network standby This unit will turn on automatically from standby mode when you select the unit as the output speakers. ≥ Network standby is normally active while the unit is connected to a network. ≥ The power consumption in standby mode will increase when the network standby is on.
- Page 17 Using WPS (Wi-Fi Protected Setup™) ≥ Do not connect a LAN cable. Doing so will disable the Wi-Fi function. e.g., A compatible wireless router may have the WPS identifier mark. Turn this unit on. ≥ Proceed to the next step after the network indicator changes from blinking in blue and red to blinking slowly in blue §...
- Page 18 ≥ Once the unit enters WPS PIN code mode, you cannot set up using the WPS button. To use the WPS button, turn off and then on the unit, and redo the network settings. ≥ Depending on a router, other connected devices may temporarily lose their connection.
- Page 19 Using a LAN cable Disconnect the AC mains lead. Connect this unit to a broadband router, etc. using a LAN cable. e.g., Broadband router, etc. LAN cable (not supplied) Connect the AC mains lead to this unit, and turn the unit on. ≥...
- Page 20 DNS, etc. You can also change the name of this unit by changing a setting in the app “Panasonic Music Streaming” (version 2.0.8 or later) (l 21). For details on the app, refer to the site below.
-
Page 21: Streaming Music Over The Network
: App Store ≥ [iOS] : Google Play™ ≥ [Android] The operations and on-screen display items, etc. of the app “Panasonic Music Streaming” are subject to change. For the latest information, visit http://panasonic.jp/support/global/cs/audio/app/ More apps are available. For details, visit www.panasonic.com/global/consumer/homeav/allseries/service (These sites are in English only.) - Page 22 – When you turn off one of the AllPlay speakers, other AllPlay speakers in the same group may stop the playback. ∫ Enhancing the sound When using the app “Panasonic Music Streaming”, you can use the below sound functions from the settings of the app. ≥ Equaliser ≥...
- Page 23 ≥ This system will be displayed as “Panasonic ALL2” if the device name is not set. ≥ When playing back music from the DLNA server (PC with Windows 7 or later installed, smartphone, Network Attached Storage (NAS) device, etc.), add the...
- Page 24 From “ ”, select this system as the output speakers. ≥ To enjoy synchronised sound from the multiple AllPlay speakers, you need to group the speakers using the app “Panasonic Music Streaming”. (l 21) - 24 -...
- Page 25 ≥ If you have multiple AllPlay speakers, you can enjoy synchronised sound from them. Select “Group” and then select the speakers to group. ≥ This system will be displayed as “Panasonic ALL2” if the device name is not set. ≥ Registration/subscription is required.
- Page 26 Streaming music on this system to other AllPlay speakers You can use the app “Panasonic Music Streaming” (l 21) to stream this system’s music source (Bluetooth /AUX/preset internet radio source) to ® other AllPlay speakers. e.g., Preparation ≥ Complete the network settings. (l 12) ≥...
- Page 27 ≥ When you turn off one of the AllPlay speakers, other AllPlay speakers in the same group may stop the playback. ≥ This system will be displayed as “Panasonic ALL2” if the device name is not set. ≥ Sound is output from other AllPlay speakers after a delay of about 1 second.
- Page 28 Presetting stations (when listening internet radio) This system can preset stations when playback using internet radio app “AllPlay Radio” only. You can preset up to 6 channels. ≥ A station previously stored is overwritten when another station is stored in the same channel preset. Preparation ≥...
- Page 29 ∫ Listening to a preset channel Touch one of [1] to [6] on the unit. ≥ When selected preset channel had not been preset, “no:ch” is displayed. - 29 -...
-
Page 30: Bluetooth ® Operations
Bluetooth operations ® By using the Bluetooth connection, you can listen to the sound of the ® Bluetooth audio device wirelessly. ® ≥ Refer to the operating instructions of the Bluetooth device for further ® instruction on how to connect a Bluetooth device. - Page 31 ∫ Connecting a paired Bluetooth device ® Touch [ ≥ [ ] blinks slowly. ≥ If [ ] lights, a Bluetooth device is already connected with this unit. ® Disconnect it. (l below) Select “SC-ALL2” from the Bluetooth device’s Bluetooth ®...
- Page 32 Bluetooth standby ® This function allows you to connect a paired Bluetooth device when this ® unit is in standby mode. ≥ This unit will be turned on automatically when you connect a paired Bluetooth device. ® – If this function is set to “On”, the standby power consumption will increase. Touch and hold [ ] and [1] for at least 4 seconds.
- Page 33 Bluetooth transmission mode ® You can change the transmission mode to prioritise transmission quality or sound quality. Preparation ≥ Touch [ ≥ If a Bluetooth device is already connected, disconnect it. ® Touch and hold [ ] and [2] for at least 4 seconds. Touch [VOL –] or [VOL +] to change the setting.
- Page 34 Bluetooth input level ® If the sound input level from the Bluetooth device is too low, change the ® input level setting. Preparation ≥ Make sure that a Bluetooth device is already connected with this unit. ® (l 31) Touch and hold [ ] and [3] for at least 4 seconds.
-
Page 35: Aux Input
AUX input You can also listen to music from an external music player through this unit. Preparation ≥ Connect an external device. (l 11) Touch [AUX]. ≥ [AUX] indicator lights up. Start playback on the connected device. ∫ To select the sound input level of the external device While in AUX mode, touch and hold [AUX] for at least 4 seconds. -
Page 36: Rear Surround
Rear surround You can add two SC-ALL2 to Panasonic SC-ALL70T (sold separately) as rear surround speakers to enjoy 5.1 ch surround sound. ≥ Refer to the operating instructions for SC-ALL70T. Pairing Preparation ≥ Turn SC-ALL2 and SC-ALL70T on. Start the pairing mode on SC-ALL70T. - Page 37 ∫ To switch to network speaker mode Turn SC-ALL70T and SC-ALL2 off and then turn SC-ALL2 on again. ≥ The network indicator will light up or blink. ≥ The audio source will change to the network. ∫ To switch to rear surround mode Touch and hold [AUX] and [6] on each SC-ALL2 for at least 4 seconds.
-
Page 38: Firmware Updates
You can also update the firmware from a pop-up prompting you to do so on-screen within the app “Panasonic Music Streaming” (version 2.0.8 or later) (l 21). For details on the app, refer to the site below. -
Page 39: Others
“Panasonic Music Streaming” (l 21). Preparation ≥ Complete the network settings. (l 12) ≥ Install your device with the app “Panasonic Music Streaming”. Turn this unit on. ≥ Check that the network indicator (blue) lights up. – If the network indicator is blinking in blue and red, wait until the blinking stops. - Page 40 Changing the clock display You can change the clock display. ∫ To change to 12-hour clock Touch and hold [DISP] and [2] for at least 4 seconds. ∫ To change to 24-hour clock Touch and hold [DISP] and [1] for at least 4 seconds. ≥...
- Page 41 Changing the display mode Touch [DISP]. Each time you touch [DISP], the display changes as follows: Blank display Clock display / “--:--” ≥ During playback of a preset channel, the current preset channel will be shown for a few seconds when you touch [DISP]. –...
- Page 42 Auto off function As a factory default, this unit will turn to standby mode automatically if there is no sound and it is not being used for approximately 20 minutes. To cancel this function Touch and hold [DISP] and [6] for at least 4 seconds. Touch [VOL –] or [VOL +] to select “OFF”.
- Page 43 You can make settings for the alarm and sleep functions by using the app “Panasonic Music Streaming”. (l 21) The operations and on-screen display items, etc. of the app “Panasonic Music Streaming” are subject to change. For the latest information, visit http://panasonic.jp/support/global/cs/audio/app/...
- Page 44 ∫ When an alarm is activated The indicators on the top panel of the unit blink fast. When snooze is not set ≥ Touch any key on the unit during blinking to turn off the alarm. When snooze is set ≥...
- Page 45 Operation sound setting As a factory default, there will be a beep sound when you touch the switch on the unit. ∫ To cancel this function Touch and hold [DISP] and [VOL –] for at least 4 seconds. ≥ “OFF” is indicated. ≥...
- Page 46 MAC address XX:XX:XX:XX:XX:XX XXX.XXX.XXX.XXX IP address ≥ This unit will be displayed as “Panasonic ALL2” if the device name is not set. ≥ If the network indicator is blinking in blue and red, wait until the blinking stops. - 46 -...
-
Page 47: Troubleshooting
If the problem remains unresolved, consult your dealer for instructions. Do you have the latest firmware installed? ≥ Panasonic is constantly improving the unit’s firmware to ensure that our customers are enjoying the latest technology. (l 38) For further dedicated help, support and advice about your ALL Series product please visit: http://panasonic.jp/support/global/cs/audio/ALL/index.html... - Page 48 Humming heard during playback. ≥ There are cords of other appliances or fluorescent light near the unit’s AC mains lead. Turn the appliances off or keep them away from the AC mains lead. The sound is distorted when using the AUX IN jack. ≥...
- Page 49 Bluetooth ® Pairing cannot be done. ≥ Check the Bluetooth device condition. ® The device cannot be connected. ≥ The pairing of the device was unsuccessful or the registration has been replaced. Try pairing the device again. (l 30) ≥ This system might be connected to a different device. Disconnect the other device and try pairing the device again.
- Page 50 Firmware updates “FAIL” is indicated on the display. ≥ The update has been failed. Touch any switch, and then try again. ≥ When using a LAN cable, make sure to connect the LAN cable while the AC mains lead is disconnected. (l 19) Network Cannot connect to the network.
- Page 51 Playback does not start. The sound is interrupted. ≥ If using the 2.4 GHz band on the wireless router, simultaneous use with other 2.4 GHz devices, such as microwaves, cordless telephones, etc., may result in connection interruptions. Increase the distance between this unit and these devices.
-
Page 52: Specifications
Specifications ∫ GENERAL Power supply AC 220 V to 240 V, 50 Hz Power consumption 12 W Power consumption in standby mode (When Bluetooth standby is off) ® §1, §2 Approx. 0.3 W (When Bluetooth standby is on) ® §1, §2 Approx. - Page 53 ∫ Bluetooth SECTION ® Version Bluetooth Ver.2.1 +EDR ® Class Class 2 Supported profiles A2DP Frequency band 2.4 GHz band FH-SS Operating distance Approx. 10 m Line of Sight ∫ Wi-Fi SECTION Wi-Fi WLAN Standard IEEE802.11a/b/g/n Frequency range 2.4 GHz band / 5 GHz band Security WPA2™...
- Page 54 Audio support format (DLNA) Sampling frequency 32/44.1/48 kHz Audio word size 16 bits Channel count 2 ch FLAC /WAV §3 Sampling frequency 32/44.1/48/88.2/96/176.4/192 kHz Audio word size 16 bits/24 bits Channel count 2 ch ∫ WIRELESS RECEIVER SECTION Wireless module Frequency range 2.4034 GHz to 2.47735 GHz No.
- Page 55 ∫ SPEAKER SYSTEM SECTION Speaker unit Full range 8 cm cone typek1 Impedance 4 ≠ ≥ Specifications are subject to change without notice. ≥ Mass and dimensions are approximate. ≥ Total harmonic distortion is measured by a digital spectrum analyzer. §1 Network standby inactive §2 When the display is off §3 Uncompressed FLAC files may not operate correctly.
- Page 56 Bluetooth ® SIG, Inc. and any use of such marks by Panasonic Corporation is under license. Other trademarks and trade names are those of their respective owners. Google Play and Android are trademarks of Google Inc.
- Page 57 Please refer to the detailed terms and conditions thereof shown in our website below. http://panasonic.jp/support/global/cs/audio/oss/all8_3_1c.html At least three (3) years from delivery of this product, Panasonic will give to any third party who contacts us at the contact information provided below, for a charge no more than our cost of physically performing source code distribution, a complete machine-readable copy of the corresponding source code covered under GPL V2.0,...
- Page 58 FLAC Decoder Copyright (C) 2000,2001,2002,2003,2004,2005,2006,2007,2008,2009 Josh Coalson Redistribution and use in source and binary forms, with or without modification, are permitted provided that the following conditions are met: – Redistributions of source code must retain the above copyright notice, this list of conditions and the following disclaimer.
- Page 59 ≥ Monday – Friday 9:00 am – 5:00 pm (Excluding public holidays). ≥ For further support on your product, please visit our website: www.panasonic.co.uk Direct Sales at Panasonic UK ≥ Order accessory and consumable items for your product with ease and confidence by phoning our Customer Communications Centre Monday –...
- Page 60 Manufactured by: Panasonic Corporation Kadoma, Osaka, Japan Importer for Europe: Panasonic Marketing Europe GmbH Panasonic Testing Centre Winsbergring 15, 22525 Hamburg, Germany Panasonic Corporation Web Site: http://www.panasonic.com RQT0A27-B C Panasonic Corporation 2015 F0515HA0...