D-Link DGS-6600 Series Quick Installation Manual
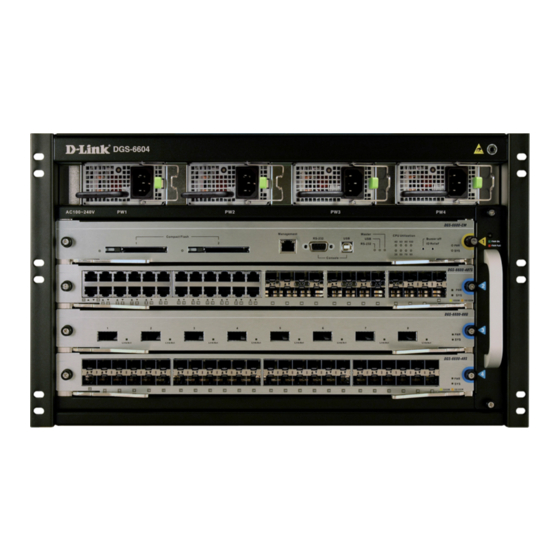
4/8 slots chassis-based switch
Hide thumbs
Also See for DGS-6600 Series:
- Hardware installation manual (96 pages) ,
- Manual (972 pages) ,
- Cli reference manual (951 pages)
Table of Contents
Advertisement
Available languages
Available languages
Quick Links
Advertisement
Table of Contents

Related Manuals for D-Link DGS-6600 Series


Summary of Contents for D-Link DGS-6600 Series
- Page 1 Building Networks for People Quick Installation Guide 4/8 Slots Chassis-Based Switch This document will guide you through the basic installation process for your new D-Link chassis-based Switch. DGS-6600 Series Documentation also available on CD and D-Link Website...
-
Page 2: About This Guide
About This Guide Warning s This guide contains step by step instructions for setting up the D-Link DGS-6600 series Power Supply Safety Warning chassis-based switch. Please note that the Ground the device before power- model you have purchased may appear... -
Page 3: Preparation For Installation
Preparation for Installation Moving the Device To ensure normal operation and prolonged life The DGS-6600 series chassis switch is quite of the DGS-6600 series chassis switch, the heavy. When handling, please pay close appropriate temperature and humidity must be attention to the following guidelines: maintained in the equipment room. -
Page 4: System Grounding Requirements
Power Requirements Proper grounding will help to ensure stable The power consumption and heat dissipation and reliable operation of the DGS-6600 series figures of the various DGS-6600 series chassis chassis switch. Be sure to verify that the switch components are listed in the table below:... -
Page 5: Installation Site Requirements
Create network crimping pliers cables and grounding cables. Meter Multimeter Test power supply and DC resistance. Figure 3. Ventilation of the DGS-6600 series chassis switch 500V Test the insulation Megohm- and grounding Mounting the DGS-6600 series chassis switch meter resistance into the Cabinet 1. -
Page 6: Installing The Fan Tray
• The grounding resistance for combined grounding should be less than 1 Ohm (Ω). The DGS-6600 series switch is powered up using an AC power supply. The procedure for Simple Grounding Steps installing the AC power supply is shown in the diagram below: •... -
Page 7: Connecting The Ac Power Supply To The Power Module
3. Use both hands to pull the levers, on the left connector to make the power connection. and right hand sides of the board, to remove the board from the DGS-6600 Series Chassis • Ensure that the connected power cables have Switch, as shown in the following diagram. -
Page 8: Unpacking Inspection Requirements
• CD software and manual Verify that the cabinet has been fastened • QIG completely, and does not move or tilt. Verify that the Power Supplies, CM and Line Cards have been installed in the chassis. 8 u D-Link DGS-6600 Series Chassis Switch... -
Page 9: Management Options
User’s Guide that comes with the switch. It contains many • Baud rate: 115200 more rules, charts, explanations and examples to help you get your network up and running. • Data bits: 8 D-Link DGS-6600 Series Chassis Switch u 9... -
Page 10: Technical Support
Managed, Smart, & Wireless Switches, or Firewalls 0871 873 0909 (09.00am- 05.30pm) (BT 10ppm, other carriers may vary.) Ireland (Mon-Fri) All Products 1890 886 899 (09.00am-06.00pm, Sat 10.00am-02.00pm) Phone rates: €0.05ppm peak, €0.045ppm off peak times 10 u D-Link DGS-6600 Series Chassis Switch... - Page 11 Der DGS-6604 bietet insgesamt vier Steckplätze, vor. davon einen für ein CM-Modul. Der DGS-6608 bietet insgesamt acht Steckplätze, davon zwei für Warnungshinweis zur Wartung CM-Redundanz. Wartungsarbeiten dürfen nur von qualifizierten Servicetechnikern vorgenommen werden. D-Link DGS-6600 Series Chassis Switch u 11...
-
Page 12: Transport Des Geräts
4. Tragen Sie bei der Arbeit an elektronischen Bauteile kein großes Gewicht tragen Schaltkreisen immer ein Erdungsarmband. können. 5. Fassen Sie Leiterplatten nur an den Kanten an. Berühren Sie keine Komponenten auf Leiterplatten. 12 u D-Link DGS-6600 Series Chassis Switch... - Page 13 Chassis-Erdungsanschluss unterbrechungsfreien und stabilen (Masseanschluss) der DGS-6600 Betrieb des Geräts zu gewährleisten. Redundante Netzteile tragen dazu Geräte. bei, unerwartete Stromausfälle weitgehend zu verhindern. Die für die redundante Stromversorgung verwendeten Netzteile müssen identisch sein. D-Link DGS-6600 Series Chassis Switch u 13...
- Page 14 Führungsschiene bei der Installation in einem offenen Schrank. Wenn der Switch des Chassis im Rack des Schaltschranks in einem geschlossenen Schrank installiert empfohlen. wird, ist auf eine ausreichende Lüftung und Wärmeableitung zu achten. 14 u D-Link DGS-6600 Series Chassis Switch...
- Page 15 Abbildung unten zeigt die Installation des Netzteils: Erdungskabels am Erdungsstab. • Ziehen Sie die Befestigungsmutter wieder an der Erdungsklamme an. • Schließen Sie das andere Ende des Erdungskabels an eine geeignete Erdungsschiene an. Abbildung 5. Installation des Netzteils D-Link DGS-6600 Series Chassis Switch u 15...
- Page 16 2. stecken Sie die Standardsteckverbindung DB9 des seriellen Kabels an den seriellen RS-232 Port des Switch-Managementmoduls und das andere Ende an den PC/das Notebook oder Abbildung 8. Wechselstrom zum Netzteil die Leitdatenstation (Steuerterminal) - oder - 16 u D-Link DGS-6600 Series Chassis Switch...
- Page 17 Stellen Sie sicher, dass Netzteile, CM und Linecards im Chassis installiert sind. Abbildung 9. Modul aus dem Chassis nehmen Stellen Sie sicher, dass die Lichtwellenleiter (Glasfaserkabel) und die Twisted-Pair-Kabel mit den richtigen Anschlüssen verbunden sind. D-Link DGS-6600 Series Chassis Switch u 17...
- Page 18 • Lüfterfach verwendet werden soll. • Luftfilter Hier können Sie den seriellen USB-Treiber herunterladen: • CD-Software und Handbuch http://www.prolific.com.tw/eng/ • Schnellinstallationsanleitung downloads.asp?ID=31 Bestätigen Sie, dass der Treiber für Ihr Betriebssystem für die X-Chip-Serie ist. 18 u D-Link DGS-6600 Series Chassis Switch...
-
Page 19: Weitere Informationen
Das SNMP-basierte Management Anschluss eines Terminals an den Konsolenport: 1. Schließen Sie das mitgelieferte Adapterkabel Der Switch kann mit D-Link D-View oder jedem (RJ-45-zu-DB-9) an den 9-poligen seriellen SNMP-kompatiblen Konsolenprogramm verwaltet werden. Die SNMP-Funktion ist für D-Link Standardport des PCs an. Schließen Sie verwaltete Switche standardmäßig deaktiviert. -
Page 20: À Propos De Ce Guide
PRODUIT LASER DE CLASSE 1 Le commutateur de type châssis DGS-6600 de Ne regardez pas directement D-Link est un appareil de réseau local intelligent et l'interface optique ou les fibres multicouches hautes performances conçu pour les optiques afin d'éviter tout risque de campus d’entreprises et les réseaux métropolitains... -
Page 21: Déplacement De L'appareil
4. Portez toujours un bracelet antistatique si vous travaillez près de circuits électroniques. 5. Tenez un circuit imprimé par ses bords. Ne touchez aucun composant du circuit imprimé. 6. Évitez tout contact entre les vêtements et les D-Link DGS-6600 Series Chassis Switch u 21... -
Page 22: Alimentation Requise
1 et 3 en veille D-Link recommande d'utiliser plusieurs alimentations pour garantir un fonctionnement continu et stable de l'appareil. Les alimentations redondantes aident à prévenir les pannes d'alimentation inattendues. Les alimentations redondantes doivent être identiques. 22 u D-Link DGS-6600 Series Chassis Switch... -
Page 23: Conditions Requises Pour Le Site D'installation
Exigences pour un montage en rack plateau ou d’une glissière lors de l’installation du châssis dans le rack est recommandée. Si vous envisagez de monter le DGS-6604/8 dans un bâti, suivez les recommandations ci-après : D-Link DGS-6600 Series Chassis Switch u 23... -
Page 24: Mise À La Terre De L'appareil
Raccordez le connecteur du câble de terre à la borne de masse. • Resserrez l'écrou sur la borne de masse. • Connectez l'autre extrémité du câble de terre à une barre de masse appropriée. Figure 5. Installation de l'alimentation 24 u D-Link DGS-6600 Series Chassis Switch... - Page 25 • Vérifiez que l'alimentation externe fournie un ordinateur équipé d'un port USB capable corresponde au module d'alimentation de prendre en charge une interface série à installé dans le commutateur avant de connecter l'alimentation. D-Link DGS-6600 Series Chassis Switch u 25...
-
Page 26: Vérification De L'installation
3. Utilisez les leviers à gauche et à droite de la carte pour la pousser en place et serrez les deux vis imperdables sur la carte en utilisant un tournevis droit. 26 u D-Link DGS-6600 Series Chassis Switch... -
Page 27: Liste De Contrôle
3. Une fois que vous avez correctement configuré le terminal, branchez le câble d’alimentation Connexion du port de console (USB ou 9 dans les unités d’alimentation du commutateur. broches D-Sub) La séquence de démarrage apparaît sur le terminal. D-Link DGS-6600 Series Chassis Switch u 27... -
Page 28: Assistance Technique
Il n’y a pas de mot de passe par défaut pour le commutateur. Gestion SNMP Vous pouvez gérer le commutateur à l’aide de l’application D-Link D-View ou de tout autre programme de console compatible SNMP. La fonction SNMP est désactivée par défaut sur les commutateurs gérés D-Link. -
Page 29: Acerca De Esta Guía
CM. DGS-6608 componentes pesados. proporciona en total ocho bahías, incluidas dos Advertencia sobre el bahías para redundancia de CM. mantenimiento El mantenimiento sólo deben llevarlo a cabo los técnicos cualificados del servicio técnico D-Link DGS-6600 Series Chassis Switch u 29... -
Page 30: Preparación Para La Instalación
4. Lleve siempre una muñequera antiestática cuando trabaje en las proximidades de los circuitos electrónicos. 30 u D-Link DGS-6600 Series Chassis Switch... -
Page 31: Requisitos De Alimentación
Las fuentes de alimentación redundantes ayudan a evitar las caídas de tensión imprevistas. Las fuentes de alimentación redundantes deben ser idénticas. D-Link DGS-6600 Series Chassis Switch u 31... -
Page 32: Requisitos De Ventilación
Se recomienda Si tiene previsto montar el DGS-6604/8 en el uso de una bandeja o un riel de una carcasa, tenga en cuenta las directrices deslizamiento al instalar el chasis en el siguientes: bastidor. 32 u D-Link DGS-6600 Series Chassis Switch... - Page 33 Vuelva a apretar la tuerca en el poste de conexión a tierra. • Conecte el otro extremo del cable de toma de tierra a una barra de conexión a tierra adecuada. Figura 5. Instalación de la fuente de alimentación D-Link DGS-6600 Series Chassis Switch u 33...
- Page 34 USB capaz de admitir una interfaz serie, • Compruebe que la fuente de alimentación utilizando el SW del controlador serie USB PL- externa suministrada coincide con el módulo 2303 de Prolific Technology Inc. de alimentación instalado en el conmutador 34 u D-Link DGS-6600 Series Chassis Switch...
-
Page 35: Comprobación De La Instalación
3. Utilice las palancas del lateral izquierdo y derecho para empujar la placa en su sitio y apriete los dos tornillos en la placa utilizando un destornillador plano. D-Link DGS-6600 Series Chassis Switch u 35... -
Page 36: Lista De Comprobación
Conexión del puerto de la consola (USB o emulación del terminal. D-Sub de 9 pines) 3. Después de configurar correctamente el terminal, enchufe el cable de alimentación en las tomas de alimentación del conmutador. 36 u D-Link DGS-6600 Series Chassis Switch... -
Page 37: Asistencia Técnica
Existe ayuda adicional disponible a través de nuestras oficinas, que aparecen enumeradas en línea. Para obtener más información acerca de los productos D-Link o su comercialización, visite el sitio web http://www. dlink.com, que le redirigirá al sitio web local de D-Link correspondiente. -
Page 38: Informazioni Sulla Guida
La presente guida contiene le istruzioni passo Avviso di sicurezza relativo passo necessarie per l’installazione dello chassis all'alimentazione switch della serie D-Link DGS-6600. Notare che il modello acquistato potrebbe essere leggermente Prima di accendere il dispositivo, diverso da quello raffigurato nelle illustrazioni. -
Page 39: Preparazione Per L'installazione
4. Lavorando intorno alla circuiteria elettronica, sono stati progettati per sostenerne indossare sempre una fascetta antistatica da il peso. polso. 5. Maneggiare la scheda dei circuiti tenendola per i bordi. Non toccare alcun componente sulla scheda PCB. D-Link DGS-6600 Series Chassis Switch u 39... -
Page 40: Requisiti Di Alimentazione
D-Link consiglia l'uso di più alimentatori per il dispositivo, in modo da garantire un funzionamento continuo e stabile. Un'alimentazione ridondante aiuta a prevenire improvvise interruzioni di alimentazione. Gli alimentatori ridondanti devono essere identici. 40 u D-Link DGS-6600 Series Chassis Switch... -
Page 41: Requisiti Del Locale Di Installazione
Requisiti per il montaggio in rack scorrevoli. Se si desidera installare il dispositivo DGS-6604/8 in una struttura a rack, osservare le seguenti linee guida: D-Link DGS-6600 Series Chassis Switch u 41... -
Page 42: Installazione Dell'alimentatore
• Stringere il dado sul terminale di messa a terra. • Collegare l'altra estremità del cavo di messa a terra a una linea di messa a terra appropriata. Figura 5. Installazione dell'alimentatore 42 u D-Link DGS-6600 Series Chassis Switch... - Page 43 CA del driver seriale USB PL-2303 di Prolific Technology Inc. • Prima di collegare l'alimentatore, verificare che l'alimentatore esterno fornito corrisponda al modulo di alimentazione installato nello switch. D-Link DGS-6600 Series Chassis Switch u 43...
- Page 44 3. Utilizzare le leve sul lato sinistro e destro per Requisiti per l'ispezione spingere la scheda in posizione e serrare successiva al disimballaggio le due viti imperdibili sulla scheda con un cacciavite a taglio. 44 u D-Link DGS-6600 Series Chassis Switch...
-
Page 45: Lista Di Controllo
è necessario quanto segue: immettere i comandi. Molti comandi richiedono i diritti di accesso di livello amministratore. • Terminale o computer dotato di porta USB/seriale a 9 pin e della funzione per D-Link DGS-6600 Series Chassis Switch u 45... -
Page 46: Ulteriori Informazioni
Web http://www.dlink.com, che indirizzerà l’utente al sito Web D-Link locale appropriato. Supporto Tecnico http://www.dlink.it/support Supporto Tecnico dal lunedì al venerdì dalle ore 9.00 alle ore 19.00 con orario continuato Telefono: 02 87366396 46 u D-Link DGS-6600 Series Chassis Switch... -
Page 47: Safety Instructions
This equipment generates, uses, and can radiate radio frequency energy and, if not installed and used in accordance with Unless expressly approved by an authorized representative of D-Link in this manual, may cause harmful interference to radio communications. writing, you may not and may not permit others to: Operation of this equipment in a residential area is likely to cause •... -
Page 48: Instrucciones De Seguridad
Only a trained service technician should service expresamente autorizados por D-Link pueden dar lugar a la pérdida de la components inside these compartments. garantía del producto. -
Page 49: European Community Declaration Of Conformity
1999/5/EG. 2. Cuando transporte un componente sensible a la electricidad Íslenska Hér með lýsir D-Link Corporation yfir því að er í samræmi við estática, colóquelo en un contenedor o embalaje antiestático. [Icelandic] grunnkröfur og aðrar kröfur, sem gerðar eru í tilskipun 1999/5/EC. -
Page 50: Disposing And Recycling
D-Link og miljøet salud de los seres humanos. Hos D-Link forstår vi oss på og er forpliktet til å minske innvirkningen som vår drift og våre produkter kan ha på miljøet. For å minimalisere denne innvirkningen designer og lager D-Link D-Link y el medio ambiente En D-Link, comprendemos y estamos comprometidos con la reducción del impacto que... - Page 51 D-Link och miljön På D-Link förstår vi och är fast beslutna att minska den påverkan våra verksamheter och produkter kan ha på miljön. För att minska denna påverkan utformar och bygger D-Link sina produkter för att de ska vara så miljövänliga som möjligt, genom att använda återvinningsbara material med låg gifthalt i både produkter och förpackningar.
- Page 52 Ver. 2.01(EU) 2013/01/11 6DGS6600Q.02G...