Table of Contents
Advertisement
Quick Links
Advertisement
Table of Contents

Related Manuals for HIKVISION DS-3WR3N

Summary of Contents for HIKVISION DS-3WR3N
- Page 1 300 Mbps Wireless Router User Guide...
- Page 2 The Manual includes instructions for using and managing the Product. Pictures, charts, images and all other information hereinafter are for description and explanation only. The information contained in the Manual is subject to change, without notice, due to firmware updates or other reasons. Please find the latest version of this Manual at the Hikvision website (https://www.hikvision.com/).
- Page 3 European standards listed under the Directive 2014/30/EU, the Directive 2014/35/EU, the Directive 2011/65/EU. Hereby, Hikvision declares that the radio equipment type Wireless Router is in compliance with Directive 2014/53/EU. The full text of the EU declaration of conformity is available at the following internet address: https://www.hikvision.com/europe/support/download/declaration-of-conformity/...
- Page 4 Wireless Router • User Guide battery to your supplier or to a designated collection point. For more information see: www.recyclethis.info Industry Canada ICES-003 Compliance This device meets the CAN ICES-3 (A)/NMB-3(A) standards requirements. This device complies with Industry Canada licence-exempt RSS standard(s). Operation is subject to the following two conditions: (1) this device may not cause interference, and (2) this device must accept any interference, including interference that may cause undesired...
- Page 5 Wireless Router • User Guide Applicable Models This guide applies to the model: DS-3WR3N. Symbol Conventions The symbols that may be found in this document are defined as follows. Symbol Description Provides additional information to emphasize or supplement important points of the main text.
- Page 6 Wireless Router • User Guide Disassembling or modifying the device or its accessories without authorization voids the warranty, and might cause safety hazards.
-
Page 7: Table Of Contents
Wireless Router • User Guide TABLE OF CONTENTS Chapter 1 Get to know your device ..................... 1 Overview ................................1 Appearance ................................1 1.2.1 LED indicator .............................. 1 1.2.2 Jack, ports, and button ..........................3 Label ..................................4 Chapter 2 Web UI ........................5 Log in to the web UI .............................. - Page 8 Wireless Router • User Guide 6.3.1 Overview ..............................71 6.3.2 Enable internet users to access LAN resources using an IP address ............72 DDNS ................................... 77 6.4.1 Overview ..............................77 6.4.2 Enable internet users to access LAN resources using a domain name ............ 78 DMZ host................................
-
Page 9: Chapter 1 Get To Know Your Device
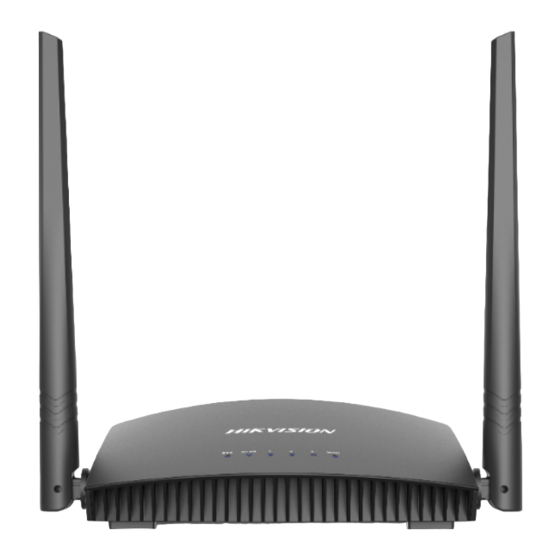
Chapter 1 Get to know your device Overview Hikvision wireless N300 home router is an eco-friendly wireless router dedicated to small and medium apartments. With 4 external 5 dBi antennas and built-in Qualcomm WiFi chip, it works perfectly with popular mobile phones and blanks your home with a reliable and stable internet connection. - Page 10 Wireless Router • User Guide LED indicator description LED indicator Status Description Solid on The system is working properly. The system is faulty. Solid on The WiFi network is enabled. WLAN Blinking Data is being transmitted wirelessly. The WiFi network is disabled. The corresponding LAN port is connected properly, but no Solid on data is being transmitted over the LAN port.
-
Page 11: Jack, Ports, And Button
Wireless Router • User Guide PWR, WAN, LAN3, LAN2, LAN1, WPS/RST Jack, ports, and button Jack, ports and button description Jack/port/button Description Power jack Used to power on the router (with the included power adapter). 10/100 Mbps auto-negotiation WAN port. Used to connect to the external network. -
Page 12: Label
Wireless Router • User Guide Label The bottom label shows the login IP address, SSID, MAC address, and serial number (SN) of the router. See the following figure. Label Login address: It is the domain name used to log in to the web UI of the router. IP Address: It is the default address used to log in to the web UI of the router. -
Page 13: Chapter 2 Web Ui
Wireless Router • User Guide Chapter 2 Web UI Log in to the web UI Connect your smartphone to the WiFi network of the router, or connect your computer to a LAN port of the router. WAN, LAN3, LAN2, LAN1 Connect your device to the router Launch a web browser on the device connected to the router, and visit http://hikvisionwifi.local. - Page 14 Wireless Router • User Guide The following page appears. Web UI If the above page does not appear, try the following solutions: Ensure that the router is powered on properly. If you are using a computer to access the page, check whether the computer obtains an IP address automatically.
-
Page 15: Log Out Of The Web Ui
Wireless Router • User Guide Log out of the web UI If you log in to the web UI of the router and perform no operation within 5 minutes, the router logs you out automatically. You can also log out by clicking Logout in the upper right corner of the web... -
Page 16: Web Ui Layout
Wireless Router • User Guide Web UI layout The web UI of the router consists of two parts, including the navigation bar and the configuration area. See the following figure. Web UI layout The functions and parameters shown in gray indicate that the functions are not supported or cannot be modified. -
Page 17: Common Element
Wireless Router • User Guide Common element The common elements used on the web UI are as follows. Common element description Common element Description It is used to save the current configurations and enable them to Save take effect. It is used to cancel the current configurations and restore the Cancel previous settings. -
Page 18: Chapter 3 Status
Wireless Router • User Guide Chapter 3 Status Log in to the web UI of the router and choose Status to enter the page. On this page, you can: View internet connection status View online device information View system information View internet connection status You can view the internet connection status on this page. - Page 19 Wireless Router • User Guide When the internet and the router are connected and Connected. You can access the internet. is shown as below, the router is connected to the internet successfully and you can access the internet via the router. Internet connection status When a red cross and “Disconnected”...
- Page 20 Wireless Router • User Guide When a red cross and "Disconnected" are shown between the internet and the router, and Failed. Please confirm your user name and password and try again. is shown on the page, it indicates that the user name and password you entered were incorrect. Please navigate to the Internet Settings page to try again.
- Page 21 Wireless Router • User Guide When a red cross and “Disconnected” are shown between the internet and the router, and Error: No response from the remote server. Please contact your ISP. is shown on the page, try the following solutions: Ensure that the Ethernet cable is connected properly.
- Page 22 Wireless Router • User Guide When a red cross and “Disconnected” are shown between the internet and the router, and Dial-up connection succeeded but the internet is inaccessible. Please contact your ISP. is shown on the page, contact your ISP for the problem. Internet connection status When a red cross and "Disconnected"...
-
Page 23: View Online Device Information
Wireless Router • User Guide View online device information This part shows the information of online devices, such as the number and real-time upload/download speed. To access the page, log in to the web UI of the router and navigate to Status > (Online devices). -
Page 24: View System Information
Wireless Router • User Guide View system information This section shows the basic information of the router, including connection type, connection duration, WAN IP address and so on. To access the page, log in to the web UI of the router and navigate to Status > System Info. System information System information parameter description Parameter... - Page 25 Wireless Router • User Guide Parameter Description Subnet Mask It specifies the subnet mask of the WAN port. Default Gateway It specifies the IPv4 default gateway of the router. Device Version It specifies the current version number of the router’s firmware. WAN IP Address It specifies the IPv4 address of the WAN port.
-
Page 26: Chapter 4 Route Settings
Wireless Router • User Guide Chapter 4 Route settings Internet settings On this page, you can complete the internet settings to achieve shared internet access for multiple users. To access the page, log in to the web UI of the router and navigate to Route Settings > Internet Settings. -
Page 27: Serve As A Router
Wireless Router • User Guide If you use the router for the first time or the router is restored to factory settings, follow the quick installation guide to configure the internet access. If you want to modify internet parameters or other settings, you can follow the instruction in this chapter. - Page 28 Wireless Router • User Guide Procedures: Launch a web browser on a device connected to the router and visit http://hikvisionwifi.local to log in to the web UI of the router. Navigate to Route Settings > Internet Settings. Set Operating Mode to Router Mode. Set Connection Type to PPPoE.
- Page 29 Wireless Router • User Guide Wait a moment. When “Connected. You can assess the internet.” is shown on the page, the router is connected to the internet. Connection status If you still cannot access the internet, try the following solutions: ...
- Page 30 Wireless Router • User Guide Set up a static IP connection When your ISP provides you with information including IP address, subnet mask, default gateway and DNS server, you can choose this connection type to access the internet. Procedures: Launch a web browser on a device connected to the router and visit http://hikvisionwifi.local to log in to the web UI of the router.
- Page 31 Wireless Router • User Guide Wait a moment. When "Connected. You can access the internet." is shown on the page, you can access the internet. Connection status If you still cannot access the internet, refer to 3.1 View internet connection status to find a solution.
- Page 32 Wireless Router • User Guide Set up a dynamic IP connection Generally, accessing the internet through a dynamic IP address is applicable in the following situations: Your ISP does not provide PPPoE user name and password, or any information including IP address, subnet mask, default gateway and DNS server.
- Page 33 Wireless Router • User Guide Set Operating Mode to Router Mode. Set Connection Type to Dynamic IP Address. Click Save at the bottom of the page. Set up a dynamic IP connection Wait a moment. When “Connected. You can access the internet.”...
-
Page 34: Serve As A Wifi Extender
Wireless Router • User Guide If you have a router that is connected to the internet and wants to extend the WiFi coverage, you can refer to this chapter. Assume that the information about your existing WiFi network is as follows: WiFi name: My_home_WiFi WiFi password: Hikvision123456 New router... - Page 35 Wireless Router • User Guide Method 1: Set the router to WISP mode Procedures: Launch a web browser on a device connected to the router and visit http://hikvisionwifi.local to log in to the web UI of the router. If you use the router for the first time or have reset the router, proceed with the following steps. If you have already configured the router, skip Step 2.
- Page 36 Wireless Router • User Guide Navigate to Route Settings > Internet Settings > Operating Mode. Set Operating Mode to WISP. Select the ISP hotspot, which is My_home_WiFi in this example. Select the WiFi signal to be boosted Enter the password of the WiFi network, which is Hikvision123456 in this example. Click OK.
- Page 37 Wireless Router • User Guide Log in to the web UI of the router again, and navigate to Status > Connection Status to ensure that Connected. You can access the internet. is shown on this page. Connection status If the connection between WiFi and My Router failed, try the following solutions: ...
- Page 38 Wireless Router • User Guide To access the internet, connect your computer to a LAN port of the new router, or connect your smartphone to the WiFi network of the new router. Navigate to Route Settings > Wireless Settings > WiFi Name and Password to check the WiFi name and password.
- Page 39 Wireless Router • User Guide Method 2: Set the router to universal relay mode Procedures: Launch a web browser on a device connected to the router and visit http://hikvisionwifi.local to log in to the web UI of the router. If you use the router for the first time or have reset the router, proceed with the following steps. If you have already configured the router, skip Step 2.
- Page 40 Wireless Router • User Guide Navigate to Route Settings > Internet Settings > Operating Mode. Set Operating Mode to Universal relay mode. Select the ISP hotspot, which is My_home_WiFi in this example. Select the ISP hotspot to be boosted Enter the password of the selected WiFi network, which is Hikvision123456 in this example. Click OK.
- Page 41 Wireless Router • User Guide If the connection between the Upstream Router and My Router failed, try the following solutions: Ensure that you have entered the correct WiFi password of the WiFi, and mind case sensitivity. Ensure that My Router is within the wireless coverage of the Upstream Router. Relocate the new router by referring to the following suggestions and power it on again: Between the original router and the uncovered area, but within the coverage of the original router.
-
Page 42: Serve As An Ap
Wireless Router • User Guide If you cannot access the internet, try the following solutions: Ensure that the existing router is connected to the internet successfully. Ensure that your wireless devices are connected to the WiFi network of the new router. ... - Page 43 Wireless Router • User Guide Procedures: Power on the router. Connect a computer to a LAN port of the router, or connect your smartphone to the WiFi network of the router. LAN3, LAN2, LAN1 Application scenario If you have finished the quick setup wizard before, launch a web browser and visit http://hikvisionwifi.local and skip Step 2.
- Page 44 Wireless Router • User Guide Log in to the web UI of the router. 1) Launch a web browser on a device connected to the router and visit http://hikvisionwifi.local to log in to the web UI of the router. A computer is used for the illustration below.
- Page 45 Wireless Router • User Guide Set the router to AP mode. 1) Navigate to Route Settings > Internet Settings > Operating Mode. 2) Set Operating Mode to AP, and click Save at the bottom of the page. Set the router to AP mode 3) Click OK in the popup window.
- Page 46 Wireless Router • User Guide Internet connection status If there is another network device with the same login domain name (hikvisionwifi.local) as the router, log in to the upstream router and find the IP address obtained by the new router in the client list.
- Page 47 Wireless Router • User Guide If you cannot access the internet, try the following solutions: Ensure that the existing router is connected to the internet successfully. Ensure that your wireless devices are connected to the correct WiFi network of the new router.
-
Page 48: Wireless Settings
Wireless Router • User Guide Wireless settings You can enable/disable the wireless network of the router. To access the configuration page, log in to the web UI of the router, and navigate to Route Settings > Wireless Settings > WiFi On/Off. WiFi on/off Overview On this page, you can configure basic WiFi parameters, such as the WiFi name and password. - Page 49 Wireless Router • User Guide WiFi name and password parameter description Parameter Description WiFi Name It specifies the WiFi network name (SSID) of the WiFi network. It specifies the encryption modes supported by the router, including: None: It indicates that a WiFi network is not encrypted and any clients can access the network without a password.
- Page 50 1) Change the WiFi Name of the WiFi network, which is John_Doe_2.4GHz in this example. 2) Select an Encryption Mode, which is WPA/WPA2-PSK Mixed in this example. 3) Change the WiFi Password of the WiFi network, which is Hikvision+Wireless24 in this example.
- Page 51 WiFi name: Jone_Doe Encryption type: WPA/WPA2-PSK Mixed WiFi password: Hikvision+Wireless245 If you do not remember the wireless parameters of the WiFi network, log in to the web UI of the router and navigate to Route Settings > Wireless Settings > WiFi Name and Password to find...
- Page 52 Tap Settings on your phone, and find WLAN. Enable WLAN. Scroll the WiFi list to the bottom, and tap Other…. Enter the WiFi name and password, which are John_Doe and Hikvision+Wireless245 in this example. Set security to WPA2/WPA3 (If WPA2/WPA3 is not available, choose WPA2).
-
Page 53: Multi Ssid And Password
Wireless Router • User Guide Overview In this module, you can enable/disable the Multi SSID and password function and change the WiFi name and password of the guest network. To access the configuration page, log in to the web UI of the router and navigate to Route Settings >... - Page 54 Set Multi SSID and Password to Enable. Change the WiFi Name, which is John_Doe in this example. Set WiFi Password, which is Hikvision+245 in this example. Click Save at the bottom of the page. Set up the multi SSID and password After the configuration, guests can connect their wireless devices, such as smartphones, to John_Doe to access the internet.
-
Page 55: Wifi Schedule
Wireless Router • User Guide Overview In this module, you can enable/disable the WiFi schedule function. To access the configuration page, log in to the web UI of the router and navigate to Route Settings > Wireless Settings > WiFi Schedule. This function is disabled by default. WiFi schedule WiFi schedule parameter description Parameter... -
Page 56: Wps
Wireless Router • User Guide The WPS function enables wireless devices such as smartphones to connect to WiFi networks of the router quickly and easily. To access the page, log in to the web UI of the router and navigate to Route Settings > Wireless Settings >... - Page 57 Wireless Router • User Guide Connect to the WiFi network using the WPS button Press the WPS button on the router. WPS/RST Press the WPS button...
- Page 58 Wireless Router • User Guide Configure the WPS function on your wireless devices within 2 minutes. Configurations on various devices may differ (Example: HUAWEI P10). 1) Find Settings on the phone. 2) Select WLAN. 3) Tap , and select WLAN settings. Configure the WPS function 4) Select WPS connection.
- Page 59 Wireless Router • User Guide Wait a moment until the WPS negotiation is completed, and the phone is connected to the WiFi network. WPS negotiation completed Connect to the WiFi network using the PBC button Procedures: Launch a web browser on a device connected to the router and visit http://hikvisionwifi.local to log in to the web UI of the router.
- Page 60 Wireless Router • User Guide Configure the WPS function on your wireless devices within 2 minutes. Configurations on various devices may differ (Example: HUAWEI P10). 1) Find WLAN settings on the phone. 2) Tap , and choose WLAN settings. Configure the WPS function 3) Select WPS connection.
- Page 61 Wireless Router • User Guide Wait a moment until the WPS negotiation is completed, and the phone is connected to the WiFi network. WPS negotiation completed Wait until the smartphone or computer is connected to the WiFi network of the router successfully.
- Page 62 Wireless Router • User Guide Connect to the WiFi network using the PIN code WPS connection using pin code is generally applied on a computer with a wireless adapter. Please refer to the relevant adapter's user guide for detailed instructions. Find the PIN code.
-
Page 63: Wifi Parameters
Wireless Router • User Guide In this section, you can change network mode, wireless channel, and wireless bandwidth of 2.4 GHz WiFi network. To access the configuration page, log in to the web UI of the router, and navigate to Route Settings >... - Page 64 Wireless Router • User Guide WiFi parameter description Parameter Description It specifies various protocols adopted for wireless transmission. 2.4 GHz WiFi network supports 11b, 11g, 11b/g mixed and 11b/g/n mixed modes. 11b/g/n: It indicates that all devices compliant with IEEE 802.11b or IEEE 802.11g protocol, or work at 2.4 GHz with IEEE 802.11n protocol can connect to the 2.4 GHz WiFi network of the router, therefore enjoying a maximum transmission rate of 300 Mbps.
-
Page 65: Chapter 5 Client Management
Wireless Router • User Guide Chapter 5 Client management Access control By configuring this function, you can limit the upload and download speed of devices connected to the router and allocate the bandwidth reasonably. On this page you can: Set the upload and download speed limit Add devices to the blacklist Remove devices from the blacklist To access the configuration page, log in to the web UI of the router and navigate to Client... - Page 66 Wireless Router • User Guide Access control parameter description Parameter Description It shows the information of the online device, including the device name and IP address. Device Name You can click to customize the device name for easier management. Download Speed It specifies the current upload and download speeds of the device.
-
Page 67: Set The Upload And Download Speed Limit
Wireless Router • User Guide Scenario: You want to allocate bandwidth equally and enable all connected devices to enjoy smooth 720p videos. Solution: Configure the bandwidth control function to meet the requirement. Procedures: Launch a web browser on a device connected to the router and visit http://hikvisionwifi.local to log in to the web UI of the router. -
Page 68: Add The Device To The Blacklist
Wireless Router • User Guide Add devices to the blacklist to block internet access: Launch a web browser on a device connected to the router and visit http://hikvisionwifi.local to log in to the web UI of the router. Navigate to Client Management > Access Control. Click corresponded to the device to be blocked to change the status to Add device to the blacklist... -
Page 69: Remove The Device From The Blacklist
Wireless Router • User Guide Procedures: Launch a web browser on a device connected to the router and visit http://hikvisionwifi.local to log in to the web UI of the router. Navigate to Client Management > Access Control > Blocked Device (Blacklist). Target the device and click Click Save at the bottom of the page. -
Page 70: Parental Control
Wireless Router • User Guide Parental control On the parental control page, you can view the information of online devices and configure their internet access options. To access the configuration page, log in to the web UI of the router, and navigate to Client Management >... - Page 71 Wireless Router • User Guide Parental control parameter description Parameter Description It specifies the name of the online device. Device Name You can click to customize the device name for easier management. Online IP Address It specifies the IP address of the online device. Device It specifies the time that has elapsed since the device Online Duration...
-
Page 72: An Example Of Configuring Parental Control
Wireless Router • User Guide Scenario: The final exam for your daughter is approaching and you want to configure her internet access through the router. Goal: Your daughter cannot access websites, such as Facebook, Twitter, Youtube, and Instagram, from 8:00 to 22:00 on weekends using the computer in her room, and cannot access the internet from 22:00 to 8:00. - Page 73 Wireless Router • User Guide Specify the period when the target websites cannot be accessed, which is 8:00 ~ 22:00 in this example. Tick the days when the rule is applied, which are Saturday and Sunday in this example. Set Website Restrictions to Only Forbid. Set Blocked Websites, which are facebook.com, twitter.com, youtube.com and instagram.com.
-
Page 74: Chapter 6 Advanced
Wireless Router • User Guide Chapter 6 Advanced MAC address filter This function enables you to add devices to the whitelist or blacklist to enable or disable specified users to access the internet through the router. To access the configuration page, log in to the web UI of the router, and navigate to Advanced > MAC Address Filter. -
Page 75: Only Allow Specified Device To Access The Internet
Wireless Router • User Guide Scenario: The WiFi network in your home is misused by unknown users sometimes. Goal: Only allow certain devices of family members to access the internet. Solution: You can configure the MAC address filter function to reach the goal. Assume the MAC address and connection status of your domestic devices are as follows. - Page 76 Wireless Router • User Guide Repeat Step 4 to Step 6 to add the Daughter's phone (98:9C:57:19:D0:1B) to the whitelist. Click Save at the bottom of the page. Whitelisted MAC address When the configuration is completed, only the three devices added can access the internet through the router.
-
Page 77: Ip-Mac Binding
Wireless Router • User Guide IP-MAC binding Through the IP-MAC binding function, specified clients can always obtain the same IP address when connecting to the router, ensuring that the router's "Port Mapping", "DDNS", "DMZ host" and other functions can function normally. This function takes effect only when the DHCP server function of the router is enabled. - Page 78 Wireless Router • User Guide Procedures: Launch a web browser on a device connected to the router and visit http://hikvisionwifi.local to log in to the web UI of the router. Navigate to Advanced > IP-MAC Binding. Enter an IP address included in the DHCP address pool, which is 192.168.0.136 in this example.
-
Page 79: Port Mapping
Wireless Router • User Guide Port mapping By default, internet users cannot actively access the LAN of the router. The port mapping function opens a port of the router, and binds the LAN server to the port using the server’s IP address and intranet service port. All-access requests to the WAN port of the router will be directed to the server. -
Page 80: Enable Internet Users To Access Lan Resources Using An Ip Address
Wireless Router • User Guide Scenario: You have set up an FTP server within your LAN. Goal: Open the FTP server to internet users and enable family members who are not at home to access the resources of the FTP server from the internet. Solution: You can configure the port mapping function to reach the goal. - Page 81 Wireless Router • User Guide Access using an IP address Smart phone WAN IP:X.X.X.X Application scenario FTP server IP 192.168.0.125 MAC 00:00:00:00:00:01 Port number 21 Procedures: Launch a web browser on a device connected to the router and visit http://hikvisionwifi.local to log in to the web UI of the router. Add a port mapping.
- Page 82 Wireless Router • User Guide The port mapping rule is added when the page is shown as below. Port mapping rule is added Assign a fixed IP address to the host where the server locates. 1) Navigate to Advanced > IP-MAC Binding. 2) Specifies an IP Address for the host of the server, which is 192.168.0.125 in this example.
- Page 83 Wireless Router • User Guide When completing the configurations, users from the internet can access the FTP server by visiting “Intranet service application layer protocol name://WAN IP address of the router”. If the external port number is not the same as the default intranet service port number, the visiting address should be: “Intranet service application layer protocol name://WAN IP address of the router:external port number”.
- Page 84 Wireless Router • User Guide If you want to access the server within a LAN using a domain name, refer to the solution DDNS Port mapping. After the configurations, if internet users still cannot access the FTP server, try the following methods: ...
-
Page 85: Ddns
Wireless Router • User Guide DDNS DDNS normally interworks with port mapping, DMZ host and remote management, so that the internet users can be free from the influence of dynamic WAN IP addresses and access the internal server or the router’s web UI with a fixed domain name. To access the configuration page, log in to the web UI of the router, and navigate to Advanced >... -
Page 86: Enable Internet Users To Access Lan Resources Using A Domain Name
Wireless Router • User Guide DDNS parameter description Parameter Description It specifies whether to enable the DDNS function. DDNS It specifies a DDNS service provider, including oray.com, 88ip.cn and Service Provider dyn.com. DDNS User Name It specifies the user name and password registered on a DDNS service provider's website for logging in to the DDNS service. - Page 87 Wireless Router • User Guide Please ensure that the router obtains an IP address from the public network. This function may not work on a host with an IP address of a private network or an intranet IP address assigned by ISPs that start with 100.
- Page 88 Wireless Router • User Guide Procedures: Launch a web browser on a device connected to the router and visit http://hikvisionwifi.local to log in to the web UI of the router. Configure the DDNS function. 1) Navigate to Advanced > DDNS. 2) Set DDNS to Enable.
- Page 89 Wireless Router • User Guide In this example, the address is ftp://XXXX.zicp.vip. Enter the ftp://XXXX.zip.vip Enter the user name and password to access the resources on the FTP server. Enter the user name and password...
- Page 90 Wireless Router • User Guide After the configurations, if internet users still cannot access the FTP server, try the following methods: Ensure that the LAN port number configured in the port mapping function is the same as the service port number set on the server. ...
-
Page 91: Dmz Host
Wireless Router • User Guide DMZ host A DMZ host on a LAN is free from restrictions when communicating with the internet. It is useful for getting a better and smoother experience in video conferences and online games. You can also set the host of a server within the LAN as a DMZ host when in need of accessing the server from the internet. -
Page 92: Enable Internet Users To Access Lan Resources Using An Ip Address
Wireless Router • User Guide Scenario: You have set up an FTP server within your LAN. Goal: Open the FTP server to internet users and enable family members who are not at home to access the resources of the FTP server from the internet. Solution: You can configure the DMZ host function to reach the goal. - Page 93 Wireless Router • User Guide Procedures: Launch a web browser on a device connected to the router and visit http://hikvisionwifi.local to log in to the web UI of the router. Set the server host as the DMZ host. 1) Navigate to Advanced > DMZ Host. 2) Set DMZ Host to Enable.
- Page 94 Wireless Router • User Guide When the default intranet service port number is 80, please change the service port number to an uncommon one (1024 to 65535), such as 9999. Enter the ftp://X.X.X.X Enter the user name and password to access the resources on the FTP server. Enter the user name and password If you want to access the server within a LAN using a domain name, refer to the solution DDNS.
-
Page 95: Ping Wan
Wireless Router • User Guide PING WAN The PING WAN function enables you to ping the WAN port IP address over the internet to check the connectivity between the router and the internet. It is enabled by default. Choose Advance, and move to the PING WAN module to enter the configuration page. This function is disabled by default. -
Page 96: Upnp
Wireless Router • User Guide UPnP UPnP is short for Universal Plug and Play. This function enables the router open port automatically for UPnP-based programs. It is generally used for P2P programs, such as BitComet and AnyChat, and helps increase the download speed. To access the configuration page, log in to the web UI of the router, and navigate to Advanced >... -
Page 97: Ap Isolation
Wireless Router • User Guide AP Isolation When this function is enabled, wireless clients connected to the same SSID will not be able to communicate with each other, which can enhance wireless network security. This function is disabled by default. When it is enabled, the page is shown as below. AP isolation... -
Page 98: Chapter 7 Administration
Wireless Router • User Guide Chapter 7 Administration Login password To ensure network security, a login password is recommended. We recommend you set a complex login password with more types of characters, such as uppercase letters, lowercase letters, numbers and special characters. To access the login password configuration page, log in to the web UI and navigate to Administration >... -
Page 99: Wan Parameters
Wireless Router • User Guide WAN parameters MTU (Maximum Transmission Unit) is the largest data packet transmitted by a network device. When the connection type is PPPoE, the default MTU value is 1480. When the connection type is the dynamic IP address or static IP address, the default MTU value is 1500. Do not change the value unless necessary. -
Page 100: Clone Wan Mac Address
Wireless Router • User Guide If you still cannot access the internet after completing Internet settings, it could be the result of the ISP’s configuration to bind the internet account information with a fixed MAC address. In this case, you can clone and change the MAC address of the router to solve the problem. To access the configuration page, log in to the web UI of the router, and navigate to Administration >... - Page 101 Wireless Router • User Guide Procedures: Launch a web browser on a device connected to the router and visit http://hikvisionwifi.local to log in to the web UI of the router. Navigate to Administration > WAN Parameters. Click the drop-down box of Clone MAC Address, and choose Clone Local Host MAC to copy the MAC address of the management device, or Manual to enter the desired MAC address.
-
Page 102: Change The Wan Speed
Wireless Router • User Guide To access the configuration page, log in to the web UI of the router, and navigate to Administration > WAN Parameters. When the Ethernet cable is not damaged and connected to the WAN port properly, but Ethernet cable disconnected is still shown on the Internet Settings page, you can try to change the WAN Speed to 10 Mbps full-duplex or 10 Mbps half-duplex to solve the problem. -
Page 103: Lan Parameters
Wireless Router • User Guide LAN parameters On this page, you can: Change the LAN IP address and subnet mask of the router. Change the DHCP server parameters of the router. The DHCP server can automatically assign an IP address, subnet mask, gateway and other information to clients within the LAN. - Page 104 Wireless Router • User Guide LAN parameter description Parameter Description It specifies the LAN IP address of the router, which is also the LAN IP Address management IP address for logging in to the web UI of the router. It specifies the subnet mask of the LAN port, used to identify the Subnet Mask IP address range of the local area network.
-
Page 105: Remote Web Management
Wireless Router • User Guide Remote web management Generally, the web UI of the router can only be accessed on devices that are connected to the router by a LAN port or wireless connection. When you encounter a network fault, you can ask for remote technical assistance, which improves efficiency and reduces costs and efforts. -
Page 106: Internet Users Access The Web Ui
Wireless Router • User Guide Remote web management parameter description Parameter Description It is used to enable or disable the remote management function of the Remote Web Management router. It specifies the IP address of the host which can access the web UI of the router remotely. - Page 107 Wireless Router • User Guide Access with an IP address Technical support IP address: 210.76.200.101 WAN IP address: X.X.X.X Application scenario Procedures: Launch a web browser on a device connected to the router and visit http://hikvisionwifi.local to log in to the web UI of the router. Navigate to Administration >...
-
Page 108: Date & Time
Wireless Router • User Guide Date & time If the system time of the router is incorrect, time-based functions of the router cannot take effect correctly, including the WiFi schedule, parental controls and automatic maintenance functions. The router supports the synchronization of time with the internet. when the router is connected to the internet, the router will calibrate the system time of the router. -
Page 109: Device Management
Wireless Router • User Guide Device management If any parameter fails to take effect or the router does not work properly, you can try rebooting the router. Rebooting the router will disconnect all connections to the router. Reboot the router during leisure time. -
Page 110: Reset The Router
Wireless Router • User Guide If you are uncertain about why the internet is inaccessible through the router or you forget the login password of the router, you can reset the router. Resetting the router is not recommended unless you cannot find a solution for the current problem anyway. - Page 111 Wireless Router • User Guide Reset the router on the web UI Procedures: Launch a web browser on a device connected to the router and visit http://hikvisionwifi.local to log in to the web UI of the router. Navigate to Administration > Device Management. Click Reset.
-
Page 112: Backup/Restore Configuration
Wireless Router • User Guide In this module, you can back up the current configurations of the router to your computer. You are recommended to back up the configuration after the settings of the router are significantly changed, or the router works in a good condition. After you restore the router to factory settings or upgrade it, you can use this function to restore the configurations that have been backed up. - Page 113 Wireless Router • User Guide Restore previous configurations of the router Procedures: Launch a web browser on a device connected to the router and visit http://hikvisionwifi.local to log in to the web UI of the router. Navigate to Administration > Device Management. Click Restore.
-
Page 114: Export System Log
Wireless Router • User Guide This function logs all key events that occur after the router is started. If you encounter a network fault, you can turn to system logs for fault rectification. To access the configuration page, log in to the web UI of the router, and navigate to Administration >... - Page 115 Wireless Router • User Guide Procedures: Go to www.hikvision.com/en. Download an applicable firmware of the router to your local computer and unzip it. Launch a web browser on a device connected to the router and visit http://hikvisionwifi.local to log in to the web UI of the router.
- Page 116 Wireless Router • User Guide Wait for a moment until the ongoing process finishes. Log in to the web UI of the router again. Navigate to Administration > Device Management and check whether the upgrade is successful based on the Current Firmware Version. For better performance of the new firmware, you are recommended to reset the router to factory default settings and re-configure the router when the upgrading is completed.
-
Page 117: Automatic Maintenance
Wireless Router • User Guide Automatic maintenance enables you to make the router restart regularly. It helps improve the stability and service life of the router. To configure the automatic maintenance function, navigate to Administration > Device Management. When this function is enabled, from 02:00 to 05:30 every day in the morning, if there is any user connected to the router and the traffic over the router's WAN port exceeds 3 KB/s within 30 minutes, the router will delay rebooting. -
Page 118: Configuring The Computer To Obtain An Ipv4 Address Automatically
Wireless Router • User Guide Appendix A A.1 Configuring the computer to obtain an IPv4 address automatically Perform the Configuring procedures corresponding to Windows Windows 8 Windows 7 required. A computer installed with a wired network adapter is used as an example to describe the procedures. - Page 119 Wireless Router • User Guide Right-click on the connection which is being connected, and then click Properties. Click properties Double-click Internet Protocol Version 4 (TCP/IPv4). Click Internet Protocol Version 4(TCP/IPv4)
- Page 120 Wireless Router • User Guide Select Obtain an IP address automatically and Obtain DNS server address automatically, and click OK. Click OK Click Close in the Ethernet Properties window.
-
Page 121: A.1.2 Windows 8
Wireless Router • User Guide A.1.2 Windows 8 Right-click in the bottom right corner of the desktop and choose Open Network and Sharing Center. Choose Open Network and Sharing Center Click Ethernet and then Properties. Click Ethernet and then Properties... - Page 122 Wireless Router • User Guide Double-click Internet Protocol Version 4 (TCP/IPv4). Double-click Internet Protocol Version 4(TCP/IPv4) Select Obtain an IP address automatically and Obtain DNS server address automatically, and click OK. Click OK Click OK in the Ethernet Properties window.
-
Page 123: A.1.3 Windows 7
Wireless Router • User Guide A.1.3 Windows 7 Click in the bottom right corner of the desktop and choose Open Network and Sharing Center. Choose Open Network and Sharing Center Click Local Area Connection and then Properties. Click Local Area Connection and then Properties... - Page 124 Wireless Router • User Guide Double-click Internet Protocol Version 4 (TCP/IPv4). Double-click Internet Protocol Version 4 (TCP/IPv4) Select Obtain an IP address automatically and Obtain DNS server address automatically, and click OK. Click OK Click OK in the Local Area Connection Properties window.
-
Page 125: A.2 Default Parameters
Wireless Router • User Guide A.2 Default parameters Parameter Parameter Default 192.168.0.1 IP Address Login None Password 192.168.0.1 IP Address LAN Parameter 255.255.255.0 Sunnet Mask Enabled DHCP Server 192.168.0.100 Start IP Address DHCP Server 192.168.0.200 End IP Address 192.168.0.1 Preferred DNS Server Router mode Operating Mode See the label on the bottom of the router... -
Page 126: A.3 Acronyms And Abbreviations
Wireless Router • User Guide A.3 Acronyms and abbreviations Acronyms and abbreviations Abbreviations Full spelling Advanced Encryption Standard Access Point Dynamic Domain Name Server DDNS Dynamic Host Configuration Protocol DHCP Dynamic Host Configuration Protocol for IPv6 DHCPv6 Demilitarized Zone Domain Name System Greenwich Mean Time Internet Protocol Internet Protocol version 4...