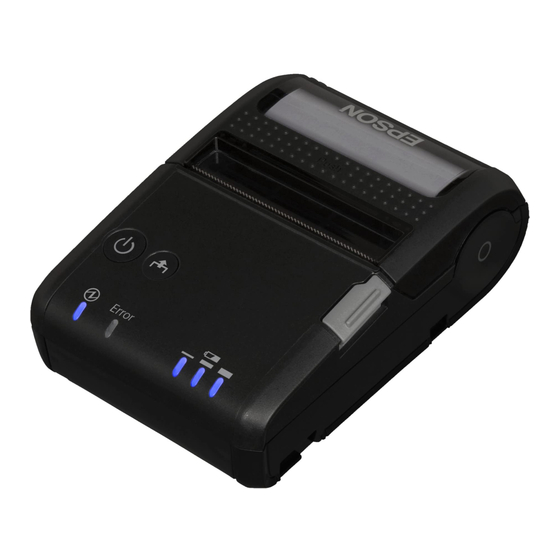
Epson TM-P20 Software User Manual
Hide thumbs
Also See for TM-P20:
- Technical reference manual (100 pages) ,
- Setup manual (52 pages) ,
- User manual (25 pages)
Table of Contents
Advertisement
Quick Links
Advertisement
Table of Contents

Related Manuals for Epson TM-P20


Summary of Contents for Epson TM-P20
- Page 1 Software User's Manual M00083001 EN...
-
Page 2: Cautions
❏ Neither is any liability assumed for damages resulting from the use of the information contained herein. ❏ Neither Seiko Epson Corporation nor its affiliates shall be liable to the purchaser of this product or third parties for damages, losses, costs, or expenses incurred by the purchaser or third parties as a result of: accident, misuse, or abuse of this product or unauthorized modifications, repairs, or alterations to this product, or (excluding the U.S.) -
Page 3: For Safety
Aim of the Manual This manual provides information on how to use TM-P20 Software & Documents Disc for the product users or development engineers who use the software. -
Page 4: Table Of Contents
Accessing from the Printer Driver's Print TM-P20 Software Installer....6 menu....... . 54 Drivers and Utilities to be Installed. -
Page 5: Overview
Overview TM-P20 provides the various drivers and utilities for Windows operating systems and smart devices. You can install the drivers and utilities for Windows using TM-P20 Software & Documents Disc. For the installation, “Installation” on page For the provided drivers and utilities for Windows, see “Drivers and Utilities to be Installed”... -
Page 6: Tm-P20 Software & Documents Disc
TM-P20 Software & Documents Disc This chapter describes how to use the TM-P20 Software & Documents Disc. TM-P20 Software Installer TM-P20 Software Installer allows you to install various drivers and utilities for the TM-P20 to Windows PC. Drivers and Utilities to be Installed Drivers ❏... -
Page 7: Support Os
❏ EpsonNet Config A network setting tool for Epson network products. In the case of this printer, you can use this tool to check and/or set network parameters by connecting the Wi-Fi model to a computer for setup via the USB interface. -
Page 8: Restrictions On Using Multiple Drivers On The Same System
Restrictions on Using Multiple Drivers on the Same System TM-P20 Software Installer may not install the driver, or if the driver can be installed, the combination of the existing driver and the newly installed driver may not be supported. Refer to the following table. -
Page 9: How To Access The Manuals
- : Not supported * : Can not be installed. ! : TM-P20 Software Installer starts in update mode. The installer shows the version of driver already installed on the computer and allows you to select whether to update the driver or not. -
Page 10: Viewing The User's Manual
Viewing the User's Manual ❏ Software User's Manual (this manual): Explains about TM-P20 Software & Documents Disc, how to install the driver, how to use the utilities, and so ❏ User's Manual: Describes how to set up TM-P20 hardware, what are included in the box, how to handle the hardware, compliant safety standards, safety precautions, and so on. -
Page 11: Getting The Url Of Epson Support Website
Insert the TM-P20 Software & Documents Disc to the computer. The TM-P20 Software Installer is automatically read and the EPSON TM-P20 Software Installer screen appears. Click the Manuals button. When the TM-P20 Software Installer is not automatically read, double click the TMInstallNavi.exe icon in the TM-P20 Software & Documents Disc. - Page 12 Insert the TM-P20 Software & Documents Disc to the computer. The TM-P20 Software Installer is automatically read and the EPSON TM-P20 Software Installer screen appears. Click the Support button. When the TM-P20 Software Installer is not automatically read, double click the TMInstallNavi.exe icon in the TM-P20 Software & Documents Disc.
-
Page 13: Installation
“Easy Install” on page 13 This is a standard installation, which installs the TM-P20 printer driver and TM-P20 Utility. If you are using a Wi-Fi network connection, EpsonNet Config and Epson Monitoring Tool are also installed. If you are using a Bluetooth connection, Epson TM Bluetooth Connector is also installed. - Page 14 Software User's Manual Installation When the TM-P20 Software Installer is not automatically read, double click the TMInstallNavi.exe icon in the TM-P20 Software & Documents Disc. The License Agreement screen appears. Read the content and select the I accept the terms in the license agreement.
-
Page 15: Wi-Fi Network Connection Setting
Wi-Fi Network Connection Setting After step 4 in “Easy Install” on page 13, connect the printer and computer using a USB cable, load paper, and then turn on the printer, and then click the Next button on TM-P20 Software Installer screen. - Page 16 If the "TM Printer" is not displayed in the EpsonNet Config, refer the followings: ❏ If the computer and printer are connected via a USB hub, connect them directly. ❏ Confirm that the “EPSON USB Controller for TM-/BA/EU Printers” pop-up window appears at the bottom right of the screen.
- Page 17 TM-P20 Software Installer Software User's Manual Installation Note: The followings are the default settings. Change the settings for your environment if required. Wireless setting ❏ SSID: EPSON_Printer ❏ Network mode: Infrastructure ❏ Security level: WPA2 personal ❏ Security key: EpsonNet TCP/IP setting ❏...
- Page 18 TM-P20 Software Installer Software User's Manual Installation Setting Description Security Level: Select the security level. If the Security Level is WEP-64bit(40bit) or WEP-128bit(104bit): Setting Description Input using hex Check the checkbox choosing the WEP Key to be input as a hexadecimal number.
- Page 19 TM-P20 Software Installer Software User's Manual Installation Setting Description Transmission Rate: Select the transmission rate. Security Level: Select the security level. If the Security Level is WEP-64bit(40bit) or WEP-128bit(104bit): Setting Description Input using hex Check the checkbox choosing the WEP Key to be input as a hexadecimal number.
- Page 20 TM-P20 Software Installer Software User's Manual Installation Setting Description Reenter PSK (Pre-shared Key): Input the Pre-shared Key again. If the Security Level is WPA-Enterprise (TKIP) or WPA-Enterprise(AES): Setting Description Authentification Method: Specify the authentification method. Select the Network Interface - TCP/IP - Basic.
- Page 21 TM-P20 Software Installer Software User's Manual Installation After setting the TCP/IP, click the Transmit button. The settings are applied to the printer and the printer automatically restarts. Note: The network communication has not been activated yet. Disconnect the USB cable.
- Page 22 Click the Printing Test button. When the test print is finished, click the Finish button to end the installation. When exiting the installation Uncheck the Run TM-P20 Utility. Then click the Finish button to end the installation. When setting the printer using TM-P20 Utility...
- Page 23 If the printer is properly connected to the network, the window to enter a user name and password appears. Enter a user name and password. The both defaults are “epson”. EpsonNet Config (Web Version) starts up. Confirm the settings from “Basic information” or “TCP/IP”.
-
Page 24: Bluetooth Connection Setting
13, load paper, turn on the printer, and then click the Next button on TM-P20 Sofware Installer screen. Click the Run TM Bluetooth Connector button to pair the computer and the printer. Epson TM Bluetooth connector installation starts if it is not installed. - Page 25 3. In the Bluetooth Settings dialog box, click the Hardware tab, and then search for the Microsoft Bluetooth Enumerator. If it is not found, the Bluetooth software cannot detect the EPSON Bluetooth printer, and you may not be able to connect to the computer.
- Page 26 TM-P20 Software Installer Software User's Manual Installation Select the printer to be paired (Not been paired yet) and click Connect. If the window to enter a passkey appears, enter a passkey and click OK. Initial passkey: 0000 The "Assign port" window appears. Select the port to be used from the pull-down list and click OK.
- Page 27 Click the Printing Test button. When the test print is finished, click the Finish button to end the installation. When exiting the installation Uncheck the Run TM-P20 Utility. Then click the Finish button to end the installation. When setting the printer using TM-P20 Utility...
-
Page 28: Usb Wired Connection Setting
TM-P20 Software Installer Software User's Manual Installation This is the end of the printer driver installation. For information on how to print using the printer driver. U See “Using the Printer Driver” on page 54 USB Wired Connection Setting After step 4 in “Easy Install”... - Page 29 Click the Printing Test button. When the test print is finished, click the Finish button to end the installation. When exiting the installation Uncheck the Run TM-P20 Utility. Then click the Finish button to end the installation. When setting the printer using TM-P20 Utility...
-
Page 30: Installing Advanced Printer Driver Ver.5 Manual
The Easy Install does not install the Advanced Printer Driver manual. To see the manual, install it separately. Insert the TM-P20 Software & Documents Disc into the computer. The TM-P20 Software Installer is automatically read and the EPSON TM-P20 Software Installer screen appears. Click the Install Now button. -
Page 31: Custom Install
❏ Epson TM Virtual Port Driver Displaying the Select Software Screen The TM-P20 Software & Documents Disc is required for Custom Install. You can select items you want to install in Select Software screen. Follow the steps below to display the Select Software screen. - Page 32 Software User's Manual Installation When the TM-P20 Software Installer is not automatically read, double click the TMInstallNavi.exe icon in the printer driver CD. The License Agreement screen appears. Read the content and select the I accept the terms in the license agreement.
-
Page 33: Installing The Printer Driver
Installing the Printer Driver The printer driver can also be installed with Easy Install in the TM-P20 Software & Documents Disc. Easy Install installs all items of the printer driver, and Custom Install allows you to select items you want to install from the following. - Page 34 TM-P20 Software Installer Software User's Manual Installation Set the followings from 2. Printer. Item Description Name Specify the printer driver name. Do not use Unicode/2-byte characters for the name. Select a port (USB/Ethernet/Bluetooth) to use from Port Type under 3.Communication Settings. Necessary settings are done according to the interface.
- Page 35 TM-P20 Software Installer Software User's Manual Installation Set the followings from 4. Apply and click Save Setting. Item Description Set as Default Printer Check when configuring the printer as that normally used from the Windows applications. When the printer is registered, the screen comes up as shown below.
-
Page 36: Installing The Opos Adk
Click the Printing Test button. When the test print is finished, click the Finish button to end the installation. This is the end of the printer driver installation. Installing the OPOS ADK Insert the TM-P20 Software & Documents Disc into the computer and follow the steps. U See “Displaying the Select Software Screen” on page 31 Check the OPOS ADK Ver.x.xx. -
Page 37: Installing The Opos Adk For .Net
Select the language, and then click the Next button. The Welcome to the InstallShield EPSON OPOS ADK for .NET screen appears. Click the Next button. The License Agreement screen appears. Read the content and select the I accept the terms in the license... -
Page 38: Installing The Javapos Adk
To install the JavaPOS ADK, Java Runtime Environment and Java Advanced Imaging API are required. Make sure to install the above software before installing JavaPOS ADK. Insert the TM-P20 Software & Documents Disc into the computer and follow the steps. U See “Displaying the Select Software Screen”... - Page 39 Software User's Manual Installation The EPSON JavaPOS ADK x.xx.x screen appears. Select the language and then click the OK button. The Introduction screen appears. Click the Next button. The License Agreement screen appears. Read the content and select the I accept the terms in the License Agreement.
-
Page 40: Register A Printer Using Setuppos
TM-P20 Software Installer Software User's Manual Installation When the installation is completed, the Installation Finished screen appears. Then click the Finish button to end the installation. This is the end of the JavaPOS ADK installation. Register a Printer Using SetupPOS After installing UPOS, register a printer using SetupPOS. - Page 41 TM-P20 Software Installer Software User's Manual Installation From the "Select Device Name" pull-down list, select the printer type to be used. Click Next. Click Make Port. The "TMPORT Making" window appears. Select "Port Type" and "Physical Port (Only COM and LPT)".
-
Page 42: Using Tm Bluetooth Connector For Paring
Click Finish. The printer is added. Note: To use Bluetooth with UPOS, you need to associate the port using Epson TM Bluetooth Connector. For details, see “Using TM Bluetooth Connector for Paring” on page Using TM Bluetooth Connector for Paring Follow the steps below to execute the utility installation. -
Page 43: Installing The Utility
The utility can also be installed with Easy Install on the TM-P20 Software & Documents Disc. Easy Install installs TM-P20 Utility for a USB connection. For a Wi-Fi network connection, it installs TM-P20 Utility, EpsonNet Config, Epson Monitoring Tool, and TM Bluetooth Connector. For a Bluetooth connection, it installs Epson TM Bluetooth Connector. - Page 44 The EPSON TM Virtual Port Driver Ver.x.xx - InstallShield Wizard screen appears. Select the language used for installation and click the OK button. The Welcome to the EPSON TM Virtual Port Driver Ver.x.xx Setup Wizard screen appears. Click the Next button.
- Page 45 When the installation is completed, the Installation Finished screen appears. When exiting the installation: Uncheck the Run TM-P20 Utility (the box is unchecked by default). Then click the Finish button to end the installation. When setting the printer using TM-P20 Utility continuously:...
-
Page 46: Update Mode
TM-P20 Software Installer Software User's Manual Installation Check the Run TM-P20 Utility checkbox. Click the Finish button to end the installation. The TM-P20 Utility starts to run. U See “TM-P20 Utility” on page 61 This is the end of the utility installation. - Page 47 TM-P20 Software Installer Software User's Manual Installation The Update Software screen appears. The system is checked and existing driver and its version are displayed. Click the Next button. The Select Printer Language (Resident Character) screen appears. Select the language of your printer and click the Next button.
-
Page 48: Uninstallation
❏ Uninstall the printer driver ❏ Uninstall the TM-P20 Utility ❏ Uninstall the EpsonNet Config ❏ Uninstall the Epson TM Virtual Port Driver ❏ Uninstall the Epson Monitoring Tool ❏ Uninstall the Epson Deployment Tool ❏ Uninstall the Epson TM Bluetooth Connector ❏... -
Page 49: Uninstalling The Windows Printer Driver
Even though the icon (the printer driver) disappears from the screen, the printer driver is not uninstalled. Quit all applications running on the computer. Select Start - Control Panel - Uninstall a program - EPSON Advanced Printer Driver for TM-P20 Ver.5 and click Uninstall. -
Page 50: Uninstall The Epsonnet Config
The Uninstall Complete screen appears. Click the Finish button to finish the uninstallation. Uninstalling the Epson TM Virtual Port Driver Select Start - Control Panel - Uninstall a program - EPSON TM Virtual Port Driver. Click Uninstall. For information of the differences in screen selections based on the OS versions. -
Page 51: Uninstalling The Epson Deployment Tool
When uninstalling this tool, also uninstall EpsonNet SDK for Windows, unless you are using it with another application. Follow the steps below to uninstall this tool. Select Start - Control Panel - Uninstall a program - Epson TM Bluetooth Connector. Click Uninstall. For information of the differences in screen selections based on the OS versions. -
Page 52: Uninstalling The Opos Adk For .Net
Uninstalling the OPOS ADK for .NET Quit all applications running on the computer. Select Start - Control Panel - Uninstall a program - EPSON OPOS ADK for .NET x.x.x. Click Uninstall. For information of the differences in screen selections based on the OS versions. - Page 53 TM-P20 Software Installer Software User's Manual Installation Select Start - Control Panel - Uninstall a program - EPSON JavaPOS ADK. Click Uninstall. For information of the differences in screen selections based on the OS versions. U See “Differences Depending on the OS” on page 9 When the User Account Control screen appears, click the Continue button.
-
Page 54: Using The Printer Driver
TM-P20 Software Installer Software User's Manual Using the Printer Driver Using the Printer Driver This chapter explains how to use the major functions of the printer driver. Printer Driver Access Methods and the Application Range Depending on how you access the printer driver, the application range of the settings you make on the printer driver varies. -
Page 55: Accessing From The Printer Driver's Properties
TM-P20 Software Installer Software User's Manual Using the Printer Driver Accessing from the Printer Driver's Properties Accessing from the Application's Print Setting Menu Language for Displaying Properties The language used in the Advanced Printer Driver screen and Help can be selected from 24 languages. Selecting the language that is easiest for you to understand will help you correctly configure the settings in the Advanced Printer Driver. -
Page 56: How To Use The Basic Functions
TM-P20 Software Installer Software User's Manual Using the Printer Driver Select the Language tab from Printing Preferences. Select the language that you wish to use in the screens and Help from the Select language pull-down list. When finished, click the OK button. - Page 57 TM-P20 Software Installer Software User's Manual Using the Printer Driver Select a cut and paper feed method displayed in the Preset option list and click OK. Select using the illustration of paper feed and cut displayed in Illustration for your reference.
-
Page 58: Peripheral Device's Action Settings
TM-P20 Software Installer Software User's Manual Using the Printer Driver Item Description Timing Start of Document At the beginning of document printing Start of Page At the beginning of each page in the document End of Page At the end of each page in the document... -
Page 59: Advanced Method
TM-P20 Software Installer Software User's Manual Using the Printer Driver Select the timing to set the peripheral device settings. U See “Setting of Peripheral Device” on page 59 Confirm Current settings and click OK. Setting of Peripheral Device Settings may be different depending on peripheral devices. - Page 60 TM-P20 Software Installer Software User's Manual Using the Printer Driver ❏ Printing start position settings ❏ Printing the 80 mm width layout with 58 mm width ❏ Setting an alias name to a font ❏ Creating an emulation font ❏...
-
Page 61: Tm-P20 Utility
Changing the Display Language You can select from 24 display languages for the TM-P20 Utility. Selecting the language that is easiest for you to understand will help you correctly configure the settings in the TM-P20 Utility. The language that initially appears is set based on the language information in your operating system. -
Page 62: Function Summary
Software User's Manual TM-P20 Utility Function Summary TM-P20 Utility provides the following functions. For details on using each function, see the TM-P20 Utility User's Manual. Item Description Current Settings Displays the setting content for the printer that is currently connected. - Page 63 TM-P20 Software Installer Software User's Manual TM-P20 Utility Item Description Operation Check Allows you to check the printer operation and communication between the printer and the driver. The utility allows you to print your logo already stored on the printer, but you cannot edit and restore it as a file.
-
Page 64: Epson Tm Utility
❏ Displaying the printer status ❏ Selecting printers using an NFC or QR code Search for "Epson TM Utility" in the App Store or Google Play, and then install the application with the following icon. Epson TM Utility provides the following functions. - Page 65 TM-P20 Software Installer Software User's Manual Epson TM Utility Item Description Printer Status Check the printer's status (cover open or closed, paper availability, drawer open or closed, and amount of battery remaining). Printer Settings Check or change the registered logo, print control (paper width, print density, print speed, and so on) settings and so on.
-
Page 66: Application Development Information
POS peripheral devices in various operation environments. Using the driver, you can develop POS system efficiently because you do not need to newly create commands. The following TM-P20 drivers that conform to UPOS are provided. Use one of them in accordance with your system environment. -
Page 67: Epos-Print Sdk
SDK is a Software Development Kit (SDK) for developers creating applications that can print from EPSON TM printers. Applications can be developed using the API provided by the ePOS-Print SDK. The following SDK is provided. Use the kit that best suits the type of application being developed. -
Page 68: Esc/Pos Commands
ESC/POS Commands The ESC/POS command is the printer command system developed by EPSON. This allows you to directly control the all functions of the printer. Using the commands with the driver, you can use a function that is not provided by the driver. -
Page 69: For Ios/Android
Using the OPOS SetupPOS, select Bitmap tab on the Device Specific Settings screen, and uncheck the checkbox for NVRAM. ❏ Storing logos in the printer Use TM-P20 Utility to store logos in the printer. For iOS/Android Use TM Utility for iOS/Android to store logos.