Table of Contents
Advertisement
Quick Links
Advertisement
Table of Contents

Related Manuals for NEC MobilePro 880


Summary of Contents for NEC MobilePro 880
- Page 2 NECC is prohibited. NEC and MobilePro are registered trademarks or trademarks of NEC Corporation and/or one or more of its subsidiaries. All are used under license. Microsoft, MS, MSN, PowerPoint, ActiveX, ActiveSync, Outlook, InkWriter, Windows,...
-
Page 3: Table Of Contents
Contents Using This Guide Text Conventions...viii 1 Getting Started Welcome... 1-2 Unpacking Your MobilePro ... 1-3 Getting to Know Your MobilePro ... 1-4 Accessories ... 1-5 Installing and Charging the Battery ... 1-5 Connecting the AC Adapter ... 1-7 Taking a Quick Tour ...1-10 Introducing the Software...1-10 Connecting to Your PC via Serial...1-11 Verifying PC Connection Settings ...1-12... - Page 4 Using other Communication Devices...1-27 Connecting Remotely ...1-27 Getting Help ...1-28 2 Introducing the NEC MobilePro Identifying System Features ... 2-2 Around the Front of the System ... 2-2 Display Panel... 2-2 Keyboard Panel and Base Unit... 2-4 Around the Back of the System... 2-6 Around the Left Side of the System ...
- Page 5 Using Microsoft ActiveSync...3-12 Using bSQUARE Software Applications...3-14 Using the Bonus Software CD ...3-14 Online Help ...3-16 4 Using the NEC MobilePro Powering On and Off ... 4-2 Making Display Panel Adjustments... 4-4 Backlight... 4-5 Automatic Off ... 4-5 Automatic On ... 4-6 Enabling the Suspend Switch...
- Page 6 5 Setting Up a Remote Connection Preparing for Connection Setup... 5-2 Connecting the Internal Modem ... 5-3 Connecting to an Internet Service Provider... 5-4 Connecting to a Remote Access Server ... 5-6 Sending and Receiving Email... 5-7 Activating a Connection... 5-9 A Troubleshooting B Specifications Index...
-
Page 7: Using This Guide
Using This Guide The NEC MobilePro™ 880 User's Guide gives you the information you need to maximize the use of your NEC MobilePro 880 Professional PC Companion. Read this guide to familiarize yourself with the MobilePro and its features. For specific information, see the following. -
Page 8: Text Conventions
Text Conventions To make this guide as easy to use as possible, text is set up as follows. Warnings, cautions, and notes have the following format: Warnings alert you to situations that could result in serious personal injury or loss of life. Cautions indicate situations that can damage the system hardware or software. -
Page 9: Getting Started
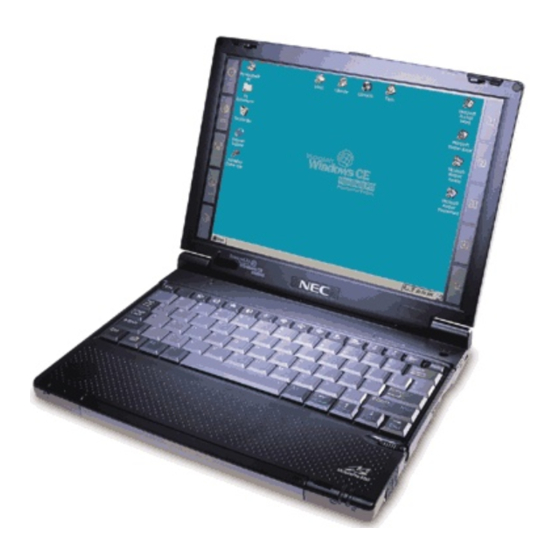
Getting Started Welcome Unpacking Your MobilePro Getting to Know Your MobilePro Installing and Charging the Battery Connecting the AC Adapter Taking a Quick Tour Introducing the Software Connecting to Your PC via Serial Connecting to Your PC via Infrared Synchronizing with your Host PC Getting Help... - Page 10 Welcome Congratulations on purchasing your NEC MobilePro 880 Professional PC Companion powered by the Microsoft Windows CE operating system. The size and capabilities of this device let you keep your most important business and personal information up-to-date and close at hand. Microsoft ActiveSync™...
-
Page 11: Unpacking Your Mobilepro
“Installing and Charging the Battery,” “Connecting the AC Adapter,” and “Taking a Quick Tour,” in Chapter 1. NEC MobilePro 880 (a stylus ships in a holder in the MobilePro) NEC MobilePro AC Adapter NEC MobilePro VGA Cable... -
Page 12: Getting To Know Your Mobilepro
Getting to Know Your MobilePro The NEC MobilePro 880 offers you a portable system designed for synchronization with your host PC. Standard features include a VR4121, 168-MHz, 32 MB RAM, a 9.4-inch SVGA DSTN, 64K color, enhanced touch screen, a V.90 internal modem, a built-in microphone, internal speaker,... -
Page 13: Accessories
Accessories The NEC MobilePro 880 ships with the following accessories: AC adapter PC Connect (serial port) cable RJ-11 Telephone cable VGA Monitor cable For a comprehensive list of MobilePro accessories, refer to the MobilePro desktop. Tap Start, Help, and double tap the MobilePro Accessories link. - Page 14 1. Unpack the contents of the MobilePro carton and locate the unit and the Lithium-Ion battery pack. A – Battery connectors B – Lithium-Ion battery pack 2. Insert the Lithium-Ion battery pack in the bay and slide the battery in the direction of the arrow, as indicated in the following figure.
-
Page 15: Connecting The Ac Adapter
3. Firmly press the battery until it is securely connected in the bay. 4. Connect the AC adapter to begin charging the battery. Refer to the next section, “Connecting the AC Adapter,” for connection information. The color of the left status LED changes from amber to green when the battery is fully charged. - Page 16 Follow these steps to connect the AC adapter. 1. Insert the plug on the AC adapter cable into the AC power port on the left side of the NEC MobilePro. Connecting the AC adapter A – AC power port B – AC adapter cable 2.
- Page 17 3. Power on the NEC MobilePro using the Power button at the top right corner of the keyboard. Using AC power saves battery life when you are on the go and ensures that the backup battery maintains its charge and helps prevent data loss.
-
Page 18: Taking A Quick Tour
This section takes you through the process of setting up your system for the first time. 1. Open the display panel to start your NEC MobilePro 880 for the first time. Press the Power button if the system does not start automatically. -
Page 19: Connecting To Your Pc Via Serial
Connecting to Your PC via Serial The MobilePro is designed to be a companion PC. Most users want to synchronize the MobilePro 880 with a host PC. The latest work done on either the MobilePro or the host PC automatically appears on both machines, once the synchronization process occurs. -
Page 20: Verifying Pc Connection Settings
Ensuring the Availability of the Serial Port The serial port on your host PC must be available for synchronization with your NEC MobilePro. Follow these steps to ensure the availability of the serial port. 1. Access the Setup utility on your host PC to verify that the port is enabled. -
Page 21: Connecting The Pc Connect Cable
Double click the System icon and select the Device Manager tab. Check the Ports listing to determine if any conflicts exist (another device is assigned to or using the serial port). The port may be flagged with an exclamation point, for example, if any conflicts exist. If another device is assigned to or is using the serial port, you must reassign the device to free up the serial port for MobilePro synchronization. - Page 22 2. Align and attach the PC Connect cable to the serial port on the MobilePro. (If your cable is labeled, insert the cable with the word Up visible on the top. If your cable has an arrow near the connector, insert the cable with the arrow visible on top.) Connecting the PC connect cable 3.
-
Page 23: Installing Microsoft Activesync
Be sure to properly align the cable connectors and ports. Incorrect connection can damage the MobilePro and the computer. Installing Microsoft ActiveSync You must install Microsoft ActiveSync on your host PC to enable synchronization with your MobilePro. The Microsoft ActiveSync CD that ships with your MobilePro contains the ActiveSync software designed for synchronization with Microsoft Office components. -
Page 24: Network Requirements
8. Select Dial-Up Adapter. 9. Reboot the system. Network Requirements If your host PC is connected to a network, configure one of the following before installing Microsoft ActiveSync: Configure a WINS server on the host PC's network, or, Configure the host PC's IP address on the MobilePro as follows: 1. -
Page 25: Installing Activesync
Installing ActiveSync Follow these steps to install Microsoft ActiveSync for synchronization with Microsoft Outlook. The installation sequence may vary depending upon the Microsoft components installed on your host PC. Note: operating system, you must install Windows NT Networking before installing Microsoft ActiveSync to your host PC. -
Page 26: Creating A Partnership
Creating a Partnership Once the host PC verifies the availability of a COM port and polls the MobilePro for synchronization settings, the New Partnership window appears. 1. Click Next to display the Select Synchronization Settings window. 2. Select the desired synchronization settings and click Next. The Setup Complete window appears. -
Page 27: Connecting To Your Pc Via Infrared
Connecting to Your PC via Infrared If your host PC is not equipped with a serial port or the serial port(s) is in use, use the infrared port to synchronize the NEC MobilePro with your host PC. The following section provides an overview of the synchronization process, using the infrared port, followed by detailed instructions for each stage of the process. -
Page 28: Modifying Pc Connection Settings
Proceed to the next section to set the infrared connection speed, if necessary. Setting the Infrared Connection Speed Your NEC MobilePro supports both SIR (115 Kbps) and FIR (4 Mbps) IR communications. Follow these steps to set the infrared connection speed. -
Page 29: Enabling The Infrared Port
Enabling the Infrared Port The infrared port on your host PC must be available for synchronization with your NEC MobilePro. Follow these steps to enable the infrared port. 1. Access the setup utility on your host PC to verify that the port is enabled. -
Page 30: Installing Microsoft Activesync
If another device is assigned to or is using the infrared port, you must reassign the device to free up the infrared port for MobilePro synchronization. 5. Reboot your host PC. Once the system restarts, an infrared icon (gray vertical bar with a red bump) appears in the system taskbar. -
Page 31: Network Requirements
5. Click on Microsoft. 6. Select TCP/IP. 7. When the Select Device screen appears, select Microsoft. 8. Select Dial-Up Adapter. 9. Reboot the system. Network Requirements If your host PC is connected to a network, configure one of the following before installing Microsoft ActiveSync: Configure a WINS server on the host PC's network, or, Configure the host PC's IP address on the MobilePro as follows:... -
Page 32: Installing Activesync
Next. The Get Connected window appears. 4. Place the NEC MobilePro so that the infrared port is within range of the host PC infrared port and read the instructions about connecting your device. Click Next. -
Page 33: Creating A Partnership
Modify the selections as required. Once installed, Microsoft ActiveSync automatically synchronizes your MobilePro 880 with your host PC's Microsoft Outlook email, contacts, calendar, and task list each time you attach the PC Connect cable to the MobilePro 880 and the host PC. -
Page 34: Synchronizing With Your Host Pc
Once your MobilePro is configured for synchronization with your host PC, synchronization occurs when the ActiveSync components on the NEC MobilePro and on the host PC are activated. When synchronizing via the serial port, the process occurs automatically. When synchronizing via the infrared port, manual intervention is required. -
Page 35: Synchronizing Via The Infrared Port
Synchronizing via the Infrared Port Once the MobilePro is configured for synchronization via infrared, the ActiveSync component on the MobilePro must be manually activated to initiate the synchronization process. Simply tap Start, Programs, Communication, ActiveSync to initiate synchronization via infrared. Resynchronizing Your MobilePro Once synchronized, you may need to re-establish communication between the MobilePro and your host PC if... -
Page 36: Getting Help
Getting Help The following table provides a comprehensive list of where you can get help on your MobilePro 880, the software, connections, accessories, and support. Item MobilePro Operation Windows CE ActiveSync (formerly Windows CE Services) Pocket Word, Excel, Access, PowerPoint, Internet Explorer,... - Page 37 Microsoft Windows CE for the Handheld PC Product Locator http://windowsce.microsoft.com/reftool/search/ s_hwsw.asp NEC Computers Inc. Accessories http://www.nec-computers.com /accessories_category.asp NEC Computers Inc. MobilePro Support http://support.neccsdeast.com/common/ csdnew.asp NEC Computers Inc. Support Telephone Numbers 800-632-4525, fax: 801-981-3133 NEC Computers Inc. MobilePro Home http://www.nec-computers.com /store/product_line.asp?prod_line_no=4...
-
Page 38: Introducing The Nec Mobilepro
Introducing the NEC MobilePro Identifying System Features Opening the Display Panel Using the Stylus Using the MobilePro’s Power Sources Caring for the MobilePro... -
Page 39: Identifying System Features
Identifying System Features The NEC MobilePro 880 is compact with features on every side. The next few sections provide figures and feature descriptions. Around the Front of the System The following sections describe front features beginning with the display panel. - Page 40 User Software Icons — allow you to configure direct access to five system functions or programs of your choice. For details about defining these icons, refer to the section, “Adjusting MobilePro Settings,” in Chapter 4. Introducing the NEC MobilePro 2-3...
-
Page 41: Keyboard Panel And Base Unit
Keyboard Panel and Base Unit The NEC MobilePro keyboard panel and base unit provide the features shown in the following figure. Features are described after the figure. Keyboard panel and base unit A – Suspend switch B – Power button C – Keyboard D –... - Page 42 – lights green when the battery is fully charged. Notification LED — flashes amber as a reminder of appointments, pages, etc. Main Battery Pack — provides battery power to the NEC MobilePro when away from an AC power source. Microphone — lets you record your voice.
-
Page 43: Around The Back Of The System
Around the Back of the System The back of the NEC MobilePro offers the features shown in the following figure. Features are described after the figure. Features on the back of the system A –... -
Page 44: Around The Left Side Of The System
USB Port — allows you to connect a USB mouse to your NEC MobilePro. Around the Left Side of the System The left side of your NEC MobilePro offers the features shown in the following figure. Features are described after the figure. -
Page 45: Around The Right Side Of The System
Around the Right Side of the System The right side of your NEC MobilePro offers the features shown in the following figure. Features are described after the figure. A – Modem port B – Stylus slot C – CompactFlash card eject button D –... -
Page 46: Around The Bottom Of The System
Around the Bottom of the System The bottom of the NEC MobilePro offers the features shown in the following figure. Features are described after the figure. Features on the bottom of the system A – ROM/RAM bay cover B– Docking cradle connector C –... -
Page 47: Opening The Display Panel
1. Slide the display panel latch to the right. 2. Lift the display panel up and towards the back of the system. When the NEC MobilePro is not in use or when you are carrying it, keep the display panel closed. This helps prevent accidental damage to the touch screen or keyboard. -
Page 48: Using Mobilepro's Power Sources
MobilePro. Using MobilePro’s Power Sources The NEC MobilePro 880 can be powered using the AC adapter or the system's main battery, making it a truly portable system. The MobilePro also contains an internal data backup battery that recharges whenever the unit is connected to an AC power source. -
Page 49: Recharging The Main Battery Pack
AC adapter. See “Connecting the AC Adapter” in Chapter 1. The battery charging LED indicates the charging status of the main battery pack when the NEC MobilePro is connected to an AC power source. The LED status displays as follows: Lights amber while charging. -
Page 50: Recharging The Backup Battery
When your MobilePro is connected to an AC power source and the main battery is removed from the system, be sure to replace the main battery before disconnecting the AC adapter to prevent possible data loss. Introducing the NEC MobilePro 2-13... -
Page 51: Battery Replacement
Removing and Inserting the Battery Pack Should you notice the life of a charged battery pack is short, replace it with a new one. Follow these instructions to replace a battery pack. 2-14 Introducing the NEC MobilePro ! CAUTION... - Page 52 Slide the release latch in the direction of its arrow and hold it. Remove the battery from its bay. Removing the battery pack A – Battery connectors B - Battery release latch C - Lithium-Ion battery pack Introducing the NEC MobilePro 2-15...
- Page 53 Firmly press the battery until it is securely connected in the bay. 5. Charge the battery. See the sections earlier in this chapter, "Recharging the Main Battery" and "Recharging the Backup Battery." 2-16 Introducing the NEC MobilePro Inserting the battery pack...
-
Page 54: Battery Precautions
Do not disassemble batteries. Do not solder or puncture batteries. Do not use a battery that is damaged or deformed, has any rust on its casing, is discolored, overheats, or emits a foul odor. WARNING Introducing the NEC MobilePro 2-17... -
Page 55: Caring For The Mobilepro
Caring for the MobilePro The NEC MobilePro is a durable, dependable unit built for extensive use and travel. Follow these guidelines to maintain the condition and performance of your MobilePro. Immediately turn off and unplug the MobilePro under the following conditions: The power cord is damaged or frayed. -
Page 56: Storage Requirements
Keep the AC adapter away from the IrDA port to ensure stable communication/transfer operations. Storage Requirements Store the NEC MobilePro and AC adapter in an environment that meets the following conditions. Maintain storage temperatures between 14°F and 140°F (-10°C and 60°C). -
Page 57: Routine Cleaning
Turning on the unit under this condition can damage the internal system components. Before turning on the NEC MobilePro, wait until the unit's internal temperature equalizes with the new environment and any internal humidity evaporates. - Page 58 Special screen wipes are available through your local computer dealer. Unit case — NECC recommends that you carefully wipe the case with a slightly damp, almost dry cloth. Introducing the NEC MobilePro 2-21...
-
Page 59: Introducing Windows Ce
Introducing Windows CE Windows CE Operating System Microsoft ActiveSync Software Applications Online Help... -
Page 60: Windows Ce Operating System
What exactly does smallest mean? It means mobility and portability provided through a reduced code base. This code base is completely 32-bit; it is multithreaded, multitasking and runs on different processors such as the NEC VR4121 MIPS processor. Your MobilePro does not have a hard disk drive. The operating system and preloaded applications are deployed on a Read-Only Memory (ROM) module;... -
Page 61: Selecting Objects
To simulate the click of the right mouse button, hold down key while you tap or drag the object with the stylus. Finally, never use a metal object in place of the stylus. Metal objects may scratch the surface of the touch screen. Selecting Objects You can select objects in Windows CE by tapping the object(s) with the stylus. -
Page 62: Windows Ce Desktop
Windows CE Desktop Windows CE gives you the newest features offered by Microsoft for your NEC MobilePro and is very similar to Windows 95. Windows CE includes a desktop with built-in pocket applications, a taskbar for quick navigation, online networking functions, and more. Your Windows CE desktop provides the following icons. - Page 63 Inbox — Allows you to send and receive email messages on your NEC MobilePro. Refer to Chapter 5, “Setting Up a Remote Connection,” for details about configuring your MobilePro to send and receive email.
-
Page 64: Pocket Applications
Note: are for example, only. Before using the scripts, modify the scripts to suit your own needs. In addition, your NEC MobilePro includes additional utilities accessible through the Start, Programs menu. ASL Connect Client for Windows CE — Provides automatic backup, restore, and synchronization features. - Page 65 Calendar — Allows you to track your appointments and create meeting requests. Contacts — Lets you store important information about your friends and colleagues. Inbox — Allows you to send and receive email. Tasks — Gives you a place to create a portable "to do" list.
-
Page 66: Printing Features
Remote Networking — Allows you to configure remote access accounts for connecting to your ISP, your local area network, and more. Terminal — Lets you view and download files from a bulletin board or to send and receive email. World Clock — Allows you to set the time, date, and alarm for your home city and a city that you are visiting. - Page 67 Note: With the optional printer cable (MC-RC3E) connected to the serial port of your NEC MobilePro, you can print to a supported, high-speed parallel printer. For information about MobilePro accessories, access the web site For additional details about using the IR port for printing and transferring data, refer to the section, “Using the IR Port,”...
-
Page 68: Network Capabilities
(CDPD) so you can have cable- or wireless-based network communications using an Ethernet LAN PC card. In addition, you can use CompactFlash type II Ethernet cards on your NEC MobilePro. Creating a Network (Ethernet) Connection To create a network (Ethernet) connection, you must install and configure an Ethernet card. -
Page 69: Microsoft Activesync
3. Tap OK, twice, select the Identification tab, and enter your name, password, and domain. Click OK, then close the Control Panel. 4. Remove and reinsert the Ethernet card when prompted. Once you have configured your Ethernet connection, use Internet Explorer on your MobilePro to surf the net or to send and receive email. -
Page 70: Backing Up And Restoring Data
Using Microsoft ActiveSync The Microsoft ActiveSync backup and restore feature creates a complete duplicate of all data stored on your NEC MobilePro. If you routinely connect to your host PC, this is the best method of data backup. The backup file is saved on the hard disk of your host PC. -
Page 71: Using Bsquare Buseful™ Backup Plus
® Using bSQUARE bUseful™ Backup Plus bUseful Backup Plus provides a convenient way for you to back up or restore your MobilePro data while traveling or away from your host PC. Back up data to a PC card or CompactFlash card for secure storage. Follow these steps to use bUseful Backup Plus to backup or restore files. -
Page 72: Software Applications
Software Applications A variety of software applications are provided on the Bonus Software CD that ships with your NEC MobilePro 880. These applications let you take full advantage of your MobilePro capabilities. Using the Bonus Software CD Use the Bonus Software CD to install your choice of the included software applications. - Page 73 5. Follow the on-screen instructions to install the software applications. Note: When installing some applications from the NEC Bonus Software CD using a Windows NT host PC, the installation process may proceed slowly. The progress bar that appears on the screen during installation may seem to stop for a period of 30 to 90 seconds.
-
Page 74: Online Help
PC provides its own online help file. Follow these instructions to find your online help resources. NEC Where to Get Help— Double tap the NEC Where to Get Help icon on your MobilePro desktop. MobilePro Accessories— Tap Start, Help, and double tap the MobilePro Accessories link. -
Page 75: Using The Nec Mobilepro
Using the NEC MobilePro Powering On and Off Making Display Panel Adjustments Using the Keyboard Adjusting MobilePro Settings Using the Voice Recorder Using PC Cards Using CompactFlash Cards Using the IR Port Upgrading ROM Resetting the MobilePro... -
Page 76: Powering On And Off
If the USB mouse is connected, it prevents you from calibrating the touch screen. If you power off, then quickly power on the NEC MobilePro, your system may erroneously report the presence of CompactFlash cards. - Page 77 Power selection in the Windows CE Control Panel. On the Windows CE desktop, tap Start, Settings, then select Control Panel. Double tap the Power icon and select the Power Off tab to designate a power off time. Using the NEC MobilePro 4-3...
-
Page 78: Making Display Panel Adjustments
“Backing Up and Restoring Data,” in Chapter 3. Making Display Panel Adjustments You can adjust the brightness of the display panel in the NEC MobilePro using two function keys located at the top right of the keyboard. Increasing panel brightness can dramatically lower battery life. -
Page 79: Backlight
2. Press the brightness up or brightness down keys as required. A – Brightness up B – Brightness down Backlight You can conserve battery life by configuring your NEC MobilePro to automatically turn off the display panel's backlight. Automatic Off Follow these steps to configure the backlight for automatic turn off. -
Page 80: Automatic On
Use the dropdown boxes to select the desired time settings. Automatic On In addition, you can configure the NEC MobilePro to turn on the backlight automatically. Follow these steps to configure the backlight for automatic turn on. 1. Tap the Advanced tab, shown in the previous figure, to access the Advanced backlight settings. -
Page 81: Enabling The Suspend Switch
Enabling the Suspend Switch You can configure your NEC MobilePro to power on or off by simply opening or closing the display cover. The Suspend switch acts as a switch for both the power and the display panel. - Page 82 You may want to connect your MobilePro to an AC power source before synchronizing with your host PC. 4-8 Using the NEC MobilePro Power off settings Your NEC MobilePro will not...
-
Page 83: Using The Keyboard
Using the Keyboard The NEC MobilePro keyboard is equipped with many features including: Application shortcut keys Brightness up/down keys Cursor control keys Control keys Windows key Feature keys are located as shown in the following figure. Key operations are described after the figure. -
Page 84: Using Application Shortcut Keys
Windows Key — You can use the Windows key to display the Start menu. Using Application Shortcut Keys The NEC MobilePro provides application shortcut keys located at the top of the keyboard. Use these keys to launch applications directly from the keyboard. The key defaults are listed in the following table. - Page 85 Default Application Shortcut Keys Icon Application Inbox Microsoft Internet Explorer Calendar Contacts Tasks Microsoft Pocket Word Microsoft Pocket Excel Microsoft Pocket PowerPoint Voice Recorder Microsoft Pocket Access Ctrl + Calculator Brightness Up Brightness Down Using the NEC MobilePro 4-11...
-
Page 86: Default Function Keys
Alt + Up Arrow Alt + Down Arrow Display Panel Icons The NEC MobilePro 880 is equipped with 10 icons that provide shortcuts to system functions and user-selected applications. The left side of the MobilePro’s display panel has five system... -
Page 87: Adjusting Mobilepro Settings
MobilePro Settings applet and select the Quick Launch tab. For more details, refer to the following section. Adjusting MobilePro Settings Your NEC MobilePro is equipped with a desktop icon labeled MobilePro Settings. To access MobilePro Settings, simply tap the MobilePro Settings system information icon on the left side of the display panel, to display the applet's window. -
Page 88: Assigning User Software Icons
The list of compliant countries outside the U.S. and Canada is subject to change. For the latest list of compliant countries outside the U.S. and Canada, refer to NECC’s web site at www.nec- computers.com. Assigning User Software Icons The user software icons located on the right side of the MobilePro’s display panel are assigned through the... -
Page 89: Connecting The Vga Cable
For instructions about resetting the MobilePro, refer to the section, “Resetting the MobilePro,” in Chapter 4. 5. Power off the MobilePro. 6. Locate the VGA port cover on the back of the MobilePro and open it. Using the NEC MobilePro 4-15... - Page 90 Monitor,” is selected, the MobilePro uses more power than normal. To conserve power, be sure to deselect this setting when not using an external monitor. 4-16 Using the NEC MobilePro A – VGA port B – VGA cable ! CAUTION ! CAUTION...
-
Page 91: Using The Voice Recorder
The NEC MobilePro features a voice recorder application that lets you record and play voice memos. Recording is dictation quality only and not intended for musical recording. Recording voice memos with the NEC MobilePro is easy. Follow these steps to record with the Microsoft Voice Recorder. -
Page 92: Menu
Using PC Cards Your NEC MobilePro comes with a PC card slot that supports one Type I or one Type II PC card. All PC cards are approximately the same size, have a standard 68-pin connector and vary only in thickness. -
Page 93: Inserting Pc Cards
2. Verify that the PC card is securely in the slot. Make sure you align the PC card correctly for insertion. Inserting a PC card incorrectly can damage the card and/or the NEC MobilePro. We recommend using the AC adapter Inserting a PC card... -
Page 94: Removing Pc Cards
2. Once the card is released, pull it the rest of the way out of the slot. Using CompactFlash Cards Your NEC MobilePro comes with a CompactFlash card slot that supports one Type I or Type II CompactFlash card. A CompactFlash card provides a storage device for your MobilePro and when inserted, creates a Storage Card 2 folder. -
Page 95: Inserting Compactflash Cards
2. Verify that the CompactFlash card is securely in the slot. Make sure you align the CompactFlash card correctly for insertion. Inserting a CompactFlash card incorrectly can damage the card and/or the MobilePro. When you insert a CompactFlash ! CAUTION Using the NEC MobilePro 4-21... -
Page 96: Removing Compactflash Cards
3. When the card pops out slightly, pull it out of the slot. Using the IR Port With the NEC MobilePro, you can send and receive data to and from another similarly equipped device using the infrared (IrDA) communication port. In addition, you can use the IR port to synchronize data with your host PC, in place of using the PC Connect (serial) cable. - Page 97 File/Receive command to receive the infrared transmission. Note: If the units are too far apart or if something blocks the path between the two ports, data may not be sent or received correctly. Using the NEC MobilePro 4-23...
-
Page 98: Upgrading Rom
Upgrading ROM You can upgrade the NEC MobilePro ROM by replacing the currently installed ROM module with an upgraded ROM module (when available). Note: MobilePro data with your host PC and perform a backup of your MobilePro data before upgrading your ROM module. - Page 99 9. Gently press on the module just above the connectors until the connection is secure. 10. Replace the two screws to secure the upgraded ROM module. Using the NEC MobilePro 4-25...
-
Page 100: Resetting The Mobilepro
Power button, or when the operating system stops responding. The NEC MobilePro is equipped with two reset buttons: a soft reset button and a full reset button. Read the following descriptions to better understand the functions of and the differences between the buttons. -
Page 101: Using The Soft Reset Button
1. Open the display panel and remove the stylus from its holder. 2. Power on the MobilePro. 3. Locate the soft reset button above the top right of the keyboard. To ensure the safety of your Using the NEC MobilePro 4-27... -
Page 102: Using The Full Reset Button
Installing a charged battery. Connecting the unit to an AC power source. Using the soft reset button to reset the system. 4-28 Using the NEC MobilePro Soft reset button A – Soft reset button... - Page 103 The full reset button is located inside of the main battery's bay. Follow these steps to remove the battery before using the full reset button to reset the NEC MobilePro. 1. Open the display panel and remove the stylus from its holder.
- Page 104 Slide the release latch in the direction of its arrow and hold it. Remove the battery from the bay. Removing the battery pack A – Battery connectors B – Battery release latch C – Battery pack 4-30 Using the NEC MobilePro...
- Page 105 You may be able to use a recent backup of your data to restore your system to a more recent configuration. Refer to the section, “Backing Up and Restoring Your Data,” in Chapter 3 for details about backing up and restoring your MobilePro. Using the NEC MobilePro 4-31...
-
Page 106: Setting Up A Remote Connection
Setting Up a Remote Connection Preparing for Connection Setup Connecting the Internal Modem Connecting to an Internet Service Provider (ISP) Connecting to a Remote Access Server (RAS) Sending and Receiving Email Activating a Connection... -
Page 107: Preparing For Connection Setup
Before you set up a dial-up connection for an internet service provider (ISP) or remote access server (RAS), and the associated email properties, you need the following: a modem (your NEC MobilePro is equipped with an internal data/fax modem). an ISP or RAS account. -
Page 108: Connecting The Internal Modem
Connecting the Internal Modem Follow these steps to connect an RJ-11 telephone cable to the internal modem. 1. Locate the modem cover on the right side of the NEC MobilePro and open it. 2. Carefully plug the RJ-11 telephone cable into the modem connector. -
Page 109: Connecting To An Internet Service Provider
During thunderstorms be sure to disconnect the modem phone cable from the NEC MobilePro. Failure to do so may result in explosion or fire. 3. Connect the other RJ-11 connector into an active (analog) phone jack. - Page 110 Follow these steps to create a new connection for your ISP account. 1. Tap Start, Programs, Communication, then select Remote Networking. 2. Double tap the Make a New Connection icon. 3. Enter a name for the new connection. 4. Select Dial-Up Connection as the connection type and tap Next.
-
Page 111: Connecting To A Remote Access Server
Connecting to a Remote Access Server Once you establish an account with your RAS and gather the necessary configuration information, you are ready to create a connection on your MobilePro for your RAS account. Follow these steps to create a new connection for your RAS account. -
Page 112: Sending And Receiving Email
Sending and Receiving Email Before configuring the necessary email service information you need some or all of the following settings: POP3 Host. Your user id. Your password, if required. SMTP host. Your email address. To send and receive email through your ISP or RAS account, you must configure the services properties through your Inbox. - Page 113 Enter RAS (Exchange server) information as follows: Enter IMAP4 information as follows: 5-8 Setting Up a Remote Connection Password - Your password, if required. Domain (Windows NT). SMTP Host - SMTP Host name. Return Address - Your email address. (If in a unix environment <your email address>).
-
Page 114: Activating A Connection
Note: email, check your optional configuration settings. If you experience difficulty receiving email, check your required configuration settings. Activating a Connection Once you create a new connection for each desired service, activate the connection with that service to open communication and send or receive email. Follow these steps to activate a connection. -
Page 115: Troubleshooting
Troubleshooting Your NEC MobilePro 880 Professional PC Companion is designed to provide many hours of service while you are at home or on the road. For optimum performance, frequently back up and synchronize the MobilePro data with your host PC. Then if something happens, most of your data is still available. - Page 116 Problem A low battery message appears. When using a PC card, such as a modem, the unit powers off. The AC adapter doesn't work. The keyboard doesn’t respond. The serial port doesn’t work. The IrDA port doesn’t work. The PC card cannot be accessed. A-2 Troubleshooting Troubleshooting Resolution...
- Page 117 Troubleshooting Problem The touch screen does not respond. The soft reset button does not respond. For further assistance, call NECC Support Services at 1-800-632-4525 Note: If you purchased and are using this computer outside of the U.S. and Canada, please contact the local NECC office or their dealers for support and service.
-
Page 118: Specifications
The following specifications are standard except where noted. Display 9.4-inch, DSTN, SVGA, 800x600, 64K color, liquid crystal display (LCD), with backlight, touch screen NEC VR4121, 168-MHz processor, optimized for Windows CE User Data Entry Methods 78-key QWERTY keyboard with stylus 17.5 mm alpha key pitch... - Page 119 Speaker One built-in speaker Infrared (IrDA) Communication Baud rate — SIR, FIR, 4 Mbps maximum Distance — 2 to 20 inches Serial Interface Baud rate — 115.2 Kbps maximum I/O Ports Serial port (Direct Cable connection) IrDA port VGA port (output) Earphone Microphone USB port Modem port...
- Page 120 PC Card Slot One Type I or Type II PC card slot CompactFlash Card Slot One Type I or Type II CompactFlash card slot Power Main battery — one rechargeable Lithium-Ion (Li-Ion) battery pack (included). Memory backup — approximately 7 days (with depleted main battery) at ambient temperature of 73ºF (23ºC).
- Page 121 Accessories (ship with system) AC adapter — Listed Direct Plug-In Power Unit Input Voltage - 100 to 240V AC; 60Hz, 13W Output Voltage – 13.5V DC, 35.1W Rechargeable Lithium-Ion Battery Pack PC Connect (serial) Cable RJ-11 Telephone Cable VGA Cable Stylus Dimensions 9.64 in.
- Page 122 VGA Cable (S1424-12V) Stylus Pack (S1424-17A) Deluxe Carrying Case (290-01500-000) Li-Ion Battery Pack (MC-BA11A) Earphone Microphone (MC-EM1) 16 MB CompactFlash card (050-00054-000) High-Speed Printer Cable (MC-RC3E) Specifications B-5...
- Page 123 Index AC adapter, 1-8 connecting, 1-8 AC power port, 2-7 Accessories, 1-5, B-4 Activating a connection, 5-9 Adjusting MobilePro settings, 4-13 panel brightness, 4-4 Assigning user software icons, 4-14 Auto Suspend, 4-7 Available options, B-4 Backing up and restoring data, 3-12 Backlight settings, 4-5 Battery...
- Page 124 VGA port, 2-6 Full reset button, 4-26 using, 4-28 Function keys, 4-12 Getting help, 1-28 Infrared port enabling, 1-21 host PC, 1-21 NEC MobilePro, 1-20 Inserting CompactFlash cards, 4-21 PC cards, 4-19 Index-2 Installing Microsoft ActiveSync, 1-16, 1-23 Installing Microsoft ActiveSync...
- Page 125 removing, 4-20 slot, 2-7 PC Connect cable when using other communication devices, 1-27 PC Connection settings infrared connection, 1-20 Pocket applications, 3-6 Power button, 2-4 Precautions, 2-18 Printing, 3-8 Problem solving, A-1 Removing CompactFlash cards, 4-22 PC cards, 4-20 Reset button full reset, 4-26 soft reset, 4-26 Resetting the MobilePro, 4-26...
- Page 126 Unpacking your MobilePro, 1-3 Upgrading ROM, 4-24 USB port, 2-7 User software icons, 4-14 Using application shortcut keys, 4-10 infrared (IR) port, 4-22 MobilePro power sources, 2-11 stylus, 2-10 voice recorder, 4-17 Windows CE, 3-2 Verifying PC connection settings, 1-12 synchronization settings, 1-18, 1-25 VGA port, 2-6...
- Page 127 Battery Replacement A lithium battery in some computers maintains system configuration information. In the event that the battery fails to maintain system configuration information, NECC recommends that you replace the battery. For battery replacement information, call your local NECC dealer. WARNING There is a danger of explosion if the battery is incorrectly replaced.
- Page 128 (For United States Use Only) Federal Communications Commission Radio Frequency Interference Statement Changes or modifications to this unit not expressly approved by the party responsible for compliance could void the user’s authority to operate the equipment. Note: This equipment has been tested and found to comply with the limits for a Class B digital device, pursuant to Part 15 of the FCC Rules.
- Page 129 FCC PART 68 This equipment complies with Part 68 of FCC rules. On the bottom of this equipment is a label that contains, among other information, the FCC registration number and ringer equivalence number (REN) for this equipment. If requested, this information must be provided to the telephone company.
- Page 130 The equipment cannot be used with public coin telephones provided by the telephone company. Connection to Party Line Service is subject to state tariffs. (Contact the state public utility commission, public service commission or corporation commission for information.) The Telephone Consumer Protection Act of 1991 makes it unlawful for any person to use a computer or other electric device to send any message via a telephone fax machine unless such message clearly contains in a margin at the top or bottom of each transmitted page or on the first page of the...
- Page 131 IC CS-03 Note: The Industry Canada label identifies certified equipment. This certification means that the equipment meets telecommunications network protective, operational and safety requirements as prescribed in the appropriate Terminal Equipment Technical Requirements document. The Department does not guarantee the equipment will operate to the user's satisfaction.
- Page 132 Note: The Ringer Equivalence Number (REN) assigned to each terminal device provides an indication of the maximum number of terminals allowed to be connected to a telephone interface. The termination on an interface may consist of any combination of devices subject only to the requirement that the sum of the Ringer Equivalence Number of all the devices does not exceed 5."...
-
Page 133: Declaration Of Conformity
15 Business Park Way Sacramento, CA 95828 declare that the product NEC MobilePro 880 is in conformity with part 15 of the FCC Rules. Operation of this product is subject to the following two conditions: (1) this device may not cause harmful...