Table of Contents
Advertisement
Quick Links
Download this manual
See also:
Product Data
Advertisement
Table of Contents

Related Manuals for Linksys WPC100


Summary of Contents for Linksys WPC100
- Page 1 USER GUIDE RangePlus Wireless Notebook Adapter WPC100 Model:...
-
Page 2: About This Guide
Glossary www.linksys.com/glossary Network Security www.linksys.com/security Copyright and Trademarks Linksys is a registered trademark or trademark of Cisco Systems, Inc. and/ or its affiliates in the U.S. and certain other countries. Copyright © 2007 Cisco Systems, Inc. All rights reserved. Other brands and product names are trademarks or registered trademarks of their respective holders. -
Page 3: Table Of Contents
Software in Linksys Products ........ -
Page 4: Chapter 1: Product Overview
Chapter 1 Chapter 1: Product Overview Thank you for choosing the RangePlus Wireless Notebook Adapter. The RangePlus Wireless Notebook Adapter uses the very latest wireless networking technology to achieve extended range. Unlike ordinary wireless networking technologies that are confused by signal reflections, MIMO actually uses these reflections to increase the range and reduce “dead spots”... -
Page 5: Chapter 2: Wireless Security Checklist
3. Enable MAC address filtering Linksys routers give you the ability to enable Media Access Control (MAC) address filtering. The MAC address is a unique series of numbers and letters assigned to every networking device. -
Page 6: Chapter 3: Advanced Configuration
Chapter 3 Chapter 3: Advanced Configuration Advanced configuration is performed through the Wireless Network Monitor (the Monitor). Use it to check the status information, search for available wireless networks, or create profiles that hold different configuration settings. Diagnostics is performed through the Diagnostic utility. Use it to detect the Adapter, test the driver and Monitor, and troubleshoot if needed. - Page 7 Chapter 3 Push Button (Recommended) Select this option to use the push button method. Use Adapter’s PIN number Select this option to enter the Adapter’s PIN number on the router. Click Next to continue, or click Back to return to the previous screen.
- Page 8 Chapter 3 Connecting to the Network Print to print out your wireless network settings. Click Then click Finish to return to the Status screen, or click Exit to exit the Monitor. Congratulations Congratulations! The Adapter is connected to the network. RangePlus Wireless Notebook Adapter Advanced Configuration Wireless Network Status...
-
Page 9: Connect
Chapter 3 Save to Profile Click Save to Profile to save the currently active connection settings to a profile. Wireless Network Statistics The Wireless Networks Statistics screen provides statistics on your current network settings. Wireless Network Statistics Transmit Rate This is the data transmission rate of the current connection. - Page 10 Chapter 3 Wi-Fi Protected Setup Click the Wi-Fi Protected Setup button to connect to a router that supports Wi-Fi Protected Setup. Refer to the “Wi-Fi Protected Setup” instructions in the “Status” section at the beginning of this chapter. Refresh Click Refresh to perform a new search for wireless devices.
- Page 11 The passphrase is case-sensitive and must be 16 or fewer alphanumeric characters. It must match the passphrase of your other wireless network devices and is compatible with Linksys wireless products only. (For non-Linksys wireless products, enter the WEP key manually.) If you enter the network’s WEP key, enter the...
- Page 12 Chapter 3 Use the Push Button Use the Push Button Press the Wi-Fi Protected Setup button on the router. Within two minutes, click the Wi-Fi Protected Setup button on this screen. The Adapter connects to the network. Connecting to the Network RangePlus Wireless Notebook Adapter Advanced Configuration Click...
- Page 13 Chapter 3 On the Adapter’s PIN number screen, click Enter the PIN Number The Adapter connects to the network. Connecting to the Network Print to print out your wireless network settings. Click Then click Finish to return to the Status screen, or click Exit to exit the Monitor.
- Page 14 The passphrase is case-sensitive and must be 16 or fewer alphanumeric characters. It must match the passphrase of your other wireless network devices and is compatible with Linksys wireless products only. (For non-Linksys wireless products, enter the WEP key manually.) If you enter the network’s WEP key, enter the...
-
Page 15: Profiles
Chapter 3 Profiles The Profiles screen lets you save different configuration profiles for different network setups. The table on the left displays a list of available profiles with their profile names and wireless network names. Profiles Profile This is the name of the profile. Wireless Network Name This is the SSID or unique name of the wireless network. - Page 16 Chapter 3 No Wi-Fi Protected Setup If the router does not use Wi-Fi Protected Setup, proceed to the appropriate section, “Wireless Security Disabled” or “Wireless Security Enabled”. Wireless Security Disabled If you connect to a network whose wireless security is disabled, then you will view this screen: Click Connect Anyway Connect Anyway.
- Page 17 The passphrase is case-sensitive and must be 16 or fewer alphanumeric characters. It must match the passphrase of your other wireless network devices and is compatible with Linksys wireless products only. (For non-Linksys wireless products, enter the WEP key manually.) If you enter the network’s WEP key, enter the...
- Page 18 Chapter 3 Use the Push Button Use the Push Button Press the Wi-Fi Protected Setup button on the router. Within two minutes, click the Wi-Fi Protected Setup button on this screen. The Adapter connects to the network. Connecting to the Network RangePlus Wireless Notebook Adapter Advanced Configuration Click...
- Page 19 Chapter 3 Enter the Adapter’s PIN Number Enter the PIN Number Access the web-based utility of the router. (Refer to the router’s documentation for instructions.) On the router’s Wi-Fi Protected Setup screen, enter the Adapter’s PIN number in the PIN field. Then click Register.
- Page 20 Chapter 3 Enter Key Manually Proceed to the appropriate section, “Wireless Security Disabled” or “Wireless Security Enabled”. Wireless Security Disabled If you connect to a network whose wireless security is disabled, then you will view this screen: Click Connect Anyway Connect Anyway.
- Page 21 The passphrase is case-sensitive and must be 16 or fewer alphanumeric characters. It must match the passphrase of your other wireless network devices and is compatible with Linksys wireless products only. (For non-Linksys wireless products, enter the WEP key manually.) If you enter the network’s WEP key, enter the...
- Page 22 16 alphanumeric characters. This passphrase must match the passphrase of your other wireless network devices and is compatible with Linksys wireless products only. (If you have any non-Linksys wireless products, enter the WEP key manually on those products.)
- Page 23 Chapter 3 WPA Personal WPA Personal offers two encryption methods, TKIP and AES, with dynamic encryption keys. WPA Personal Encryption Select TKIP or AES. Passphrase Enter the network’s Passphrase (also called a pre-shared key) of 8-63 characters. Click Next to continue, or click Back to return to the previous screen.
- Page 24 Chapter 3 PEAP WPA Enterprise - PEAP If you selected PEAP, configure the following: Login Name Enter the login name of your wireless network. Password Enter the password of your wireless network. Server Name Enter the name of the authentication server (this is optional).
- Page 25 Chapter 3 Certificate Select the certificate you installed to authenticate you on your wireless network. If you want to use any certificate, keep the default, Trust Any. Inner Authen. Select the authentication method used inside the PEAP tunnel. Click Next to continue, or click Back to return to the previous screen.
- Page 26 Chapter 3 Congratulations screen appears. Click Connect to Network to implement the new settings immediately and return to the Status screen. Click Return to Profiles screen to keep the current settings active and return to the Profiles screen. Congratulations Congratulations! The profile is successfully configured.
-
Page 27: Appendix A: Troubleshooting
Adapter is configured with the same Wireless Network Name (SSID) and wireless encryption settings as the other computers in the Infrastructure configuration. WEB: If your questions are not addressed here, refer to the Linksys website, www.linksys.com RangePlus Wireless Notebook Adapter Troubleshooting... -
Page 28: Appendix B: Specifications
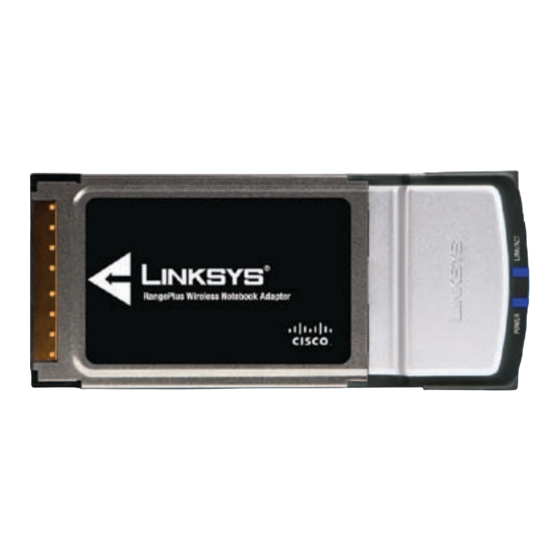
Appendix B Appendix B: Specifications Model WPC100 Standards IEEE 802.11b, IEEE 802.11g LEDs Power, Link/Act # of Antennas 2 Antennas Connector type CardBus Modulations 802.11b: CCK, QPSK, BPSK 802.11g: OFDM 802.11n: BPSK, QPSK, 16-QAM, 64-QAM RF Power (EIRP) in dBm 802.11b: 18dBm ~ 19 dBm,... -
Page 29: Appendix C: Windows Xp Wireless Zero Configuration
Use Windows XP Configuration If you want to switch back to the Wireless Network Monitor, right-click the Wireless Network Monitor icon, and select Use Linksys Wireless Network Monitor. Use Linksys Wireless Network Monitor NOTE: For more information on Windows XP Wireless Zero Configuration, refer to Windows Help. - Page 30 Appendix C Wireless Security NOTE: Windows XP Wireless Zero Configuration does not support the use of a passprase. Enter the exact WEP key used by your access point. Your wireless network will appear as Connected when your connection is active. Wireless Network Connection For more information about wireless networking on a Windows XP computer, click Start>Help>Support.
-
Page 31: Appendix D: Warranty Information
Your exclusive remedy and Linksys’ entire liability under this limited warranty will be for Linksys, at its option, to (a) repair the product with new or refurbished parts, (b) replace the product with a reasonably available equivalent new or refurbished Linksys product, or (c) refund the purchase price of the product less any rebates. - Page 32 This limited warranty is governed by the laws of the jurisdiction in which the Product was purchased by you. Please direct all inquiries to: Linksys, P.O. Box 18558, Irvine, CA 92623. RangePlus Wireless Notebook Adapter...
-
Page 33: Appendix E: Regulatory Information
Appendix E Appendix E: Regulatory Information FCC Statement This device complies with Part 15 of the FCC Rules. Operation is subject to the following two conditions: (1) This device may not cause harmful interference, and (2) this device must accept any interference received, including interference that may cause undesired operation. -
Page 34: Avis D'industrie Canada
Appendix E Avis d’Industrie Canada Cet appareil numérique de la classe B est conforme aux normes NMB-003 et RSS210 du Canada. L’utilisation de ce dispositif est autorisée seulement aux conditions suivantes : il ne doit pas produire de brouillage et il doit accepter tout brouillage radioélectrique reçu, même si ce brouillage est susceptible de compromettre le fonctionnement du dispositif. -
Page 35: User Information For Consumer Products Covered By Eu Directive 2002/96/Ec On Waste Electric And Electronic Equipment (Weee)
(WEEE) This document contains important information for users with regards to the proper disposal and recycling of Linksys products. Consumers are required to comply with this notice for all electronic products bearing the following symbol: English - Environmental Information for Customers in... - Page 36 Appendix E Eesti (Estonian) - Keskkonnaalane informatsioon Euroopa Liidus asuvatele klientidele Euroopa Liidu direktiivi 2002/96/EÜ nõuete kohaselt on seadmeid, millel on tootel või pakendil käesolev sümbol keelatud kõrvaldada koos sorteerimata olmejäätmetega. See sümbol näitab, et toode tuleks kõrvaldada eraldi tavalistest olmejäätmevoogudest.
- Page 37 Appendix E Lietuvškai (Lithuanian) - Aplinkosaugos informacija, skirta Europos Sąjungos vartotojams Europos direktyva 2002/96/EC numato, kad įrangos, kuri ir kurios pakuotė yra pažymėta šiuo simboliu (įveskite simbolį), negalima šalinti kartu su nerūšiuotomis komunalinėmis atliekomis. Šis simbolis rodo, kad gaminį reikia šalinti atskirai nuo bendro buitinių...
- Page 38 återvinning skyddar mot eventuella negativa konsekvenser för miljön och personhälsa. För mer detaljerad information om kassering av din gamla utrustning kontaktar du dina lokala myndigheter, avfallshanteringen eller butiken där du köpte produkten. WEB: For additional information, please visit www.linksys.com estää...
-
Page 39: Appendix F: Software License Agreement
Agreement. “Software” includes, and this Agreement will apply to (a) the software of Linksys or its suppliers provided in or with the applicable Linksys product, and (b) any upgrades, updates, bug fixes or modified versions (“Upgrades”) or... - Page 40 If You would like a copy of the GPL or other open source code in this Software on a CD, Linksys will mail to You a CD with such code for $9.99 plus the cost of shipping, upon request.
- Page 41 Appendix F freedom to share and change free software–to make sure the software is free for all its users. This General Public License applies to most of the Free Software Foundation’s software and to any other program whose authors commit to using it. (Some other Free Software Foundation software is covered by the GNU Lesser General Public License instead.) You can apply it to your programs, too.
- Page 42 Appendix F If the modified program normally reads commands interactively when run, you must cause it, when started running for such interactive use in the most ordinary way, to print or display an announcement including an appropriate copyright notice and a notice that there is no warranty (or else, saying that you provide a warranty) and that users may redistribute the program under these conditions,...
- Page 43 SUCH DAMAGES. END OF TERMS AND CONDITIONS END OF SCHEDULE 2 Schedule 3 If this Linksys product contains open source software licensed under the OpenSSL license: This product includes software developed by the OpenSSL Project for use in the OpenSSL Toolkit.
- Page 44 Appendix F This product includes software written by Tim Hudson (tjh@cryptsoft.com). In addition, if this Linksys product contains open source software licensed under the OpenSSL license then the license terms below in this Schedule 3 will apply to that open source software. The license terms below in this Schedule 3 are from the public web site at http://www.openssl.org/source/license.html.
- Page 45 Appendix F The word ‘cryptographic’ can be left out if the routines from the library being used are not cryptographic related. If you include any Windows specific code (or a derivative thereof ) from the apps directory (application code) you must include an acknowledgement: “This product includes software written by Tim Hudson (tjh@ cryptsoft.com)”...