Table of Contents
Advertisement
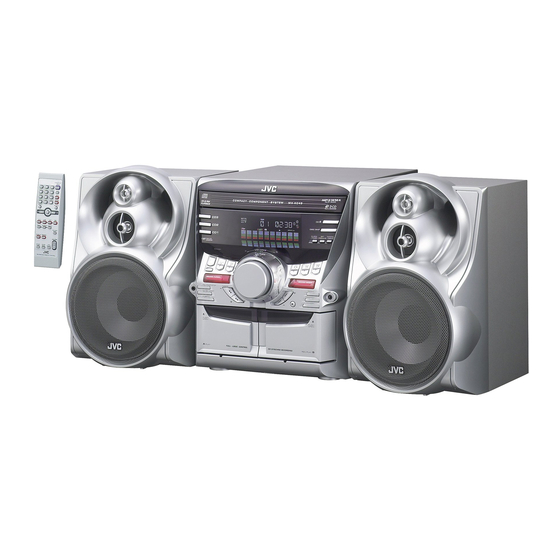
COMPACT COMPONENT SYSTEM
MX-KC45
Consists of CA-MXKC45 and SP-MXKC45
SP-MXKC45
CA-MXKC45
INSTRUCTIONS
SP-MXKC45
For Customer Use:
Enter below the Model No. and Serial No.
which are located either on the rear, bot-
tom or side of the cabinet. Retain this
information for future reference.
Model No.
Serial No.
LVT1521-001A
[J]
Advertisement
Chapters
Table of Contents
Troubleshooting

Related Manuals for JVC MX-KC45


Summary of Contents for JVC MX-KC45
- Page 1 COMPACT COMPONENT SYSTEM MX-KC45 Consists of CA-MXKC45 and SP-MXKC45 SP-MXKC45 CA-MXKC45 INSTRUCTIONS SP-MXKC45 For Customer Use: Enter below the Model No. and Serial No. which are located either on the rear, bot- tom or side of the cabinet. Retain this information for future reference.
- Page 2 OR ELECTRIC SHOCK, DO NOT EXPOSE THIS APPLIANCE TO RAIN OR MOISTURE. CAUTION Changes or modifications not approved by JVC could void the user’s authority to operate the equipment. For Canada/pour le Canada THIS DIGITAL APPARATUS DOES NOT EXCEED THE CLASS B LIMITS FOR RADIO NOISE EMISSIONS FROM DIGITAL APPARATUS AS SET OUT IN THE INTERFERENCE-CAUSING EQUIPMENT STANDARD ENTITLED “DIGITAL...
- Page 3 IMPORTANT FOR LASER PRODUCTS / IMPORTANT POUR PRODUITS LASER 1. CLASS 1 LASER PRODUCT 2. CAUTION: Do not open the top cover. There are no user serviceable parts inside the unit; leave all servicing to qualified ser- vice personnel. 3. CAUTION: VISIBLE AND / OR INVISIBLE CLASS 1M LASER RADIATION WHEN OPEN. DO NOT STARE INTO BEAM OR VIEW DIRECTLY WITH OPTICAL INSTRUMENTS.
-
Page 4: Features
❏ The controls and operations have been redesigned to make them very easy to use, freeing you to just enjoy the music. • With JVC’s COMPU PLAY you can turn on the System and automatically start the Radio, Cassette Deck, or CD Player with a single touch. -
Page 5: Table Of Contents
Table of Contents Introduction ...1 Features... 1 How This Manual Is Organized... 1 IMPORTANT CAUTIONS... 1 Table of Contents ...2 Getting Started ...3 Accessories ... 3 How To Put Batteries In the Remote Control... 3 Using the Remote Control ... 3 Connecting the FM Antenna... -
Page 6: Getting Started
Getting Started Accessories Make sure that you have all of the following items, which are supplied with the System. AM Loop Antenna (1) FM Wire Antenna (1) Remote Control (1) Batteries (2) If any of these items are missing, contact your dealer immediately. How To Put Batteries In the Remote Control Match the polarity (+ and –) on the batteries with the + and –... -
Page 7: Connecting The Fm Antenna
Getting Started CAUTION: • Make all connections before plugging the System into an AC power outlet. Connecting the FM Antenna Using the Supplied Wire Antenna FM wire antenna Using the Coaxial Type Connector (Not supplied) A 75Ω antenna with coaxial type connector (IEC or DIN45 325) should be connected to the FM 75Ω COAXIAL terminal. If reception is poor, connect the outdoor antenna. -
Page 8: Connecting The Am Antenna
Getting Started Connecting the AM Antenna Rear Panel of the Unit • Even when connecting an outside AM antenna, keep the indoor AM loop connected. CAUTION: • To avoid noise, keep antennas away from the System, the connecting cord and the AC power cord. Connecting the Speakers 1. -
Page 9: Connecting External Equipment
COMPU Play JVC’s COMPU PLAY feature lets you control the most frequently used System functions with a single touch. With One Touch Operation you can play a CD, a tape, turn on the radio, or listen to an external equipment with a single press of the play button for that function. -
Page 10: Basic Operations
Basic Operations Numeric keys DISPLAY SOUND TURBO SOUND MODE * When the System is in use, the display shows other items as well. Turning the Power On and Off Turning the System On Press the STANDBY/ON button. The display comes on and “POWER ON” is displayed once. The STANDBY indicator goes out. -
Page 11: Adjusting The Volume
Adjusting the Volume Turn the VOLUME control on the Unit clockwise to increase the volume or turn it counterclockwise to decrease the volume. Press the VOLUME + button on the Remote Control to increase the volume or press the VOLUME – button on the Remote Control to decrease the volume. -
Page 12: Using The Tuner
Using the Tuner Numeric keys FM/AM FM MODE Á * When the System is in use, the display shows other items as well. You can listen to FM and AM stations. Stations can be tuned in manually, automatically, or from preset memory storage. ❏... -
Page 13: Presetting Stations
• In AM broadcast, reception sensitivity will be changed by turning the AM loop antenna. Turn the AM loop antenna for best reception. Presetting Stations You can preset up to 30 FM stations and up to 15 AM stations. • Preset numbers may have been set to factory test fre- quencies prior to shipment. -
Page 14: Using The Cd Player
Using the CD Player Numeric keys CD1-CD3 REPEAT PROGRAM This unit has been designed to playback the following CDs: • Audio CD • CD-R (CD-Recordable) • CD-RW (CD-ReWritable) • MP3/WMA disc (MP3/WMA files recorded on a CD-R or CD- RW)* Only CDs bearing these marks can be used with this System. -
Page 15: To Load Cds
About Disc Indicator: Disc Rotation indicator The Disc indicator consists of the following three kinds of indica- tors: Disc Number indicator: Lights all the time. Selected Disc indicator:Lights for the currently selected disc number. Disc Rotation indicator:Runs when the selected CD is playing or paused. -
Page 16: Basics Of Using The Cd Player-Normal Play
Using the CD Player Basics of Using the CD Player- Normal Play To Play CDs Load CDs. Press one of the Disc button (CD1-CD3) you want to play. The selected disc number (e.g. “CD DISC 1”) appears on the display. The first track of the selected CD begins playing. -
Page 17: Resume Play For Audio Cd And Mp3/Wma Disc
Resume Play for Audio CD and MP3/WMA Disc You can store the point of the track where you stopped playback. By pressing CD 6 button, you can start playback again from the point where you stopped it. On the Unit ONLY Press the SET/RESUME button for 2 seconds until both “RESUME”... -
Page 18: Random Play
Using the CD Player To Exit and Re-enter Program Play The program you have made is stored in memory. So, you can exit Program Play temporarily or re-enter Program Play unless you de- lete the program. To exit the program mode once, press the 7 button to stop playing. -
Page 19: Using The Cassette Deck (Listening To A Tape)
Using the Cassette Deck (Listening to a Tape) * When the System is in use, the display shows other items as well. The Cassette Deck allows you to play, record, and dub audio tapes. ❏ Listening to type I tape is suitable for this Cassette Deck. The use of tapes longer than 120minutes (including 120 minute tapes) is not recommended, since char- acteristic deterioration may occur and these tapes... -
Page 20: Using The Cassette Deck (Recording)
Using the Cassette Deck (Recording) * When the System is in use, the display shows other items as well. Recording onto a cassette from any of the sound sources is simple. Just place a tape in Deck B, have the source ready, make one or two settings, and you’re ready to record. -
Page 21: Standard Recording
Standard Recording To Record Any Sound Source to Tape Follow these steps to record from any sound source onto a tape in Deck B. Insert a blank or erasable tape into the Deck B and wind past the tape leader. Tape travelling direction Prepare the source, by, for example, tuning in a radio station, loading CDs, or turning on... -
Page 22: Using An External Equipment
Using an External Equipment Listening to the External Equipment You can listen to the external equipment such as portable CD, MD player, STB, or other auxiliary. ❏ First, make sure that the external equipment is properly connect- ed to the System. (See page 6.) Set the volume level to the minimum posi- tion. -
Page 23: Using The Timers
Using the Timers REC (Recording) Timer indicator * When the System is in use, the display shows other items as well. For simplicity, we show here only the items described in this section. Three types of timers are available: DAILY Timer Use this timer to set wake up everyday to music from any source, instead of an alarm clock. -
Page 24: Setting The Daily Timer
Using the Timers Setting the Daily Timer Once you have set the Daily Timer, it is stored in memory. So, the Daily Timer will be activated at the same time every day until it is canceled. The Timer indicator ( ) and “DAILY”... -
Page 25: Setting The Rec (Recording) Timer
When selecting TAPE: Insert a cassette tape you want to play into Deck A. When selecting AUX: Prepare the external equipment so that it will turn on at the ON time set by the System. To allow this, the equipment should have the timer function. Setting the volume level. - Page 26 Using the Timers On the Unit You can set the time in the same way as for setting the Daily Tim- Insert a blank or erasable tape into the Deck B and wind past the tape leader. Press the CLOCK/TIMER button until “ON TIME”...
-
Page 27: Setting The Sleep Timer
Setting the SLEEP Timer Use the Sleep Timer to turn the System off after a certain number of minutes when it is playing. By setting the Sleep Timer, you can fall asleep to music and know that your System will turn off by it- self rather than play all night. -
Page 28: Care And Maintenance
Care And Maintenance Handle your CDs and tapes carefully, and they will last a long time. Compact Discs • Remove the CD from its case by holding it at the edges while pressing the case’s center hole lightly. • Do not touch the shiny surface of the CD, or bend the CD. -
Page 29: Troubleshooting
Troubleshooting • If you are having a problem with your System, check this list for a possible solution before calling for service. • If you cannot solve the problem from the hints given here, or the System has been physically damaged, call a qualified person, such as your dealer, for service. -
Page 32: Specifications
Specifications Input Sensitivity/Impedance (1 kHz) Speaker Specifications (each unit) Design and specifications are subject to change without notice. © 2006 Victor Company of Japan, Limited Amplifier Output Power 200 W per channel, min. RMS, driven into 6 Ω at 1kHz, with no more than 10% total harmonic distortion AUX IN 400 mV/50 kΩ... - Page 33 COMPACT COMPONENT SYSTEM SYSTEME DE COMPOSANTS COMPACT MX-KC45 Consists of CA-MXKC45 and SP-MXKC45 Se compose de CA-MXKC45 et de SP-MXKC45 CA-MXKC45 SP-MXKC45 CA-MXKC45 INSTRUCTIONS MANUEL D’INSTRUCTIONS LVT1521-002A...
- Page 34 OR ELECTRIC SHOCK, DO NOT EXPOSE THIS APPLIANCE TO RAIN OR MOISTURE. CAUTION Changes or modifications not approved by JVC could void the user’s authority to operate the equipment. For Canada/pour le Canada THIS DIGITAL APPARATUS DOES NOT EXCEED THE CLASS B LIMITS FOR RADIO NOISE EMISSIONS FROM DIGITAL APPARATUS AS SET OUT IN THE INTERFERENCE-CAUSING EQUIPMENT STANDARD ENTITLED “DIGITAL...
- Page 35 IMPORTANT FOR LASER PRODUCTS / IMPORTANT POUR PRODUITS LASER 1. CLASS 1 LASER PRODUCT 2. CAUTION: Do not open the top cover. There are no user serviceable parts inside the unit; leave all servicing to qualified ser- vice personnel. 3. CAUTION: VISIBLE AND / OR INVISIBLE CLASS 1M LASER RADIATION WHEN OPEN. DO NOT STARE INTO BEAM OR VIEW DIRECTLY WITH OPTICAL INSTRUMENTS.
-
Page 36: Introduction
❏ The controls and operations have been redesigned to make them very easy to use, freeing you to just enjoy the music. • With JVC’s COMPU PLAY you can turn on the System and automatically start the Radio, Cassette Deck, or CD Player with a single touch. -
Page 37: Table Of Contents
Table of Contents Introduction ...1 Features... 1 How This Manual Is Organized... 1 IMPORTANT CAUTIONS... 1 Table of Contents ...2 Getting Started ...3 Accessories ... 3 How To Put Batteries In the Remote Control... 3 Using the Remote Control ... 3 Connecting the FM Antenna... -
Page 38: Getting Started
Getting Started Accessories Make sure that you have all of the following items, which are supplied with the System. AM Loop Antenna (1) FM Wire Antenna (1) Remote Control (1) Batteries (2) If any of these items are missing, contact your dealer immediately. How To Put Batteries In the Remote Control Match the polarity (+ and –) on the batteries with the + and –... -
Page 39: Connecting The Fm Antenna
Getting Started CAUTION: • Make all connections before plugging the System into an AC power outlet. Connecting the FM Antenna Using the Supplied Wire Antenna FM wire antenna Using the Coaxial Type Connector (Not supplied) A 75Ω antenna with coaxial type connector (IEC or DIN45 325) should be connected to the FM 75Ω COAXIAL terminal. If reception is poor, connect the outdoor antenna. -
Page 40: Connecting The Am Antenna
Getting Started Connecting the AM Antenna Rear Panel of the Unit • Even when connecting an outside AM antenna, keep the indoor AM loop connected. CAUTION: • To avoid noise, keep antennas away from the System, the connecting cord and the AC power cord. Connecting the Speakers 1. -
Page 41: Connecting External Equipment
COMPU Play JVC’s COMPU PLAY feature lets you control the most frequently used System functions with a single touch. With One Touch Operation you can play a CD, a tape, turn on the radio, or listen to an external equipment with a single press of the play button for that function. -
Page 42: Basic Operations
Basic Operations Numeric keys DISPLAY SOUND TURBO SOUND MODE * When the System is in use, the display shows other items as well. For simplicity, we show here only the items described in this section. Turning the Power On and Off Turning the System On Press the STANDBY/ON button. -
Page 43: Adjusting The Volume
Adjusting the Volume Turn the VOLUME control on the Unit clockwise to increase the volume or turn it counterclockwise to decrease the volume. Press the VOLUME + button on the Remote Control to increase the volume or press the VOLUME – button on the Remote Control to decrease the volume. -
Page 44: Using The Tuner
Using the Tuner Numeric keys FM/AM FM MODE Á * When the System is in use, the display shows other items as well. For simplicity, we show here only the items described in this section. You can listen to FM and AM stations. Stations can be tuned in manually, automatically, or from preset memory storage. -
Page 45: Presetting Stations
• In AM broadcast, reception sensitivity will be changed by turning the AM loop antenna. Turn the AM loop antenna for best reception. Presetting Stations You can preset up to 30 FM stations and up to 15 AM stations. • Preset numbers may have been set to factory test fre- quencies prior to shipment. -
Page 46: Using The Cd Player
Using the CD Player Numeric keys CD1-CD3 REPEAT PROGRAM This unit has been designed to playback the following CDs: • Audio CD • CD-R (CD-Recordable) • CD-RW (CD-ReWritable) • MP3/WMA disc (MP3/WMA files recorded on a CD-R or CD- RW)* Only CDs bearing these marks can be used with this System. -
Page 47: To Load Cds
About Disc Indicator: Disc Rotation indicator The Disc indicator consists of the following three kinds of indica- tors: Disc Number indicator: Lights all the time. Selected Disc indicator:Lights for the currently selected disc number. Disc Rotation indicator:Runs when the selected CD is playing or paused. -
Page 48: Basics Of Using The Cd Player-Normal Play
Using the CD Player Basics of Using the CD Player- Normal Play To Play CDs Load CDs. Press one of the Disc button (CD1-CD3) you want to play. The selected disc number (e.g. “CD DISC 1”) appears on the display. The first track of the selected CD begins playing. -
Page 49: Resume Play For Audio Cd And Mp3/Wma Disc
Resume Play for Audio CD and MP3/WMA Disc You can store the point of the track where you stopped playback. By pressing CD 6 button, you can start playback again from the point where you stopped it. On the Unit ONLY Press the SET/RESUME button for 2 seconds until both “RESUME”... -
Page 50: Random Play
Using the CD Player To Exit and Re-enter Program Play The program you have made is stored in memory. So, you can exit Program Play temporarily or re-enter Program Play unless you de- lete the program. To exit the program mode once, press the 7 button to stop playing. -
Page 51: Using The Cassette Deck (Listening To A Tape)
Using the Cassette Deck (Listening to a Tape) ¢ TAPE B TAPE A * When the System is in use, the display shows other items as well. For simplicity, we show here only the items described in this section. The Cassette Deck allows you to play, record, and dub audio tapes. ❏... -
Page 52: Using The Cassette Deck (Recording)
Using the Cassette Deck (Recording) TAPE B TAPE A * When the System is in use, the display shows other items as well. For simplicity, we show here only the items described in this section. Recording onto a cassette from any of the sound sources is simple. Just place a tape in Deck B, have the source ready, make one or two settings, and you’re ready to record. -
Page 53: Standard Recording
Standard Recording To Record Any Sound Source to Tape Follow these steps to record from any sound source onto a tape in Deck B. Insert a blank or erasable tape into the Deck B and wind past the tape leader. Tape travelling direction Prepare the source, by, for example, tuning in a radio station, loading CDs, or turning on... -
Page 54: Using An External Equipment
Using an External Equipment Listening to the External Equipment You can listen to the external equipment such as portable CD, MD player, STB, or other auxiliary. ❏ First, make sure that the external equipment is properly connect- ed to the System. (See page 6.) Set the volume level to the minimum posi- tion. -
Page 55: Using The Timers
Using the Timers SLEEP REC (Recording) Timer indicator * When the System is in use, the display shows other items as well. For simplicity, we show here only the items described in this section. Three types of timers are available: DAILY Timer Use this timer to set wake up everyday to music from any source, instead of an alarm clock. -
Page 56: Setting The Daily Timer
Using the Timers Setting the Daily Timer Once you have set the Daily Timer, it is stored in memory. So, the Daily Timer will be activated at the same time every day until it is canceled. The Timer indicator ( ) and “DAILY”... -
Page 57: Setting The Rec (Recording) Timer
When selecting TAPE: Insert a cassette tape you want to play into Deck A. When selecting AUX: Prepare the external equipment so that it will turn on at the ON time set by the System. To allow this, the equipment should have the timer function. Setting the volume level. - Page 58 Using the Timers On the Unit You can set the time in the same way as for setting the Daily Tim- Insert a blank or erasable tape into the Deck B and wind past the tape leader. Press the CLOCK/TIMER button until “ON TIME”...
-
Page 59: Setting The Sleep Timer
Setting the SLEEP Timer Use the Sleep Timer to turn the System off after a certain number of minutes when it is playing. By setting the Sleep Timer, you can fall asleep to music and know that your System will turn off by it- self rather than play all night. -
Page 60: Care And Maintenance
Care And Maintenance Handle your CDs and tapes carefully, and they will last a long time. Compact Discs • Remove the CD from its case by holding it at the edges while pressing the case’s center hole lightly. • Do not touch the shiny surface of the CD, or bend the CD. -
Page 61: Troubleshooting
Troubleshooting • If you are having a problem with your System, check this list for a possible solution before calling for service. • If you cannot solve the problem from the hints given here, or the System has been physically damaged, call a qualified person, such as your dealer, for service. - Page 62 EN, FR 0206NYMCREBET © 2006 Victor Company of Japan, Limited...