Table of Contents
Advertisement
Advertisement
Table of Contents

Related Manuals for Dell 1209S


Summary of Contents for Dell 1209S
- Page 1 Dell™ 1209S Projector User’s Guide...
- Page 2 Other trademarks and trade names may be used in this document to refer to either the entities claiming the marks and names or their products. Dell Inc. disclaims any proprietary interest in trademarks and trade names other than its own.
-
Page 3: Table Of Contents
Contents Your Dell Projector Connecting Your Projector Connecting a Computer Connecting a DVD Player Using Your Projector Turning Your Projector On Turning Your Projector Off Adjusting the Projected Image Adjusting the Projector Zoom and Focus .... - Page 4 OTHERS Troubleshooting Your Projector Changing the Lamp Specifications Contacting Dell™ Appendix: Glossary Contents ......
-
Page 5: Your Dell Projector
Your Dell Projector Your projector comes with all the items shown below. Ensure that you have all the items, and contact Dell™ if anything is missing. Package Contents Power cable CR2032 Battery CR2032 CD Owner’s manual & Documentation 1.8m VGA cable (VGA to VGA) -
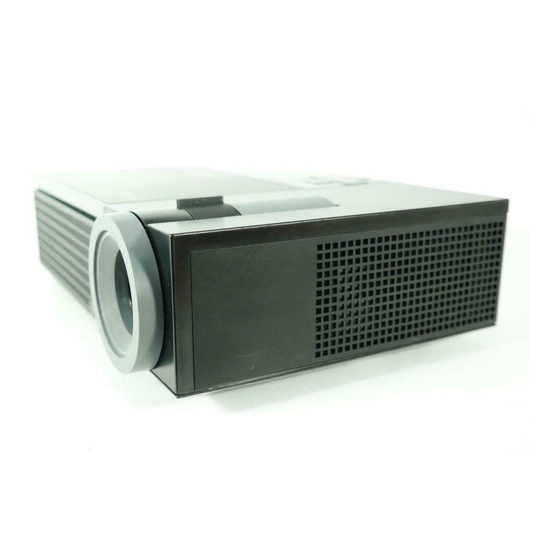
Page 6: About Your Projector
Ensure that the projector is mounted in a well-ventilated area. Do not block the ventilation slots and openings on the projector. Ensure the projector operates between ambient temperatures (5ºC to 35ºC). NOTE: For more information, see the your projector. Your Dell Projector Product Information Guide that ships with... -
Page 7: Connecting Your Projector
Connecting Your Projector DVI-D In VGA - A Dell 1209S DVI-D input connector VGA-A output (monitor loop-through) VGA-A input (D-sub) connector VGA-B input (D-sub) connector S-video connector Composite video connector Audio input connector Audio output connector USB remote connector RS232 connector... -
Page 8: Connecting A Computer
VGA to VGA cable USB to USB cable NOTE: The USB cable is not provided by Dell. NOTE: The USB cable must be connected if you want to use the Next Page and Previous Page features on the remote control. -
Page 9: Connecting A Computer Using A Dvi-D Cable
DVI-D In VGA - A Power cord DVI-D cable USB to USB cable NOTE: The USB cable and DVI-D cable are not provided by Dell. VGA - A VGA - B S-Video In Video In Audio In Connecting Your Projector... -
Page 10: Connecting A Computer Using An Rs232 Cable
DVI-D In VGA - A Power cord RS232 cable NOTE: The RS232 cable is not provided by Dell. Consult a professional installer for the cable and RS232 remote control software. Connecting Your Projector VGA - A S-Video In Video In... -
Page 11: Connecting A Dvd Player
DVI-D In VGA - A Power cord S-video cable NOTE: The S-video cable is not provided by Dell. You can buy the S-Video Extension (50ft/100ft) cable from the Dell website. VGA - A VGA - B S-Video In Video In... -
Page 12: Connecting A Dvd Player Using A Composite Cable
DVI-D In VGA - A Power cord Composite video cable NOTE: The Composite cable is not provided by Dell. You can buy the Composite Video Extension (50ft/100ft) cable from the Dell website. Connecting Your Projector VGA - A VGA - B... -
Page 13: Connecting A Dvd Player Using A Component Cable
VGA - A Power cord VGA to YPbPr cable NOTE: The VGA to YPbPr cable is not provided by Dell. You can buy the VGA to YPbPr Extension (50ft/100ft) cable from the Dell website. VGA - A S-Video In Video In... -
Page 14: Connecting A Dvd Player Using A Hdmi Cable
Connecting a DVD Player using a HDMI Cable DVI-D In VGA - A Power cord HDMI cable DVI-D adapter NOTE: The HDMI cable and DVI-D adapter are not provided by Dell. Connecting Your Projector Video In Audio In VGA - A VGA - B S-Video In... -
Page 15: Using Your Projector
Turn on your source (computer, DVD player, etc.). The projector automatically detects your source. The Dell Logo will continue for 30 seconds while power on. If the "Searching for signal..." message appears on the screen, ensure that the appropriate cables are securely connected. -
Page 16: Adjusting The Projected Image
Lower the projector, and then release the button to lock the elevator foot into position. DVI-D In VGA - A VGA - A VGA - B S-Video In Dell 1209S Elevator button Elevator foot Tilt adjustment wheel Using Your Projector Video In Audio In... -
Page 17: Adjusting The Projector Zoom And Focus
Adjusting the Projector Zoom and Focus CAUTION: To avoid damaging the projector, ensure that the zoom lens and elevator foot are fully retracted before moving the projector. Rotate the zoom tab to zoom in and out. Rotate the focus ring until the image is clear. The projector focuses at distances ranging between 3.3 ft to 39.4 ft(1.0 m to 12 m). -
Page 18: Adjusting Projection Image Size
Adjusting Projection Image Size 302.8"(769.2cm) 227.1"(576.9cm) 176.7"(448.7cm) 126.2"(320.5cm) 75.7"(192.3cm) 25.2 "(64.1cm) 22.89" (58.3cm) 3.3'(1.0m) Using Your Projector... -
Page 19: Using The Control Panel
If the LAMP light is solid amber, replace the lamp. If the LAMP light is blinking amber, the lamp driver or color wheel have failed and the projector automatically shuts down. If the problem persists, contact Dell™. 176.7" 227.1" (576.9cm) (769.2cm) - Page 20 The display automatically shuts down. Turn the display on again after the projector cools down. If the problem persists, contact Dell™. • A blinking amber TEMP light indicates that a projector fan or color wheel have failed and the projector automatically shuts down.
-
Page 21: Using The Remote Control
Using the Remote Control 10 10 LED light Source Auto adjust Up button Left button Enter Menu Down button Mute LED indicator. Press to switch between Digital RGB, Analog RGB, Composite, S-video, Component (YPbPr via VGA). Press to synchronize the projector to the input source. -
Page 22: Using The On-Screen Display
"Turning Your Projector On" on page 15 and "Turning Your Projector Off" on page 15. The Dell 1209S Micro-projector has preset configurations that are optimized for displaying data (PC Graphics) or video (movies, games, etc.). Press the Video Mode button to toggle... -
Page 23: Main Menu
adjust the settings. To go back to Main Menu, go to Back tab and press the Enter button on the control panel or the remote control. To exit the OSD, go to EXIT tab and press the Enter button or press the Menu button directly on the control panel or the remote control. -
Page 24: Auto-Adjust
AUTO-ADJUST Auto Adjustment is in progress, the following message appears on the screen, "Auto Adjustment in Progress...". SET UP It includes V. Keystone, Auto Keystone, Projector Mode, Aspect Ratio and Projector Info settings. V. K —Adjusts the image distortion caused by tilting the projector. EYSTONE —Auto adjusts the image distortion by tilting the projector. -
Page 25: Picture (In Pc Mode)
– Component cable (720p/1080i/1080p) —Displays the projector model name, the present input source and ROJECTOR projector series number (PPID#). PICTURE (in PC Mode) Using the Picture menu, you can adjust the display settings of your projectors. The Picture menu, provides the following options: —Use RIGHTNESS —Use... -
Page 26: Picture (In Video Mode)
PICTURE (in Video Mode) Using the Picture menu, you can adjust the display settings of your projectors. The Picture menu, provides the following options: —Use RIGHTNESS —Use ONTRAST —Allows you to adjust the color temperature. The screen appears OLOR cooler at higher color temperatures and warmer at lower color temperatures. When you adjust the values in the Color Adjust menu, the Custom mode is activated. -
Page 27: Display (In Pc Mode)
DISPLAY (in PC Mode) Using the Display menu, you can adjust the display settings of your projectors. The Picture menu, provides the following options: —Allows you to optimize the projectors display mode: IDEO PC, Movie, sRGB (provides more accurate color representation), Game, and Custom (set your preferred settings). -
Page 28: Display (In Video Mode)
—Allows you to change the display data clock frequency to match the REQUENCY frequency of your computer graphics card. If you see a vertical flickering wave, use Frequency control to minimize the bars. This is a coarse adjustment. —Synchronize the phase of the display signal with the graphic card. If you RACKING experience an unstable or flickering image, use Tracking to correct it. -
Page 29: Lamp
LAMP Using the Lamp menu, you can adjust the display settings of your projectors. The Picture menu, provides the following options: —Displays the operating hours since the last lamp timer reset. —Select Yes to set the Power Saving delay period. The delay period is OWER AVING the time you want the projector to wait without an input signal. -
Page 30: Language
LANGUAGE The Language menu allows you to set the language for the OSD. Using Your Projector... -
Page 31: Others
Input in a source at native resolution then press Enter and select "Yes". The projector will capture the screen image as a "My Customized logo". This screen replaces all the original screens with the Dell logo. User can recover the default screen by selecting Dell Logo on the pop-up screen. - Page 32 —When Password Protect is enabled, a Password Protect screen ASSWORD requesting you to enter a password will be displayed when the power plug is inserted into the electrical outlet and the power for the projector is first turned on. By default, this function is disabled. You can enable this feature using the Password menu.
- Page 33 If you have entered incorrect password, you will be given another 2 chances. After the three invalid attempts, the projector will automatically turn off. NOTE: If you forget your password, contact DELL™ or qualified service personnel. To cancel the password function, select Off and enter the password to disable the function.
-
Page 34: Troubleshooting Your Projector
Troubleshooting Your Projector If you experience problems with your projector, see the following troubleshooting tips. If the problem persists, contact Dell™. See Contacting Dell™ on page 44 Problem No image appears on the screen Troubleshooting Your Projector Possible Solution • Ensure that the lens cap is removed and the projector is turned on. - Page 35 Possible Solution Press the Auto Adjust button on the remote control or the control panel. If you are using a Dell™ portable computer, set the resolution of the computer to XGA (1024 x 768): Right-click the unused portion of your Windows desktop, click Properties and then select Settings tab.
- Page 36 The projector has overheated. The display automatically shuts down. Turn the display on again after the projector cools down. If the problem persists, contact Dell™. will automatically shut down. If the problem persists, contact Dell™. Try to press the Menu button on the panel for 15 seconds to unlock the OSD.
- Page 37 (continued) Problem The remote control is not operating smoothly or works only within a limited range (continued) Possible Solution The battery may be low. Check if the LED indicator from the remote is too dim. If so, replace with a new CR2032 battery. Troubleshooting Your Projector...
-
Page 38: Changing The Lamp
Replacement suggested! www.dell.com/lamps" appears on the screen. If this problem persists after replacing the lamp, contact Dell™. For more information, see Contacting Dell™on page 44. CAUTION: The lamp becomes very hot when in use. Do not attempt to replace the lamp until the projector has been allowed to cool down for at least 30 minutes. - Page 39 LAMP(S) INSIDE THIS PRODUCT CONTAIN MERCURY AND MUST BE RECYCLED OR DISPOSED OF ACCORDING TO LOCAL, STATE OR FEDERAL LAWS. FOR MORE INFORMATION, GO TO WWW.DELL.COM/HG OR CONTACT THE ELECTRONIC INDUSTRIES ALLIANCE AT WWW.EIAE.ORG. FOR LAMP SPECIFIC DISPOSAL INFORMATION CHECK WWW.LAMPRECYCLE.ORG.
-
Page 40: Specifications
Specifications Light Valve Brightness Contrast Ratio Uniformity Lamp Number of Pixels Displayable Color Color Wheel Speed Projection Lens Projection Screen Size Projection Distance Video Compatibility Power Supply Power Consumption Audio Specifications 0.55" SVGA DMD Type X, DarkChip1™ 2500 ANSI Lumens (Max.) 1800:1 Typical (Full On/Full Off) 85% Typical (Japan Standard - JBMA) 165~200-watt user-replaceable 3000-... - Page 41 Noise Level Weight Dimensions (W x H x D) Environmental Regulatory I/O Connectors 34 dB(A) Full-on mode, 31 dB(A) Eco mode 4.95 lbs (2.25 kg) External 11.68 x 7.96 x 3.17 ± 0.04 inches (296.5 x 202 x 80.5 ± 1 mm) Operating temperature: 5 F- 95 Humidity: 80% maximum...
- Page 42 Example: Power ON Command (Send low byte firstly) --> 0xBE, 0xEF, 0x10, 0x05, 0x00, 0xC6, 0xFF, 0x11, 0x11, 0x01, 0x00, 0x01 • Control Commands List To view the latest RS232 code, go to the Dell Support site at: support.dell.com. Specifications RS232 Pin Assignment Value...
- Page 43 Compatibility Modes (Analog/Digital) Resolution 640X480 640X480 640X480 720X400 720X400 800X600 800X600 800X600 848X480 1024X768 1024X768 1024X768 1280X720 1280X768 1280X800 1280X1024 1280X1024 1280X1024 1360X768 1400X1050 1440X900 1600X1200 1680X1050 V. Frequency (Hz) 59.9 70.1 60.3 85.1 59.9 59.9 59.8 59.9 H. Frequency (KHz) 31.5 37.5 43.3...
-
Page 44: Contacting Dell
Dell product catalog. Dell provides several online and telephone-based support and service options. Availability varies by country and product, and some services may not be available in your area. To contact Dell for sales, technical support, or customer service issues: Visit support.dell.com. -
Page 45: Appendix: Glossary
Appendix: Glossary ANSI L —A standard for measuring the brightness. It is calculated by UMENS dividing a square meter image into nine equal rectangles, measuring the lux (or brightness) reading at the center of each rectangle, and averaging these nine points. - Page 46 dB— decibel—A unit used to express relative difference in power or intensity, usually between two acoustic or electric signals, equal to ten times the common logarithm of the ratio of the two levels. Diagonal Screen— A method of measuring the size of a screen or a projected image.
- Page 47 S-Video—A video transmission standard that uses a 4-pin mini-DIN connector to send video information on two signal wires called luminance (brightness, Y) and chrominance (color, C). S-Video is also referred to as Y/C. SECAM— A French and international broadcast standard for video and broadcasting, closely related to PAL but with a different method of sending color information.
- Page 48 Power cord connector 7 RS232 connector 7 Security cable slot 7 S-video connector 7 USB remote connector 7 VGA-A input (D-sub) connector VGA-A output (monitor loop-through) 7 VGA-B input (D-sub) connector Contact Dell 5 Control Panel 19 Dell contacting 44...
- Page 49 Power Consumption 40 Power Supply 40 Projection Distance 40 Projection Lens 40 Projection Screen Size 40 Regulatory 41 RS232 Protocol 42 Uniformity 40 Video Compatibility 40 Weight 41 support contacting Dell 44 telephone numbers 44 Troubleshooting 34 Contact Dell 34 Index...