Motorola PMMN4095 User Manual
Wireless remote speaker microphone
Hide thumbs
Also See for PMMN4095:
- User manual (606 pages) ,
- User manual (2 pages) ,
- User manual (634 pages)
Table of Contents
Advertisement
Available languages
Available languages
Quick Links
ACCESSORIES
LONG RANGE
WIRELESS SOLUTIONS
USER GUIDE
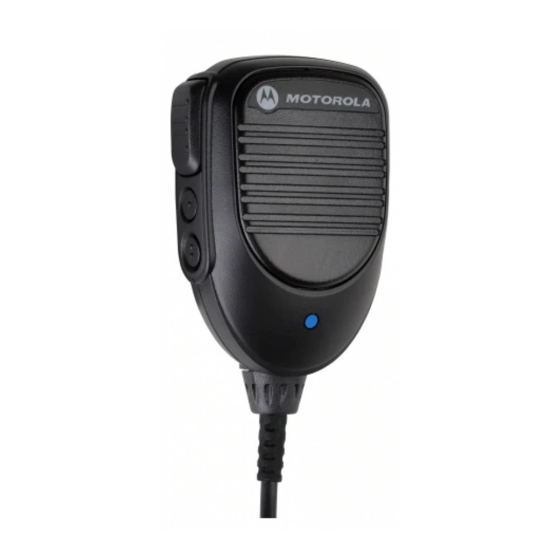
WIRELESS REMOTE SPEAKER MICROPHONE PMMN4095_
MOBILE MICROPHONE WITH BLUETOOTH GATEWAY PMMN4097_
DUAL-UNIT CHARGER PMLN6714_
VEHICULAR CHARGER PMLN6716_
WIRELESS REMOTE SPEAKER MICROPHONE BATTERY PMNN4461_
en
es-CO
pt-BR
fr-FR
es-ES
it-IT
fr-CA
ko
de-DE
pt-PT
nl-NL
ru
Advertisement
Chapters
Table of Contents
Troubleshooting

Related Manuals for Motorola PMMN4095


Summary of Contents for Motorola PMMN4095
- Page 1 ACCESSORIES LONG RANGE WIRELESS SOLUTIONS USER GUIDE WIRELESS REMOTE SPEAKER MICROPHONE PMMN4095_ MOBILE MICROPHONE WITH BLUETOOTH GATEWAY PMMN4097_ DUAL-UNIT CHARGER PMLN6714_ VEHICULAR CHARGER PMLN6716_ WIRELESS REMOTE SPEAKER MICROPHONE BATTERY PMNN4461_ es-CO pt-BR fr-CA de-DE fr-FR es-ES it-IT pt-PT nl-NL...
- Page 3 • Body Worn Operation. When microphone is worn on the body, always awareness and control for compliance with applicable standards and use Motorola-approved clip for this product. Using approved body- regulation. worn accessories is important because the use of non-Motorola- approved accessories may result in exposure levels, which exceed This device complies with part 15 of the FCC Rules.
- Page 4 W A R N I N G radio's volume, the less time is required before your hearing could be 2. Use of accessories not recommended by Motorola may result in risk of fire, electric shock, or injury. affected. Hearing damage from loud noise is sometimes undetectable at first and can have a cumulative effect.
- Page 5 Vehicular Charger PMLN6716_ Table 1.1: Motorola Authorized Battery • Equipment shall be used in vehicle and in dry condition. Keep in mind Kit (Part) Number Platform/Description that rain or snow can reach the equipment i.e. through an open vehicle window.
- Page 6 RADIOS COMPATIBILITY SOFTWARE COMPATIBILITY ® The Long Range Wireless Solutions are compatible with the Mission The Mobile Microphone Bluetooth Gateway is compatible with the Critical Wireless Pod software version R01.05.00 or later. radios listed below: Table 1.2: Radios Compatibility Region Model Series XPR5550*, XPR5350*, XPR4580, XPR4550, North America...
- Page 7 Recommended Wearing Positions..... . . page 5 The PMMN4095 Wireless Remote Speaker Microphone (WRSM) is designed to be used with the PMMN4097 Mobile Microphone ®...
- Page 8 Assembling the Swivel Clip Attaching the Battery Insert the swivel clip through the battery slot. Rotate the clip to the right With the WRSM turned off, align the battery to back chassis and fully position as indicated in Figure 2.1 below. slot in until the battery latch is engaged.
- Page 9 Detaching the Battery Charging the Battery To detach the battery, lift up the battery latch and pull the battery backward until the battery is fully disengaged from the back chassis. Figure 2.4: Charging position of the WRSM with battery attached Figure 2.3: Removing he battery from the WRSM English...
- Page 10 DO NOT discard batteries in a fire. language. Procedure: The Motorola-approved battery shipped with your WRSM is uncharged. Prior to using a new battery, fully charge the new battery to ensure Hold the Power Button for 6 seconds after the power up LED optimum capacity and performance.
- Page 11 Figure 2.6: Recommended wearing positions Figure 2 5: Language Selection NOTE: When the WRSM is worn on the body, always use Motorola- approved clip. Using approved body-worn accessories is important because the use of non-Motorola-approved accessories may result in exposure levels, which exceed the FCC occupational/controlled environment RF exposure limits.
- Page 12 IDENTIFYING WRSM INDICATORS AND Overview of the WRSM CONTROLS Take a moment to review the following: Volume Toggle Audio Indicator Overview of the WRSM ....... page 6 Power Programmable Power Indicators and Battery Alerts .
- Page 13 Power Indicators and Battery Alerts Audio Indicators Table 2.3: Audio Indicators The WRSM is battery powered. It is very important to pay attention to the low battery warning described in Table 2.2 to avoid improper State Audio Indication LED functioning of the WRSM. Table 2.2: Power Indicators and Battery Alerts Audio Not Available, Power Indication...
-
Page 14: Table Of Contents
To power ON the WRSM, press and hold the Power Button until you use your WRSM. Use this navigation guide to familiarize yourself with hear “Motorola Solutions” prompt. To power OFF, press the Power the basic features: Button until the WRSM turns off. -
Page 15: Volume Control
Volume Control Pairing Your WRSM Procedure: To increase the volume, push volume lever towards the . To decrease the volume, push lever towards the Ensure both the radio and WRSM are powered on. To mute, hold lever to the for 2 seconds. To unmute, push lever to Place the blue dot (secure pairing spot) on the WRSM within one or press the PTT button. -
Page 16: Transfer Audio
Transfer Audio Procedure: Press the PTT button on the Mobile Mic Gateway to unpair and audio will route back to the Mobile Radio. Alternatively, place the blue dot (secure pairing spot) on the WRSM within one inch of the blue dot (secure pairing spot) on the Mobile Mic Gateway. -
Page 17: Poor Signal / Out Of Range Warning Indication
Poor Signal / Out Of Range Warning Push-to-Talk (PTT) Button Indication Press and hold down the PTT button to talk. Release the PTT button to listen. The microphone is activated when the PTT button is pressed. You will be prompted with the Poor Signal / Ouf Of Range Warning Indication if the WRSM is about to lose the wireless link at Bluetooth fringe area. -
Page 18: Tasklight Button
Tasklight Button Table 2.7: Dark Mode Indicators Press the Tasklight Button for 1 second to switch ON/OFF the tasklight. Power Indication, Audio Tone Indication Indication and Tasklight Voice Prompt During low/critical battery, the Tasklight blinks for 30 seconds and will be Indication auto switched OFF. -
Page 19: Secondary Receiver Audio Accessory
Secondary Receiver Audio Accessory Optional Accessories Table 2.8: Optional Accessories When a secondary accessory is plugged into the audio jack, audio will Part Number Description be routed through secondary accessory Earpiece with Coiled Cord and 3.5 mm RT Angle RLN4941_ Attaching Secondary Receiver Audio Accessory Plug RLN4885_... -
Page 20: Firmware Upgrade
Firmware Upgrade Anatel Label Firmware upgrade is available for this WRSM and it is only upgradeable by your dealer. Check with your dealer for more information on the latest firmware upgrades. NOTE: DO NOT charge the WRSM with this micro USB port, it is strictly for firmware upgrade only. - Page 21 Making Final Connections ......page 16 The PMMN4097 Mobile Microphone Bluetooth Gateway is designed to be used with PMMN4095 Wireless Remote Speaker Microphone. English...
- Page 22 Installing Mobile Mic Gateway to a Mobile Radio Back-up Plate Carefully select the installation location for the Mobile Mic Gateway. Vehicle Plan the installation so that the Mobile Mic Gateway’s location is within Dashboard convenient reach of the user, but will not interfere with the vehicle’s operation.
- Page 23 IDENTIFYING MOBILE MIC GATEWAY Overview of the Mobile Mic Gateway CONTROLS Take a moment to review the following: Overview of the Mobile Mic Gateway ....page 17 Push-to-Talk Configuring the Programmable Buttons .
- Page 24 Configuring the Programmable Buttons GENERAL MOBILE MIC GATEWAY OPERATION The 1-Dot Button and 2-Dot Button on the Mobile Mic Gateway are programmable through radio’s Customer Programming Software (CPS). Once you understand how your Mobile Mic Gateway is configured, you Your radio’s User Guide contains a full description of the programmable are ready to use your Mobile Mic Gateway.
-
Page 25: Pairing Your Mobile Mic Gateway With Wrsm
Pairing Your Mobile Mic Gateway with IMPORTANT : There will be no audio from the Mobile Radio once the WRSM is paired with the Mobile Mic Gateway. The WRSM system is not designed to have audio coming from both the Mobile Radio and WRSM simultaneously. Pressing Procedure: the PTT button on the Mobile Mic Gateway while the WRSM is in use will disconnect the WRSM and revert... -
Page 26: Transfer Audio Or Replacing With New Wireless Device
Transfer Audio Or Replacing With New Wireless Device Procedure: Press the PTT button on the Mobile Mic Gateway to unpair and audio will route back to the Mobile Radio. Alternatively, place the blue dot (secure pairing spot) on the WRSM within one inch of the blue dot (secure pairing spot) on the Mobile Align Mic Gateway. -
Page 27: Wireless Link Restored
Wireless Link Restored NOTE: Audio will continue via the Mobile Mic Gateway until the WRSM is reconnected to the Mobile Mic Gateway via the NOTE: Once the wireless device is in range or after interference has alignment of the Blue pairing dots. subsided, the link between the WRSM and Mobile Mic Gateway is restored. -
Page 28: Disconnecting The Mobile Mic Gateway From Mobile Radio
Disconnecting the Mobile Mic Gateway from Mobile Radio To disconnect the Mobile Mic Gateway from your mobile radio, follow the steps below: Procedure: Turn the locking collar of the Mobile Mic Gateway in a quarter turn counterclockwise. Pull the cable from the accessory interface connector to release. Coiled Cord Replacement To remove the PMMN4097 coiled cord, follow the steps below: Procedure:... - Page 29 Operational Guidelines .......page 24 Motorola Authorized Battery ......page 24 Motorola Authorized Power Sources/Power Supplies .
-
Page 30: Operational Guidelines
The Power Sources/Power Supplies listed in Table 4.2 are approved for the pocket. use with the Dual-Unit Charger: • The Dual-Unit Charger is designed to provide simultaneous charging Table 4.2: Motorola Au horized Power Supply for both pockets. Power Supply Kit Description Number Motorola Authorized Battery Power Supply, Charger Switch Mode, 110 –... -
Page 31: Overview Of The Duc
Overview of the DUC LEDs Pocket Barrel Connector Figure 4.1: Dual-Unit Charger (Front View) Figure 4.2: Dual-Unit Charger (Side View) English... -
Page 32: Operating Instructions
Dual-Unit Chargers are intended for use only with the authorized When the battery is properly seated in the pocket, the charger LED Motorola battery and power supplies listed in Table 4.1 and Table will light in accordance with Table 4.3. -
Page 33: Led Light Indication
LED Light Indication Table 4.3: Charger Status (Continued) Battery under voltage recovery time out When troubleshooting, always observe the color of the LED. Loss of charge current control Table 4.3: Charger Status Fast Flash Red Excessive power supply voltage LED Indication Charger State Fault connection happened –... -
Page 34: Troubleshooting
Troubleshooting If There is Fast Flash Red Indication: Confirm the battery being used with the WRSM is listed in Table 4.1 and is good in condition. Confirm that the power supply being used with the WRSM is listed in Table 4.2 and is good in condition. Remove the battery and restart the Dual-Unit Charger. - Page 35 Table 6.1: Replaceable Parts CHAPTER 6: REPLACEABLE PARTS Part Number Description Power Supply, Charger Switch Mode, 110 – 240 V Other than the replaceable parts listed below, the PMMN4095_, 25012022007 PMMN4097_, PMLN6714_ and PMLN6716_ are not repairable. Power Supply, Charger Switch Mode, 110 – 240 V 25012022008 The following parts are available: Table 6.1: Replaceable Parts...
- Page 36 CHAPTER 7: OPEN SOURCE SOFTWARE LEGAL NOTICE This Motorola Solutions Product contains Open Source Software. For information regarding licenses, acknowledgments, required copyright notices and other usage terms, refer to the documentation for this Motorola Solutions Product at: https://businessonline.motorolasolutions.com Go to: Resource Center > Product Information > Manual >...
- Page 37 DO NOT disassemble the PMMN4095_, PMMN4097_, PMLN6714_ and PMLN6716_; they are not repairable. Order replacement parts listed in “REPLACEABLE PARTS" on page 41. Please contact Motorola Solutions Customer Care as shown in Table 8.1 below for ordering or any technical troubleshooting assistance.
- Page 38 Product. MOTOROLA cannot be respons ble in any way for any ancillary equipment not furnished by MOTOROLA which is attached to or used in connection with the Product, or for operation of the Product with any ancillary equipment, and all such equipment is expressly excluded from this warranty.
- Page 39 Product (e.g., dealer or communication service provider), it can facilitate your obtaining warranty service. You can also call MOTOROLA at This warranty sets forth the full extent of MOTOROLA’S respons bilities 1-800-927-2744 US/Canada. regarding the Product. Repair, replacement or refund of the purchase price, at MOTOROLA’s option, is the exclusive remedy.
- Page 40 MOTOROLA software or exercise of rights in such MOTOROLA software permitted. No license is That MOTOROLA will have sole control of the defense of such suit granted by implication, estoppel or otherwise under MOTOROLA and all negotiations for its settlement or compromise; and patent rights or copyrights.
- Page 41 Motorola. É importante usar os acessórios aprovados para uso junto ao corpo, porque o uso Bidirecionais Móveis de acessórios não aprovados pela Motorola pode resultar em níveis de exposição que excedem os limites da RF de ambiente ocupacional/controlado da FCC.
- Page 42 A A VISOS • Reduza o volume antes de conectar o headset ou o fone de ouvido. 2. O uso de acessórios não autorizados pela Motorola pode resultar • em risco de incêndio, choque elétrico ou ferimentos. Limite o tempo de uso dos headsets ou fones de ouvido com volume alto.
- Page 43 Certifique-se de que o cabo esteja localizado fora de locais de o usuário pode ser solicitado a tomar medidas adequadas. circulação para não ser pisado, chutado, molhado ou danificado. Tabela 1.1: Bateria autorizada Motorola Carregador Veicular PMLN6716_ • Número do kit (peça) Plataforma/Descrição...
- Page 44 COMPATIBILIDADE DOS RÁDIOS COMPATIBILIDADE DE SOFTWARE ® As Soluções Wireless de Longo Alcance são compatíveis com o O Microfone Móvel com Gateway Bluetooth é compatível com os software Critical Wireless Pod R01.05.00 ou posterior. rádios indicados abaixo: Tabela 1.2: Compatibilidade dos Rádios Região Série do Modelo XPR5550*, XPR5350*, XPR4580, XPR4550,...
- Page 45 Posições de Uso Recomendadas ..... página 5 O Microfone com Alto-falante Remoto Sem fio PMMN4095 (WRSM) foi desenvolvido para ser usado com o Microfone Móvel com Gateway ®...
- Page 46 Montagem do Clipe Giratório Colocar a Bateria Insira o clipe giratório pelo compartimento da bateria. Gire o clipe para Com o WRSM desligado, alinhe a bateria com o chassi traseiro até que a posição correta conforme indicado na Figura 2.1 abaixo. o chassi e o slot da bateria fiquem totalmente alinhados.
- Page 47 Remover a Bateria Carregar a Bateria Para remover a bateria, levante a trava e puxe a bateria para trás até que desprenda totalmente da parte posterior do chassi. Figura 2.4: Posição de carregamento do WRSM com a bateria. Figura 2.3: Remova a bateria do WRSM Português (Brasil)
- Page 48 NÃO jogue as baterias no fogo. desejado. Procedimento: A bateria aprovada pela Motorola que acompanha o WRSM está descarregada. Antes de utilizar a nova bateria, carregue-a totalmente Para selecionar o recurso de idioma, segure o botão Liga/desliga para garantir o máximo de capacidade e desempenho.
- Page 49 Motorola. É importante usar os acessórios aprovados para uso junto ao corpo, porque o uso de acessórios não aprovados pela Motorola pode resultar em níveis de exposição que excedem os limites da RF de ambiente ocupacional/controlado da FCC.
- Page 50 IDENTIFICAR INDICADORES E CONTROLES Visão geral do WRSM DO WRSM Indicador de Dedique alguns momentos para ler os seguintes tópicos: Controle de Volume Áudio Visão geral do WRSM ....... página 6 Botão Liga/ Botão Programáve Indicadores de Energia e Alertas de Bateria.
- Page 51 Indicadores de Energia e Alertas de Bateria Indicadores Sonoros Tabela 2.3: Indicadores Sonoros O WRSM funciona com baterias. Preste muita atenção no aviso da parte inferior da bateria descrito na Tabela 2.2 para evitar Estado LED Indicador de áudio funcionamento indevido do WRSM. Áudio Não Disponível, Tabela 2.2: Indicadores de Energia e Alertas de Bateria Dispositivo Não...
- Page 52 Para ligar o WRSM, pressione e segure o botão Liga/Desliga até ouvir o para usá-lo. Use este guia de navegação para se familiarizar com os comando "Motorola Solutions". Para desligar, pressione o botão Liga/ recursos básicos: Desliga até que o WRSM se apague.
-
Page 53: Controle De Volume
Controle de Volume Emparelhamento do WRSM Para aumentar o volume, pressione a alavanca em sentido . Para diminuir o volume, pressione a alavanca em sentido Procedimento: Para silenciar o volume, pressione a alavanca em sentido por 2 Certifique-se de o rádio e o WRSM estejam ligados. segundos. -
Page 54: Transferir Áudio
Tabela 2.5: LED de emparelhamento, indicador de tom e comando Se o WRSM for emparelhado com um microfone móvel com gateway e de voz (Continuação) precisa ser emparelhado a outro microfone móvel com gateway, o WRSM não precisará apagar o emparelhamento anterior. O LED Indicador Indicador Comando... -
Page 55: Aviso De Sinal Fraco / Fora De Alcance
Botão PTT (Push-To-Talk) Mantenha pressionado o botão PTT para falar. Solte o botão PTT para ouvir. O microfone é ativado quando o botão PTT é pressionado. 100 m Linha de Visão Figura 2.11: Alcance de comunicação Novo host: Siga as etapas de “Emparelhamento do WRSM" na página 9 para uma nova conexão. -
Page 56: Botão Tasklight
Botão Tasklight Tabela 2.7: Indicadores do Modo Escuro Pressione o Botão Tasklight por um segundo para Ligar/Desligar a luz. LED Indicador de Energia, Indicador Comando Indicador Indicador de Áudio e Quando a bateria estiver fraca/muito fraca, a Tasklight piscará por de tom de Voz Tasklight... -
Page 57: Acessório Receptor De Áudio Secundário
Acessório Receptor de Áudio Secundário Acessórios Opcionais Tabela 2.8: Acessórios Opcionais Quando um acessório secundário estiver conectado à entrada de Número de áudio, este será roteado pelo acessório secundário. Descrição Peça Conexão do Acessório Receptor de Áudio Fone com cabo em espiral e plugue RLN4941_ Secundário com ângulo reto de 3,5 mm... - Page 59 Fazer Conexões Finais ......página 16 O Microfone Móvel com Gateway Bluetooth PMMN4097 foi projetado para ser usado com o Microfone com Alto-falante Remoto Sem fio PMMN4095. Português (Brasil)
- Page 60 Instalação do Microfone Móvel com Gateway em um Rádio Móvel Placa posterior Painel do Selecione com atenção o local de instalação do microfone móvel com veículo gateway. Planeje a instalação de modo que a localização do microfone móvel com gateway esteja dentro de um alcance conveniente para o usuário, mas que não interfira na operação do veículo.
- Page 61 IDENTIFICAR CONTROLES DO MICROFONE Visão geral do Microfone Móvel com MÓVEL COM GATEWAY Gateway Dedique alguns momentos para ler os seguintes tópicos: Visão geral do Microfone Móvel com Gateway ... página 17 Configurar Botões Programáveis .
- Page 62 Configurar Botões Programáveis OPERAÇÃO GERAL DO MICROFONE MÓVEL COM GATEWAY O Botão de 1 ponto e o Botão de 2 pontos em seu microfone móvel com gateway são programáveis no rádio, através do Software de Depois de compreender como seu microfone móvel com gateway é Programação do Cliente (CPS).
-
Page 63: Emparelhamento Do Microfone Móvel Com Gateway Com Wrsm
Emparelhamento do Microfone Móvel com IMPORTANTE : Não haverá áudio do Rádio Móvel quando o WRSM estiver emparelhado com o Mic Móvel com Gateway. Gateway com WRSM O sistema não foi projetado para ter áudio proveniente do Rádio Móvel e do WRSM Procedimento: simultaneamente. -
Page 64: Transferir Ou Substituir Áudio Com Um Novo Dispositivo Sem Fio
Transferir ou Substituir Áudio com um Novo Dispositivo Sem Fio Procedimento: Pressione o botão PTT em seu Mic Móvel com Gateway para desemparelhar e o áudio será encaminhado de volta para o Rádio Móvel. Como alternativa, posicione o ponto azul (local de emparelhamento Alinhar seguro) no WRSM a uma distância de 2,5 cm (1 pol.) do ponto azul (local de emparelhamento seguro) do Mic Móvel com Gateway. -
Page 65: Link Sem Fio Perdido
Link sem Fio Perdido Quando o microfone móvel com gateway estiver em uso, não haverá áudio no WRSM. Se houver interferência, ou se o Mic Móvel com Gateway estiver com NOTA: o áudio continuará pelo microfone móvel com gateway até sinal fraco ou fora de alcance, a conexão entre o WRSM e o Mic Móvel que o WRSM seja reconectado ao microfone móvel com com Gateway pode ser perdida. -
Page 66: Desconectar O Microfone Móvel Com Gateway Do Rádio Móvel
Desconectar o Microfone Móvel com Gateway do Rádio Móvel Para desconectar o Mic Móvel com Gateway do seu rádio móvel, siga as etapas abaixo: Procedimento: Gire o anel de bloqueio do microfone móvel com gateway a 90 °no sentido anti-horário. Puxe o cabo do conector da interface do acessório para soltar. - Page 67 Orientações Operacionais ......página 24 Bateria Autorizada Motorola ......página 24 Fontes de Alimentação Autorizadas pela Motorola .
-
Page 68: Orientações Operacionais
• O carregador duas unidades foi projetado para apresentar uso com o Carregador de duas unidades: carregamento simultâneo para os dois suportes. Tabela 4.2: Fonte de Alimentação Autorizada pela Motorola Número do kit da Bateria Autorizada Motorola Fonte de Descrição alimentação... -
Page 69: Visão Geral Do Carregador De Duas Unidades
Visão geral do Carregador de Duas Unidades LEDs Suporte Conector da Fonte de Alimentação Figura 4.1: Carregador de Duas Unidades (Vista Frontal) Figura 4 2: Carregador de Duas Unidades (Vista Lateral) Português (Brasil) -
Page 70: Instruções Operacionais
Carregadores de duas unidades devem ser usados somente com Quando a bateria está devidamente encaixada no suporte, o LED baterias e fontes de alimentação autorizadas pela Motorola do carregador acende de acordo com a Tabela 4.3. mostradas na Tabela 4.1 e Tabela 4.2. O uso com produtos não... -
Page 71: Luz Led Indicadora
Luz LED Indicadora Tabela 4.3: Status do Carregador (Continuação) Bateria em recuperação de tensão Durante a resolução de problemas, sempre observe a cor do LED. A temperatura da bateria está muito Tabela 4.3: Status do Carregador Âmbar piscando quente ou muito fria lentamente - Aguarde para carregar Indicação do LED... -
Page 72: Solução De Problemas
Solução de Problemas Se houver indicação de luz vermelha piscando rapidamente Confirme se a bateria que está sendo usada com o WRSM está listada na Tabela 4.1 e se está em boas condições. Confirme se a fonte de alimentação que está sendo usada com o WRSM está... - Page 73 Tabela 6.1: PEÇAS DE REPOSIÇÃO (Continuação) CAPÍTULO 6: PEÇAS DE REPOSIÇÃO Número de Descrição Peça Além das peças de reposição listadas abaixo, o PMMN4095_, Fonte de alimentação, Carregador Switch Mode, PMMN4097_, PMLN6714_ e PMLN6716_ não podem ser consertados. 25012022007 110 a 240 V BRZ As peças a seguir estão disponíveis: Fonte de alimentação, Carregador Switch Mode, 25012022008...
- Page 74 CAPÍTULO 7: AVISOS LEGAIS PARA SOFTWARE DE CÓDIGO ABERTO Esse produto da Motorola Solutions contém Software de Código Aberto. Para obter mais informações relativas a licenças, confirmações, avisos de copyright necessários e outros termos de uso, consulte a documentação para este produto da Motorola em: https://businessonline.motorolasolutions.com...
- Page 75 PMLN6716_; eles não podem ser consertados. Solicite peças de reposição listados nas “PEÇAS DE REPOSIÇÃO" na página 40. Entre em contato com o Atendimento ao Cliente da Motorola Solutions conforme mostrado na Tabela 8.1 abaixo para fazer pedidos ou solicitar qualquer tipo de suporte técnico para solução de problemas.
- Page 76 Produto com qualquer equipamento auxiliar, e todos esses equipamentos estão expressamente excluídos desta garantia. Como cada sistema que pode usar o Produto é único, a MOTOROLA não se responsabiliza pela faixa, cobertura ou operação do sistema como um todo nesta garantia.
- Page 77 MOTOROLA com relação ao Produto. O reparo, substituição ou revendedor ou provedor de serviços de comunicação), pode facilitar a reembolso do preço de compra, a critério da MOTOROLA, é a única obtenção do serviço de garantia. Você também pode ligar para a reparação.
- Page 78 Produto ou por qualquer peça dele. uma patente nos Estados Unidos, e a MOTOROLA pagará os custos As leis dos Estados Unidos e de outros países garantem à Motorola e danos finais conferidos ao comprador, usuário final, em qualquer determinados direitos exclusivos para softwares MOTOROLA dessas ações que sejam atr buíveis a qualquer alegação, mas cujo...
- Page 79 MOTOROLA, MOTO, MOTOROLA SOLUTIONS e o logotipo M estilizado são marcas comerciais ou marcas registradas da Motorola Trademark Holdings, LLC e são usadas sob licença. Todas as demais marcas registradas são de propriedade de seus respectivos proprietários. © 2014 Motorola Solutions, Inc. Todos os direitos reservados.
- Page 80 O dispositivo bluetooth deste equipamento opera em caráter secundário, isto é, não tem direito a proteção contra interferência prejudicial, mesmo de estações do mesmo tipo, e não pode causar interferência a sistemas operando em caráter primário.
- Page 81 MOTOROLA, MOTO, MOTOROLA SOLUTIONS and the Stylized M logo are trademarks or registered trademarks of Motorola Trademark Holdings, LLC and are used under license. All other trademarks are the property of their respective owners. © 2014 Motorola Solutions, Inc. All rights reserved.