Table of Contents
Advertisement
Quick Links
Advertisement
Table of Contents

Related Manuals for Sharp ES-FW105D7PS


Summary of Contents for Sharp ES-FW105D7PS
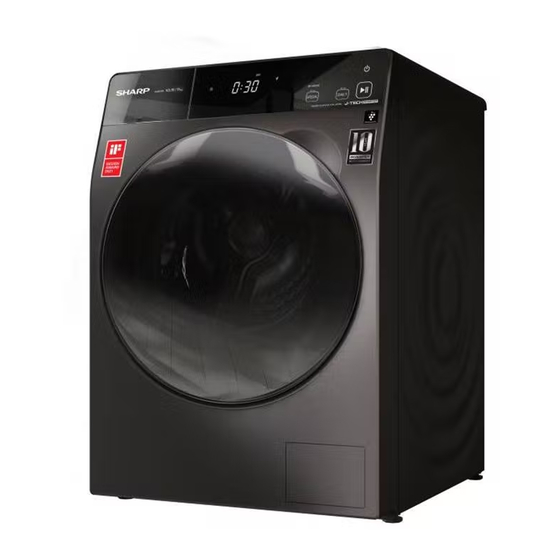
- Page 1 Operation manual of front load washer dryer...
-
Page 2: Important Safety Symbols And Precautions
Safety precautions To ensure your safety, proper operation, and long service life, read this manual carefully, and follow the instructions when installing, operating, and maintaining the washing machine. We are not liable for any damages resulting from improper use. Keep this manual in safekeeping so that it can be referred to at any time when needed. There are precautions marked with symbols such as "Warning"... - Page 3 Safety precautions Precautions about installation AC 220-240V...
- Page 4 Precautions about operation...
- Page 5 Safety precautions...
- Page 6 Precautions about using the dryer Precautions about maintenance...
-
Page 7: Protecting The Environment
Protecting the environment... - Page 8 Parts anel anel table feet...
-
Page 9: Installation
Installation Product specifications Model ES-FW105D7PS Rated Capacity 10.5 kg Drying Capacity 7.0 kg Rated Voltage 220 - 240 V~ Rated Frequency 50 Hz Drying power 1300 W Water Pressure 0.03 - 0.8 MPa Rated Heating Washing Power 1950 W Spin Speed (Maximum) -
Page 10: Installation Requirements
Installation requirements To avoid the unnecessary risk of fire, electric shock or personal injury, all electrical circuit and grounding must be set as per the national electrical standard. washing machine. The power cord has to be positioned so that it will not be stepped on, pressed or clamped by the article on or next to it. - Page 11 Installation requirements Unit: Ambient temperature...
-
Page 12: Unpacking The Washing Machine
Unpacking the washing machine... - Page 13 Installation Removing the shipping bolts Before using the washing machine, you must remove all shipping bolts from the back of the washing machine. To remove the shipping bolts: Loosen all shipping bolts with the spanner. Fixing belt Shipping bolt Take each bolt head and pull it out from the hole.
- Page 14 Adjusting the adjustable feet ...
- Page 15 Installation Water inlet installation Tap selection The front end should be longer than 10mm. The tap exit end face should be flat and smooth, if not file it to avoid leakage. Suitable tap Not suitable tap 1. Press down the slider and remove the inlet hose connector from the inlet hose , like below illustration 1.
-
Page 16: Positioning The Drain Hose
Installation If you are using a screw type of water tap, use the provided screw-type adaptor to connect to the water tap as shown. Positioning the drain hose Ensure the drain hose is fixed, and the position does not move or become loose, otherwise it will cause leakage and property loss. - Page 17 Inspection and preparation before washing...
- Page 19 Before using the washing machine Using methods of detergents and additives Softener drawer—Softener During the last rinsing, softeners in the Main wash drawer detergent drawer will be poured automatically. The amount of liquid detergents shall not Softener drawer exceed “MAX” base line. Prewash drawer Do not put powder or liquid detergents in the softener drawer.
-
Page 20: Control Panel
Control panel Power button Start / Pause button Start / Pause Program mode buttons Select DAILY SPECIAL program mode button Program name Manual setting buttons / Feature buttons Display • • •... -
Page 21: Simple Steps To Start
Simple steps to start Power DAILY SPECIAL DRY, TEMP. Start/Pause Power DAILY DELAY Start/Pause Start/Pause... -
Page 22: Program Overview
Operations Program overview Selectable programs with DAILY Proper Program Description spin speed temperature load Suitable for washing generally or slightly 40 °C soiled cotton textiles, linen bed sheet, COTTON 1400 rpm 10.5 kg (Cold to 90 °C) linen table cloth, underwear, towels, shirts, etc. - Page 23 Operations Selectable programs with SPECIAL Proper Program Description spin speed temperature load To change modes, see page 23. Still Mode - 5 minutes: hat, stuffed toys, leather goods and silk, only deodorizing - 10 minutes: hat, stuffed toys, leather DRY AIRWASH 1 kg goods and silk, both deodorizing and removing bacteria...
- Page 24 Operations Available options list Available options Program PREWASH TEMP. RINSE SPIN SCENT STEAM DELAY COTTON RINSE+SPIN SPIN SUPER QUICK WASH&DRY 60' WASH&DRY DRY AIRWASH HYGIENE ALLERGY INTENSIVE BEDDING WOOL DRUM CLEAN DRY AIRWASH has two modes. The rpm LED is blinking when Rotation Mode is selected.
-
Page 25: Function Buttons
Operations Function buttons PREWASH Use this function to add preliminary wash before the main wash. TEMP. You can select the appropriate water temperature according to the cloth. Press repeatedly to select water temperature in sequence: cold, NOTE • If STEAM function is already valid, the available temperature settings are : RINSE You can select the appropriate rinse times according to the cloth. - Page 26 Operations NOTE SCENT Wash clothing effectively to last softener scent. The clothing will be soaked in water with softener. When this function is set, the feature icon ( ) will be lit. NOTE • If the current set rinse times are below 2 times, the rinse times setting will automatically be changed to 2 times.
- Page 27 Operations STEAM Use this function to use the enhanced washing performance. When this function is set, the feature icon ( ) will be lit. NOTE This option is installed in the programs (HYGIENE and ALLERGY) and cannot be deselected. If the current set temperature is below 60 C, the temperature setting will automatically be changed to 60 C.
-
Page 28: Add Laundry
Operations Add laundry Press Start/ Pause to add clothes. When the icon is on, door can be unlocked. Adding laundry is acceptable in the washing or rinsing process in below. - Water level is lower than door locking water level - Water temperature is lower than 55 C Door lock When the door lock is in the closed state, the icon is on;... -
Page 29: Setting Mode
Operations Setting mode To activate setting mode, hold down PREWASH, TEMP. RINSE simultaneously for 3 seconds when the washing machine is turned on. Setting mode can be activated before program is started. Setting buttons in below table and Start/Pause is lighting in this mode. Setting mode is completed after Start/Pause has been pressed. - Page 30 Cleaning the detergent dispenser Cleaning the enclosure...
- Page 31 Drum clean Cleaning the drain pump filter...
- Page 33 Maintaining the washing machine Cleaning the water supply valve filter You should clean the supply valve filter from time to time or when you see "E01" error message on the display: Pull out the power plug and turn off the Clean the inside and outside of the threaded water supply faucet of the washing connector.
- Page 34 Handling a frozen washing machine Storing the washing machine...
- Page 35 Problems and solutions Phenomenon Solution...
- Page 36 Phenomenon Solution...
-
Page 37: Troubleshooting
• Touch the panel directly with finger. Operating with gloves, Button does not respond. bandages, nails, or other sharp objects does not respond. • Press the center of the button. • Do not take your finger off the button immediately. - Page 38 Phenomenon Solution...
-
Page 39: Error Messages Description
Error messages description Error code Code description Solution , ,...