Table of Contents
Advertisement
Quick Links
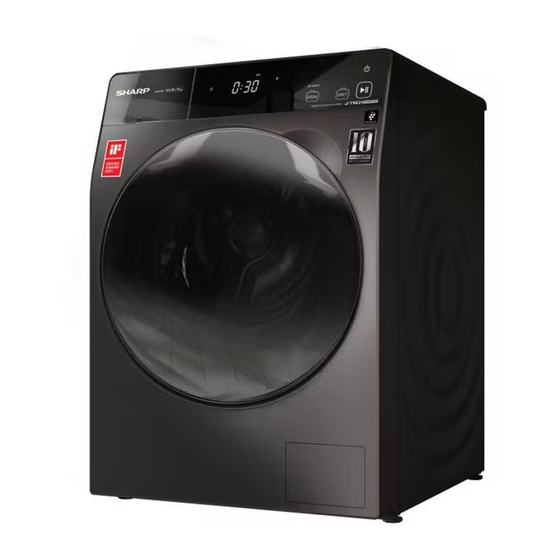
WASHER DRYER
ES-FW105D7PS
Operation manual
Thank you for purchasing our product.
Please read this manual carefully before use.
Please read "Safety Precautions"carefully
before use.
Please keep this manual in a safe place.
Our product is specially designed for
household use only.
Table of contents
Page
1
7
7
8
9
11
12
13
14
15
16
16
18
19
29
29
29
30
30
32
33
33
34
34
38
Advertisement
Table of Contents

Related Manuals for Sharp ES-FW105D7PS


Summary of Contents for Sharp ES-FW105D7PS
-
Page 1: Table Of Contents
● Installation Parts Product Specifications WASHER DRYER Installation requirements Unpacking the washing machine ES-FW105D7PS Removing the shipping bolts Adjusting the adjustable feet Water inlet installation Positioning the drain hose ● Before using the washing machine Inspection and preparation before washing Using methods of detergents and additives ●... -
Page 2: Safety Precautions
Safety Precautions To ensure your safety, proper operation, and long service life, read this manual carefully, and follow the instructions when installing, operating, and maintaining the washing machine. We are not liable for any damages resulting from improper use. Keep this manual in safekeeping so that it can be referred to at any time when needed. There are precautions marked with symbols such as "Warning"... - Page 3 Safety Precautions Precautions about installation ● Never attempt to operate the washing machine if it is damaged, malfunctioning, partially disassembled, or has missing or broken parts, including a damaged cord or plug. ● The installation of the washing machine must be performed by a qualified technician or service company.
- Page 4 Safety Precautions Precautions about operation ● Do not attempt to repair the washing machine by yourself. Repairs made by inexperi- enced or unqualified persons may make more serious damage to the washing machine and cause personal injury. ● Do not repair or replace any part of the washing machine. All repairs and servicing must be performed by qualified service personnel unless specifically recommended in this User Manual.
- Page 5 ● Use household detergents which are available on the market and applicable to machine wash only. ● Make sure that the pockets of all clothing to be washed are empty. Hard, sharp objects such as coins, safety pins, nails, screws, or stones can cause extensive damage to the washing machine.
- Page 6 Safety Precautions Precautions about using the dryer ● Make sure to carefully check the washing symbols on garments before drying. ● Remove all objects from pockets such as lighters and matches. ● Items that have been soiled with substances such as cooking oil, vegetable oil, acetone, alcohol, petroleum, kerosene, spot removers, turpentine, waxes and wax removers should be washed in hot water with an extra amount of detergent before being dried in the washing machine.
- Page 7 Safety Precautions Protecting the environment ● This washing machine is manufactured from recyclable materials. If you decide to dispose of this washing machine, please observe local waste disposal regulations. Cut off the power cord so that the washing machine cannot be connected to a power source.
-
Page 8: Installation
Installation Strictly observe the relevant installation procedures in the manual to ensure that you use the washing machine safely. Parts Unpack your washing machine and inspect it for shipping damage. Also make sure that you have received all items shown below. If the washing machine was damaged during shipping or you do not have all items,contact the place you purchased immediately. -
Page 9: Product Specifications
Installation Product Specifications Model ES-FW105D7PS Rated Capacity 10.5kg Drying Capacity 7.0kg Rated Voltage 220-240V Rated Frequency 50Hz Drying power 1200W Water Pressure 0.03MPa-0.8MPa Rated Heating Washing Power 1800W Spin Speed (Maximum) 1400RPM External dimensions (mm) 598×680×850 Net weight (kg) -
Page 10: Installation Requirements
Installation Installation requirements Power supply ● To avoid the unnecessary risk of fire, electric shock or personal injury, all electrical circuit and grounding must be set as per the national electrical standard. ● Do not overload the wall power socket. ●... - Page 11 Installation Installation requirements Installation Location ● Do not position the washing machine on a platform or a structure with weak support. ● To make the most of the washing machine, position it on a hard, flat and clean surface without any water or oil. ●...
-
Page 12: Unpacking The Washing Machine
Installation Unpacking the washing machine Lift up the machine from bottom. After remove the carton box and transport materials, lift up the machine from ● bottom. Please make sure the foam mattress is removed from the bottom, and not stuck to the bottom. If need to lay down the machine to remove foam mattress, please protect the ●... -
Page 13: Removing The Shipping Bolts
Installation Removing the shipping bolts Before using the washing machine,you must remove all shipping bolts from the back of the washing machine. To remove the shipping bolts: Loosen all shipping bolts with the spanner. Take each bolt head and pull it out from the loose hole. -
Page 14: Adjusting The Adjustable Feet
Installation Adjusting the adjustable feet If the floor is uneven,adjust the adjustable feet of the washing machine. Do not insert pieces of wood or any other objects under the leg. Turn left to loosen the leg bolt with the Spanner spanner. -
Page 15: Water Inlet Installation
Installation Water inlet installation Tap selection Not suitable tap Suitable tap The front end should be longer than 10mm. The tap exit end face should be flat and smooth, if not file it to avoid leakage. 1. Press down the slider and remove the inlet hose connector from the inlet hose , like below illustration 1. -
Page 16: Positioning The Drain Hose
Installation If you are using a screw type of water tap, use the provided screw-type adaptor to connect to the water tap as shown. Positioning the drain hose Ensure the drain pipe is fixed, and the position does not move or become loose, otherwise it will cause leakage and property loss. -
Page 17: Before Using The Washing Machine
Before using the washing machine Inspection and preparation before washing To prevent the fault of washing machine and the damage to laundry,you have to pay attention to the following items. Sort the laundry according to soil, color and lint. ● Cotton laundry shall be turned inside out and washed separately,or other laundry may be stained with dust,lint,etc. - Page 18 Before using the washing machine Small articles such as underwear must be washed in a washing mesh bag. ● Underwear with metal hooks should be washed in a washing mesh bag to prevent the metal from rupturing through the underwear to damage the laundry and inner drum. ●...
-
Page 19: Using Methods Of Detergents And Additives
Before using the washing machine Using methods of detergents and additives Softener drawer—Softener ● During the last rinsing, softeners in the Main wash drawer detergent drawer will poured automatically. Softener drawer ● The amount of liquid detergents shall not Prewash drawer exceed “MAX”... -
Page 20: Operations
Operations Simple steps to start Washing, Washing and Drying 1. Press Power to turn on the washing machine. 2. Press DAILY (see page 21) or SPECIAL (see page 22) to select program. 3. Set options (DRY, TEMP., etc.) as necessary. Available options differ depending on the selected program. - Page 21 • Do not touch the control panel with wet hands or with gloves, bandages etc. Touch directly with finger. • Do not apply any sharp objects to the control panel in order to operate the washing machine.
- Page 22 Operations Program Overview Selectable programs with DAILY Proper Program Description spin speed temperature load ● Suitable for washing generally or slightly 40 °C soiled cotton textiles, linen bed sheet, COTTON 1400 rpm 10.5 kg (Cold to 90 °C) linen table cloth, underwear, towels, shirts, etc.
- Page 23 Operations Selectable programs with SPECIAL Proper Program Description spin speed temperature load ● This program is to eliminate bacteria and deodorizing of clothing by using PCI. ● The target laundry and performance will vary depending on the operating time. DRY AIRWASH 1 kg - 5 minutes: light clothing, only deodorizing - 10 minutes: light clothing, both...
- Page 24 Operations Available Options List Available Options PREWASH TEMP. RINSE SPIN SCENT STEAM DELAY ● ● ● ● ● ● ● ● COTTON ● ● ● ● ● ● ● ● ● ● ● ● ● RINSE+SPIN ● ● ● SPIN ●...
- Page 25 Operations Function buttons PREWASH Use this function to add preliminary wash before the main wash. TEMP. You can select the appropriate water temperature according to the cloth. Press repeatedly to select water water temperature in sequence: cold, 20˚C, 30˚C, 40˚C, 60˚C and 90˚C. NOTE •...
- Page 26 Operations You can select Dry Level. Press repeatedly to select Dry Level in sequence. You can select: Normal, Iron, Low Temperature, Dry Timer (0:30, 1:00, 2:00, 3:00, 4:00, blank (Off)). - When Normal is selected , the icon ( ) blinks; - when Iron is selected , the icon ( ) blinks;...
- Page 27 Operations STEAM Use this function to use the enhanced washing performance. When this function is set, the feature icon ( ) will be lit. NOTE • This option is installed in the programs (HYGIENE and ALLERGY) and cannot be deselected. •...
- Page 28 Operations Add Laundry When the icon is on, you can add cloth. Adding Laundry is acceptable in the washing or rinsing process in below. - water level is lower than door locking water level; - water temperature is lower than 55˚C Door Lock When the door lock is in the closed state, the icon is on;...
- Page 29 Operations Setting Mode To activate setting mode, hold down Power for 4 seconds when the washing machine is turned off. Setting Buttons in below table and Start/Pause is lighting in this mode. Setting Mode is completed after Start/Pause has been pressed. The washing machine is automatically turned off after Start/ Pause has been pressed.
-
Page 30: Maintaining The Washing Machine
Maintaining the washing machine Cleaning the detergent dispenser Cleaning the enclosure Clean the detergent dispenser when Keep the washing machine clean to enhance detergent and softener accumulate. the performance, avoid unnecessary Press the release lever on the inside maintenance and increase the service life. of the detergent dispenser and pull it Before cleaning the washing machine,the out. -
Page 31: Drum Clean
Maintaining the washing machine Keep the washing machine clean to enhance the performance, avoid unnecessary maintenance and increase the service life. Drum clean This is a auto drum clean program and can remove the possibly bred mould in the drum. Turn on the water supply faucet. - Page 32 Maintaining the washing machine Unscrew the pump filter by turning left Wash any residue and stain from the filter and drain off all the water. and make sure the inside of the drain pump is not blocked. Reinsert the drain pump filter. Install the drain pump filter by turning right and close the filter cover .
-
Page 33: Cleaning The Water Supply Valve Filter
Maintaining the washing machine Cleaning the water supply valve filter You should clean the supply valve filter from time to time or when you see "E01" error message on the display: Pull out the power plug and turn off the Clean the inside and outside of the threaded water supply faucet of the washing connector. -
Page 34: Handling A Frozen Washing Machine
Maintaining the washing machine Handling a frozen washing machine If the temperature drops below 0℃ and your washing machine is frozen,you can: 1.Wrap up the faucet with the towel soaked in warm water warm water and pour warm water on it to unfreeze the water supply hose. -
Page 35: Troubleshooting
Troubleshooting Problems and Solutions Phenomenon Solution • Check if the water pressure is sufficient when washing. Detergent is left in the • Check if the detergents are put in the injection port of the body detergent dispenser after a drawer. program is finished. - Page 36 Troubleshooting Phenomenon Solution • Make sure the drain hose is straightened all the way to the drain system. If you encounter a drain restriction, call for service. • Make sure the drain pump filter is not clogged. • Close the door and press or tap Start/Pause. For your safety,the washing machine will not tumble or spin unless Washing machine does the door is closed.
- Page 37 • Touch the panel directly with finger. Operating with gloves, Key does not respond. bandages, nails, or other sharp objects does not respond. • Press the center of the key. • Do not take your finger off the key immediately.
- Page 38 Troubleshooting Phenomenon Solution • Check if the laundry was taken out immediately after the program was finished. Smell is not removed with • Depending on the type and strength of clothing and smell, it DRY AIRWASH program. may not be possible to deodorize sufficiently. •...
-
Page 39: Error Messages Description
Troubleshooting Error messages description Error code Code description Solution ● Check whether the water tap for water supply is opened. ● Clean the filter cover of water inlet valve. Abnormal ● Check the water pressure. water supply ● Contact with the after-sales service department to replace the computer board or other parts and components. - Page 40 Troubleshooting Error messages description Error code Code description Solution ● Check whether the harness terminal is connected securely. Overflow alarm ● Contact with the after-sales service department to replace the water inlet valve or other parts and components. Abnormal ● Check whether the harness terminal is connected securely. communication ●...