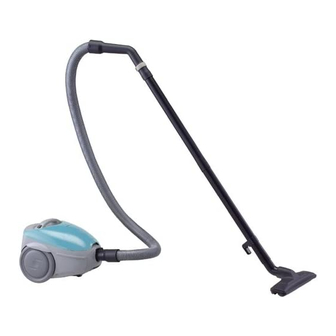
Panasonic MC-3920 Service Manual
Hide thumbs
Also See for MC-3920:
- Operating instructions manual (8 pages) ,
- Operating instructions manual (8 pages)
Table of Contents
Advertisement
Quick Links
SPECIFICATIONS
Model
Power Source
Motor Power Max.
Air Power
Dust Capacity
Cord Length
Weight (Main Body)
Dimensions (WxLxH)
Attachements
AC110V~120V
Floor Nozzle, Crevice Tool, Hose, Extension Wand, Curve Wand, Dusting Brush
MC-3920
AC220V
AC230V
1500W
Paper : 350W
Paper : 400g
5m
3.5kg
255mm x 296mm x 250mm
© 2005 Matsushita Electric Co., (M) Bhd. All rights
reserved. Unauthorized copying and distribution is a
violation of law. (Company No. 6100K)
Order Number: MEL0508014C3
Vacuum Cleaner
MC-3920
AC240V
Advertisement
Table of Contents

Summary of Contents for Panasonic MC-3920
- Page 1 Order Number: MEL0508014C3 Vacuum Cleaner MC-3920 SPECIFICATIONS Model MC-3920 Power Source AC110V~120V AC220V AC230V AC240V Motor Power Max. 1500W Air Power Paper : 350W Dust Capacity Paper : 400g Cord Length Weight (Main Body) 3.5kg Dimensions (WxLxH) 255mm x 296mm x 250mm...
-
Page 2: Schematic Diagram
SCHEMATIC DIAGRAM AC110V 50Hz/60Hz (TAIWAN) AC220V,AC230V,AC240V 50Hz/60Hz (GENERAL WITH FUSE ONLY) YELLOW... -
Page 3: Exploded View
EXPLODED VIEW... -
Page 4: Replacement Parts List
REPLACEMENT PARTS LIST Remarks Ref No. Part Name Part No. Handle YMC01BYX0LG0 Grey Dust Cover Unit YMC92LYX0LG0 Lime Green Dust Cover Unit YMC92LYX0AB0 Aqua Blue Crevice Tool YMC60RCM400 Upper Body YMC02AYX000 Tapping Screw XTN4+20BFY Tapping Screw XTN4+16BFY Antibacteria Filter YMC30LYX000 Exhaust Packing YMC60LYX000 Motor Support Rubber Rear... - Page 5 ATTACHMENT EXPLODED VIEW ATTACHMENT PARTS LIST Ref No. Part Name Part No. Remarks Hose Assembly YMC94PQV000 Hose Supporter YMC24P0R000 Connection Pipe Ass'y YMC92PJD1V0 Curved Wand YMC30P0R2V0 Extension Wand Ass'y YMC99PYX000 Floor Nozzle Assembly YMC99R6L000 Malaysia (47) Floor Nozzle Assembly YMC99RQV000 Others...
- Page 6 Upper and Lower Body Dust Cover Removing: 1) Open the dust cover (Fig.1) 2) Unlock the hook to lift up the dust cover (Fig.2) 3) Remove 6 screws from the front side of the body (Fig.3) 4) Lift the handle (Fig.4) 5) Lift the the upper body (Fig.5) (Fig.1) Unlock hook...
- Page 7 Body partition, Cord Reel Assembly Removing: 1) Remove the body partition assembly from the lower body (Fig.6) 2) Remove the fuse, thermal protector, and lead wires (Fig.7) 3) Press the brake lever and release the pre-winding while holding the plug. After the pre-winding is completely released, turn the shaft with a flat-blade screwdriver (Fig.8) (Fig.6)
- Page 8 Motor Motor support Motor support rubber rear rubber front Motor Removing: 1) Detach the body partition and the cord reel ass'y. 2) Remove the motor. 3) Take out the noise suppresser, motor support rubber, lead wires, and motor support (Fig.10) Noise Assembling suppressor...
- Page 9 REPAIR OF MAIN PARTS The location of the tight packing at the front of the lower body varies depending on the country in which the vacuum cleaner is sold. Check the lower body in advance for the location before replacing. Lower Body Tight Packing a) 110V Model...
-
Page 10: Troubleshooting Chart
TROUBLE SHOOTING CHART... -
Page 11: Packing Instruction
PACKING INSTRUCTION 9 HOSE CURVED WAND HOSE CONNECTION WAND 2 PARTITION BOARD BODY EXTENSION WAND FLOOR NOOZLE SUPPORTER OPERATING INSTRUCTION BODY CUSHION PACKING LIST Ref No. Part Name Part No. Remarks Carton Box YMC61ZYX000 Others Carton Box YMC61ZYX00V Malaysia Carton Box YMC61ZYX004 M.East/Africa Partition Board...


