Table of Contents
Advertisement
Quick Links
Advertisement
Table of Contents

Related Manuals for AEG BEK722910M


Summary of Contents for AEG BEK722910M
- Page 1 User Manual 79669GO-MN Oven BEK722910M USER MANUAL...
-
Page 2: Table Of Contents
FOR PERFECT RESULTS Thank you for choosing this AEG product . We have created it to give you impeccable performance for many years, with innovative technologies that help make life simpler – features you might not find on ordinary appliances . -
Page 3: Important Safety Instructions
. injury, property damage and affect your ability to make a claim under the AEG manufacturer’s The cooking process must be supervised . A warranty provided with your product. Products short term cooking process must be supervised continuously . - Page 4 IMPORTANT SAFETY INSTRUCTIONS WARNING! WARNING! Oven Child safety During use the appliance becomes hot . Care This appliance is not intended for use by should be taken to avoid touching the hot persons (including children) with reduced surfaces inside the oven . physical, sensory or mental capabilities, or lack of experience and knowledge, unless they Switch the appliance off before removing the...
-
Page 5: For Your Safety
FOR YOUR SAFETY If you smell gas Important information for the installer This appliance may only be installed by a LP gas • Turn off gas supply at source . installer registered with the Liquefied Petroleum Gas • Extinguish all naked flames . Association of Southern Africa . -
Page 6: Description Of Your Appliance
DESCRIPTION OF YOUR APPLIANCE Model 79669GO-MN Freestanding gas hob with flame safeguard, programmable touch control electric oven Removable wok trivet Stainless steel splashback Removable cast iron trivet Gas burner Control panel Oven door Storage compartment Stainless steel kick panel Control Panel Gas hob burner controls Programmable controller Gas hob burner controls... -
Page 7: Bek722910M
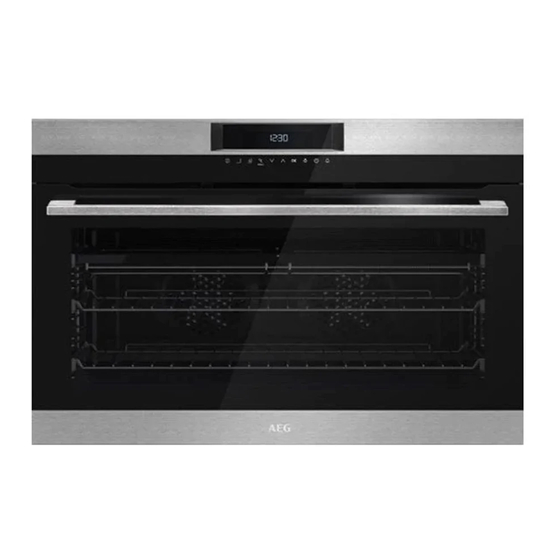
Model BEK722910M Built-in programmable touch control electric oven Control Panel – oven programmable controller Programmable controller... -
Page 8: Control Panel - Electronic Programmer
CONTROL PANEL – ELECTRONIC PROGRAMMER Use the sensor fields to operate the appliance Sensor field Function Comment Display Shows the current settings of the appliance. ON / OFF To turn on and off the appliance. Press the sensor field to choose the menu: Heating Functions. Heating Functions To turn on or turn off the light, press the field for 3 seconds. -
Page 9: 5.2 Display
er or the functions: Functio Heat + Hold, Set + Go. Yo settings of the core tempe Minute Minder To set the function: Minut DISPLAY 5.2 Display A. Heating funct B. Time of day C. Heat-up indic D. Temperature Heating function E. -
Page 10: Before First Use
BEFORE FIRST USE DAILY USE WARNING! Refer to Safety chapters. WARNING! Refer to Safety chapters. Initial Cleaning Navigating the menus Remove all accessories and removable shelf supports from the appliance . 1 . Activate the appliance using Refer to “Care and cleaning” chapter . 2 . - Page 11 DAILY USE – MAIN MENU Sensor field Submenu Description Heating Functions Contains a list of heating functions Favourites Contains a list of favourite cooking programmes created by the user Basic Settings Used to set the appliance configuration Specials Contains a list of additional heating functions Set Time of Day Sets the current time on the clock.
-
Page 12: Heating Functions
HEATING FUNCTIONS Heating Function Application Conventional To bake and roast food on one shelf position. Cooking True Fan To bake on up to three shelf positions at the same time and to dry food. Set the Cooking temperature 10 - 20°C lower than for the function: Conventional Cooking. Cooking with steam is a great addition to straight ‘hot air’... -
Page 13: Specials
SPECIALS CLOCK FUNCTIONS Clock Function Application Heating Function Application To set a countdown This function can be used (max. 2 h 30 min). for defrosting frozen foods, This function has no such as vegetables and Defrost effect on the operation fruits. -
Page 14: Additional Functions
CLOCK FUNCTIONS (CONTINUED) ADDITIONAL FUNCTIONS Heat + Hold Favourites Conditions for the function: You can save your favourite settings, such as duration, • The set temperature is more than 80°C . temperature or heating function . They are available in •... - Page 15 If the Pyrolysis function operates, the door is (apart from ON / OFF), the display goes back to locked and the symbol of a key comes on in the day brightness mode for the next 10 seconds . the display . –...
-
Page 16: Hints And Tips
HINTS AND TIPS Cooling/Venting fan WARNING! Refer to Safety chapters . Your built-in appliance is fitted with a cooling fan . This prevents your kitchen cabinet from overheating The temperature and baking times and reduces the condensation inside the oven . It will in the tables are guidelines only . -
Page 17: Installing Your Oven Accessories
INSTALLING YOUR OVEN ACCESSORIES Installing the side racks Positioning the dishes on the grill dish carrier • The side racks attach to each side of your oven . There is a left hand and right hand version (see image below for details) . •... -
Page 18: Before Using The Appliance
BEFORE USING THE APPLIANCE – GAS HOB MODEL Installing the trivets Position the middle trivet ensuring the trivet fingers are aligned with the side trivet Position the 2 side trivets onto the hob first, fingers. ensuring the 2 corner location recesses are The wok support sits on top of the trivet to the back of the hob . - Page 19 BEFORE USING THE APPLIANCE – GAS HOB MODEL (CONTINUED) Installing the standard burners Installing the wok burners The burner crown must be fitted correctly onto The wok burner crowns must also be fitted the burner cup or damage will occur during correctly onto the wok burner cups .
-
Page 20: Getting To Know Your Gas Cooktop
GETTING TO KNOW YOUR GAS COOKTOP Using your gas hotplates Model 79669GO-MN NOTE: Gas controls turn anticlockwise from ‘Off’ and have limited movement. Lighting burners Electronic ignition 1. Low heat burner These hobs are fitted with mains powered electronic Used for simmering with small cookware items . ignition . -
Page 21: Using Your Oven
COOKING TEST Get to know your new oven with this Method: ‘Simple Test Cake’ 1 . Butter base and sides of two, 20cm straight-sided round or square cake pans . Then line the base with Although we strive for a perfect performing oven, it’s grease proof or baking paper . -
Page 22: Steam Assisted Cooking
STEAM ASSISTED COOKING AEG ovens have the ability to add steam while baking . Cooking with steam is a great addition to straight ‘hot air’ cooking . Steam brings out all the natural flavours and goodness in the food, cooks evenly from surface to centre and retains more nutrients and vitamins . -
Page 23: Cooking Guide
COOKING GUIDE Oven shelf location • For best baking results preheat oven for 30 minutes . • Select the correct shelf location for food Your oven has 5 positions for mounting the shelves being cooked . or grill dish carrier . These are numbered from 1 (the •... - Page 24 COOKING GUIDE (CONTINUED) Choosing the best oven settings The following table is intended as a guide and experience may show some variation in cooking times necessary to meet individual requirements . For best baking results, preheat your oven for 30 minutes . Modes without Oven Fan Food Temperature...
- Page 25 COOKING GUIDE (CONTINUED) True Fan Cooking Plus (Bake + Steam function) Food Water in cavity Temperature Oven shelf Time in minutes well (ml) °C position* Yeast goods Bread loaves 180 - 200 2 or 3 35 - 45 Bread rolls 190 - 210 2 or 3 20 - 25...
- Page 26 COOKING GUIDE (CONTINUED) Grilling guide Roasting meat 1 . Place the meat in the oven and set the temperature WARNING! between 180°C and 200°C . It is recommended to wrap your meats in an oven roasting bag or foil to NOTE: Always clean the grill / oven dish after every prevent fats and oils from splattering, making it use.
-
Page 27: Dealing With Cooking Problems
DEALING WITH COOKING PROBLEMS (see also solving problems) Problem Causes Remedies Uneven cooking: • Incorrect shelf position . – Select shelf that puts food in the centre • Oven tray too large . of the oven . • Trays not centralised . –... -
Page 28: Cleaning Your Appliance
CLEANING YOUR APPLIANCE Gas Hotplate WARNING! • The trivets can be removed for cleaning by carefully • Always make sure that the oven is electrically lifting them from the hob . isolated before cleaning . This can be done by the •... -
Page 29: Cleaning Your Oven Accessories
CLEANING YOUR OVEN ACCESSORIES Removing the trays and shelves from Cleaning your oven door your appliance The oven door has been designed to allow the two inner door glasses to be removed for cleaning without • Slide the dish and grill tray towards you until they removing the door from the product . - Page 30 CLEANING YOUR OVEN ACCESSORIES (CONTINUED) Cleaning your oven door Changing the light globe • There are 2 light globes located in the top of the oven cavity towards the front . The light globe WARNING! glass is accessible between the passes of the •...
-
Page 31: Storage Compartment
STORAGE COMPARTMENT The storage compartment is accessible through the pivoting door . Unused oven racks and grill dishes can be stored here . WARNING! DO NOT store flammable or combustible items in the storage compartments . This is not a compartment for warming food . -
Page 32: Solving Problems
SOLVING PROBLEMS Faults NOTE: Only authorised personnel should carry out servicing. If the household fuse continues to blow, call If there is a problem with the oven and / or grill, please: the Customer Care Centre. In the event of a power failure the gas burners may be lit with a hand held •... -
Page 33: Installation Of The Appliance
(adjustable 910 – of trivet above hob) 930mm) cabinetry kick panel to be used . Model BEK722910M is designed to be built into cabinetry either below a benchtop or into a vertical cabinet . WARNING! • The cooker must be installed and serviced only by an authorised person . - Page 34 INSTALLATION OF THE APPLIANCE (CONTINUED) Freestanding Installation The freestanding type installation uses the appliance as To ensure cooker stability, the anti-tilt brackets must supplied, and can be fitted in between cabinets, with be installed, and the end of chain attached to the cabinets on one side or without adjacent cabinets .
- Page 35 INSTALLATION OF THE APPLIANCE (CONTINUED) Freestanding installation (continued) Installation of anti-tilt brackets and hook • The anti-tilt brackets must be secured to the floor at rear of cavity with an appropriate fastener according to dimensions in diagram . Hole location for hook installation 425mm Measurements are to be adjusted to account for...
- Page 36 INSTALLATION OF THE APPLIANCE (CONTINUED) Slot-in Installation Slot-in Conversion To convert the free standing appliance to a slot in installation the kick panel provided on the appliance is removed and the appliance is mounted on a plinth . This enables a continuous cupboard kick board to be installed, giving a more integrated appearance .
- Page 37 INSTALLATION OF THE APPLIANCE (CONTINUED) Slot-in installation (continued) • Slide cooker into position to check fitment to anti-tilt bracket . For freestanding installation, Installation of anti-tilt brackets and stops check the height and level of the cooker . Adjust • The brackets are to be secured to the back wall cooker feet as required .
- Page 38 INSTALLATION OF THE APPLIANCE (CONTINUED) Built-in installation Cabinet construction for built in oven For the best integration within a kitchen, install this appliance in a cupboard that gives a flush fit with the surrounding cupboard fronts . A recess of 20mm is ideal .
- Page 39 INSTALLATION OF THE APPLIANCE (CONTINUED) Underbench installation Vertical cabinet installation Your underbench oven looks best when the control The oven can be built into a vertical cabinet in the panel is directly under the benchtop . An upper infill same manner as an underbench . The required cavity panel may be added if the cooktop placed above the dimensions are the same and the product is secured to benchtop is too deep .
-
Page 40: Wiring Requirements
This appliance must be installed by an authorised person, according to all codes and regulations of: • Electrical supply authorities . Supply cord size BEK722910M: 1 .5mm required 79669GO-MN: 1 .5mm • Building regulations . • Local government and council authorities . -
Page 41: Electrical & Gas Connection Locations
ELECTRICAL & GAS CONNECTION LOCATIONS Model 79669GO-MN Checking piping size To work out a suitable pipe size for connection use: The information in this table . Gas type 168mm Gas connection point to regulator 79669GO-MN 1013 .3 g/h 47 .5 MJ/h Information about the length of run, number of elbows, tees and bends, the available service pressure and the supply requirements . -
Page 42: Natural Gas Conversion
NATURAL GAS CONVERSION TESTING THE OPERATION OF THE GAS COOKER Model 79669GO-MN NOTE: You MUST test the cooker after installation, before you hand it over to the customer. You MUST This appliance is supplied set up to for LPG usage . A have a manometer and a connecting tube. -
Page 43: Warranty
ELECTROLUX / AEG MAJOR APPLIANCES -WARRANTY CONDITIONS... - Page 45 NOTES...
- Page 46 NOTES...
- Page 47 NOTES...
- Page 48 © 2019 Electrolux Home Products Pty Ltd P/No: A13239401 Rev A ECN 100978 AMAN_90cm_Oven_Apr19...