
Related Manuals for Makita XFD14


Summary of Contents for Makita XFD14
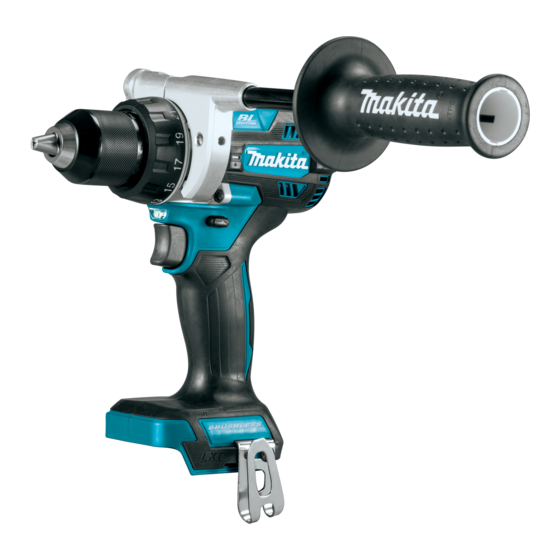
- Page 1 INSTRUCTION MANUAL MANUAL DE INSTRUCCIONES Cordless Driver Drill Atornillador Taladro Inalámbrico XFD14 IMPORTANT: Read Before Using. IMPORTANTE: Lea antes de usar.
-
Page 2: Specifications
ENGLISH (Original instructions) SPECIFICATIONS Model: XFD14 Drilling capacities Steel 13 mm (1/2") Wood Auger bit: 50 mm (2") Self-feed bit: 76 mm (3”) Hole saw: 152 mm (6”) Fastening capacities Wood screw 10 mm x 90 mm (3/8" x 3-1/2") Machine screw M6 (1/4") - Page 3 Power tools can produce electromagnetic fields Store idle power tools out of the reach of chil- (EMF) that are not harmful to the user. However, dren and do not allow persons unfamiliar with the power tool or these instructions to operate users of pacemakers and other similar medical the power tool.
-
Page 4: Cordless Driver Drill Safety Warnings
Service WARNING: DO NOT let comfort or familiarity Have your power tool serviced by a qualified with product (gained from repeated use) replace repair person using only identical replacement strict adherence to safety rules for the subject parts. This will ensure that the safety of the power product. -
Page 5: Tips For Maintaining Maximum Battery Life
It will also void the Makita warranty for the Makita tool and CAUTION: Always install the battery cartridge charger. -
Page 6: Overheat Protection
This tool is equipped with an electric brake. If the tool consistently fails to quickly stop after the switch trigger is released, have the tool serviced at a Makita service center. NOTE: Depending on the conditions of use and the... - Page 7 Pull the switch trigger to light up the lamp. The lamp keeps on lighting while the switch trigger is being pulled. The lamp goes out approximately 10 seconds after releasing the switch trigger. NOTE: When the tool is overheated, the tool stops automatically and the lamp starts flashing.
-
Page 8: Adjusting The Fastening Torque
Adjusting the fastening torque ► 1. Adjusting ring 2. Mark (1 - 21 graduation) 3. Arrow The fastening torque can be adjusted in 21 levels by turning the adjusting ring. Align the graduations with the arrow on the tool body. You can get the minimum fastening torque at 1 and maximum torque at 21. Before actual operation, drive a trial screw into your material or a piece of duplicate material to determine which torque level is required for a particular application. -
Page 9: Operation
Installing hook OPERATION CAUTION: When installing the hook, always CAUTION: When the speed comes down secure it with the screw firmly. If not, the hook extremely, reduce the load or stop the tool to may come off from the tool and result in the personal avoid the tool damage. -
Page 10: Drilling Operation
CAUTION: These accessories or attachments bit, decrease the tool performance and shorten the are recommended for use with your Makita tool service life of the tool. specified in this manual. The use of any other CAUTION:... -
Page 11: Especificaciones
ESPAÑOL (Instrucciones originales) ESPECIFICACIONES Modelo: XFD14 Capacidades de taladrado Acero 13 mm (1/2") Madera Broca de barrena: 50 mm (2″) Broca de autoalimentación: 76 mm (3″) Sierra perforadora: 152 mm (6″) Capacidades de apriete Tornillo para madera 10 mm x 90 mm (3/8" x 3-1/2") Tornillo de máquina... - Page 12 No exponga las herramientas eléctricas a la Si dispone de dispositivos para la conexión de lluvia ni a condiciones húmedas. La entrada de equipos de extracción y recolección de polvo, asegúrese de conectarlos y utilizarlos debida- agua en una herramienta eléctrica aumentará el mente.
- Page 13 Mantenga los mangos y superficies de asi- Advertencias de seguridad para el miento secos, limpios y libres de aceite o taladro atornillador inalámbrico grasa. Los mangos y superficies de asimiento resbalosos no permiten una manipulación segura Instrucciones de seguridad para todas las operaciones ni el control de la herramienta en situaciones inesperadas.
- Page 14 Asimismo, esto inva- tura pueda alcanzar o exceder los 50 °C (122 lidará la garantía de Makita para la herramienta y el °F). cargador Makita. 14 ESPAÑOL...
-
Page 15: Descripción Del Funcionamiento
Consejos para alargar al máximo Para colocar el cartucho de batería, alinee la lengüeta sobre el cartucho de batería con la ranura en la carcasa la vida útil de la batería y deslice en su lugar. Inserte por completo hasta que se fije en su lugar con un pequeño clic. -
Page 16: Protección Contra Sobrecarga
Makita. Iluminación de la luz delantera La herramienta está equipada con un sistema de pro- tección para la herramienta/batería. Este sistema corta automáticamente la alimentación para prolongar la vida... -
Page 17: Cambio De Velocidad
Accionamiento del conmutador de Número Velocidad Torsión Operación desplegado aplicable inversión de giro Baja Alta Operación de carga pesada PRECAUCIÓN: Verifique siempre la dirección Alta Baja Operación de de la rotación antes de la operación. carga ligera PRECAUCIÓN: Para cambiar la velocidad, primero apague la herra- Utilice el conmutador de inver- mienta. -
Page 18: Montaje
Ajuste de la torsión de apriete ► 1. Anillo de ajuste 2. Marca (graduación 1 - 21) 3. Flecha La torsión de apriete puede ajustarse en 21 niveles girando el anillo de ajuste. Alinee las graduaciones con la flecha en el cuerpo de la herramienta. Puede conseguir una fijación de torsión mínima en 1 y una torsión máxima en 21. Antes de la operación real, coloque un tornillo de prueba en el material o algún duplicado del material para determi- nar qué... -
Page 19: Operación
Instalación o extracción de la punta Instalación del portabrocas de destornillador/broca de taladro Accesorio opcional ► 1. Portabrocas 2. Punta de destornillador ► 1. Mandril 2. Cerrar 3. Abrir Coloque el portabrocas en la protuberancia en la base Gire el mandril en sentido inverso al de las manecillas de la herramienta o ya sea del lado derecho o izquierdo del reloj para abrir las garras de la prensa de sujeción. -
Page 20: Mantenimiento
Suelte el gatillo interruptor en cuanto el embrague patine. de servicio autorizados o de fábrica Makita, empleando siempre repuestos Makita. NOTA: Cuando atornille en madera, taladre primero un orificio de 2/3 del diámetro del tornillo. - Page 21 GARANTÍA LIMITADA DE MAKITA Ésta Garantía no aplica para México Consulte la hoja de la garantía anexa para ver los términos más vigentes de la garantía aplicable a este producto. En caso de no disponer de esta hoja de garantía anexa, consulte los detalles sobre la garantía descritos en el sitio web de su país respectivo indicado...
- Page 24 Para reducir la exposición a estos productos químicos: trabaje en un área bien ventilada y póngase el equipo de seguridad indicado, tal como las máscaras contra polvo que están especialmente diseñadas para filtrar partículas microscópicas. Makita Corporation 3-11-8, Sumiyoshi-cho, Anjo, Aichi 446-8502 Japan 885859-941...