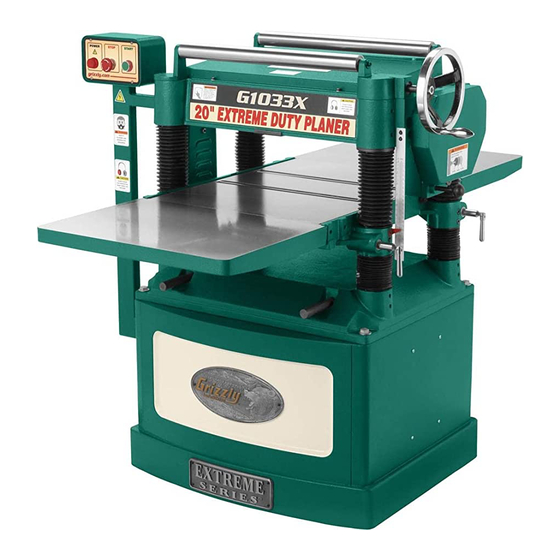
Grizzly EXTREME Series Manual
Hide thumbs
Also See for EXTREME Series:
- Owner's manual (92 pages) ,
- Manual (68 pages) ,
- Manual insert (32 pages)
Advertisement
Quick Links
Safety Rules
1. Wear proper personal protection equipment (safety glasses, hearing protection,
respiratory protection)
2. Keep loose clothing, hair, and jewelry away from the machine
3. Do not bypass any safety devices
4. Keep hands clear of the feed area
5. Ensure the workpiece is appropriate material and size
6. Inspect workpiece thoroughly before using planer
7. Plane only one piece at a time
8. Let the planer come up to speed before starting the cut
9. Let the planer come to a complete stop before leaving the tool
10. If something is broken or breaks, notify one of the woodshop leads at
(
w oodshop@sparkmakerspace.org
Planer Summary
1. Tool Location in Shop
2. Parts of the saw (refer to diagram)
3. Uses for Tool
4. Kickback Prevention
5. Before Use
a. Oil Planer
i.
b. Check workpiece for planer suitability
i.
ii.
iii.
iv.
v.
c. Set start depth
6. During Use
a. Start planer without workpiece
b. Keep hands clear of machine internals
c. Let automatic feed controls workpiece motion
d. Adjust depth as needed (¼ - ½ turn of handle)
e. Use assistant or outfeed roller for large stock
7. Cleanup
8. Defects & Corrections
Unless otherwise noted, diagrams in this document are taken from the manual for the Grizzly
Industrial Model G1033 table saw, and are copyright of Grizzly Industrial, Inc.
PLANER GUIDE
) .
One drop each, four hex sockets
Natural wood only
Min thickness: ¼"
Min width: ¾"
Min length: 12"
Maximum width: 20"
Advertisement

Related Manuals for Grizzly EXTREME Series


Summary of Contents for Grizzly EXTREME Series
- Page 1 Use assistant or outfeed roller for large stock 7. Cleanup 8. Defects & Corrections Unless otherwise noted, diagrams in this document are taken from the manual for the Grizzly Industrial Model G1033 table saw, and are copyright of Grizzly Industrial, Inc.
- Page 2 Machine Parts 1) Table height handwheel: raises and lowers table to adjust cutting height. One complete handwheel turn is approximately 1/16”. 2) Feed rate control knob: adjustes feed rate of planer. The feed rate must only be adjusted when the machine is running, but not during a cutting operation, or the gearbox may be damaged.
- Page 3 Internal Parts A. Anti-Kickback Fingers: Provide additional safety for the operator by minimizing sudden movements of the workpiece. B. Serrated Infeed Roller: Pulls the workpiece toward the cutterhead. C. Chip Breaker: Breaks off chips created by the cutterhead to prevent tear-out and diverts the chips to the dust hood.
- Page 4 Instructions for Use Uses for Tool: 1. Good for: a. Reducing board thickness b. Solid, natural wood 2. Prohibited: a. Engineered lumber (Plywood/laminates/particle board/MDF) b. Wood with nails, staples, rocks, sand, etc. (NO PALLET LUMBER) c. End grain d. Significantly warped boards e.
- Page 5 Cut must be made in the most stable orientation (concave side down). g. Significantly warped lumber (cupped, bowed, or twisted) should not be planed. h. The Grizzly planer is on loan to SPARK, and should be treated with utmost respect.
- Page 6 At The Planer 1. Material Handling a. Plane only one piece at a time. Do not attempt to run multiple workpieces through the planer simultaneously. b. Varying the location of the workpiece left and right on the infeed table will increase the life of the cutting edges.
- Page 7 b. Speed should only be set while planer is running 9. Stand to one side of planer path, and feed workpiece into planer a. Ensure the piece is fed squarely into planer, particularly on long pieces b. The infeed and outfeed rollers will grab and feed the workpiece. Users should not push or pull on the workpiece once the workpiece is engaged with the automatic feed system.
- Page 8 Defects & Corrections 1. Chipped Grain a. Problem: Small chips or lifted portions of the workpiece. Usually a result of cutting against the grain, planing lumber with knots or excessive amount of cross grain, or using dull knives/inserts. Some amount of chipping is normal with highly figured wood. b.
- Page 9 Glue and resin buildup on the rollers and cutterhead will cause overheating by decreasing cutting sharpness while increasing drag in the feed mechanism. The result can include scorched lumber, uneven knife/insert marks, and chatter. b. Solution: Ensure all glue-ups are thoroughly dry before being planed 1.
- Page 10 Baseline Configuration Identification 1. Depth set <2” 2. Feed speed set to low (knob furthest out) a. Feed speed adjustment must be made with planer running 3. Dust collection system attached Planer Competencies Trained User Competencies Setup ● Set feed rate ●...