Table of Contents
Advertisement
Quick Links
Advertisement
Table of Contents

Related Manuals for Electrolux KOC6P40X


Summary of Contents for Electrolux KOC6P40X
- Page 1 KOC6P40X Steam oven User Manual...
-
Page 2: Table Of Contents
14. ENERGY EFFICIENCY.................. 39 WE’RE THINKING OF YOU Thank you for purchasing an Electrolux appliance. You’ve chosen a product that brings with it decades of professional experience and innovation. Ingenious and stylish, it has been designed with you in mind. So whenever you use it, you can be safe in the knowledge that you’ll get great results every time. -
Page 3: Safety Information
ENGLISH SAFETY INFORMATION Before the installation and use of the appliance, carefully read the supplied instructions. The manufacturer is not responsible for any injuries or damage that are the result of incorrect installation or usage. Always keep the instructions in a safe and accessible location for future reference. - Page 4 1.2 General Safety Only a qualified person must install this appliance and • replace the cable. Do not use the appliance before installing it in the • built-in structure. Disconnect the appliance from the power supply • before carrying out any maintenance.
-
Page 5: Safety Instructions
ENGLISH 2. SAFETY INSTRUCTIONS 2.1 Installation Depth with open 1022 mm WARNING! door Only a qualified person must Ventilation opening 560x20 mm install this appliance. minimum size. • Remove all the packaging. Opening placed on • Do not install or use a damaged the bottom rear side appliance. - Page 6 • Do not operate the appliance with wet leakage trips and contactors. hands or when it has contact with • The electrical installation must have water. an isolation device which lets you • Do not apply pressure on the open disconnect the appliance from the door.
- Page 7 ENGLISH furniture panel until the appliance has The appliance becomes very hot and cooled down completely after use. hot air is released from the front cooling vents. 2.4 Care and cleaning • Pyrolytic cleaning is a high temperature operation that can WARNING! release fumes from cooking residues Risk of injury, fire, or...
-
Page 8: Installation
• To repair the appliance contact the Authorised Service Centre. 3. INSTALLATION 3.1 Building in WARNING! Refer to Safety chapters. www.youtube.com/electrolux www.youtube.com/aeg How to install your AEG/Electrolux Oven - Column installation (*mm) min. 550 min. 560... - Page 9 ENGLISH (*mm) min. 550 min. 560 3.2 Securing the oven to the cabinet...
-
Page 10: Product Description
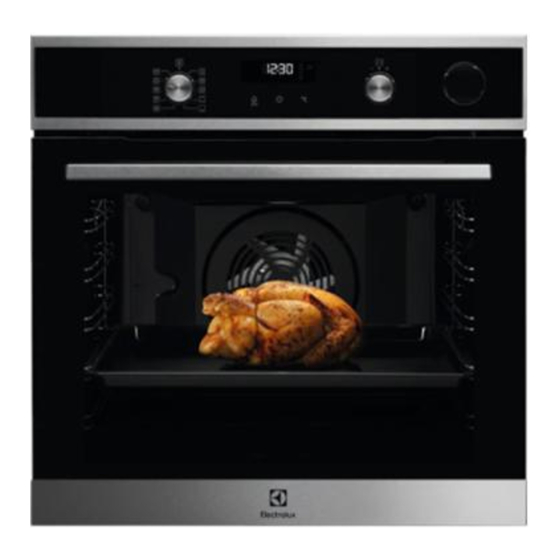
4. PRODUCT DESCRIPTION 4.1 General overview Control panel Knob for the heating functions Display Control knob (for the temperature) Water drawer Heating element Lamp Shelf support, removable Draining pipe Water outlet valve Shelf positions Steam inlet 4.2 Accessories • Trivet For roasting and grilling. -
Page 11: Before First Use
ENGLISH 5.3 Display A. Timer / Temperature B. Heat-up and residual heat indicator C. Water drawer D. Food Sensor (selected models only) E. Door lock (selected models only) F. Hours / minutes G. Demo Mode (selected models only) H. Clock functions 6. - Page 12 7.2 Fast Heat Up CAUTION! The appliance is hot. There The fast heat up decreases the heat up is a risk of burns. Be careful time. when you empty the water Do not put food in the oven drawer.
- Page 13 ENGLISH Heating Application function To bake and roast food on one shelf position. Conventional Cooking To bake cakes with crispy bottom and to preserve food. Bottom Heat To defrost food (vegeta‐ bles and fruit). The de‐ 3. Open the oven door and put the frosting time depends Defrost on the amount and size...
-
Page 14: Clock Functions
7.8 Notes on: Moist Fan Baking When you use this function the lamp automatically turns off after 30 sec. This function was used to comply with For the cooking instructions refer to the energy efficiency class and "Hints and tips" chapter, Moist Fan ecodesign requirements according to EU Baking. - Page 15 ENGLISH 8.3 How to set function: Duration Step 1 Set a heating function. Step 2 - press repeatedly. - starts to flash. Step 3 Turn the control knob to set the minutes. - press to confirm. Step 4 Turn the knob for the temperature to set the hour. - press to confirm.
-
Page 16: Using The Accessories
Step 4 Turn the knob for the temperature to set the hour for the function: Dura‐ tion. Press: The display shows: Step 5 Turn the knob for the temperature to set the hour for the function: End Time. Press:... - Page 17 ENGLISH Wire shelf: Push the shelf between the guide bars of the shelf support and make sure that the feet point down. Deep pan: Push the tray between the guide bars of the shelf support. Wire shelf, Deep pan: Push the tray between the guide bars of the shelf support and the wire shelf on the guide bars above.
- Page 18 Make sure the supports of the wire shelf Make sure the supports of the wire shelf point up. point down. 9.3 Accessories for steam The dietary baking dish for steam cooking functions cooking Dietary Baking dish consists of a glass...
- Page 19 ENGLISH Injector, injector tube, and a steel grill. Steel grill (E) • Do not put the hot baking dish on • Do not clean the baking dish with cold / wet surfaces. abrasives, scourers and powders. • Do not pour cold liquids into the 9.4 Steam cooking in a dietary baking dish when it is hot.
-
Page 20: Additional Functions
10. ADDITIONAL FUNCTIONS 10.1 How to use: Child lock the temperature in the oven is more than 40 °C.Turn the knob for the temperature When the function is on the oven cannot left or right to check the oven be turned on accidentally. -
Page 21: Hints And Tips
ENGLISH 11. HINTS AND TIPS If you use two baking trays at the same Refer to Safety chapters. time, keep one empty level between them. Cooking meat and fish 11.1 Cooking recommendations Use a deep pan for very fatty food to prevent the oven from stains that can be The oven has five shelf positions. - Page 22 FLANS (°C) (min) Vegetables filled 170 - 180 30 - 40 Lasagne 170 - 180 40 - 50 Potato gratin 160 - 170 50 - 60 1 (2 and 4) Use the second shelf position. Use the wire shelf.
- Page 23 ENGLISH 11.3 Cooking in the dietary baking dish MEAT Use the function: True Fan + Steam. (min) Use the second shelf position. Cooked ham 55 - 65 Set the temperature to 130°C. Kasseler 80 - 100 Set the temperature to 130°C. VEGETABLES (min) Tomatoes...
- Page 24 Conventional Cook‐ True Fan Cooking CAKES (min) (°C) (°C) Buttermilk 80 - 100 Cake mould, cheesecake Ø 26 cm Strudel 60 - 80 Baking tray Jam tart 30 - 40 Cake mould, Ø 26 cm Sponge cake 170 40 - 50 Cake mould, Ø...
- Page 25 ENGLISH Conventional Cook‐ True Fan Cooking CAKES (min) (°C) (°C) Buns, pre‐ 12 - 20 Baking tray heat the empty oven Eclairs 25 - 35 Baking tray Eclairs, two 2 and 4 35 - 45 Baking tray levels Plate tarts 45 - 70 Cake mould, Ø...
- Page 26 Conventional Cooking True Fan Cooking FLANS (min) (°C) (°C) Pasta flan, preheat‐ 40 - 50 ing is not needed Vegetable flan, pre‐ 45 - 60 heating is not nee‐ Quiches 50 - 60 Lasagne 180 - 190 180 - 190...
- Page 27 ENGLISH Conventional Cook‐ True Fan Cooking MEAT (min) (°C) (°C) Whole duck 120 - 150 Whole goose 150 - 200 Rabbit, cut in pieces 60 - 80 Hare, cut in pieces 150 - 200 Whole pheasant 90 - 120 Use the second shelf position. Conventional True Fan Cook‐...
- Page 28 VEAL POULTRY (°C) (min) (°C) (min) Veal knuckle, 1.5 160 - 180 120 - 150 Chicken, half, 190 - 210 35 - 50 - 2 kg 0.4 - 0.5 kg each Chicken, pou‐ 190 - 210 50 - 70 lard, 1 - 1.5 kg...
- Page 29 ENGLISH 11.7 Dehydrating - True Fan Cooking VEGETA‐ Cover trays with grease proof paper or BLES (°C) baking parchment. Mushrooms 50 - 60 6 - 8 For a better result, stop the oven halfway through the drying time, open the door Herbs 40 - 50 2 - 3...
- Page 30 (°C) (min) Rolls, 9 pieces baking tray or dripping 30 - 40 Pizza, frozen, wire shelf 10 - 15 0.35 kg Swiss roll baking tray or dripping 25 - 35 Brownie baking tray or dripping 25 - 30 Soufflè, 6 pieces ceramic ramekins on...
- Page 31 ENGLISH (°C) (min) Vegetarian ome‐ pizza pan on wire shelf 200 25 - 30 lette Mediterranean baking tray or dripping 25 - 30 vegetables, 0.7 11.10 Information for test institutes Tests according to IEC 60350-1. (°C) (min) Small Conven‐ Baking 20 - 30 cakes, tional...
-
Page 32: Care And Cleaning
(°C) (min) Sponge True Fan Wire 40 - 50 Preheat the cake, Cooking shelf oven for 10 mi‐ cake nutes. mould Ø26 cm Sponge True Fan Wire 2 and 4 40 - 60 Preheat the cake, Cooking shelf oven for 10 mi‐... - Page 33 ENGLISH 12.1 Notes on cleaning Clean the front of the oven with a soft cloth with warm water and a mild detergent. Use a cleaning solution to clean metal surfaces. Clean stains with a mild detergent. Cleaning Agents Clean the cavity after each use. Fat accumulation or other residue may cause fire.
- Page 34 CAUTION! If there are other appliances installed in the same cabinet, do not use them at the same time as this function. It can cause damage to the oven. Before the Pyrolysis: Turn off the oven and Remove all accessories.
- Page 35 ENGLISH Step 1 Turn off the oven. Step 2 Place a deep pan below the steam inlet. Step 3 Pour water into the water drawer: 850 ml. Add citric acid: 5 teaspoons. Wait for 60 min. Step 4 Turn on the oven and set the function: True Fan + Steam. Set the temper‐ ature to 230 °C.
- Page 36 Step 1 Open the door fully and hold both hinges. Step 2 Lift and turn the levers fully on both hinges. Step 3 Close the oven door halfway to the first opening position. Then lift and pull forward and remove the door from its seat.
-
Page 37: Troubleshooting
ENGLISH Make sure that you put the glass panels (A and B) back in the correct sequence. Check for the symbol / printing on the side of the glass panel, each of the glass panels looks different to make the disassembly and assembly easier. - Page 38 The oven does not turn on or does Cleaning not heat up Problem Check if... Problem Check if... There is water in There is not too You cannot acti‐ The oven is cor‐ the oven cavity. much water in the...
-
Page 39: Energy Efficiency
......... Serial number (S.N.) ......... 14. ENERGY EFFICIENCY 14.1 Product Information and Product Information Sheet* Supplier's name Electrolux Model identification KOC6P40X 949494558 Energy Efficiency Index 81.2 Energy efficiency class Energy consumption with a standard load, con‐ 0.93 kWh/cycle ventional mode... - Page 40 Energy consumption with a standard load, fan- 0.69 kWh/cycle forced mode Number of cavities Heat source Electricity Volume 72 l Type of oven Built-In Oven Mass 31.5 kg * For European Union according to EU Regulations 65/2014 and 66/2014.
- Page 41 ENGLISH 15. ENVIRONMENTAL CONCERNS appliances marked with the symbol Recycle materials with the symbol with the household waste. Return the Put the packaging in relevant containers product to your local recycling facility or to recycle it. Help protect the contact your municipal office. environment and human health by recycling waste of electrical and electronic appliances.
- Page 44 www.electrolux.com/shop...