
Related Manuals for Sharp KF-66DIDD04WM1-EN


Summary of Contents for Sharp KF-66DIDD04WM1-EN
- Page 1 Home Appliances KF-66DIDD04WM1-EN KF-66DIDD04IM1-EN KF-66DIDD04BH1-EN Cooking User Manual...
- Page 2 Thank you for choosing this product. This User Manual contains important safety information and instructions on the operation and maintenance of your appliance. Please take the time to read this User Manual before using your appliance and keep this book for future reference. Icon Type Meaning...
-
Page 3: Table Of Contents
CONTENTS 1.SAFETY INSTRUCTIONS ....................4 1.1 General Safety Warnings ....................4 1.2 Installation Warnings ......................7 1.3 During Use ........................8 1.4 During Cleaning and Maintenance .................9 2.INSTALLATION AND PREPARATION FOR USE ............11 2.1 Instructions for the Installer ..................11 2.2 Electrical Connection and Safety..................12 2.3 Anti-tilting kit .........................13 2.4 Adjusting the feet ......................13 3.PRODUCT FEATURES ....................14... -
Page 4: Safety Instructions
1. SAFETY INSTRUCTIONS • Carefully read all instructions before using your appliance and keep them in a convenient place for reference when necessary. • This manual has been prepared for more than one model therefore your appliance may not have some of the features described within. - Page 5 WARNING: Danger of fire: Do not store items on the cooking surfaces. WARNING: If the surface is cracked, switch off the appliance to avoid the possibility of electric shock. • For induction hobs, metallic objects such as knives, forks, spoons and lids should not be placed on the hob surface because they can get hot.
- Page 6 • Do not use steam cleaners to clean the appliance. WARNING: To avoid the possibility of electric shock, make sure that the appliance is switched off before replacing the lamp. CAUTION: Accessible parts may be hot when cooking or grilling. Keep young children away from the appliance when it is in use.
-
Page 7: Installation Warnings
• Make sure that the supply cord is not trapped or damaged during installation. If the supply cord is damaged, it must be replaced by the manufacturer, its service agent or similarly qualified persons in order to prevent a danger. •... -
Page 8: During Use
• Materials around the appliance (i.e. cabinets) must be able to withstand a minimum temperature of 100°C. • The appliance must not be installed behind a decorative door, in order to avoid overheating. 1.3 DurinG uSe • When you first use your oven you may notice a slight smell. -
Page 9: During Cleaning And Maintenance
• Always position pans over the centre of the cooking zone, and turn the handles to a safe position so they cannot be knocked. • If the product will not be used for a long period of time, turn the main control switch off. Turn the gas valve off when gas appliances are not in use. - Page 10 CE Declaration of conformity We declare that our products meet the applicable European Directives, Decisions and Regulations and the requirements listed in the standards referenced. This appliance has been designed to be used only for home cooking. Any other use (such as heating a room) is improper and dangerous.
-
Page 11: Installation And Preparation For Use
2. INSTALLATION AND PREPARATION FOR USE Installation of the Cooker WARNING : This appliance must be • If the kitchen furniture is higher than the installed by an authorised service cooktop, the kitchen furniture must be person or qualified technician, at least 10 cm away from the sides of according to the instructions in this guide appliance for air circulation. -
Page 12: Electrical Connection And Safety
2.2 eleCtriCal ConneCtion anD Safety • If the appliance is not connected to the mains with a plug, a all-pole WARNING: The electrical connection disconnector (with at least 3 mm contact of this appliance should be carried out spacing) must be used in order to meet by an authorised service person or the safety regulations. -
Page 13: Anti-Tilting Kit
• For this connection, a ‘Twin and Earth Product Dimensions 6242Y’ type cable should be used. A (mm) B (mm) (Width X Depth X Height) (Cm) 60x60x90 (Double Oven) 297.5 50x60x90 (Double Oven) 247.5 90x60x85 60x60x90 309.5 60x60x85 309.5 50x60x90 247.5 50x60x85 247.5... -
Page 14: Product Features
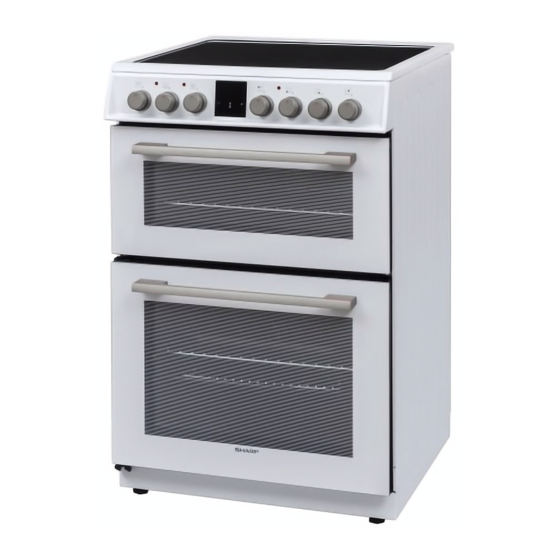
3. PRODUCT FEATURES Important: Specifications for the product vary and the appearance of your appliance may differ from that shown in the figures below. List of Components 1. Cooktop 2. Control Panel 3. Top Oven Door Handle 4. Top Oven Door 5. -
Page 15: Use Of Product
4. USE OF PRODUCT • To check if the cookware is suitable for induction cooking you can hold a magnet to the base of the cookware. 4.1 hob ControlS If the magnet sticks, the cookware is Induction Zone generally suitable or you can put little water in the cookware on a cooking The induction zone is controlled by a knob zone set at maximum level. - Page 16 Switching the Cooking Zones On Use the corresponding knob to set the cooking level from 0 to 9. The element is now ready to use. For fast boil times, keep the knob at the “P” position for 2 seconds to activate the Boost function and then adjust to the desired level.
- Page 17 The programmed cooking zone will switch Error Codes off and “H” will be displayed if the cooking zone is hot. If there is an error, an error code will be shown on the heater displays. The sound signal and the blinking of the Cooling Fan is disabled.
- Page 18 Main Oven Functions Fan Function: Switch on the FAN function * The functions available on your oven may using the main oven differ from those listed below depending on control knob. The the model purchased. oven’s thermostat and Defrost Function: warning lights will Switch on the switch on, and the...
- Page 19 Use of the Digital Touch Timer Grilling Function: Switch on the GRILL function using the top oven function control knob. The oven thermostat and warning lights will illuminate, and the grill heating element will switch on. Use this function for grilling. When you have finished grilling, switch the top oven off.
- Page 20 Semi-automatic time adjustment (cooking period) 3. After a few seconds, the dot will This function helps you to cook for a fixed stop flashing and will period of time. A time range between 0 and remain illuminated. 10 hours can be set. Prepare the food for cooking and put it in the oven.
- Page 21 4. Press “MODE” until 3. Use the “+” and you see “end” symbol “-” buttons to set the on the screen. The desired finishing time. time and the symbols “A” will flash. 5. Select the desired 4. The current time will finishing time using the reappear on the “+”...
-
Page 22: Accessories
4.2 aCCeSSorieS The Wire Grid The Wire Grid for Deep Trays The wire grid is best used for grilling or for processing food in oven-friendly containers. Make sure the wire grid is correctly placed within a deep tray. It is recommended to use this accessory for grilling steaks, meatballs and similar food. -
Page 23: Cleaning And Maintenance
5. CLEANING AND Cleaning the Ceramic Glass MAINTENANCE Ceramic glass can hold heavy utensils but may be broken if it is hit with a sharp object. 5.1 CleaninG WARNING: Switch off the appliance WARNING : Ceramic Cooktops - if the... - Page 24 Cleaning the Enamelled Parts Removal of the Inner Glass • Clean the enamelled parts of your You must remove the oven door glass appliance on a regular basis. before cleaning, as shown below. • Wipe the enamelled parts with a soft 1.
-
Page 25: Maintenance
Removal of the Oven Door 5.2 MaintenanCe WARNING: The maintenance of this Before cleaning the oven door glass, you must remove the oven door, as shown appliance should be carried out by an authorised service person or qualified below. technician only. 1. -
Page 26: Troubleshooting&Transport
6. TROUBLESHOOTING&TRANSPORT 6.1 troubleShootinG If you still have a problem with your appliance after checking these basic troubleshooting steps, please contact an authorised service person or qualified technician. Problem Possible Cause Solution Check the household fuse for the appliance. Hob control card’s display is blacked out. -
Page 27: Transport
6.2 tranSport If you need to transport the product, use the original product packaging and carry it using its original case. Follow the transport signs on the packaging. Tape all independent parts to the product to prevent damaging the product during transport. If you do not have the original packaging, prepare a carriage box so that the appliance, especially the external surfaces of the product, is protected against external threats. -
Page 28: Technical Specifications
7. TECHNICAL SPECIFICATIONS 7.1 enerGy fiChe Brand Model KF-66DIDD04WM1-EN KF-66DIDD04IM1-EN KF-66DIDD04BH1-EN Type of Hob Electric Number of Cooking Zones Heating Technology-1 Induction Size-1 Ø16,0 Energy Consumption-1 Wh/kg 182,0 Heating Technology-2 Induction Size-2 Ø16,0 Energy Consumption-2 Wh/kg 182,0 Heating Technology-3 Induction Size-3 Ø21,0... - Page 29 Brand Model KF-66DIDD04WM1-EN KF-66DIDD04IM1-EN KF-66DIDD04BH1-EN Type of Oven ELECTRIC Mass 45,0 Energy Efficiency Index - conventional 105,1 Energy Efficiency Index - fan forced Energy Class Energy consumption (electricity) - conventional kWh/ 0,75 cycle Energy consumption (electricity) - fan forced kWh/...
- Page 30 Service & Support Visit Our Website sharphomeappliances.com 52370699...