Advertisement
Available languages
Available languages
Quick Links
INSTRUCTION MANUAL
MODE D'EMPLOI
MANUAL DE INSTRUCCIONES
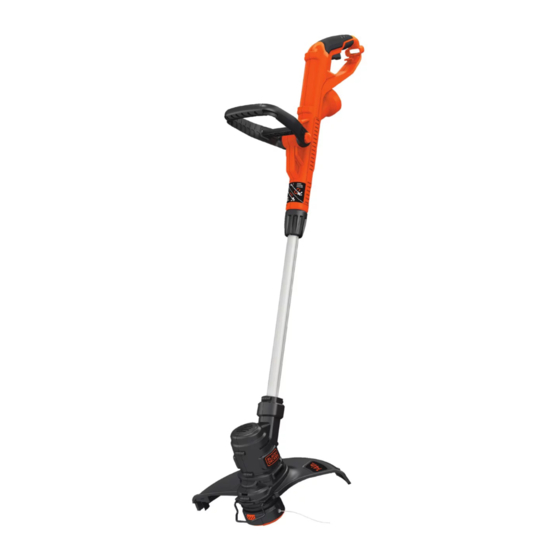
STRING TRIMMER
TAILLE-BORDURE
PODADORA
Please read before returning this product for any reason.
à LIRE avant de retourner ce produit pour quelque raison que
ce soit.
LEA EL MANUAL antes de devolver este producto por
cualquier motivo.
ST9000
Advertisement

Related Manuals for Black & Decker ST9000


Summary of Contents for Black & Decker ST9000
- Page 1 MODE D’EMPLOI MANUAL DE INSTRUCCIONES STRING TRIMMER TAILLE-BORDURE PODADORA ST9000 Please read before returning this product for any reason. à LIRE avant de retourner ce produit pour quelque raison que ce soit. LEA EL MANUAL antes de devolver este producto por...
- Page 2 English English (original instructions) Français (traduction de la notice d’instructions originale) Español (traducido de las instrucciones originales) Thank you for choosing BLACK+DECKER! If you have a question or experience a problem with your BLACK+DECKER purchase, go to: http://www.blackanddecker.com/ instantanswers If you can’t find the answer or do not have access to the Internet, call 1-800-544-6986 from 8 a.m.
- Page 3 English Definitions: Safety Alert Symbols and Words This instruction manual uses the following safety alert symbols and words to alert you to hazardous situations and your risk of personal injury or property damage. DANGER: Indicates an imminently hazardous situation which, if not avoided, will result in death or serious injury.
- Page 4 English KEY INFORMATION YOU SHOULD KNOW • DON’T OVERREACH – Keep proper footing and balance at all times. WARNING: • DON’T FORCE APPLIANCE – It will do the job better and Do not remove guard. with less likelihood of a risk of injury at the rate for which The guard must be attached when trimming.
- Page 5 English • KEEP GUARDS in place and in working order. qualified electrician to install the proper wall outlet. Do not change the equipment plug, extension cord • KEEP HANDS AND FEET away from cutting area. receptacle, or extension cord plug in any way. WARNING: SAFETY WARNINGS AND INSTRUCTIONS: Do not use appliance if the...
- Page 6 English Assembly tools required Figure E • Phillips Screwdriver (not supplied) Installing the guard WARNING: NEVER OPERATE appliance WITHOUT GUARD FIRMLY IN PLACE. The guard must always be properly attached on the appliance to protect the user. Figure F 1. Remove the screw from the guard. 2.
- Page 7 English OPERATION receptacle end of the extension cord into the power cord plug 3 in the trimmer. WARNING: Figure I To reduce the risk of serious personal injury, turn unit off and disconnect it from power source before making any adjustments or removing/installing attachments or accessories.
- Page 8 English Helpful cutting tips Figure K • Use the tip of the string to do the cutting; do not force string head into uncut grass. Use edge guide along such things as fences, houses and flower beds for best practices. •...
- Page 9 English nOTE: Hand wound spools from bulk line are likely to Figure O become tangled more frequently than BLACK+DECKER factory wound spools. For best results, factory wound spools are recommended. To install bulk line, follow the steps below: 1. Unplug trimmer. 2.
- Page 10 English MAINTENANCE TWO-YEAR LIMITED WARRANTY Black & Decker (U.S.) Inc. warranties this product to be free from defects in WARNING: material or workmanship for a period of two (2) years following the date of To avoid serious injury, purchase, provided that the product is used in a home environment. This unplug the appliance before performing any limited warranty does not cover failures due to abuse, accidental damage maintenance.
- Page 11 English TROUBlEshOOTing PROBlEM sOlUTiOn Trimmer runs slowly. • Unplug trimmer. • Check that the spool housing can rotate freely. Carefully clean it if necessary. • Check that the cutting line does not protrude more than approximately 4-13/16 inches (122mm) from the spool.
- Page 12 FRAnçAis Définitions : symboles et termes d'alarmes sécurité Ces guides d'utilisation utilisent les symboles et termes d'alarmes sécurité suivants pour vous prévenir de situations dangereuses et de risques de dommages corporels ou matériels. DANGER : indique une situation dangereuse imminente qui, si elle n’est pas évitée, entraînera la mort ou des blessures graves.
- Page 13 FRAnçAis VOICI DES RENSEIGNEMENTS IMPORTANTS • AVERTISSEMENT IMPORTANT : lorsque l’outil est utilisé comme coupe bordure, des À CONNAÎTRE pierres, morceaux de métal et autres objets peuvent être projetés à haute vitesse par le AVERTISSEMENT : fil. L’outil et le dispositif de protection sont conçus pour réduire le risque.
- Page 14 FRAnçAis les outils doivent être rangés à l’intérieur, dans ʵ composés présents dans les engrais un endroit sec et verrouillé, hors de portée des ʵ composés présents dans les insecticides, herbicides et enfants. pesticides • ÊTRE VIGILANT – Ne pas utiliser l’appareil ʵ...
- Page 15 FRAnçAis POSE DU PARE-MAIN utilisation à l’extérieur, comme les rallonges SW-A, SOW- A, STW-A, STOW-A, SJW-A, SJOW-A, SJTW-A ou JTOW-A AVERTISSEMENT : S’assurer que la rallonge est en bon état. Lorsque qu’une rallonge électrique est utilisée, s’assurer d’en utiliser une NE JAMAIS UTILISER L’APPAREIL SANS LE PARE-MAIN de calibre suffisamment élevé...
- Page 16 FRAnçAis 5. Ajuster la poignée de façon à avoir le bras avant Tirer délicatement sur la rallonge afin de s’assurer que celle-ci est complètement droit lorsque le taille-bordure est en fermement retenue par la poignée du taille-bordure. Brancher la position de fonctionnement. prise femelle de la rallonge sur la fiche 3 ...
- Page 17 FRAnçAis UTILISATION • Maintenir une distance minimale de 609,6 mm (24 po) entre le dispositif de protection et vos pieds, comme le AVERTISSEMENT : montre la figure L. Figure K pour réduire le risque de blessures graves, éteindre l’outil et retirer le débrancher le bloc-piles avant d’effectuer tout réglage et d’enlever ou d’installer tout accessoire.
- Page 18 FRAnçAis CONSEJOS ÚTILES PARA CORTAR 4. Tenir la bobine vide d’une main et le boîtier de bobine de l’autre, puis sortir la bobine en tirant dessus. • Utilice la punta de la cuerda para realizar el corte; no 5. Si le levier (figure O) situé...
- Page 19 FRAnçAis AVERTISSEMENT : Figure T L’utilisation de tout accessoire non recommandé par BLACK+DECKER, avec cet outil, pourrait s’avérer dangereuse. REMBOBINAGE DE LA BOBINE AVEC DU FIL EN VRAC (UTILISER UNIQUEMENT UN FIL ROND DE 1,65 MM (0,065 PO) DE DIAMÈTRE) N’utilisez pas de fils carrés, en forme d’étoile ou autre, ou ENTRETIEN de diamètres différents.
- Page 20 FRAnçAis GARANTIE LIMITÈE DE DEUX ANS l’outil. Ce dernier pourrait avoir d’autres droits selon l’État ou la province qu’il habite. Pour toute question, communiquer Black & Decker (É.-U.) Inc. garantit que le produit est exempt avec le directeur du centre de réparation BLACK+DECKER le de défauts de matériau et de fabrication pendant deux(2) ans à...
- Page 21 EsPAñOl Definiciones: Símbolos y palabras de alerta de seguridad Este manual de instrucciones utiliza los siguientes símbolos y palabras de alerta de seguridad para alertarle de situaciones peligrosas y del riesgo de lesiones corporales o daños materiales. PELIGRO: Indica una situación de peligro inminente que, si no se evita, provocará la muerte o lesiones graves.
- Page 22 EsPAñOl INFORMACIÓN CLAVE QUE USTED DEBE • PARA REDUCIR EL RIESGO de lesiones por CONOCER rebote, trabaje alejándose de cualquier objeto sólido cercano, como paredes, escalones, piedras grandes, ADVERTENCIA: árboles, etc. Sea muy cuidadoso al trabajar cerca de objetos sólidos y, cuando sea necesario, pode a mano. No quite el • EVITE ARRANQUES ACCIDENTALES –...
- Page 23 EsPAñOl GFCI incorporada y pueden utilizarse para esta medida de V ......voltios or AC/DC ..corriente alterna seguridad. o directa Hz ....... hertz • NO MALTRATE EL CABLE: nunca transporte el ...... Construcción de min ..... minutos Clase II (doble aparato sosteniéndolo por el cable ni tire de éste para or DC ..
- Page 24 EsPAñOl potencia y sobrecalentamiento. La tabla muestra la medida 4. Continúe deslizando el protector hasta que lo oiga correcta que debe utilizar según la longitud del cable y la encajar en su lugar. La lengüeta de bloqueo 13 debe capacidad nominal en amperios indicada en la placa. En caso de encajado en la ranura de la caja 14 ...
- Page 25 EsPAñOl Figure F Figure I Figure G LIBERACIÓN DE LA CUERDA DE CORTE Al despacharse de la fábrica, la cuerda de corte está sujeta con cinta a la cubierta del carrete. • Quite la cinta que sujeta la cuerda de corte a la cubierta del carrete.
- Page 26 EsPAñOl o de retirar/instalar dispositivos o accesorios. Un Figure K arranque accidental podría causar lesiones. ADVERTENCIA: Siempre utilice protección adecuada para los ojos que cumple con la norma ANSI Z87.1 (CAN/CSA Z94.3) mientras opera esta herramienta eléctrica. ADVERTENCIA: Figure L Antes de realizar cualquier ensamblaje, ajuste o cambio de accesorios, desconecte el enchufe de la fuente de alimentación.
- Page 27 EsPAñOl CONSEJOS ÚTILES PARA CORTAR 3. Para obtener óptimos resultados, reemplace el carrete con el modelo Nº AF-100 de BLACK+DECKER. • Utilice la punta de la cuerda para realizar el corte; no 4. Tome el carrete vacío con una mano y la cubierta del empuje el cabezal de la cuerda contra el césped sin cortar.
- Page 28 EsPAñOl ADVERTENCIA: 8. Coloque el carrete en la herramienta como se describe El uso de en el “REEMPLAZO DEL CARRETE”. accesorios no recomendados por BLACK+DECKER para ATENCIÓN: esta herramienta puede ser peligroso. El uso de accesorios ENROLLADO DEL CARRETE CON CUERDA A no recomendados por BLACK+DECKER para esta herramienta puede ser peligroso.
- Page 29 EsPAñOl AMÉRICA LATINA: Esta garantía no se aplica a productos • Asegúrese de que el principio de la línea de corte se vendidos en América Latina. Para los productos que se venden tensa contra el carrete como se muestra en la figura S. en América Latina, consulte la información de garantía específica •...
- Page 30 EsPAñOl PROBLEMA SOLUCIÓN • Desenchufe la herramienta. La herramienta funciona lentamente. • Vérifier que le boîtier de la bobine peut tourner librement. Le nettoyer avec précaution si nécessaire. • S’assurer que le fil de coupe sort d’au plus 122 mm ( 4-13/16 po) de la bobine. Le cas échéant, le couper afin que sa longueur atteigne juste la lame de coupe pour le fil.
- Page 31 · GARANTÍA BLACK+DECKER · BLACK+DECKER WARRANTY . SOLAMENTE PARA PROPOSITOS DE MEXICO Distributor Name · Sello firma del distribuidor Date of purchase · Fecha de compra Invoice No. · No. de factura PRODUCT INFOMATION · IDENTIFICACIÓN DEL PRODUCTO Cat. No. · Catalogo ó Modelo Serial Number ·...
- Page 32 BOSQUES DE CIDROS ACCESO RADIATAS NO. 42 COL. BOSQUES DE LAS LOMAS. 05120 MÉXICO, D.F TEL. (01 55) 5326 7100 01 800 847 2309/01 800 847 2312 Black & Decker (U.S.) Inc. 701 East Joppa Road, Towson, MD 21286 N551890 ST9000 AUG17 Copyright © 2017 BLACK+DECKER...