ZyXEL Communications P-330W User Manual
Multi-function 802.11b+g wireless router
Hide thumbs
Also See for P-330W:
- User manual (141 pages) ,
- Quick start manual (15 pages) ,
- Release note (5 pages)

Related Manuals for ZyXEL Communications P-330W


Summary of Contents for ZyXEL Communications P-330W
- Page 1 Multi-Function 802.11b+g Wireless Router 802.11g/802.11b Wireless Access Point Broadband Internet Access 4-Port Switching Hub User’s Manual...
-
Page 3: Table Of Contents
Table of Contents INTRODUCTION ....................... 2 Wireless Router Features..................... 2 Package Contents ......................4 Physical Details ......................5 INSTALLATION......................... 7 Requirements ....................... 7 Procedure ........................7 SETUP..........................9 Overview........................9 Configuration Program....................9 Setup Wizard......................11 Configuration via Web....................13 PC CONFIGURATION..................... -
Page 4: Introduction
Chapter 1: I n tro d u c ti o n This Chapter provides an overview of the Wireless Router's features and capabilities. Congratulations on the purchase of your new Wireless Router. The Wireless Router is a multi- function device providing the following services: •... - Page 5 Introduction Advanced Internet Functions • Communication Applications. Support for Internet communication applications, such as interactive Games, Telephony, and Conferencing applications, which are often difficult to use when behind a Firewall, is included. • Special Internet Applications. Applications which use non-standard connections or port numbers are normally blocked by the Firewall.
-
Page 6: Package Contents
Configuration & Management • Easy Setup. Use your WEB browser from anywhere on the LAN or WLAN for configuration. • Configuration File Upload/Download. Save (download) the configuration data from the Wireless Router to your PC, and restore (upload) a previously-saved configuration file to the Wireless Router. -
Page 7: Physical Details
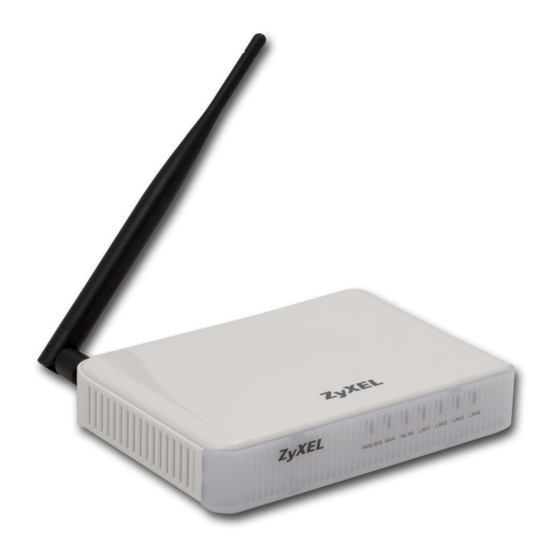
Introduction Physical Details Front-mounted LEDs Figure 1: Front Panel Power LED On - Power on. Off - No power. Internet LED On - Connection to the Broadband Modem attached to the WAN (Internet) port is established. Off - No connection to the Broadband Modem. Flashing - Data is being transmitted or received via the WAN port. - Page 8 Rear Panel Figure 2: Rear Panel Power port Connect the supplied power adapter here. 10/100BaseT Use standard LAN cables (RJ45 connectors) to connect your PCs to LAN port these ports. If required, any port can be connected to another hub. Any LAN port will automatically function as an "Uplink"...
-
Page 9: Installation
Chapter 2 : I n s tal l ati o n This Chapter covers the physical installation of the Wireless Router. Requirements • Network cables. Use standard 10/100BaseT network (UTP) cables with RJ45 connectors. • TCP/IP protocol must be installed on all PCs. •... - Page 10 If required, connect any port to a normal port on another Hub, using a standard LAN cable. Any LAN port on the Wireless Router will automatically function as an "Uplink" port when required. 3. Connect WAN Cable Connect the DSL or Cable modem to the WAN port on the Wireless Router. Use the cable supplied with your DSL/Cable modem.
-
Page 11: Setup
Chapter 3 : S etu p This Chapter provides Setup details of the Wireless Router. Overview This chapter describes the setup procedure for: • Internet Access • LAN configuration • Wireless setup • Assigning a Password to protect the configuration data. PCs on your local LAN may also require configuration. - Page 12 • Double - click the icon for the Wireless Router (either on the Desktop, or in My Network Places) to start the configuration. Refer to the following section Setup Wizard for details of the initial configuration process. Using your Web Browser To establish a connection from your PC to the Wireless Router: 1.
-
Page 13: Setup Wizard
Setup Wizard The Setup Wizard provides brief and basic configuration of this device, you may enter each screen to change the default settings. For more detailed settings, you may refer to the “Configuration via Web” section. 1. View the listed configuration items and click Next to continue. 2. - Page 14 Configure the parameters for wireless LAN clients. Check the Disable Access Point to disable the settings of this screen. Click Next to continue. 6. To manage your wireless network security by selecting the encryption type (None, WEP and WPA (TKIP)) from the pull-down menu. Click Finish to exit Set Wizard screen. Common Connection Types Cable Modems Type...
-
Page 15: Configuration Via Web
DSL Modems Type Details ISP Data required Dynamic Your IP Address is allocated None. IP Address automatically, when you connect to you ISP. Static (Fixed) Your ISP allocates a IP Address allocated to you. IP Address permanent IP Address to you. PPPoE You connect to the ISP only User name and password. - Page 16 IP Address Default: 192.168.1.254 (this is the local address of this Router) Subnet Mask Default: 255.255.255.0 Disable: Select to disable this Router to distribute IP DHCP Addresses (Disabled) Server: Select to enable this Router to distribute IP Addresses (DHCP Server). And the following field will be activated for you to enter the starting IP Address DHCP Client Range The starting address of this local IP network address pool.
- Page 17 Password Setup New Password Maximum input is 36 alphanumeric characters (case sensitive) Confirmed Password Key in the password again to confirm. Save After completing the settings on this page, click Save to save the settings. Reset Click Reset to clear settings. Status Internet Shows the internet connection status...
- Page 18 Wireless Basic Settings Disable Access Point Check to disable the AP function. The wireless (WLAN) LED on front panel will remain OFF if the Wireless interface is disabled. Band You can choose one mode of the following you need. 2.4GHz (B): 802.11b supported rate only. 2.4GHz (G): 802.11g supported rate only.
- Page 19 Wireless Advanced Settings Authentication Type Open System If your access point/wireless router is using "Open " authentication, then the wireless adapter will need to be set to the same authentication type. Shared Key: Shared Key is when both the sender and the recipient share a secret key.
- Page 20 Site Survey Site survey displays all the active Access Points and IBSS in the neighborhood. When you are in the client mode, you can select one AP to associate. Click Refresh to get the latest information. Security Here you can configure the security of your wireless network. Selecting different method will enable you to have different level of security.
- Page 21 Click the Set WEP Keys will prompt you a SET WEP KEY window to set 64bit or 128bit Encryption. Select HEX if you are using hexadecimal numbers (0-9, or A-F). Select ASCII if you are using ASCII characters (case-sensitive). hexadecimal digits or five ASCII characters are needed if 64-bit WEP is used;...
- Page 22 RADIUS Server. Press to save the new settings on the screen. Save Reset Press to discard the current settings. Wireless Trusted Stations Select the Access Control Mode from the pull-down Wireless Access Control Mode menu. Disable: Select to disable Wireless Access Control Mode. Allow Listed: Only the stations shown in the table can associate with the AP.
- Page 23 Access Control Enable Access Control Select to enable Access Control function. Select Services to Block This lists all defined Services. Select the Services you wish to block. Port Range For TCP and UDP Services, enter the beginning of the range of port numbers used by the service.
- Page 24 Enable DDNS Select to enable DDNS function. This free service is very useful when combined with the Virtual Server feature. It allows Internet users to connect to your Virtual Servers using a URL, rather than an IP Address. This also solves the problem of having a dynamic IP address.
- Page 25 settings. Reset Click Reset to restore to default values. Virtual Server Enable Virtual Servers Check to enable virtual server function. Servers You can set up a local server with specific port number that stands for the service (e.g. web (80), FTP (21), Telnet (23)). When this device receives an incoming access request for this specific port, it will be forwarded to the corresponding internal server.
- Page 26 Special Application If you use Internet applications that use non-standard connections or port numbers, you may find that they do not function correctly because they are blocked by the Wireless Router's firewall. In this case, you can define those applications as "Special Application" so that they can function properly.
- Page 27 WAN Access Type Select the WAN access type (Static IP, DHCP, PPPoE and PPTP) from the pull-down menu. Enter the DNS server IP address(es) provided by your DNS 1-3 ISP, or you can specify your own preferred DNS server IP address(es).
- Page 28 Enter the IP address or domain name that you want to ping. IP Address/ Host name Click to start pinging. Click to clear the current IP address /Host name. Reset DoS Setting A DoS (Denial of Service) attack does not attempt to steal data or damage your PCs, but overloads your Internet connection so you cannot use it - the service is therefore unavailable.
- Page 29 time (sec) number so that your network performance won’t be hampered. Click to selct all listed items. Selct All Click to clear all listed items. Clear All Click to save the current settings. Apply Changes Diagnostics Remote management The Wireless Router can be managed from any PC on your LAN. And, if the Internet connection exists, it can also (optionally) be configured via the Internet.
- Page 30 This screen also allows you to set the Wireless Router back to its factory default configuration. Any existing settings will be deleted. An example Config File screen is shown below. Backup Config Use this to download a copy of the current configuration, and store the file on your PC.
- Page 31 Enable Log Click to enable log function. Enable Remote Log Click to enable the remote log function. The log record will be saved into a remote server. System all: Wireless only: Dos only: Save After completing the settings on this page, click Save to save the settings.
- Page 32 MAC Filtering Enable MAC Check to enable MAC filtering function. Filtering MAC Address Enter the client MAC address. Description You may key in a description for the MAC address. Current Filter Table Shows the current filter information. Save After completing the settings on this page, click Save to save the settings.
- Page 33 Time Zone Setting Current Time Enter the current time of this wireless router. Enable NTP client NTP ( client update Check to enable Network Time Protocol Server) update function. Time Zone Select Select the time zone from the pull-down menu. NTP server You may choose to select NTP server from the pull-down menu or enter an IP address of a specific server.
- Page 34 Browse Click the Browse button, find and open the firmware file (the browser will display to correct file path). Start Upgrade Click the Start Upgrade button to perform Reset Click Reset to restore to default values. Navigation & Data Input •...
-
Page 35: Pc Configuration
Chapter 4 : P C Co n f i g u rati o n Overview For each PC, the following may need to be configured: • TCP/IP network settings • Internet Access configuration • Wireless configuration Windows Clients This section describes how to configure Windows clients for Internet access via the Wireless Router. - Page 36 Checking TCP/IP Settings - Windows 98/ME: 1. Select Control Panel - Network. You should see a screen like the following: 2. Select the TCP/IP protocol for your network card. 3. Click on the Properties button. You should then see a screen like the following. Ensure your TCP/IP settings are correct, as follows: Using DHCP To use DHCP, select the radio button Obtain an IP Address automatically.
- Page 37 • On the DNS Configuration tab, ensure Enable DNS is selected. If the DNS Server Search Order list is empty, enter the DNS address provided by your ISP in the fields beside the Add button, then click Add.
- Page 38 Checking TCP/IP Settings - Windows NT4.0 1. Select Control Panel - Network, and, on the Protocols tab, select the TCP/IP protocol, as shown below. 2. Click the Properties button to see a screen like the one below.
- Page 39 3. Select the network card for your LAN. 4. Select the appropriate radio button - Obtain an IP address from a DHCP Server or Specify an IP Address, as explained below. Obtain an IP address from a DHCP Server This is the default Windows setting. Using this is recommended. By default, the Wireless Router will act as a DHCP Server.
- Page 40 2. The DNS should be set to the address provided by your ISP, as follows: • Click the DNS tab. • On the DNS screen, shown below, click the Add button (under DNS Service Search Order), and enter the DNS provided by your ISP.
- Page 42 Checking TCP/IP Settings - Windows 2000: 1. Select Control Panel - Network and Dial-up Connection. 2. Right - click the Local Area Connection icon and select Properties. You should see a screen like the following: 3. Select the TCP/IP protocol for your network card. 4.
- Page 43 5. Ensure your TCP/IP settings are correct, as described below. Using DHCP To use DHCP, select the radio button Obtain an IP Address automatically. This is the default Windows setting. Using this is recommended. By default, the Wireless Router will act as a DHCP Server.
- Page 44 Checking TCP/IP Settings - Windows XP 1. Select Control Panel - Network Connection. 2. Right click the Local Area Connection and choose Properties. You should see a screen like the following: 3. Select the TCP/IP protocol for your network card. 4.
- Page 45 5. Ensure your TCP/IP settings are correct. Using DHCP To use DHCP, select the radio button Obtain an IP Address automatically. This is the default Windows setting. Using this is recommended. By default, the Wireless Router will act as a DHCP Server.
- Page 46 Internet Access To configure your PCs to use the Wireless Router for Internet access: • Ensure that the DSL modem, Cable modem, or other permanent connection is functional. • Use the following procedure to configure your Browser to access the Internet via the LAN, rather than by a Dial-up connection.
-
Page 47: Macintosh Clients
Macintosh Clients From your Macintosh, you can access the Internet via the Wireless Router. The procedure is as follows. 1. Open the TCP/IP Control Panel. 2. Select Ethernet from the Connect via pop-up menu. 3. Select Using DHCP Server from the Configure pop-up menu. The DHCP Client ID field can be left blank. -
Page 48: Wireless Station Configuration
Wireless Station Configuration This section applies to all Wireless stations wishing to use the Wireless Router's Access Point, regardless of the operating system which is used on the client. To use the Wireless Access Point in the Wireless Router, each Wireless Station must have compatible settings, as follows: Mode The mode must be set to Infrastructure. -
Page 49: Troubleshooting
Appendix A T ro u b l es ho o ti n g This Appendix covers the most likely problems and their solutions. Overview This chapter covers some common problems that may be encountered while using the Wireless Router and some possible solutions to them. If you follow the suggested steps and the Wireless Router still does not function properly, contact your dealer for further advice. -
Page 50: Wireless Access
Solution 2: The Wireless Router processes the data passing through it, so it is not transparent. Use the Special Applications feature to allow the use of Internet applications which do not function correctly. If this does solve the problem you can use the DMZ function. This should work with almost every application, but: •... -
Page 51: About Wireless Lans
Appendix B A b o u t W i rel es s L A N s This Appendix provides some background information about using Wireless LANs (WLANs). Modes Wireless LANs can work in either of two (2) modes: • Ad-hoc •... -
Page 52: Wep
WEP (Wired Equivalent Privacy) is a standard for encrypting data before it is transmitted. This is desirable because it is impossible to prevent snoopers from receiving any data which is transmitted by your Wireless Stations. But if the data is encrypted, then it is meaningless unless the receiver can decrypt it. -
Page 53: Appendix C Specifications
A ppen d i x C S pec i f i c ati o n s Multi-Function Wireless Router Model Wireless Router Dimensions 141mm(W) * 100mm(D) * 27mm(H) Operating Temperature 0° C to 40° C Storage Temperature -10° C to 70° C Network Protocol: TCP/IP Network Interface:... -
Page 54: Regulatory Approvals
Regulatory Approvals CE Standards This product complies with the 99/5/EEC directives, including the following safety and EMC standards: • EN300328-2 • EN301489-1/-17 • EN60950 CE Marking Warning This is a Class B product. In a domestic environment this product may cause radio interference in which case the user may be required to take adequate measures. - Page 55 Federal Communication Commission Interference Statement This equipment has been tested and found to comply with the limits for a Class B digital device, pursuant to Part 15 of the FCC Rules. These limits are designed to provide reasonable protection against harmful interference in a residential installation.