AEG IAE84881FB User Manual
Hide thumbs
Also See for IAE84881FB:
- User manual (616 pages) ,
- User manual (17 pages) ,
- User manual (36 pages)
Table of Contents
Advertisement
Quick Links
Advertisement
Table of Contents

Related Manuals for AEG IAE84881FB


Summary of Contents for AEG IAE84881FB
- Page 1 IAE84881FB User Manual USER MANUAL...
-
Page 2: Table Of Contents
FOR PERFECT RESULTS Thank you for choosing this AEG product. We have created it to give you impeccable performance for many years, with innovative technologies that help make life simpler – features you might not find on ordinary appliances. Please spend a few minutes reading to get the very best from it. - Page 3 installation or usage. Always keep the instructions in a safe and accessible location for future reference. 1.1 Children and vulnerable people safety This appliance can be used by children aged from 8 years • and above and persons with reduced physical, sensory or mental capabilities or lack of experience and knowledge if they have been given supervision or instruction concerning the use of the appliance in a safe way and understand the...
-
Page 4: Safety Instructions
CAUTION: The cooking process has to be supervised. A • short term cooking process has to be supervised continuously. WARNING: Danger of fire: Do not store items on the • cooking surfaces. Metallic objects such as knives, forks, spoons and lids •... - Page 5 • Seal the cut surfaces with a sealant to • Make sure not to cause damage to the prevent moisture from causing swelling. mains plug (if applicable) or to the mains • Protect the bottom of the appliance from cable. Contact our Authorised Service steam and moisture.
- Page 6 from the power supply. This to prevent an • Use only the Food Sensor recommended electrical shock. for the hob, one at a time. • Users with a pacemaker must keep a • Do not use it when it is malfunctioning or distance of minimum 30 cm from the damaged.
-
Page 7: Installation
and are not suitable for household room • Contact your municipal authority for illumination. information on how to dispose of the appliance. 2.7 Disposal • Disconnect the appliance from the mains supply. • Cut off the mains electrical cable close to WARNING! the appliance and dispose of it. -
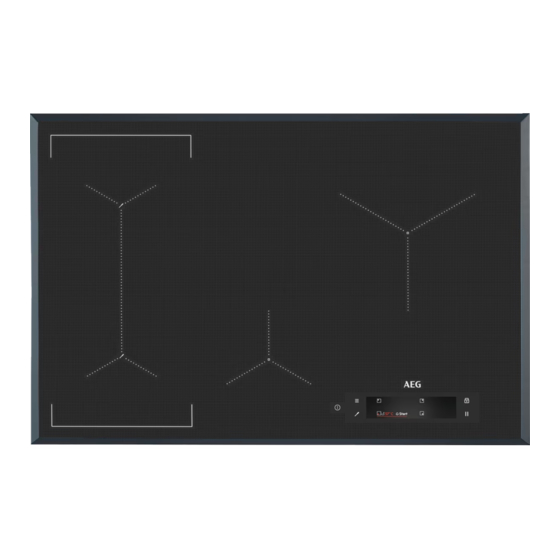
Page 8: Product Description
Find the video tutorial "How to install your AEG Induction Hob - Worktop installation" by www.youtube.com/electrolux typing out the full name indicated in the www.youtube.com/aeg graphic below. How to install your AEG Induction Hob - Worktop installation 4. PRODUCT DESCRIPTION 4.1 Cooking surface layout... - Page 9 Symbol Comment Zone indicator To show for which zone the slider is active. To set the timer functions. Slider To adjust the heat setting. PowerBoost To activate the function. Lock To activate and deactivate the function. Pause To activate and deactivate the function. 0 - 9 To show the current heat setting.
-
Page 10: Before First Use
refreshes the connection status every 3 function via Assisted Cooking, the seconds. temperatures are defined for different food types. You can also choose your own For more information refer to temperatures if you activate the function via "Hints and Tips for the Food Sous Vide in the Menu. - Page 11 5.3 Food Sensor calibration • To activate a given option, touch the relevant symbol on the display. Before you start using the Food Sensor you • The selected function is activated when need to calibrate it, to ensure that the you remove the finger from the display.
-
Page 12: Daily Use
Always calibrate the Food Sensor after To leave the Menu, touch or the right side pairing. of the display, outside of the pop-up window. To navigate through the Menu use or . To leave the Menu, touch or the right side of the display, outside of the pop-up window. - Page 13 • you do not deactivate a cooking zone or 3. Touch or slide your finger to set the change the heat setting. After some time desired heat setting. a message comes on and the hob The symbol turns red and becomes bigger. deactivates.
- Page 14 • for the neighbouring cooking zones even The function has no effect on the operation of if you are not using them, the cooking zones. • when hot cookware is placed on a cold 1. Select any cooking zone. cooking zone, The relevant slider appears on the display.
- Page 15 1. Place the cookware on two cooking 6.10 Lock zones. The cookware must cover the You can lock the control panel while the hob centres of both zones. operates. It prevents an accidental change of 2. Touch to activate the function. The the heat setting.
- Page 16 If Assisted Cooking runs on the left front 4. If a pop-up window appears with cooking zone, use the zones on the right for instructions, touch OK and then Start to cooking without the function. continue. The function operates with the pre-defined Do not use cookware with the bottom settings.
- Page 17 2. Place the pot filled with cold water on the 5. Touch Start to activate preheating. left front or rear cooking zone. Once the pot reaches the intended temperature, an acoustic signal sounds and 3. Touch > Sous Vide. You can also a pop-up window appears.
- Page 18 6.18 Display Brightness 1. Touch on the display to open the Menu. You can change the brightness of the 2. Select Hob Functions > Melting from the display. list. There are 4 brightness levels, 1 is the lowest 3. Touch Start. and 4 is the highest.
-
Page 19: Hints And Tips
7. HINTS AND TIPS WARNING! Refer to "Technical data". Refer to Safety chapters. 7.1 Cookware 7.2 Correct pans for Pan Fry function For induction cooking zones a Use only pans with flat bottom. To check if strong electro-magnetic field the pan is correct: creates the heat in the cookware very quickly. - Page 20 7.5 Examples of cooking is made of different materials (a sandwich construction). applications • humming: you use a high power level. The correlation between the heat setting of a • clicking: electric switching occurs, the pot zone and its consumption of power is not is detected after you place it on the hob.
- Page 21 7.6 Hints and Tips for the Food Sensor For functions such as Assisted Cooking and Sous Vide, you can use the Food Sensor on the left side of the hob only. With the Thermometer function you can use the Food Sensor also on the right side of the hob.
- Page 22 • Pay special attention to food hygiene when preparing poultry, eggs, and fish. Poultry should always be prepared at the temperature of at least 65 °C for a minimum of 50 minutes. • Make sure the fish you want to prepare with the use of Sous Vide have the sashimi quality, i.e.
- Page 23 Food type Cooking Preparation Thickness / Core temp / Cooking time method level amount of cooking (min) food temp (°C) Beef - steak Sous Vide rare 2 cm 50 - 54 45 - 210 4 cm 120 - 210 6 cm 180 - 210 medium 2 cm...
- Page 24 Food type Cooking Preparation Thickness / Core temp / Cooking time method level amount of cooking (min) food temp (°C) Rice Swelling cooked 10 - 30 Potatoes Boiling cooked 15 - 30 Vegetables Sous Vide cooked 30 - 40 (fresh) Asparagus Sous Vide cooked...
-
Page 25: Care And Cleaning
8. CARE AND CLEANING special hob scraper on the glass surface WARNING! at an acute angle and move the blade on Refer to Safety chapters. the surface. • Remove when the hob is sufficiently 8.1 General information cool: limescale rings, water rings, fat stains, shiny metallic discoloration. - Page 26 Problem Possible cause Remedy The display does not react to the Part of the display is covered or the Remove the objects. Move the pots touch. pots are placed too near to the dis‐ away from the display. play. Clean the display, wait until the ap‐ There is some liquid or an object on pliance is cold.
- Page 27 Problem Possible cause Remedy Other appliances work at the same Remove any appliances that may frequency and disturb the connec‐ disturb the connection. Refer to tion. "Technical Data". Temperature of the food is different The Food Sensor is inserted incor‐ Make sure the measurement point is than expected.
-
Page 28: Technical Data
Make sure, you operated the hob correctly. If not the 10. TECHNICAL DATA 10.1 Rating plate Model IAE84881FB PNC 949 597 523 01 Typ 62 D4A 01 CA 220 - 240 V / 400 V 2N 50 - 60 Hz Induction 7.35 kW... -
Page 29: Energy Efficiency
Food Sensor is approved for use in contact with food. 11. ENERGY EFFICIENCY 11.1 Product Information Sheet according to UK Ecodesign Regulation Model identification IAE84881FB Type of hob Built-In Hob Number of cooking zones Heating technology Induction Diameter of circular cooking zones (Ø) Left front 21.0 cm... -
Page 30: Environmental Concerns
11.2 Energy saving • Put the smaller cookware on the smaller cooking zones. You can save energy during everyday • Put the cookware directly in the centre of cooking if you follow below hints. the cooking zone. • Use the residual heat to keep the food •... - Page 32 www.aeg.com/shop...