Advertisement
Quick Links
Advertisement

Related Manuals for Baumatic BACG3034


Summary of Contents for Baumatic BACG3034
- Page 1 Instruction manual...
- Page 2 GAS COOKTOPS...
- Page 3 CONTENTS Welcome to Think Letter page 3 General Information page 4-5 Warning and Safety Instructions page 5-6 Instructions for Use pages 7–10 Instructions for Installation pages 11–17 Technical Data page 20-21...
- Page 4 Dear Customer, Congratulations on purchasing your new product from Think Appliances. To register your parts and labour warranty (some conditions apply please refer to your warranty card for more details) please contact out Customer Care team on: 1800 444 357 Our Customer Care centre is there to ensure you get the most out of your appliance.
- Page 5 The foregoing does not affect your statutory rights. In the event that you require any After Sales Service or advice, please contact the Baumatic Service Department on telephone number – 1800 444 357. Ensure that any protective packaging or coatings are removed before using this appliance.
- Page 6 Baumatic do wish to emphasise that compliance does not remove the fact that surfaces will become hot during use and retain heat after operation. Baumatic advise that the appliance is not intended for use by young children or infirm persons without supervision.
- Page 7 This appliance is not suitable for use in marine craft, caravans or mobile homes, unless each burner is fitted with a flame safeguard. DO NOT MODIFY THIS APPLIANCE Baumatic declines any responsibility for injury or damage to persons or property as a result of improper use or installation of this appliance.
- Page 8 INSTRUCTIONS FOR USE A person who is perhaps unfamiliar with the appliance should retain this user manual for future reference. These instructions cover the following Models: BACG3034 BACG3035 BACG6030 BACG6004 BACG7002 BACG7502 BACG7531 BACG7532 BACG9003 BACG9033 USING THE HOB The symbols on the Control Panel fascias show which burner the Control Knob operates.
- Page 9 The ignition spark will operate as long as the button is held down. When a flame has been established, release the button. To regulate the flame, continue turning anti-clockwise to the required setting between the large and small flame symbols. To turn the burner off, turn clockwise.
- Page 10 HELPFUL HINTS Always use the correct diameter pan, one that is the same or slightly larger than the flame ring. The flame should never exceed the diameter of the pan. The bottom of the pan should be flat and wherever possible, keep the lid on the pan when cooking.
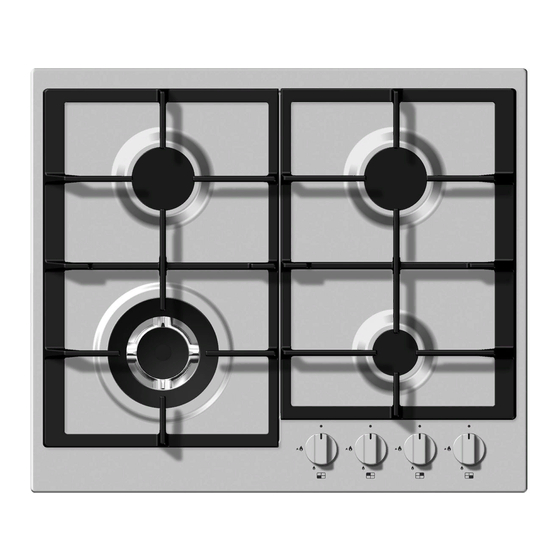
- Page 11 Depending on the model, the following burners are provided: • Large (Rapid or Triple Crown) – for rapid cooking or boiling large quantities of liquid • Wok – for rapid cooking or boiling large quantities of liquid • Medium (Semi-rapid) – for general cooking •...
- Page 12 AS 5601 - Gas Installations and any other statutory regulations. Gas Safety Regulations (Installation & Use) Baumatic Installation Instructions POSITIONING THE APPLIANCE Combustible Surfaces Any adjoining wall surface situated within 200mm from the edge of any hob burner must be a suitable non-combustible material for a height of 150mm for the entire length of the hob.
- Page 13 • Adhesive sealing strip and fixing clamps & screws • ½ BSP Elbow & Seal • LPG conversion kit comprising an LPG jet for each burner and a self-adhesive label for amending Gas Category on the appliance Rating Label. INSTALLATION NOTES Cut the aperture to the dimensions shown at Figure 1 or use the template if printed on the packaging.
- Page 15 VENTILATION OF ROOMS To ensure correct combustion and the removal of spent air the room in which this appliance is installed must be well ventilated by natural or mechanical means, or a combination of both. The minimum quantity of air for combustion will depend on the room volume, number of appliances and their total power rating.
- Page 16 AS/NZS 1869 (AGA Approved), 10mm ID, class B or D, no more than 1.2m long and in accordance with AS5601. Ensure that the Hose does not come into contact with the hot surfaces of the hotplate, oven, dishwasher or other appliance that may be installed underneath or next to the hotplate.
- Page 17 the gas connection point to amend the Gas Category. Figure 3 - Injector GAS FLOW ADJUSTMENT In order to adjust the minimum gas flow proceed as follows: Ignite the burner and turn down to the minimum setting. Remove the control knob from the gas tap. Adjust the flow either clockwise to decrease or anti-clockwise to increase the flame.
- Page 18 ELECTRICAL CONNECTION Before connecting the appliance, make sure the supply voltage marked on the rating Plate corresponds with the mains supply voltage. WARNING – THIS APPLIANCE MUST BE EARTHED Ensure the appliance is plugged into a 10 amp GPO. IMPORTANT The wires in the main supply lead are coloured in accordance with the following code:- Green and Yellow...
- Page 19 AUTHORISED PERSONNEL DO NOT MODIFY THIS APPLIANCE During the guarantee period, in case of need all service intervention should be referred back to the Baumatic Service Department. Please note that intervention or repair by any unauthorised personnel will invalidate such guarantee.
- Page 20 If it becomes necessary to replace the gas tap, proceed as follows: Disconnect the appliance as described above. Disconnect the gas pipe from the gas tap, disassemble from the gas rail by removing the fixing screws. When fitting a new tap, ensure that a new gasket is used. Re-connect the gas tap, check for gas soundness and reassemble the hob.
- Page 23 Baumatic ® w w w . b a u m a t i c . c o m...