Frigidaire FFMV162L Use & Care Manual
Frigidaire ffmv162l: user guide
Hide thumbs
Also See for FFMV162L:
- Installation manuallines (5 pages) ,
- Installation instructions manual (72 pages) ,
- Features & dimensions (2 pages)
Table of Contents
Advertisement
All about the
Use
of your
WELCOME & CONGRATULATION ............................2
IMPORTANT SAFETY INSTRUCTIONS ......................2
PART NAMES ........................................................8
BEFORE OPERATING ........................................... 10
MANUAL COOKING .............................................. 11
....
............................................. 1
www.frigidaire.com USA 1-800-944-9044
&
Microwave Oven
TA B L E O F C O N T E N T S
7
www.frigidaire.ca Canada 1-800-265-8352
Care
COOKING CHARTS .............................................. 19
CLEANING AND CARE ..........................................21
.................................... . . . . 24
SPECIFICATIONS.................................................
WARRANTY .........................................................
24
25
Advertisement
Table of Contents

Related Manuals for Frigidaire FFMV162L


Summary of Contents for Frigidaire FFMV162L
-
Page 1: Table Of Contents
PART NAMES ...8 BEFORE OPERATING ... 10 MANUAL COOKING ... 11 AUTO COOKING ... 1 www.frigidaire.com USA 1-800-944-9044 & Care TA B L E O F C O N T E N T S COOKING CHARTS ... 19 CLEANING AND CARE ...21 SERVICE CALL CHECK SPECIFICATIONS... -
Page 2: Welcome & Congratulation
If you do need service, you can relax knowing help is only a phone call away. A list of toll-free customer service numbers is included in the back of this manual. Or call Frigidaire Customer Services at 1-800-944-9044, 24 hours a day, 7 days a week. IMPORTANT SAFETY INSTRUCTIONS For your safety the information in this manual must be followed to minimize the risk of fi... -
Page 3: Save These Instructions
CAUTION indicates a potentially hazardous situation which, if not avoided, may result in minor or moderate injury. • To reduce the risk of fi re in the microwave oven cavity: - Do not overcook food. Carefully attend appliance when paper, plastic or other combustible materials are placed inside the microwave oven to facilitate cooking. -
Page 4: Electrical Requirements
UNPACKING AND EXAMINING YOUR MICROWAVE OVEN Open the bottom of the carton, bend the carton fl aps back and tilt the microwave oven over to rest on plastic foam pad. Lift carton off microwave oven and remove all packing materials, Installation Instructions, Wall Template, Top Template, Charcoal Filter, Turntable and Turntable Support. -
Page 5: Federal Communications Commission Radio Frequency Interference Statement
• Relocate the microwave oven with respect to the receiver. • Move the microwave oven away from the receiver. • Plug the microwave oven into a different outlet so that the microwave oven and the receiver are on different branch circuits. -
Page 6: About Your Microwave Oven
When using the microwave oven at power levels below 100%, you may hear the magnetron cycling on and off. It is normal for the exterior of the microwave oven to be warm to the touch when cooking or reheating. Condensation is a normal part of microwave cooking. Room humidity and the moisture in food will infl... -
Page 7: About Utensils And Coverings
Don’t assume that because a child has mastered one cooking skill he/she can cook everything. Children need to learn that the microwave oven is not a toy. See page 20 for Child Lock feature. ABOUT SAFETY •... -
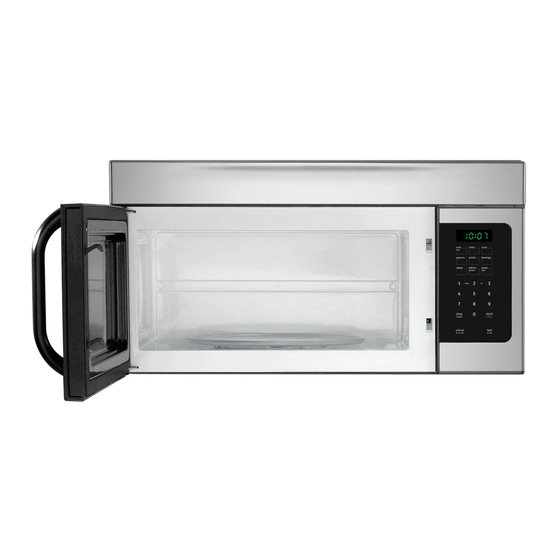
Page 8: Part Names
PART NAMES Microwave features Front View Bottom View cook timer clock time popcorn potato beverage reheat defrost power wt/time level ready stop start cancel + 30 sec exhaust light hi·lo·off on·off Front Rear Window Interlock system Door assembly Turntable ring assembly Turntable Shaft Turntable glass tray Control panel... -
Page 9: Control Panel
Popcorn (P17) Beverage (P17) Potato (1-3 potatoes) (P17) Reheat (3 different settings) (P15) Defrost (by time or weight) (P13) EasySet (3 instant key settings) ( P11 ) Numeric pads (0 thru 9) Clock (P10) Timer (P11) (10) Cook Time (P12) Note:For detailed information,please go to relative page list above. -
Page 10: Before Operating
• Wood: Wooden bowls and boards will dry out and may split or crack when you use them in the microwave oven. Baskets made of wood will react in the same way. • Tightly covered utensils: Be sure to leave openings for steam to escape from covered cookware. -
Page 11: Manual Cooking
Exhaust High / Low / Off The exhaust ventilation moves steam and other cooking vapors from the cooking surface of the range below the microwave oven. To operate the exhaust vent, Touch the Exhaust High/Low/Off pad once for the highest speed setting. Touch the pad again to choose the Low speed setting and a 3rd time to turn the exhaust ventilation off. -
Page 12: Heating With High Power Level
MANUAL COOKING Heating with high power level Example: to heat for 5 minutes at 100% power: 1. Press Cook Time pad. 2. Use the number pads to enter desired heating time (cook time may be set up to 99 minutes and 99 seconds). - Page 13 Using the Stop/Cancel key This feature will let you quickly stop or cancel the cooking process. stop/cancel Touch the pad to : Erase if you have entered wrong information. Canel timer. Press pad once to pause the oven temporalily during cooking. (Touch pad again to START/...
-
Page 14: Defrosting Tips
MANUAL COOKING Defrosting tips • When using the defrost weight feature, the weight entered should always be pounds (valid entries are from 0.1 to 6.0 pounds). • Use both defrost weight and defrost time features for raw food items only. Defrosting gives best results when food to be thawed is a minimum of 0°F (taken directly from a true freezer). -
Page 15: Reheat Cooking Suggestions
Reheat The reheat feature provides 3 quick preset settings based on serving size to reheat food for your cooking convenience. Example: to reheat 24 ounces of food. 1. Press Reheat pad 3 times to reheat 24oz. of food. 24oz will appear in the display (see reheat category table). -
Page 16: Suggested Power Levels For Cooking
Suggestions for getting the best results To help you achieve the best possible results from your microwave oven, read the following suggestions below; • Storage temperature Foods taken from the freezer or refrigerator take longer to cook than the same foods would at room temperature. -
Page 17: Auto Cooking 1
Popcorn • DO NOT leave micowave oven unattended while popping corn. The popcorn feature lets you pop 3 different commercially packaged microwave popcorn sized bags. Use the table below to determine the setting to use. Amount 1.75 oz. (default setting) 3.0 oz. - Page 18 Suggestions Cook a single “microwave-only” bag of popcorn at a time. Use caution when removing and opening the hot popcorn bag from the oven. Let microwave oven cool down at least 5 minutes before using again. Pierce each potato several times using a fork. Place on turntable in spoke-like fashion.
-
Page 19: Cooking Charts
Cooking meat in your microwave Be sure to place prepared meats on a microwave-safe roasting rack in a microwave-safe dish. Start cooking the meat fat side down and if necessary, use narrow strips of aluminum foil to shield any bone tips or thin meat areas. After cooking, check the temperature in several places before letting the meat stand the recommended time. - Page 20 COOKING CHARTS Cooking vegetables in your microwave • Vegetables should be washed just before cooking. Rarely is extra water needed. If dense vegetables such as potatoes, carrots and greens are being cooked, add about ¼ cup of water. • Small vegetables (sliced carrots, peas, lima beans, etc.) will cook faster than larger vegetables.
-
Page 21: Cleaning And Care
To avoid risk of personal injury or property damage, wear gloves when replacing the light bulbs. 1. Unplug the microwave oven or turn off power at the main circuit breaker. 2. Remove the bulb cover mounting screws at both light positions under the microwave. -
Page 22: Charcoal Filter Replacement
Charcoal Filter installed in your microwave oven, is used for nonvented, recirculated installation. The filter should be changed every 6 to 12 months depending on use. 1. Disconnect power to the microwave oven at the circuit breaker panel or by unplugging. 2. Remove the vent grill mounting screws. -
Page 23: Cleaning Suggestions
Never use rough scouring powder or pads on the microwave. Wipe the microwave oven inside and out with a soft cloth and and warm (not hot) mild detergent solution. Then rinse and wipe completely dry. -
Page 24: Service Call Check
SERVICE CALL CHECK Please check the following before calling for service: Place one cup of water in a glass measuring cup in the microwave oven and close the door securely. Operate the microwave oven for one minute at HIGH 100%. -
Page 25: Warranty
MAJOR APPLIANCE WARRANTY INFORMATION Your appliance is covered by a one year limited warranty. For one year from your original date of purchase, Electrolux will pay all costs for repairing or replacing any parts of this appliance that prove to be defective in materials or workmanship when such appliance is installed, used and maintained in accordance with the provided instructions.