Panasonic AG-CX350 Manual
Hide thumbs
Also See for AG-CX350:
- Operating instructions manual (201 pages) ,
- Manual (108 pages) ,
- How to connect (8 pages)
Advertisement
Quick Links
SKAARHOJ DEVICE CORES
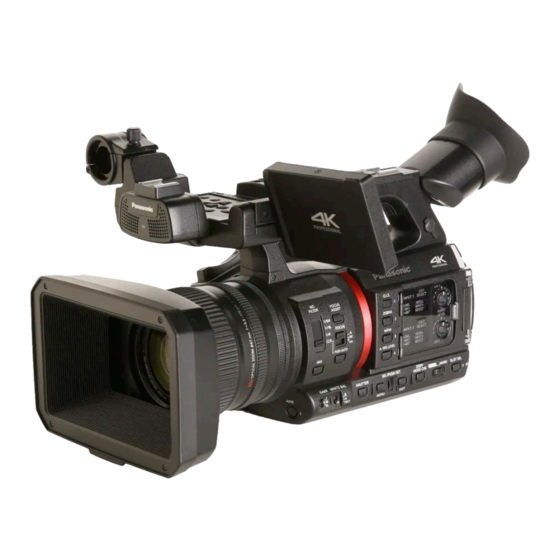
Device: Panasonic AG-CX350
Introduction
The Device Core "Panasonic CX350" is used for controlling the AG-CX350 and AG-CX10 cameras. The
goal of this manual is to help configuring a SKAARHOJ interface to control features available in the Device
Core at this present time.
Multicam Control
Please notice with the release of UniSketch v2.4.16 Multicam Control have been enabled. Prior to v2.4.16
only a single camera could be controlled from the Device Core. With the update up to 4 cameras can be
controlled from a single Device Core. Please see information in the section "Multicam Control"
Setting up Camera
In order to control the camera it must be connected to the same network as your SKAARHOJ Controller..
All communication between a SKAARHOJ interface and the camera is done via IP. The implementation
have been done on version 1.01-00.0.00
1
Advertisement

Related Manuals for Panasonic AG-CX350


Summary of Contents for Panasonic AG-CX350
- Page 1 Device: Panasonic AG-CX350 Introduction The Device Core “Panasonic CX350” is used for controlling the AG-CX350 and AG-CX10 cameras. The goal of this manual is to help configuring a SKAARHOJ interface to control features available in the Device Core at this present time.
- Page 2 IP address on the camera which the SKAARHOJ controller can connect to and to create a user account for authentication. You can use a different IP address as long as the Panasonic Device Core on the SKAARHOJ controller reflects this.
- Page 3 SKAARHOJ DEVICE CORES • MENU - NETWORK - LAN PROPERTY - IPv4 SETTING set static IP • DHCP: OFF • IP ADDRESS: 192.168.10.27 • SUBNET MASK: 255.255.255.0 • DEFAULT GATEWAY: 192.168.10.1 • PRIMANRY DNS:...
- Page 4 Please notice the below instructions are are for the Panasonic AU-EVA1 manual but the principles are the same. Use the Panasonic AG-CX350 configuration instead. Please follow these instructions if you have a RCPv2 and want to use it with the Panasonic AU- EVA1camera.
- Page 5 Select the “Panasonic AU-EVA1” config and then go to the Firmware Application and press “Check for updates”. This will generate a Select the “Panasonic AU-EVA1” config in the drop down list. This will firmware file on our server and download it to the controller.
-
Page 6: Confirm Connection
SKAARHOJ DEVICE CORES Confirm Connection If the RCPv2 have come preconfigured with the Panasonic Configuration or you have just successfully downloaded the Firmware to the RCPv2, then it is ready to control the camera provided you have followed the steps in the “Setting up Camera” section. It is important that the IP address you have set on the camera matches the IP address of the Panasonic CX350 Device Core. - Page 7 The subsequent output in the Serial Monitor will display a lot of Error messages. This is expected as the base layer for communication between the AG-CX350 and the AU-EVA1 Panasonic Camera are the same, but the feature set of the AG-CX350 is more slim.
- Page 8 IP settings on the SKAARHOJ controller is using the Serial Monitor in the Firmware Application and check IP settings in the boot up process. Using different IP address on Panasonic AU-EVA1 camera You can set a different IP address on the camera as long as the Device Core IP address is updated as well.
- Page 9 SKAARHOJ DEVICE CORES Debugging Connection between SKAARHOJ Controller and Camera If IP settings are correct but the Account name is not correct the Serial Monitor will report “Camera Error: Wrong user” If the Account name is correct but the password is not the Serial Monitor will report “Camera Error: Wrong User”...
- Page 10 SKAARHOJ DEVICE CORES Alternative way of Downloading and Installing the Firmware on a RCPv2 Please notice the below instructions are for the Panasonic AU-EVA1 manual but the principles are the same. Use the Panasonic AG-CX350 configuration instead. If you have issues using the Firmware Application to generate and installing the Firmware on your RCPv2 please follow these steps Press “Online Configuration”...
- Page 11 SKAARHOJ DEVICE CORES After the firmware have been generated press “Download” Open the Firmware Updater Application and use the “Load Firmware from file” in the option tab Notice on Windows the Port dropdown will display “COM” ports. Please see section “Port selection on Windows” in Installation and Operation manual https://www.skaarhoj.com/support/manuals/ On Mac On PC.
- Page 12 This section is only relevant if you are building a configuration from scratch. The Device Core “Panasonic CX350” must be added to your controller The Device Core must have the IP address matching, the one set on the camera it self (see “Setting up...
- Page 13 SKAARHOJ DEVICE CORES This is a overview of the actions implemented in the Device Core...
-
Page 14: Sending Data
• AG-CX350 #4: 192.168.10.95 It is therefore not recommend to have other Panasonic cameras in the IP range if you just want to control a single camera unless you set a Device Core option limiting the number of cameras the Device Core will try and connect to (see “Device Configurations”... - Page 15 SKAARHOJ DEVICE CORES Using Camera Select action When assigning the “Camera Select” action to a button, the button/display content will be shown if the controller finds a camera. When you press to select a camera it will be highlighted.
-
Page 16: Device Configurations
SKAARHOJ DEVICE CORES Device Configurations Device configuration options exist: Index 0: Limits number of cameras for control If “0” = default (Device Core will connect to 4 cameras) If “1-4” =If “1” the Device Core will only connect to 1 cameras, if “2” the Device Core will only connect to 2 cameras and so forth. - Page 17 SKAARHOJ DEVICE CORES Example: Limiting the Device Core option to connect to only 1 camera could look like this device configuration code: “D0:0=1” where the general form would be “Dx:y=z” where “x” is the number of the device core as installed on the controller (starting with zero for the first device core), “y”...
- Page 18 SKAARHOJ DEVICE CORES Example: If the Panasonic AG-CX350 device core is the first like below: Then settings the additional connection behaviour would be set by this configuration under “Manage Media” on the configuration page for your controller...
-
Page 19: Zoom + Focus
If a Focus near/far adjustments have been initiated on a SKAARHOJ controller and one try to focus directly on the lens this will overrule Focus adjustments from the SKAARHOJ controller. This is a table of actions for some of the actions in the Panasonic CX350 Device Core (noted with EVA1 actions but principle is the same) - Page 20 SKAARHOJ DEVICE CORES Focus far/near with steps defined to a specific value. Used to quickly Focus (Step) focus to a desired range Binary triggers: Will only reflect the current focus value in m Pulse inputs: Will focus far/near with the given speed value Speed Limit 1: Small steps Speed Limit 6: Large steps Displays: “Step Fcs/Focus range in m”...
- Page 21 SKAARHOJ DEVICE CORES Tally With the default configuration “Panasonic CX350” for the RCPv2 tally will be enabled on the camera from the DB9 connector (EXT I/O) directly on the RCPv2 panel. Integrating Tally directly via IP from Video Switchers It is possible to integrate tally directly from a Video Switcher we have a Device Core for. In the case of a ATEM Switcher the following steps needs to be taken to achieve Tally control on the camera: Add an ATEM Device Core to the configuration...