
Related Manuals for AEG LAVAMAT 61270 WDBI


Summary of Contents for AEG LAVAMAT 61270 WDBI
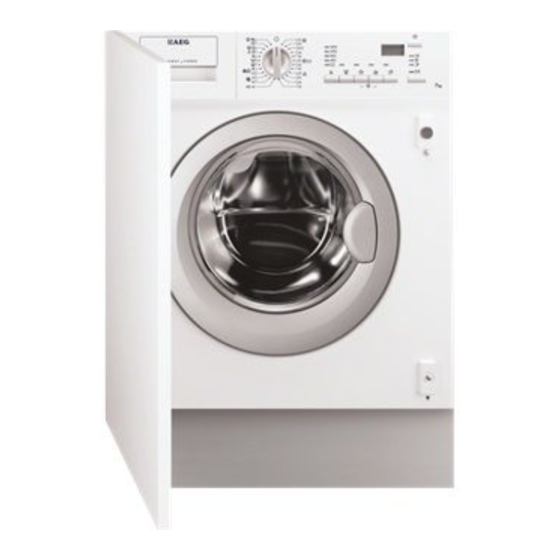
- Page 1 EN User manual LAVAMAT 61270 WDBI ES Manual de instrucciones LAVAMAT 61470 WDBI...
-
Page 2: Table Of Contents
15. BUILDING IN ............. . 35 FOR PERFECT RESULTS Thank you for choosing this AEG product. We have created it to give you impeccable performance for many years, with innovative technologies that help make life simpler –... -
Page 3: Safety Information
ENGLISH 1. SAFETY INFORMATION Before the installation and use of the appliance, careful- ly read the supplied instructions. The manufacturer is not responsible if an incorrect installation and use cau- ses injuries and damages. Always keep the instructions with the appliance for future reference. 1.1 Children and vulnerable people safety WARNING! Risk of suffocation, injury or permanent disability. -
Page 4: Safety Instructions
• If the supply cord is damaged, it must be replaced by the manufacturer, its service agent or similarly quali- fied persons in order to avoid a hazard. • The operating water pressure (minimum and maxi- mum) must be between 0,5 bar (0,05 MPa) and 8 bar (0,8 MPa) •... - Page 5 ENGLISH Water connection sene, spot removers, turpentine, wax- es and wax removers, wash them in • Make sure not to cause damage to the hot water with an extra amount of de- water hoses. tergent. • The appliance is to be connected to •...
-
Page 6: Technical Information
• Disconnect the appliance from the • Remove the door catch to prevent mains supply. children and pets to get closed in the appliance. • Cut off the mains cable and discard it. 3. TECHNICAL INFORMATION Dimensions Width / Height / Depth... -
Page 7: Product Description
ENGLISH 4. PRODUCT DESCRIPTION Detergent dispenser Feet for the appliance level Control panel Water drain hose Door handle Mains cable Rating plate Water inlet hose Drain pump Feet for the appliance level 4.1 Accessories Spanner To remove the transit bolts. Plastic caps To close the holes on the rear side of the cabinet after the removal of... -
Page 8: Control Panel
5. CONTROL PANEL Programme selector dial Display SPIN button (Centrif.) START/PAUSE button (Start/Pausa) • DELAY START button (Inicio Diferi- Rinse hold position STAIN button (Manchas) Pilot lights: TIME SAVING (TIME) button (Ahorra • A – Washing phase (Lavado) Tiempo) •... - Page 9 ENGLISH Set drying time when you set a drying programme, the display shows the drying time in minutes and/or hours (see paragraph «Drying»). After the programme has started, the appliance updates the re- maining time every minute. Alarm codes In the event of operating problems, some alarm codes can be displayed, for example (see chapter «Troubleshooting»).
-
Page 10: Programmes
10 www.aeg.com 5.4 Child safety lock • after pressing button 8: it will be im- possible to change any other pro- This device permits you to leave the ap- gramme or option. pliance unsupervised and not to worry To enable or disable this option press si-... - Page 11 ENGLISH Programme Maximum and Minimum Temperature Cycle De- Options Type of Laundry scription Maximum Load Plancha Fácil Main wash SPIN REDUCTION 40° Rinses RINSE HOLD Max. load 1 kg Short spin EXTRA RINSE Synthetic fabrics to be gentle washed and spun. The laundry is gently washed and spun to avoid any creasing.
- Page 12 12 www.aeg.com Programme Maximum and Minimum Temperature Cycle De- Options Type of Laundry scription Maximum Load Secado — Algodón DRYING TIME se- Drying cotton programme. lection. Refrescar Main wash SPIN REDUCTION 30° Rinses Max. load 3 kg Short spin Quick wash for sport items, or cotton and synthetic items lightly soiled or worn once.
- Page 13 ENGLISH 6.1 Drying programmes Timed programmes Sugges- Drying Spin Degree of Drying Type of Fabric drying Load Speed time Minutes 160 - 4 kg 1400 EXTRA DRY Cotton and linen Ideal for towelling mate- (bathrobes, bath 110 - 3 kg 1400 rials towels, etc)
-
Page 14: Consumption Values
14 www.aeg.com 7. CONSUMPTION VALUES Programme Energy con- Water con- Programme sumption sumption duration (KWh) (litres) (minutes) Cottons 60° 1.35 For the du- ration of the Cotton Energy Saving Pro- 1.05 pro- gramme 60° grammes, Cottons 40° 0.85 please refer to the dis- Synthetics 40°... - Page 15 ENGLISH Make sure that no laundry stays between the seal and the door. There is a risk of water leakage or damage to the laundry. 9.2 Filling the detergent and additives The detergent compartment for the prewash phase, the soak programme and for the stain function.
- Page 16 16 www.aeg.com If you turn the programme dial to DAILY The relative pilot light another programme when the comes on. appliance is working, the yellow The washing duration will pilot light of button 8 blinks 3 be reduced to wash daily times.
- Page 17 ENGLISH 9.9 Setting the DELAY START Turn the programme dial to and then (button 9) to the new programme position. Press the 8 button again to start the new Press this button again an again to set programme. The washing water in the the required delay.
-
Page 18: Daily Use - Drying
18 www.aeg.com The water must be emptied out before Turn the programme selector dial to opening the door. During this time the to switch the machine off. drum continues to turn at regular inter- Remove the laundry from the drum and vals until water drain. - Page 19 ENGLISH If you need to open the door be- speed is only possible after se- fore or during the anti-crease lecting drying. phase or to interrupt it, press any Press the button 6 to set the drying button or turn the programme time.
-
Page 20: Hints And Tips
20 www.aeg.com 11. HINTS AND TIPS 11.1 The laundry load 11.3 Detergents and additives • Divide the laundry in: white, coloured, • Only use detergents and additives synthetics, delicates and wool. specially made for washing machines. • Obey the washing instructions that are •... - Page 21 ENGLISH Water hardness table Water hardness Level Type °dH °T.H. mmol/l Clarke soft 0-15 0-1.5 medium 8-14 16-25 1.6-2.5 10-16 hard 15-21 26-37 2.6-3.7 17-25 very hard > 21 > 37 >3.7 >25 11.5 Drying hints • = The drying cycle is at reduced temperature •...
-
Page 22: Care And Cleaning
22 www.aeg.com 12. CARE AND CLEANING WARNING! find on the packaging of the manufactur- Do this separately from the laundry Disconnect the appliance from the mains wash. supply before you clean it. 12.2 External cleaning 12.1 Descaling Clean the appliance only with soap and The water we use contains limescale. - Page 23 ENGLISH Remove the top part of the liquid additive compartment. Clean all the parts with water. Clean the dispenser recess with a brush. Put back the dispenser in the recess. WARNING! 12.6 Drain pump Before unscrewing the pump The pump should be inspected regularly cover, switch the appliance off and particularly if: and remove the mains plug from...
- Page 24 24 www.aeg.com When no more water comes out, unscrew the pump cover (A) by turn- ing it anti-clockwise and remove the filter. Use pliers, if necessary. Always keep a rag nearby to dry up any water spillages when removing the cover. Clean the filter under a tap, to remove any traces of fluff.
- Page 25 ENGLISH To clean the water inlet filters: Close the water tap. Remove the water inlet hose from the water tap. Clean the filter in the inlet hose with a stiff brush. Remove the inlet hose behind the appliance. Clean the filter in the valve with a stiff brush or a towel.
-
Page 26: Troubleshooting
26 www.aeg.com By doing this, any water remaining in the When you use the machine again, make machine is removed, avoiding ice form- sure that the ambient temperature is ing and consequently damage to the ap- above 0°C. pliance. 13. TROUBLESHOOTING Certain problems are due to lack of sim- •... - Page 27 ENGLISH Problem Possible cause/Solution The water tap is closed. • Open the water tap. The inlet hose is squashed or kinked. • Check the inlet hose connection. The machine does not The filter in the inlet hose or the inlet valve filter are fill: blocked.
- Page 28 28 www.aeg.com Problem Possible cause/Solution Too little detergent or unsuitable detergent has been used. • Increase the detergent quantity or use another one. Stubborn stains have not been treated prior to wash- ing. Unsatisfactory washing • Use commercial products to treat the stubborn results: stains.
- Page 29 ENGLISH Problem Possible cause/Solution The drying time has not been selected. • Select the drying time. The water tap is not turned on. • Open the water tap. The drain filter is clogged. The machine does not • Clean the drain filter. dry or does not dry The machine is overloaded.
-
Page 30: Installation
30 www.aeg.com 14. INSTALLATION 14.1 Unpacking Use the gloves. Remove the external film. If necessary, use a cutter. Remove the cardboard top. Remove the polystyrene packaging materials. Remove the internal film. Open the door. Remove the poly- styrene piece from the door seal... - Page 31 ENGLISH Put one of the polystyrene packag- ing elements on the floor behind the appliance. Carefully put down the appliance with the rear side on it. Make sure not to damage the ho- ses. Remove the polystyrene protection from the bottom. Pull up the appliance in vertical po- sition.
- Page 32 32 www.aeg.com Put the plastic caps in the holes. You can find these caps in the user manual bag. WARNING! We recommend that you keep Remove all the packaging and the packaging and the transit the transit bolts before you install bolts for when you move the ap- the appliance.
- Page 33 ENGLISH 14.3 The inlet hose • Connect the hose to the appliance. Turn the inlet hose only left or right. Loose the ring nut to set it in the cor- rect position. • Connect the water inlet hose to the cold water tap with 3/4 thread.
- Page 34 34 www.aeg.com With the plastic hose guide. • On the edge of a sink. • Make sure that the plastic guide can- not move when the appliance drains. Attach the guide to the water tap or the wall. • To a stand pipe with vent-hole.
-
Page 35: Building In
ENGLISH You can extend the drain hose to maximum 400 cm. Contact the service centre for the other drain hose and the extension. 15. BUILDING IN 15.1 Building in • This appliance has been designed to 600 mm be built into the kitchen furniture. The recess should have the dimensions min. - Page 36 36 www.aeg.com Fig. 3 • Hinges To mount the hinges it is necessary to drill two holes (dia. 35 mm, depth 12.5-14 mm depending on the depth of door furniture) on the inner side of the door. The distance between the...
- Page 37 ENGLISH If the door has to be opened from left to right, invert the position of the plates E , the magnet D and the plate C. Mount the counter-magnet D and the hinges A as previously described (Fig. 7 ) CAUTION! Do not remove the screw B.
- Page 38 15. EMPOTRADO ............. . 72 PARA OBTENER RESULTADOS PERFECTOS Gracias por escoger este producto AEG. Este artículo ha sido creado para ofrecer un rendimiento impecable durante muchos años, con innovadoras tecnologías que facilitarán su vida y prestaciones que probablemente no encuentre en electrodomésticos corrientes.
-
Page 39: Información Sobre Seguridad
ESPAÑOL 1. INFORMACIÓN SOBRE SEGURIDAD Antes de instalar y utilizar el aparato, lea atentamente las instrucciones facilitadas. El fabricante no se hace responsable de los daños y lesiones causados por una instalación y uso incorrectos. Guarde siempre las ins- trucciones junto con el aparato para futuras consultas. 1.1 Seguridad de niños y personas vulnerables ADVERTENCIA Existe riesgo de sufrir asfixia, lesiones o incapaci-... -
Page 40: Instrucciones De Seguridad
40 www.aeg.com • Respete la carga máxima de 7 kg (consulte el capítulo “Tabla de programas”). • Si el cable eléctrico sufre algún daño, el fabricante, su servicio técnico o un profesional tendrán que cam- biarlo para evitar riesgos. • La presión de trabajo del agua (mínima y máxima) de-... - Page 41 ESPAÑOL • No desconecte el aparato tirando del • Si utiliza detergente, suavizante o pro- cable de conexión a la red. Tire siem- ductos similares, siga las instrucciones pre del enchufe. del fabricante. • No toque el cable de red ni el enchufe •...
-
Page 42: Información Técnica
42 www.aeg.com 2.3 Mantenimiento y limpieza 2.4 Desecho ADVERTENCIA ADVERTENCIA Podría sufrir lesiones o dañar el Existe riesgo de lesiones o asfi- aparato. xia. • Antes de proceder con el manteni- • Desconecte el aparato de la red. miento, apague el aparato y desco- •... -
Page 43: Descripción Del Producto
ESPAÑOL 4. DESCRIPCIÓN DEL PRODUCTO Dosificador de detergente Pata para nivelación del aparato Panel de control Tubo de desagüe Tirador de la puerta Cable de alimentación Placa de características Conexión de agua Bomba de desagüe Pata para nivelación del aparato 4.1 Accesorios Llave inglesa Para retirar los pasadores de trans-... -
Page 44: Panel De Mandos
44 www.aeg.com 5. PANEL DE MANDOS Selector de programas Visor digital Tecla CENTRIFUGADO(Centrif.) Tecla INICIO/PAUSA (Start/Pausa) • Tecla INICIO DIFERIDO (Inicio Dife- Posición Agua en la cuba rido) Tecla MANCHAS (Manchas) Indicadores luminosos: Tecla AHORRO DE TIEMPO (TIEM- • A – Fase de lavado (Lavado) PO) (Ahorra Tiempo) •... - Page 45 ESPAÑOL Ajuste del tiempo de secado Cuando se selecciona un programa de secado, la pantalla mues- tra el tiempo de secado en minutos y/u horas (consulte el aparta- do "Secado"). Una vez que se ha iniciado el programa, el aparato actualiza el tiempo restante cada minuto Códigos de alarma En caso de problemas de funcionamiento pueden mostrase al-...
-
Page 46: Programas
46 www.aeg.com 5.3 Señales sonoras que preocuparse de si los niños pueden sufrir lesiones o dañar el electrodomésti- La máquina incorpora un dispositivo acústico que suena en los siguientes ca- Esta función también permanece activa- sos: da cuando la lavadora no está en funcio- namiento. - Page 47 ESPAÑOL Programa Descrip- Temperaturas máxima y mínima ción del ci- Opciones Tipo de prenda Carga máxima Prelavado REDUCCIÓN DEL Algodón + Prelavado Lavado CENTRIFUGADO 95° - 40° principal AGUA EN LA CU- Carga máxima 7 kg - Carga reducida 3 kg Aclarados Algodón blanco y de color Centrifuga-...
- Page 48 48 www.aeg.com Programa Descrip- Temperaturas máxima y mínima ción del ci- Opciones Tipo de prenda Carga máxima Aclarado delicados Aclarados REDUCCIÓN DEL Carga máxima 7 kg Centrifuga- CENTRIFUGADO Programa para aclarar y centrifugar prendas do largo AGUA EN LA CU- que se han lavado a mano.
- Page 49 ESPAÑOL 2) Si ha seleccionado la opción Super rápido con la tecla 4, se recomienda reducir la carga máxima como se indica. Puede utilizarse la carga completa, aunque con resultados de limpieza ligeramente inferiores. 3) Si utiliza detergente líquido, debe seleccionar un programa sin PRELAVADO. 6.1 Programas de secado Programas de tiempo controlado Tiempo...
-
Page 50: Valores De Consumo
50 www.aeg.com 7. VALORES DE CONSUMO Programa Consumo de Consumo de Duración del energía agua programa (KWh) (litros) (minutos) Algodón 60° 1.35 Compruebe Programa Algodón ECO 1.05 la duración 60° de los pro- Algodón 40° 0.85 gramas en la pantalla del Sintéticos 40°... - Page 51 ESPAÑOL Asegúrese de que no quedan prendas enganchadas entre la puerta y el cierre. Podría provocar fugas de agua y dañar la colada. 9.2 Introducción del detergente y los aditivos El compartimento del detergente para la fase de prelavado, el programa de remojo y la función de manchas.
- Page 52 52 www.aeg.com Si gira el selector hasta otro pro- 9.6 Selección de la opción grama mientras el aparato está AHORRO DE TIEMPO (botón funcionando, el piloto amarillo de la tecla 8 parpadeará 3 veces. La pantalla muestra el mensaje Esta opción le permite modificar el tiem- Err para indicar una selección in-...
- Page 53 ESPAÑOL Si ha seleccionado un intervalo de inicio El inicio diferido no puede seleccionarse diferido con la tecla 9, la máquina co- con el programa Descarga. menzará la cuenta atrás. Si se selecciona una opción incorrecta, 9.10 Cambio de una opción o el piloto amarillo de la tecla 8 parpadea de un programa en marcha 3 veces.
-
Page 54: Uso Diario - Secado
54 www.aeg.com apagar la máquina. Transcurridos unos • Seleccione el programa DESCARGA o minutos podrá abrir la puerta (preste CENTRIFUGADO atención al nivel del agua y a la tem- • Si es necesario, reduzca la velocidad peratura). . de centrifugado. - Page 55 ESPAÑOL Una vez que se ha iniciado el pro- También es posible secar hasta 4 grama, el tiempo restante se actuali- kg de tejidos de algodón (con- za cada minuto. sulte la tabla «Programas de se- cado»). Si ajusta sólo 10 minutos de fase de secado con la tecla de tiempo PRECAUCIÓN de secado, el aparato sólo ejecu-...
-
Page 56: Consejos
56 www.aeg.com Retire las prendas. do toallas, lana y sudaderas) y vicever- 10.3 Pelusa en las prendas • Secar al aire este tipo de tejidos la pri- mera vez que los lave. Durante la FASE DE LAVADO Y SECA- • Para limpiar el filtro. - Page 57 ESPAÑOL • Use los productos adecuados para el sea baja, no es necesario utilizar un des- tipo y color del tejido, la temperatura calcificador. del programa y el grado de suciedad. Póngase en comunicación con las autori- dades correspondientes para conocer la •...
-
Page 58: Mantenimiento Y Limpieza
58 www.aeg.com • el nivel de secado • Utilice un suavizante especial para se- cadoras de tambor. • Tipo de prenda Cuando haya finalizado el programa de • el peso de las prendas que se han car- secado, retire la ropa lo antes posible. - Page 59 ESPAÑOL 12.5 Dosificador de detergente Para limpiar el dosificador: Presione la palanca. Tire del dosificador hacia fuera. Retire la parte superior del compar- timento de aditivo líquido. Limpie todas las piezas con agua. Limpie el hueco del dosificador con un cepillo. Vuelva a colocar el dosificador en el hueco.
- Page 60 60 www.aeg.com Coloque un recipiente cerca de la puerta del filtro para recoger el lí- quido que pueda derramarse. Saque la manguera de descarga de emergencia (B), colóquela en el re- cipiente y quite el tapón. Cuando deje de salir agua, desen- rosque la tapa del filtro (A) girándo-...
- Page 61 ESPAÑOL Tapone de nuevo la manguera de desagüe de emergencia y coloque la manguera en su sitio. Vuelva a colocar el filtro en la bom- ba insertándolo correctamente en las guías especiales. Enrosque la ta- pa de la bomba firmemente girán- dola hacia la derecha.
-
Page 62: Solución De Problemas
62 www.aeg.com Vuelva a colocar el tubo de entrada. Cerciórese de que las conexiones están bien apretadas para evitar fu- gas. Abra el grifo. 45° 20° 12.8 Descarga de emergencia por debajo de 0°C, tome las siguientes precauciones Si la lavadora no descarga, proceda de cierre la toma de agua;... - Page 63 ESPAÑOL • grama Si no consigue resolver el proble- : problema con el suministro de ma después de realizar todas las com- agua probaciones pertinentes, póngase en • : problema con el desagüe contacto con el centro de servicio técni- •...
- Page 64 64 www.aeg.com Problema Causa y soluciones posibles La manguera de desagüe está doblada o retorcida. • Compruebe la conexión de la manguera de desa- güe. El filtro de descarga está obstruido. • Limpie el filtro de descarga. La máquina no desa- Se ha seleccionado una opción o programa que fi-...
- Page 65 ESPAÑOL Problema Causa y soluciones posibles El programa todavía no ha terminado. • Espere hasta que finalice el ciclo de lavado. No se ha desbloqueado el cierre de la puerta. La puerta no se abre: • Espere a que la luz PUERTA se apague. Hay agua en el tambor.
-
Page 66: Instalación
66 www.aeg.com Problema Causa y soluciones posibles La máquina incorpora un tipo de motor que emite un ruido extraño comparado con el de otros moto- La lavadora emite un res tradicionales. Este nuevo motor garantiza un ini- ruido extraño: cio más suave e incluso una mejor distribución de las prendas en el tambor durante el centrifugado, así... - Page 67 ESPAÑOL Retire la cubierta de cartón. Retire los materiales del embalaje de poliestireno. Retire la película interna. Abra la puerta. Retire la pieza de poliestireno de la junta de la puerta y todos los elementos del tambor. Extienda uno de los materiales de embalaje de poliestireno en el suelo detrás del aparato.
- Page 68 68 www.aeg.com Retire la protección de poliestireno de la base. Levante el aparato hasta la posición vertical. Retire el cable de alimentación y el tubo de desagüe de los soportes de los tubos. Suelte los tres pernos. Utilice la llave suministrada con el aparato.
- Page 69 ESPAÑOL ADVERTENCIA Se recomienda guardar el emba- Retire todo el embalaje y los pa- laje y los pasadores de transpor- sadores de transporte antes de te para cuando traslade el apara- instalar el aparato. 14.2 Colocación y nivelado • Instale la máquina en el suelo sobre una superficie plana y rígida.
- Page 70 70 www.aeg.com 14.3 El tubo de entrada • Conecte el tubo al aparato. Gire el tu- bo de entrada solo a la derecha o a la izquierda. Suelte la tuerca anular para ajustarla en la posición correcta. • Conecte el tubo de entrada de agua fría a una toma de agua fría con rosca...
- Page 71 ESPAÑOL Con la guía de plástico. • En el borde de un fregadero. • Asegúrese de que la guía de plástico no se mueva cuando el aparato desa- gua. Acople la guía al grifo de agua o a la pared. •...
-
Page 72: Empotrado
72 www.aeg.com Puede extender el tubo de desa- güe hasta un máximo de 400 cm. Póngase en contacto con el ser- vicio técnico para el otro tubo de desagüe y la extensión. 15. EMPOTRADO 15.1 Empotrado • Este aparato está diseñado para inte- 600 mm grarse en los muebles de cocina. - Page 73 ESPAÑOL Fig. 3 • Bisagras Para poner las bisagras es preciso ta- ladrar dos orificios (diámetro de 35 mm, fondo 12,5 - 14 mm dependiendo del fondo del mueble) por el lado in- terno de la puerta. La distancia entre los centros de ambos orificios debe ser de 416 mm.
- Page 74 74 www.aeg.com Si la puerta se va a abrir de izquierda a derecha, invierta la posición de las pla- cas E, el imán D y la placa C. Monte el contraimán D y las bisagras A según se ha descrito previamente (fig. 7).
- Page 75 ESPAÑOL...
- Page 76 www.aeg.com/shop...