Table of Contents
Advertisement
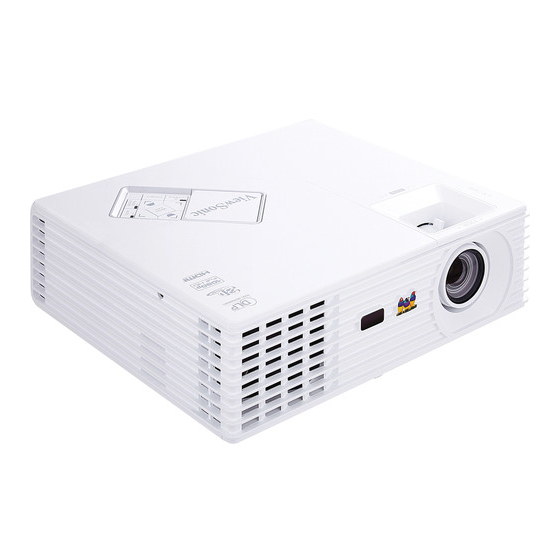
PJD7822HDL
DLP Projector
User Guide
IMPORTANT: Please read this User Guide to obtain important information on installing
and using your product in a safe manner, as well as registering your product for future
service. Warranty information contained in this User Guide will describe your limited
coverage from ViewSonic Corporation, which is also found on our web site at http://
www.viewsonic.com in English, or in specific languages using the Regional selection
box in the upper right corner of our website. "Antes de operar su equipo lea cu
idadosamente las instrucciones en este manual"
Model No. VS16000
Advertisement
Table of Contents

Related Manuals for ViewSonic PJD7822HDL


Summary of Contents for ViewSonic PJD7822HDL
- Page 1 Warranty information contained in this User Guide will describe your limited coverage from ViewSonic Corporation, which is also found on our web site at http:// www.viewsonic.com in English, or in specific languages using the Regional selection box in the upper right corner of our website.
- Page 2 At ViewSonic, we believe that our products have the potential to make a positive impact in the world, and we are confident that the ViewSonic product you have chosen will serve you well. Once again, thank you for choosing ViewSonic !
- Page 3 Compliance Information FCC Compliance Statement This device complies with part 15 of FCC Rules. Operation is subject to the following two conditions: (1) this device may not cause harmful interference, and (2) this device must accept any interference received, including interference that may cause undesired operation.
- Page 4 Declaration of RoHS2 Compliance This product has been designed and manufactured in compliance with Directive 2011/65/EU of the European Parliament and the Council on restriction of the use of certain hazardous substances in electrical and electronic equipment (RoHS2 Directive) and is deemed to comply with the maximum concentration values issued by the European Technical Adaptation Committee (TAC) as shown below: Proposed Maximum Substance...
- Page 5 Important Safety Instructions Read these instructions. Keep these instructions. Heed all warnings. Follow all instructions. Do not use this unit near water. Clean with a soft, dry cloth. Do not block any ventilation openings. Install the unit in accordance with the manufacturer’s instructions.
- Page 6 PS/2, VGA and XGA are registered trademarks of International Business Machines Corporation. Disclaimer: ViewSonic Corporation shall not be liable for technical or editorial errors or omissions contained herein; nor for incidental or consequential damages resulting from furnishing this material, or the performance or use of this product.
- Page 7 Product Registration To fulfill possible future product needs, and to receive additional product information as it becomes available, please visit your region section on ViewSonic’s website to register your product online. The ViewSonic CD also provides an opportunity for you to print the product registration form.
-
Page 8: Table Of Contents
Table of contents Important safety Using the projector in standby mode. 37 Shutting down the projector ....38 instructions .......2 Menu operation........39 Introduction......4 Maintenance ....48 Projector features ......... 4 Care of the projector ......48 Shipping contents......... 5 Lamp information ......49 Projector exterior view...... -
Page 9: Important Safety Instructions
Important safety instructions Your projector is designed and tested to meet the latest standards for safety of information technology equipment. However, to ensure safe use of this product, it is important that you follow the instructions mentioned in this manual and marked on the product. Safety Instructions Please read this manual before you operate your projector. - Page 10 Do not block the ventilation holes. If the ventilation holes are seriously obstructed, overheating inside the projector may result in a fire. - Do not place this projector on a blanket, bedding or any other soft surface. - Do not cover this projector with a cloth or any other item. - Do not place inflammables near the projector.
-
Page 11: Introduction
Introduction Projector features The projector integrates high-performance optical engine projection and a user-friendly design to deliver high reliability and ease of use. The projector offers the following features. • Dynamic PC and Dynamic Movie functions adjusting the power consumption of the lamp according to the brightness of the image being projected •... -
Page 12: Shipping Contents
Shipping contents Carefully unpack and verify that you have all of the items shown below. If any of these items are missing, please contact your place of purchase. Standard accessories The supplied accessories will be suitable for your region, and may differ from those illustrated. -
Page 13: Projector Exterior View
Projector exterior view External control panel Front/upper side (See "Projector" on page 7 details.) Lamp cover Vent (heated air exhaust) Front IR remote sensor Adjuster foot Focus and Zoom rings Projection lens RS-232 control port Type A USB port (for 5V power) Type B USB port HDMI 1 port HDMI 2 port... -
Page 14: Controls And Functions
Controls and functions Projector M E N U EXIT Focus ring Right Adjusts the focus of the projected image. Activates panel key lock. Zoom ring When the On-Screen Display (OSD) Adjusts the size of the image. menu is activated, the #3, #4, and #8 keys Keystone/Arrow keys ( are used as directional arrows to select the Down) - Page 15 Remote control To use the remote mouse control keys Enter (Page Up, Page Down, , and ), see Enacts the selected On-Screen Display "Using the remote mouse control" on (OSD) menu item. page 10 for details. My Button Allows user to define a short cut key POWER on the remote control, and the function Toggles the projector between standby...
- Page 16 Magnify Color Mode Displays the zoom bar that magnifies or Selects an available picture setup mode. reduces the projected picture size. Exit Goes back to previous OSD menu, exits Lock and saves menu settings. Activates or deactivates panel key lock. PgUp (Page Up)/PgDn (Page Down) Freeze Operates your display software program...
- Page 17 Using the remote mouse control The capability of operating your computer with the remote control gives you more flexibility when delivering presentations. Connect the projector to your PC or notebook with a USB cable prior to using the remote control in place of your computer’s mouse. See "Connecting a computer"...
- Page 18 Replacing the remote control batteries To open the battery cover, turn the remote control over to view its back, push on the finger grip on the cover and slide it in the direction of the arrow as illustrated. The cover will slide off. Remove any existing batteries (if necessary) and install two AAA batteries observing the battery polarities as indicated in the base of the battery compartment.
-
Page 19: Positioning Your Projector
Positioning your projector Choosing a location Your room layout or personal preference will dictate which installation location you select. Take into consideration the size and position of your screen, the location of a suitable power outlet, as well as the location and distance between the projector and the rest of your equipment. -
Page 20: Projection Dimensions
Projection dimensions Refer to "Dimensions" on page 58 for the center of lens dimensions of this projector before calculating the appropriate position. The "screen" mentioned below refers to the projection screen usually consisting of a surface and a support structure •... -
Page 21: Connection
Connection When connecting a signal source to the projector, be sure to: Turn all equipment off before making any connections. Use the correct signal cables for each source. Ensure the cables are firmly inserted. • In the connections shown below, some cables may not be included with the projector (see "Shipping contents"... -
Page 22: Connecting A Computer Or Monitor
Connecting a computer or monitor Connecting a computer The projector provides two VGA input sockets that allow you to connect them to both IBM® compatibles and Macintosh® computers. A Mac adapter is needed if you are connecting legacy version Macintosh computers. To connect the projector to a notebook or desktop computer: Take the supplied VGA cable and connect one end to the D-Sub output socket of the computer. -
Page 23: Connecting Video Source Devices
Connecting Video source devices You can connect your projector to various Video source devices that provide any one of the following output sockets: • HDMI • Component Video • S-Video • Video (composite) You need only connect the projector to a Video source device using just one of the above connecting methods, however each provides a different level of video quality. - Page 24 If the selected video image is not displayed after the projector is turned on and the correct video source has been selected, check that the Video source device is turned on and operating correctly. Also check that the signal cables have been connected correctly. VGA-Component adapter • (ViewSonic P/N: CB-00008906)
- Page 25 Connecting an S-Video source device Examine your Video source device to determine if it has an unused S-Video output socket available: • If so, you can continue with this procedure. • If not, you will need to reassess which method you can use to connect to the device. To connect the projector to an S-Video source device: Take an S-Video cable and connect one end to the S-Video output socket of the Video source device.
-
Page 26: Operation
Operation Starting up the projector Plug the power cord into the projector and into a wall socket. Turn on the wall socket switch (where fitted). Press POWER on the projector or remote control to start the projector. The POWER indicator light stays blue when the projector is (If necessary) Rotate the focus ring to adjust the image clearness. -
Page 27: Using The Menus
Position Auto Power Off Disable Phase Blank Timer Disable H. Size Panel Key Lock Zoom Splash Screen ViewSonic 3D Settings Message Color Management Standby Settings Analog RGB MENU Exit Analog RGB MENU Exit Press MENU/EXIT twice* on to highlight the SYSTEM the projector or Exit on the SETTING: BASIC menu. -
Page 28: Utilizing The Password Function
Utilizing the password function For security purposes and to help prevent unauthorized use, the projector includes an option for setting up password security. The password can be set through the On-Screen Display (OSD) menu. For details of the OSD menu operation, please refer to "Using the menus"... - Page 29 RECALL PASSWORD Sync on the remote control for 3 seconds. The Please write down the recall code, projector will display a coded number on the and contact ViewSonic Customer Center. screen. Recall code: Write down the number and turn off your 0 2 1 2 projector.
- Page 30 Disabling the password function To disable password protection, go back to the SYSTEM SETTING: ADVANCED > Security Settings > Power On Lock menu after opening the OSD menu system. Select Off by pressing . The message 'INPUT PASSWORD' is displayed. Enter the current password.
-
Page 31: Switching Input Signal
Switching input signal The projector can be connected to multiple devices at the same time. However, it can only display one full screen at a time. Be sure the Quick Auto Search function in the SOURCE menu is On if you want the projector to automatically search for the signals. -
Page 32: Adjusting The Projected Image
• Auto: Sets the projector to detect the color space setting of input signal automatically. Press to highlight HDMI Range and press to select a suitable HDMI color range according to the color range setting of the output device connected. •... -
Page 33: Magnifying And Searching For Details
Correcting keystone Keystoning refers to the situation where the projected image is noticeably wider at either the top or bottom. It occurs when the projector is not perpendicular to the screen. To correct this, besides adjusting the height of the projector, you will need to manually correct it following one of these steps. -
Page 34: Selecting The Aspect Ratio
Selecting the aspect ratio The 'aspect ratio' is the ratio of the image width to the image height. Most analog TV and computers are in 4:3 ratio, and digital TV and DVDs are usually in 16:9 ratio. With the advent of digital signal processing, digital display devices like this projector can dynamically stretch and scale the image output to a different aspect than that of the image input signal. - Page 35 About the aspect ratio In the pictures below, the black portions are inactive areas and the white portions are active areas. OSD menus can be displayed on those unused black areas. Auto: Scales an image proportionally to fit the projector's native resolution in its horizontal width.
-
Page 36: Optimizing The Image
Optimizing the image Selecting a picture mode The projector is preset with several predefined picture modes so that you can choose one to suit your operating environment and input signal picture type. To select an operation mode that suits your need, you can follow one of the following steps. •... - Page 37 Movie mode: Is suitable for enjoying dark movies or DVD movies best viewed in a blackened (little light) home cinema or lounge room environment. Dynamic Movie mode: Is suitable for enjoying dark movies or DVD movies best viewed in a blackened (little light) home cinema or lounge room environment. In addition, the projector will optimize the image quality using the dynamic Movie function in accordance with the projected contents.
- Page 38 Adjusting Brightness Highlight the PICTURE > Brightness menu and press The higher the value, the brighter the image. And the lower the setting, the darker the image. Adjust this control so the black areas of the image appear just as black and that detail in the dark areas is visible.
- Page 39 Gamma refers to the relationship between input source and picture brightness. Selecting a Color Temperature Highlight the PICTURE > Advanced > Color Temperature menu and press The options available for color temperature* settings vary according to the signal type selected. T1: With the highest color temperature, T1 makes the image appear the most bluish white than other settings.
- Page 40 Please refer to the illustration to the right for how the colors relate to each other. For example, if you select Red and set its range at 0, only pure red in the projected Yellow GREEN picture will be selected. Increasing its range will include red close to yellow and red close to magenta.
-
Page 41: Setting The Presentation Timer
Setting the presentation timer Presentation timer can indicate the presentation time on the screen to help you achieve better time management when giving presentations. Follow these steps to utilize this function: Press Timer on the remote control to access the Presentation Timer menu or go to the SYSTEM SETTING: ADVANCED >... -
Page 42: Hiding The Image
Hiding the image In order to draw the audience's full attention to the presenter, you can use on the projector or Blank on the remote control to hide the screen image. Press any key on the projector or remote control to restore the image. The word 'BLANK' appears at the lower right corner of the screen while the image is hidden. -
Page 43: Using The Cec Function
To activate the High Altitude Mode: Notice Press MENU/EXIT on the projector or Menu on We recommend you use the High Altitude the remote control and then press until the mode by selecting it whenever your environment is higher than 1500 m. SYSTEM SETTING: ADVANCED menu is highlighted. -
Page 44: Using The 3D Functions
Using the 3D functions This projector features 3D function which enables you to enjoy 3D movies, videos, and sporting events in a more realistic way by presenting the depth of the images. You need to wear a pair of 3D glasses to view 3D images. If the 3D signal is input from an HDMI 1.4a compatible device, the projector detects the signal for 3D Sync information and once detected, it projects images in 3D format automatically. -
Page 45: Shutting Down The Projector
• If you attempt to restart the projector right after it’s been turned off, it may not be turned on successfully and will rerun its cooling procedure. • When Off is selected, the Smart Restart function will be automatically turned off. Shutting down the projector Press POWER and a confirmation message... -
Page 46: Menu Operation
Menu operation Menu system Please note that the on-screen display (OSD) menus vary according to the signal type selected. The menu items are available when the projector detects at least one valid signal. If there is no equipment connected to the projector or no signal detected, limited menu items are accessible. - Page 47 Off/30 min/1 hour/2 hours/ Sleep Timer 3 hours/4 hours/8 hours/ SYSTEM 12 hours SETTING: Panel Key Lock On/Off BASIC Splash Screen Black/Blue/ViewSonic/Off Message On/Off Power Saving On/Off Active VGA Out On/Off Standby Settings Active Audio Out On/Off Quick Power Off...
- Page 48 Main menu Sub-menu Options High Altitude Mode On/Off On/Off Mute On/Off Audio Settings Volume 5 sec/10 sec/15 sec/ Menu Display Time 20 sec/25 sec/30 sec Menu Settings Center/Top-Left/ Menu Position Top-Right/Bottom-Left/ Bottom-Right Closed Caption Enable On/Off Closed Caption Caption Version CC1/CC2/CC3/CC4 Lamp Mode Normal/Economic...
- Page 49 Description of each menu Function Description Corrects the projected picture’s color when the projection surface is Screen Color not white. See "Using Screen Color" on page 30 for details. There are several options to set the image's aspect ratio depending on Aspect Ratio your input signal source.
- Page 50 Function Description Pre-defined picture modes are provided so you can optimize your Color Mode projector image set-up to suit your program type. See "Selecting a picture mode" on page 29 for details. Selects a picture mode that most suits your need for the image quality Reference and further fine-tune the image based on the selections listed on the same page below.
- Page 51 Function Description Quick Auto "Switching input signal" on page 24 for details. Search HDMI Format "Changing HDMI input settings" on page 24 for details. HDMI Range Allows the projector to decrease the power consumption automatically DynamicEco if no input signal is detected after a set period of time. Timer It takes some time to initiate this function.
- Page 52 Function Description Sets the language for the On-Screen Display (OSD) menus. See Language "Using the menus" on page 20 for details. The projector can be installed on a ceiling or behind a screen, or with Projector one or more mirrors. See "Choosing a location"...
- Page 53 Function Description A mode for operation in high altitude areas. See "Operating in a high High Altitude altitude environment" on page 35 for details. Mode Enables or disables the DCR (Dynamic Contrast Ratio) function. Selecting On enables the function and the projector will automatically switch the lamp mode between normal and economic modes according to the input image detected.
- Page 54 Function Description Presentation Reminds the presenter to finish the presentation within a certain time Timer frame. See "Setting the presentation timer" on page 34 for details. Security "Utilizing the password function" on page 21 for details. Settings Remote "Remote control code" on page 9 for details.
-
Page 55: Maintenance
Maintenance Care of the projector Your projector needs little maintenance. The only thing you need to do on a regular basis is to keep the lens clean. Never remove any parts of the projector except the lamp. Contact your dealer if other parts need replacing. -
Page 56: Lamp Information
Lamp information Getting to know the lamp hour When the projector is in operation, the duration (in hours) of lamp usage is automatically calculated by the built-in timer. To obtain the lamp hour information: Press MENU/EXIT on the projector or Menu on the remote control and then press until the SYSTEM SETTING: ADVANCED menu is highlighted. - Page 57 Timing of replacing the lamp When the LAMP indicator light lights up red or a message appears suggesting it is time to replace the lamp, please install a new lamp or consult your dealer. An old lamp may cause a malfunction in the projector and in some instances the lamp may explode.
- Page 58 Be careful of sharp edges in the lamp compartment. Wash hands after lamp replacement. • Only ViewSonic certified lamps are tested with this projector. Use of other lamps may cause electrical shock and fire. Turn the power off and disconnect the projector from the wall socket.
- Page 59 Loosen the screw that secures the lamp. Disconnect the lamp’s wire connector from the projector, and then lift the handle so that it stands up. Use the handle to slowly pull the lamp out of the projector. CAUTION • Pulling it too quickly may cause the lamp to break and scatter broken glass in the projector.
- Page 60 Place the lamp protection film supplied with the new lamp on the lamp compartment. Replace the lamp cover on the projector. Tighten the screws that secure the lamp cover. CAUTION • Loose screw may cause a bad connection, which could result in malfunction. •...
- Page 61 Indicators Light Status & Description POWER TEMP LAMP Power events Blue Stand-by mode Flashing Powering up Blue Blue Normal operation Blue Normal power-down cooling Flashing Lamp events Blue The projector needs seconds to cool down. Flashing The projector has shut down automatically. If you try to re-start the projector, it will shut down again.
-
Page 62: Troubleshooting
Troubleshooting The projector does not turn on. Cause Remedy Plug the power cord into the AC inlet on the There is no power from the power projector, and plug the power cord into the cord. power outlet. If the power outlet has a switch, make sure that it is switched on. -
Page 63: Specifications
Specifications Projector specifications • All specifications are subject to change without notice. • Not all models can be purchased in your region. General Product name DLP Projector Optical Resolution 1920 x 1080 Display system 1-CHIP DMD Lamp 210 W lamp Electrical Power supply AC100–240V, 50–60 Hz (Automatic) - Page 64 Output terminal RGB output D-Sub 15-pin (female) x 1 Audio signal output PC audio jack x 1 USB port Type A x 1 (for 5V power) 2 watt x 1 Speaker Control terminal 9 pin x 1 RS-232 serial control USB serial control Type mini B IR receiver...
-
Page 65: Dimensions
Dimensions 268 mm (W) x 84.4 mm (H) x 221 mm (D) (Excluding extrusions) M E N U 84.4 EXIT Ceiling mount installation Ceiling mount screws: M4 x 8 (Max. L = 8 mm) 110.05 Unit: mm... -
Page 66: Timing Chart
Timing chart Supported timing for PC input Vertical Horizontal Pixel Resolution Mode Frequency Frequency Frequency (Hz) (kHz) (MHz) 720 x 400 720x400_70 70.087 31.469 28.3221 VGA_60** 59.940 31.469 25.175 VGA_72 72.809 37.861 31.500 640 x 480 VGA_75 75.000 37.500 31.500 VGA_85 85.008 43.269... - Page 67 Supported timing for Component-YP input Horizontal Vertical Dot Clock Timing Resolution frequency Frequency Frequency (KHz) (Hz) (MHz) 480i* 720 x 480 15.73 59.94 13.5 480p* 720 x 480 31.47 59.94 576i* 720 x 576 15.63 13.5 576p* 720 x 576 31.25 720/50p 1280 x 720...
- Page 68 Supported timing for HDMI input Horizontal Vertical Dot Clock Video Mode Resolution frequency Frequency Frequency (KHz) (Hz) (MHz) 480i* 720(1440) x 480 15.73 59.94 480p***** 720 x 480 31.47 59.94 576i* 720(1440) x 576 15.63 576p***** 720 x 576 31.25 720/50p*** 1280 x 720 37.5...
- Page 69 1400 x1050 SXGA+_60** 59.978 65.317 121.750 1600 x1200 UXGA** 60.000 75.000 162.000 640 x 480@67Hz MAC13 66.667 35.000 30.240 832 x 624@75Hz MAC16 74.546 49.722 57.280 1152 x 870@75Hz MAC21 75.06 68.68 100.00 • *Supported timing for 3D signal with Frame Sequential format. •...
-
Page 70: Copyright Information
Copyright 2014. All rights reserved. No part of this publication may be reproduced, transmitted, transcribed, stored in a retrieval system or translated into any language or computer language, in any form or by any means, electronic, mechanical, magnetic, optical, chemical, manual or otherwise, without the prior written permission of ViewSonic Corporation. Disclaimer... -
Page 71: Appendix
Appendix IR control table Code A Format Byte1 Byte2 Byte3 Byte4 Power Auto Sync Video Source Color Mode Up / KeyS + Left Enter Right Down / KeyS - Menu My Button Exit Mouse L key Mouse R key PgUp PgDn Mouse Magnify... -
Page 72: Rs232 Command Table
Code B Format Byte1 Byte2 Byte3 Byte4 Power Auto Sync Video Source Color Mode Up / KeyS + Left Enter Right Down / KeyS - Menu My Button Exit Mouse L key Mouse R key PgUp PgDn Mouse Magnify Volume + Volume - Panel Key Lock Freeze... - Page 73 0x06 0x14 0x00 0x04 0x00 0x34 0x11 0x0A 0x01 0x68 Blue Splash Screen Write 0x06 0x14 0x00 0x04 0x00 0x34 0x11 0x0A 0x02 0x69 ViewSonic Splash Screen Splash Screen 0x06 0x14 0x00 0x04 0x00 0x34 0x11 0x0A 0x03 0x6A Screen Capture...
- Page 74 Message Off 0x06 0x14 0x00 0x04 0x00 0x34 0x11 0x27 0x00 0x84 Write Message Message On 0x06 0x14 0x00 0x04 0x00 0x34 0x11 0x27 0x01 0x85 Read Message status 0x07 0x14 0x00 0x05 0x00 0x34 0x00 0x00 0x11 0x27 0x85 Front Table 0x06 0x14 0x00 0x04 0x00 0x34 0x12 0x00 0x00 0x5E Rear Table...
- Page 75 Aspect ratio 0x06 0x14 0x00 0x04 0x00 0x34 0x12 0x04 0x00 0x62 Auto Aspect ratio 4:3 0x06 0x14 0x00 0x04 0x00 0x34 0x12 0x04 0x02 0x64 Write Aspect ratio Aspect ratio 0x06 0x14 0x00 0x04 0x00 0x34 0x12 0x04 0x03 0x65 16:9 Aspect ratio 0x06 0x14 0x00 0x04 0x00 0x34 0x12 0x04 0x06 0x68...
- Page 76 Brightest 0x06 0x14 0x00 0x04 0x00 0x34 0x12 0x0B 0x00 0x69 Movie 0x06 0x14 0x00 0x04 0x00 0x34 0x12 0x0B 0x01 0x6A User 1 0x06 0x14 0x00 0x04 0x00 0x34 0x12 0x0B 0x02 0x6B User 2 0x06 0x14 0x00 0x04 0x00 0x34 0x12 0x0B 0x03 0x6C Write PC / Gaming 0x06 0x14 0x00 0x04 0x00 0x34 0x12 0x0B 0x04 0x6D...
- Page 77 Input source 0x06 0x14 0x00 0x04 0x00 0x34 0x13 0x01 0x00 0x60 Input source 0x06 0x14 0x00 0x04 0x00 0x34 0x13 0x01 0x08 0x68 VGA2 Input source Write 0x06 0x14 0x00 0x04 0x00 0x34 0x13 0x01 0x03 0x63 HDMI Source input Input source 0x06 0x14 0x00 0x04 0x00 0x34 0x13 0x01 0x05 0x65...
- Page 78 0x06 0x14 0x00 0x04 0x00 0x34 0x15 0x00 0x00 0x61 0x06 0x14 0x00 0x04 0x00 0x34 0x15 0x00 0x01 0x62 0x06 0x14 0x00 0x04 0x00 0x34 0x15 0x00 0x02 0x63 0x06 0x14 0x00 0x04 0x00 0x34 0x15 0x00 0x03 0x64 0x06 0x14 0x00 0x04 0x00 0x34 0x15 0x00 0x04 0x65 0x06 0x14 0x00 0x04 0x00 0x34 0x15 0x00 0x05 0x66 0x06 0x14 0x00 0x04 0x00 0x34 0x15 0x00 0x06 0x67...
- Page 79 0x06 0x14 0x00 0x04 0x00 0x34 0x11 0x28 0x00 0x85 Write 0x06 0x14 0x00 0x04 0x00 0x34 0x11 0x28 0x01 0x86 HDMI Format Auto 0x06 0x14 0x00 0x04 0x00 0x34 0x11 0x28 0x02 0x87 HDMI Format Read 0x07 0x14 0x00 0x05 0x00 0x34 0x00 0x00 0x11 0x28 0x86 status Enhanced 0x06 0x14 0x00 0x04 0x00 0x34 0x11 0x29 0x00 0x86...
- Page 80 Gamma 1 0x06 0x14 0x00 0x04 0x00 0x34 0x11 0x2C 0x01 0x8A Gamma 2 0x06 0x14 0x00 0x04 0x00 0x34 0x11 0x2C 0x02 0x8B Gamma 3 0x06 0x14 0x00 0x04 0x00 0x34 0x11 0x2C 0x03 0x8C Gamma 4 0x06 0x14 0x00 0x04 0x00 0x34 0x11 0x2C 0x04 0x8D Write Gamma Gamma 5...
- Page 81 Latin America C= http://www.viewsonic.com/ www.viewsonic.com/la/ soporte@viewsonic.com (Mexico) la/soporte/servicio-tecnico Nexus Hightech Solutions, Cincinnati #40 Desp. 1 Col. De los Deportes Mexico D.F. Tel: 55) 6547-6454 55)6547-6484 Other places please refer to http://www.viewsonic.com/la/soporte/servicio-tecnico#mexico Latin America C= http://www.viewsonic.com/ www.viewsonic.com/la/ soporte@viewsonic.com (Peru) la/soporte/servicio-tecnico Macau www.hk.viewsonic.com T= 853 2870 0303 service@hk.viewsonic.com...
- Page 82 If a product proves to be defective in material or workmanship during the warranty period, ViewSonic will, at its sole option, repair or replace the product with a like product. Replacement product or parts may include remanufactured or refurbished parts or components.
- Page 83 Exclusion of damages: ViewSonic's liability is limited to the cost of repair or replacement of the product. ViewSonic shall not be liable for: Damage to other property caused by any defects in the product, damages based upon...
- Page 84 Exclusion of damages: ViewSonic's liability is limited to the cost of repair or replacement of the product. ViewSonic shall not be liable for: Damage to other property caused by any defects in the product, damages based upon inconvenience, loss of use of the product, loss of time, loss of profits, loss of business opportunity, loss of goodwill, interference with business relationships, or other commercial loss, even if advised of the possibility of such damages.
- Page 85 Tel: (52) 999-925-1916 Tel: 01(52)95-15-15-22-22 E-Mail: rrrb@sureste.com Fax: 01(52)95-15-13-67-00 E-Mail. gpotai2001@hotmail.com Tijuana: FOR USA SUPPORT: ViewSonic Corporation Av Ferrocarril Sonora #3780 L-C 14035 Pipeline Ave. Chino, CA 91710, USA Col 20 de Noviembre Tel: 800-688-6688 (English); 866-323-8056 (Spanish); Tijuana, Mexico E-Mail: http://www.viewsonic.com...